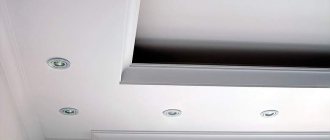
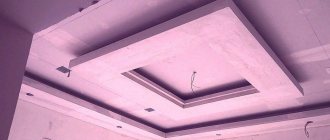
One of the frequently used building materials for finishing the ceiling surface is plasterboard (gypsum plasterboard).
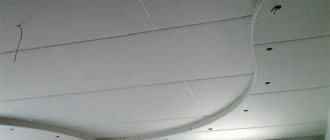
The material has gained its popularity due to its excellent technical characteristics, in particular environmental friendliness, ease of installation and the ability to create the most incredible designs, niches, arches. But there are times when, after repairs, cracks appear on the plasterboard ceiling. How to properly repair a crack in a plasterboard ceiling will be described below.
What causes cracks in plasterboard ceilings?
To eliminate defects that have arisen in the form of cracks on a plasterboard structure after painting, you need to determine the cause of their appearance. Among the most common factors that can provoke these troubles are:
- Simultaneous measures were taken to install an air conditioner, heating system and putty. When the temperature in the room changes during repair work, cracks often form on the ceiling after 2-3 days
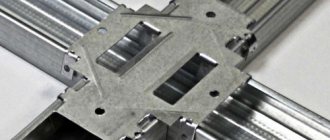
- Failure to comply with installation rules when installing a plasterboard structure. A common mistake is the incorrect placement of metal profiles - the distance between them is too large. Poor quality putty can also lead to trouble. The integrity of the plasterboard ceiling can also be compromised by failure to follow the sequence of actions, for example, the installation of lighting fixtures and the design of openings for ventilation were done after sealing the seams
- Installation of plasterboard ceiling to walls or columns is too rigid. With this approach, there is a “movement” of the ceiling in the space of the joints of the ceiling and walls. The point is that distortion lines appear along the seams between the plasterboard sheets. Since the main profiles were attached to the guides using self-tapping screws, and the sheets were fixed to the guides, this determined the excessive rigidity of the finished structure.
- “Dry” method of installing ceiling structures to dimensional parts made of gypsum plasterboard. It would be more correct to use demarcation tape and putty to separate these structures. That is, the joint had to be made not close to the treated wall.
- Incorrect installation of reinforcing tape. You must first apply the required amount of putty under this tape to create a strong bonding layer and remove any air bubbles that have formed. To correct the error, you will need to do everything again better.
- The use of an insufficiently well-dried lattice structure or solid flooring made of natural material - wood. Due to deformation during shrinkage of new rafters or beams, prerequisites arise for significant shifts in the sheathing, which leads to the appearance of cracks.
- The presence of dust particles on the seams does not allow them to properly bond with the putty. How to fix cracks in a plasterboard ceiling in this case? It is necessary to use a deep penetration primer before filling work.
Repair materials and tools
To repair defects that have arisen on a plasterboard ceiling, you will need a whole set of construction equipment and knowledge of the technology for eliminating such troubles. Tools include:
- hard spatula
- special hard knife
- chisel for cracks
- sandpaper
- special diamond mesh
- spatula with a width of 100-150 mm
- composition Uniflot or Funefuller
- paint roller
- deep penetration primer
- spray bottle with water
- containers for paint, primer
- quality paint
Having decided on the tools, you can begin to eliminate cracks in the plasterboard structure.
Preparing for sealing, checking the ceiling
To understand how to fix cracks in a plasterboard ceiling, it is recommended that you familiarize yourself with the sequence of construction work. First of all, it is necessary to assess the size of the problem, the condition of the plaster layer, and determine the actual depth and width of the resulting gap.
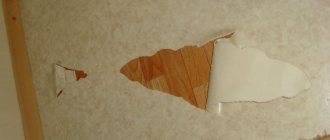
Preparatory work to eliminate defects begins with the removal of exfoliated sections of plaster; it is removed to layers that have retained their strength.
Cracks caused by displacement of the ceiling slabs must be thoroughly cleaned of plaster, decorative coating, putty, etc. The crumbling layer can be removed using a knife or spatula.
The resulting gap between the sheets of drywall must be freed from the reinforcing material and cleaned with a sharp knife, having first chamfered the edges of adjacent slabs. The surfaces to be corrected should be cleaned of dust particles by using a spray bottle of water. Modern putty mixtures made on the basis of building gypsum have a low level of adhesion to a dry surface, so it is advisable to wet the surface to be sealed.
To find out whether cracks will form in the ceiling in the future, you need to stick paper beacons on the crack. If after 2 days the paper remains intact, then you can begin to repair the defects.
If errors are identified during the installation of a plasterboard structure, large sections of the ceiling will need to be replaced.
To correct and strengthen the frame, all drywall is removed and a primary ceiling is created. The level of the new surface must completely coincide with the remaining sheets, and the joints must be carefully sealed.
How to repair a hole in a plasterboard ceiling
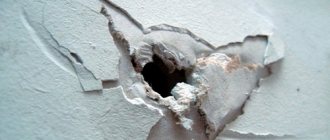
If, during installation work or during operation of the premises, due to negligence, a small hole appears on the plasterboard ceiling slab, proceed according to the same principle. The only difference is that a large diameter hole needs to be patched, while a small scale of damage may require local cosmetic repairs. Applying several layers of satengypsum will reliably disguise the hole. Subsequent grouting and priming will bring the entire surface of the ceiling to perfect condition.
In situations where the size of the damage reaches 5 cm or more, we apply a patch to the damaged sheet of drywall. Using a tape measure, measure the outer sides of the rectangle into which the hole would fit. Then, using a file and a mounting knife, align the edges of the hole in accordance with the dimensions of the rectangle. The patch that will be applied to the damaged area of the ceiling surface should have a perimeter 5-6 cm longer than the perimeter of the cut hole. The back side of the patch is freed from the plaster layer. In our work we only need the cardboard part of the material. On the main surface, similar actions are performed, only in reverse. A cut is made from the front side, removing the cardboard. The gypsum mixture (fugenfüller or satengypsum) is carefully applied to the edges of the patch and the main sheet of drywall.
A small clamp allows you to fix the patch in the desired plane. In this position, the section of the ceiling being repaired must stand. After 1-2 days, a finishing layer of putty is applied to the patch, after which grouting, priming and painting are carried out.
Note: fugenfüller is a material that looks like putty. The difference is that this material dries faster, so it is more convenient to use in situations where you need to quickly achieve the necessary adhesion of finishing materials. The high density of the material allows it to fill voids faster. The pressure of the spatula results in virtually all air being removed from the plastic mass, making the treated surface perfectly smooth.
Repairing a crack
So, how to remove cracks in a plasterboard ceiling.
Step-by-step instruction:
- After cleaning and preparing the surface, treat it 1-2 times with a deep penetration primer emulsion;
- Prepare a working solution (putty) following the instructions on the package;
- Fill in the gaps. Perform all actions carefully, leveling the putty well with a spatula;
- Leave the repaired area to dry for a day;
- Using sandpaper, bring the surface as smooth as possible;
- The corrected plane is ready for finishing (painting, wallpapering, etc.).
This option is suitable for sealing shallow cracks.
To eliminate larger cracks, it is necessary to use a serpyanka. The embedding process consists of:
- Filling deep cracks;
- Serpyanka stickers;
- Repeated puttying after the first layer has dried;
- Grouting and painting.
It is advisable to paint the surface with the same paint as during the first finishing, from the same manufacturer. This is an excellent solution for repairing heavily damaged surfaces.
In the most difficult situations, when you need to close pronounced defects, you can use various waterproof sealants and polyurethane foam. These measures are especially helpful if there is a possible risk of leaks from above.
Alternatively, to remove the crack, you can make a special bandage from linen or cotton fabric. The strip of fabric should not only cover the gap, but also cover its edges by at least 2-3 cm.
To avoid shrinkage of such a bandage, it needs to be washed and ironed. After that, the fabric is moistened in a container with an adhesive composition, wrung out and applied to the area to be repaired. The strip is leveled and puttyed after drying.
Having studied the information described above, it becomes clear how to remove cracks in a plasterboard ceiling after painting.
������� �������
�� ����� ����, ��������� ������ ����� ���� ������� � �������� ����������� ������� �������� � �� ����������� �������� ����������� ����� � ����� ������� �� ��������������� ���������, ��������������� ��� ���������� �������. ��, ���� ��������� �������� ������, ���� �������, ����� ���� �� �������������, �� ����������� �������� ���� ������ ��������.
- ������������ ������ ����. �� ��� �� ���������� � ��������� ������ �� ���� ������� ���� ����� �������� � ������������.
- ������������ ������ ������ ������������. �������, � �������� ������� ���������� ���������, ������ �������������� �� �� ���������, � �����. �� ���� ��������� �������� �����������.
- ����� ��������� ���������� ������� �������� ����������. �� �� ���������� ������� ������� ������ �� ���������� ������������� ���� ��� �������.
- ���������� �������. ����� �������, � ������ �������, ������� � �������������� ��������������� �������.
- ������� ��������. ���� �������� ������������� �� ������ ������ ������, �������, ����������� ����� ������� ��������� �������� ��������, ��������� �������� � ����������� ������ ���� �� �������� �����������, �� ������ ��� � ���.
�� ��� ��� ������� ���� ����������� ��������� ���������. ��������, ������ ��������, ���������� �����, �� ���������. ����� � ������������ ������� ��������� �� ������� �� ������� �������, ��, ��������� �� ��� �� ����������.
� ��� � ����������� �������, ����� �������� ����� ���������� � ���������� ��� ������� ������������ ������������ ������ � ��������� ��������������.
��� ����������� �������� ����������� ����������. ���� �����, ����� ������� � � ������������ ����������. ��� ��� ������������, ��� ������ ����������� ������ � ������������� ������������ �������.
��������� ���������� ������� ��� �������� ��� ���� ����� �������� � ����� ������ ��������� ����������� � ��������� ���������� �������, ����� ��������� ������ ����� ����� �� ��������� ����� ������ �����.
������� ���������� �����������
���� �������� �� �� ���, ��� �� ��������� ������� �� ��������� ������ ��������, �� ����� ���������.
� ��� �� ��������� ������������ ���������� �������� ��� ���������� ����������. ������, ����� ���������� ������ ������ �� �������, ���������� ��������� ������� � ���������� ������� � ���������� ���������� ���������. � ����������� �� �������� �������, ���������� ����� ������������� ������� ������.
�������, ����� ���, ��� �� ��������, ����� ������� ������. ��, ������ ��� � ��������� ��������� ������, �������� ��� � ��������. ��� ����������, ����� ������������� ��� ������� �������� ���� ������� ������� ��� ��������� � ������������, � ��� �� ����� ���� ������� ��� �������� ���������� �������� ��������.
�� ����� ������������� ����������, ���������� ������� ������ �� ���������� ����� 2- 3 �����������. �������� ��� �� ��� �� �������, ��� � ���������� �������� � ��� ���������� ������� ��������� ���������.
������ ���� � ������ �����������, ����� ��������� ������������� ������. ����� ������������ �����, � �� �����. ���� ������ �� ������ ������ ������� ��������� � �����������.
����� ���������� ���������, ��������� ������ ���� ������������ �����. ��� ������������� �����������, ����� ����� �� ��������� �������� ����� ��� ����������� ������������� �������. ���� �� ����������� ������ ���������, ����� ����� ����������.
����� ������ ���� ����������� ������������� ������� �����, ��� ��� ��� �������� ����������. ����� ����� ����� �������� �������� ��������� ���, � ������ � �������� ��������� � �������� �������� ����� � ��� �� �� ����������� �������� �������� ������.
����� ��������� ����� ����, ��� ����� ����������� ��� ������������� � ���������. �� ����, ������ ������� �� ������������ ����� ������� � ����� ���������� � ������.
Home / Types of ceilings / Plasterboard / Causes and elimination of cracks in plasterboard ceilings
No one can guarantee that after finishing a plasterboard ceiling, cracks will never appear on it.
It's rather a matter of time. The appearance of cracks, even small ones, is inevitable. Why cracks appear on a ceiling made of plasterboard and how to get rid of them can be read in this material.
What mistakes do beginners most often make when repairing cracks in an apartment?
When repairs are done by yourself, it is easy to make a mistake. Usually, beginners incorrectly assess the level of the problem. Or they choose the wrong material to fill the gap. It is also popular to neglect the stage of cleaning the surface from contamination. To prevent them, it is recommended to consult with a specialist in advance and perform each step carefully.
Usually, beginners incorrectly assess the level of the problem.
A crack in the wall may appear unexpectedly; it is important to understand the cause and fix the problem in a timely manner. You can cover up the defect yourself, but professional advice won’t hurt
The putty agent is selected based on the wall material.
Causes of the phenomenon
In fact, the appearance of cracks can be associated with a huge number of external factors - from the impact of vibrations of a tram passing near the house to poor-quality material used in finishing work. But, there are several main reasons, knowing which you can, if not prevent, then maximize the service life of the coating.
- Natural shrinkage of the house. You cannot get rid of it, and cracks for this reason are most often possible in new buildings.
- Incorrect installation of drywall sheets. Often, in an attempt to save some materials, installation is carried out not “in a run-up”, but end-to-end. Damage will inevitably appear on the seams.
- General violations of finishing technology for such materials. From joints not sealed properly to the lack of a primer layer during finishing.
- Frame sagging. This phenomenon is primarily associated with the use of low-quality fasteners.
- External vibrations. If the apartment is located on the first floors of a building, often heavy vehicles passing nearby cause vibrations that can lead to the formation of cracks even on concrete floors, not to mention gypsum boards.
Not all of these reasons can be eliminated completely. For example, it will not be possible to remove vibrations coming from outside. You can significantly reduce their influence on the finished ceiling, but you cannot completely get rid of them.
But frame sagging can be dealt with very effectively - it is enough to use high-quality parts and mounting devices during installation.
This will practically eliminate the possibility of sagging. The same applies to the materials used. The better quality they are, the greater the likelihood of long and trouble-free operation of the ceiling.
Violations of the technology of finishing or fixing gypsum boards are also easy to avoid - you just need to follow the instructions and follow the installation technology, then you won’t have to worry about the appearance of cracks for a very long time.
Options for solving the problem
When choosing tactics that will help eliminate cracks once and for all, first of all take into account the established causes of ceiling defects:
- If the frame is rigid, and the crack grows slowly but constantly, and its shape does not follow the joint between the sheets, then the reason for its appearance is shrinkage or vibration of the building. In this case, there is no point in waiting for the end of the process, and it will not be possible to remove the defect with putty. The only way to ensure that the crack does not appear again without having to disassemble the ceiling is to disguise it by gluing decorative polyurethane or polystyrene foam boards.
Polyurethane tile finishing
- If play in the structure or sagging of drywall is detected due to incorrect frame assembly technology, the ceiling is dismantled.
- If it turns out that the crack arose due to poor-quality sealing of seams or non-compliance with puttying technology, it can be removed by local jointing and sealing, followed by painting the ceiling.
Having determined the causes of cracking, you can competently begin to restore the ceiling surface.
Methods for eliminating damage
If, despite everything, defects still appear on the surface of the new coating, they can be eliminated.
And this will not require significant financial investments or special skills. Usually, to repair cracks in the ceiling, basic skills in finishing work and a small amount of material are enough. Depending on the size of the defect, slightly more materials may be required.
The crack needs to be made bigger before it can be repaired. Yes, that’s right - to expand the existing defect, increasing it in size. This is necessary so that the material applied during repair has a large area for adhesion to the surface, and it is also possible to remove all loose particles of the coating.
Along the edges of the resulting depression, it is necessary to remove the paint to a distance of about 2-3 centimeters. This is done for the same reason as the previous operation - to increase the adhesion area of the putty.
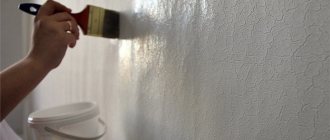
After removing dust and other contaminants, you need to carefully prime the recess. It is better to use a brush rather than a roller. The nap of the roller does not always apply the primer well in the recesses.
After the primer has dried, the first layer of putty mixture is applied. When using a fugenfuhler, it will be possible not to use paper tape to reinforce the area being repaired. If another putty is used, tape will be necessary.
When the first layer of applied putty has dried, it is once again treated with a primer. Next, you can apply the finishing putty or, in the case of conventional compounds, stick a paper tape and apply the finishing compound over its surface.
After this layer has dried, it must be sanded if necessary and painted. At this point, the repair of the plasterboard ceiling will be completed and you can begin cleaning.
"load...
Having made a chic ceiling from plasterboard, you can find out after a while that it is cracked in some places. Moreover, it is not always the master’s fault. There are many objective reasons that provoke divergence or displacement of gypsum board joints.
If the crack is small, you can revive it yourself. The main thing is to figure out what factor caused the problem, eliminate it, and only then begin repairs. Let's figure out how to repair a crack in the ceiling without calling a professional.
Cracks in the external and interior walls of the apartment - who should repair it, where to go
Before sealing a gap in the wall, they find out where it came from. There are several factors influencing this process. When it comes to a brick house, this is often associated with its shrinkage. Another reason could be a violation of construction rules. The foundation of a brick house must stand for one winter, and only then further work can be carried out.
The appearance of defects, for whatever reason they arise, requires solving them. And here another question arises - who to contact in order to understand who will do the repairs.
The first authority is the management company. However, in practice, she does not always undertake to eliminate cracks. Then you should go to a design and construction company, which will assess the incident and tell you what to do next.
Before sealing a gap in the wall, they find out where it came from.
Why do cracks appear in walls and what are they?
Gaps appear due to various factors. Before you start covering up wall defects, you need to assess the scale. The presence of a millimeter crack is not scary. The root of the problem may be changes in the soil under the structure, as well as poor stability of the load-bearing walls. You can simply cover it with some object.
However, the scale of the problem may be greater, depending on the material from which the house is built. For brick and concrete, such a small crack is not tragic, but for a foam block it is more significant. Repairing a panel house is easier.
Frequent vibration, windy weather, heavy traffic, high temperatures are phenomena that significantly affect the possibility of defects forming in the walls of different types of houses. Important factors are swelling and shrinkage periods - the reaction of the material to different weather conditions. The purpose of the building and the loads to which it is subjected also influence.
Important factors are swelling and shrinkage periods - the reaction of the material to different weather conditions.
What are the dangers of cracks in the wall of a house?
Before you cover up cracks in a wall, you should figure out how dangerous it is. It’s bad if this is a consequence of violation of construction standards or major repairs.
To check, you can set a mark with a plaster solution; instead, you can use a control strip. To do this, special plaster is applied to the gap, the width is approximately the size of your palm. I wait about a month, if the gap does not appear again, then there is no need to be afraid.
If it appears, they wait another two months; professionals talk about the possibility of waiting three. If the size increases, then you need to contact a professional. He will help determine the scale of destruction and find the right solution.
To check, you can set a mark with a plaster solution; instead, you can use a control strip.
Causes of cracking seams on ceilings
The first thing the owner should do when he discovers a cracked seam is to press down on the ceiling and see how well it holds up. If the slab moves, then local repairs are useless. It will be necessary to carry out complete dismantling and eliminate the shortcomings of the frame fastening.
An objective factor in the appearance of cracks in the ceiling in new buildings is the shrinkage of the house.
If the building was built in a short time or on clay soil, the foundation will still “play” for three or four years, which means there may be movement of the walls and ceiling slabs. In this case, you should not do expensive repairs at all in the next three years. And if the ceiling is already sewn up and cracks appear, you will have to endure until the building completely shrinks, since repairs are useless.
Another common cause of cracks in the ceiling of a large room is the installation of sheet-to-sheet drywall, i.e. without moving seams. And if the house is located on a busy street, where there is vibration of the walls from constant traffic, or the neighbors above were making major repairs, then the seam may burst along the entire length of the room.
Installation of plasterboard sheets must be done in a checkerboard pattern, with offset seams, otherwise strong vibration may result in a crack along the entire length of the room.
Small cracks cannot be ruled out if, at the time of sealing the joints on the plasterboard ceiling, a primer was not used (thereby reducing the adhesion of the putty mixture and gypsum board) or the chamfer was not cut off to improve the surface monolith. In any case, it’s up to you to fix the problem.
Technological factors
A technological crack is already a human factor. The basis is non-compliance with the technology of installing drywall on the ceiling.
The construction of a suspended ceiling structure consists of several stages. Depending on which of them the errors were made, the reasons why the crack appeared may lie on the surface or be hidden in the depths of the structure. Typically, a crack adorns the surface at the joints of sheets of sheets.
Errors when assembling the frame include insufficiently strong fastening of the guides to the base, which is necessary to hold a heavy structure:
- There is no profile at the joints of the sheets;
- Some dowels got caught in loose material, fell out due to the load, and a crack appeared on the surface due to sagging.
- The screw does not expand the dowel enough when tightening due to its small diameter.
Proper installation of the suspension
The installation of the suspensions was carried out not in the jumper, but behind the side ears. When loaded, the suspension is pulled away from the base. This also leads to the ceiling sagging and the putty cracking.
- Installing drywall sheet by sheet by inexperienced craftsmen is one of the most common mistakes. In small rooms a crack may not appear, but in large areas cracking is guaranteed after the putty has completely dried.
- The crack appears due to improper execution of sheet joints. The factory-made longitudinal edges of the sheets are equipped with a bevel for sealing seams. But in most cases, after cutting drywall, the edge is smooth. Some craftsmen do not cut the chamfer, and as a result the seams are weak and a crack appears.
Finishing errors:
- A crack will appear if the ceiling was not primed before finishing putty and sickle was not used.
- Cracking is caused by incorrectly selected material or the use of an expired and poor-quality putty composition, improper preparation of the mixture for application, or failure to comply with the temperature regime.
Many of the reasons why a crack appears can be identified by characteristic signs.
Sealing shallow cracks
The first step is to check how deep the ceiling has burst.
And for this you will need a narrow spatula, which is used to carefully remove all the paint from the cracked seam until a sickle mesh is found. If the mesh itself is intact, it means that the problem was poor putty or incorrect application of layers. We will analyze step by step what to do with such a ceiling and what to cover it with.
The entire cracked surface is expanded at the edges by several cm in order to completely remove the crumbled drywall
- We expand the edges of the crack by 2-3 cm from the sides using a spatula or chisel.
- We clean the problem area with a mesh to remove as much putty residue as possible.
- We pass the edges of the cut-out area with a mesh (or sandpaper) to remove the layer of water-based emulsion. It will interfere with the reliable bonding of putty and drywall.
- Brush off the resulting dust with a dry brush and coat the surface with primer.
- We wait for complete drying (at least 12 hours).
- We putty using a wide spatula. If the crack is deep, putty is applied in several stages, applying a second layer after the first has dried.
- The putty surface should become smooth and level with the general surface of the ceiling.
- We wait for it to dry and prime again.
- All that remains is to paint over the repair area, and it is better to do this not point by point, but to go over the entire ceiling with a roller. Otherwise, fresh paint may turn out to be whiter than last year’s.
