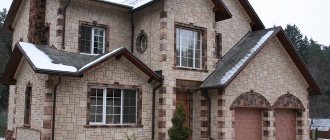
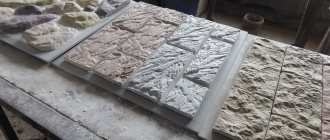
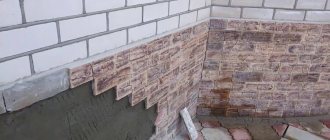
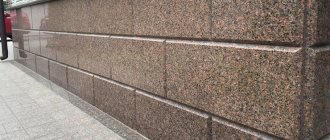
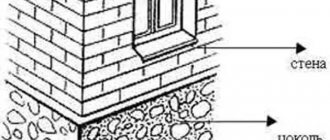
The basement is a very important part of the house from both a functional and decorative point of view. Therefore, finishing the basement is a separate task, to which a good owner of a country cottage will definitely pay a lot of attention. Most often, decorative stone is used for these purposes - an expensive material that not everyone can afford in large quantities. But today the material has a cheaper alternative that is not inferior in its performance characteristics. This is an artificial stone for a plinth.
Artificial stone for plinth
What are the requirements for finishing a plinth made of artificial stone?
Let's start with a list of requirements that any high-quality finishing of the base must meet, regardless of what material it is made of. This fully applies to artificial stone.
- Waterproofing – the base is constantly exposed to moisture that falls on it along with rain and snow. Therefore, the finishing should not allow water to pass through itself and perform a protective function - to protect the lower part of the walls of the house and the foundation from dampness and gradual destruction.
Artificial stone for plinth
Lining the base with artificial stone
- Resistance to mechanical loads - during the shrinkage of a newly built house and various movements caused by certain factors, the finishing of the base may experience various loads and forces. They can also occur for other reasons. Therefore, artificial stone and other materials must be strong enough to remain in their original form under the influence of moderate mechanical loads.
- Resistance to temperature changes - external finishing, especially in autumn and spring, experiences impacts caused by sudden changes in weather. If this requirement is not met, the material will very quickly lose strength, chip and collapse.
- Durability – when buying artificial stone, the home owner expects a long service life. And good material should fully meet these expectations.
- Attractive appearance and harmonious combination with the rest of the home's decoration.
Lining the base with artificial stone
What stones should be used for cladding?
Quite different materials can be used for cladding the base, and here is a list of them:
- concreting;
- plaster and paint;
- tiles and artificial stone;
- siding;
- natural stones.
The most practical and durable option is to use natural stones, although it is by no means the cheapest.
The reputation has been carried through many centuries, and today the following types are used for decoration:
- granite;
- marble;
- Lemesite;
- shungite;
- sandstone;
- dolomite;
- shell rock;
- slate (flagstone);
- quartzite.
Advantages of artificial stone for plinths
Now it’s worth telling why artificial stone has become such a popular material for finishing plinths. It should be noted that this is due not only to its low cost relative to natural material, since there are many other advantages.
- Convenience and ease of use – modern varieties of artificial stone are created in such a way that they can be laid on the base without any special preparation. Therefore, you can do all the work yourself, without involving third-party specialists and without spending your own money on their services.
Another example of cladding
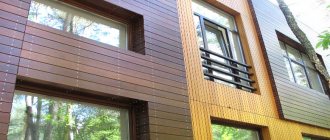
Basement of a wooden house
- Easy processing - if you have the appropriate machine or grinder, it is very easy to correct and trim artificial stone tiles. This advantage of the material greatly simplifies the installation process on the plinth.
- A wide variety of colors, textures and shades - using artificial stone, you have the opportunity to get exactly the finishing of the base that you need, and at a relatively low cost.
- Standardized sizes of individual tiles significantly simplify the installation process and eliminate the need to waste time selecting matching stones and adjusting them.
- Less load on the base and foundation of the building due to the relatively small mass of the individual material compared to natural stone.
- Durability and moisture resistance - modern artificial stone, manufactured with strict adherence to all technological processes, is no worse than natural material and can also last for decades without losing its appearance and strength.
Installation of finishing stone
The only drawback that discourages some homeowners from using artificial stone is its “unnaturalness”. But here it should be understood that the material is made from the same mineral components and it so accurately replicates the color and texture of the original that they can only be distinguished up close.
Base for artificial stone
Base cladding technology
Let's assume that you have finally chosen the type of rock that suits you, but an equally important point when facing is the technology that you will use. There are two installation methods, and each of them is used in its own situation.
Thus, “wet” involves the application or use of special adhesive compounds, which will make finishing the base to look like stone much easier. The technology is cheap and extremely popular, and is used quite often.
This is interesting: finishing the basement of a house with decorative stone.
There is also an alternative called “dry installation”, which involves finishing the plinth with natural stone using a pre-installed lattice with wooden or metal slats.
Wet method of facing the base
All types of artificial rocks are installed using the wet cladding method. In some places, one of the layers is glue, while in others it will be necessary to additionally apply a special mixture to the leveled facade. It is extremely important that the adhesive layer is no thicker than 1 cm and is applied under humidity conditions above 75 percent and air temperature within 5 °C.
But these conditions are idealized, and a deviation of ten degrees or percent will not make the performance worse, so don't worry about it too much. However, precisely because of these requirements, facade finishing is carried out only during the season.
Dry method of plinth cladding
But the dry method is used extremely rarely and only for natural breeds. It is somewhat similar to the installation of a ventilated facade using technology. Before starting the process itself, do not forget to work directly with the base, covering up any unevenness and cracks. After all, in the future they can lead to difficulties during installation, and they will simply be extremely dangerous due to the possibility of developing uncontrolled erosion or damage to the main part of the facade, which is already dangerous for the lives of people living in the building.
Types of artificial stone
Today, the construction market offers a huge number of different types of artificial stone. So that you can navigate this diversity, we have made a table that presents the main types of this material and their features.
Currently, there are artificial stone facing materials that are completely different in appearance, shape and color.
Table. Artificial stone for plinth - main types.
| Name | Description |
Cement-based artificial stone | The most popular type of artificial stone is widely used for finishing plinths, facades and interior walls in private cottages, apartment buildings and public buildings. This material is manufactured as follows: a solution prepared from high-quality cement, sand, dye, plasticizers and other additives that improve certain properties of the final product is poured into a plastic, rubber or silicone mold. Depending on the type of dye and shape used, the appearance and texture of a particular type of stone is reproduced. The result is a beautiful, strong and durable material, but quite heavy. |
Polymer sand artificial stone | Composite finishing material. It is created, as the name implies, from a mixture of sand, acting as a filler, and various polymers used as binders, plasticizers, etc. It is produced in the form of individual tiles, which are connected to each other using locks of various designs. Polymer sand artificial stone is fixed to the base and other surfaces of buildings using a frame and self-tapping screws. A lightweight and fairly durable material, the installation of which goes well with the insulation of the base, facade and other surfaces. |
Flexible artificial stone | This material is a multilayer composite, produced in the form of individual tiles or solid sheets. A very thin section of rock is attached to the fabric base using glue. On the inside there is another layer of glue - it is necessary to secure the canvas or tiles to the surface. To protect against premature drying, the material is covered with paper. It is distinguished by the lightest weight among all types of artificial stone, flexibility, versatility and good resistance to temperature changes. |
Clinker tiles | In its manufacturing method and appearance it resembles a cement-based artificial stone, but in this case the material is made of clay. In its class, clinker tiles have the most outstanding performance characteristics and high cost. |
Homemade artificial stone | The cheapest option for artificial stone for a plinth is to apply a layer of concrete mortar to the surface, on which, using tools, a finish reminiscent of natural stone is formed - with roughness, unevenness and seams between the individual elements. The color is imitated using several layers of paint. |
Important! It is worth highlighting siding façade and plinth panels separately. They have a polymer base with holes for fastening to the frame and locks for connecting to each other. And their outer side can be made of concrete mixture or polymers. But at the same time, it accurately imitates the color, appearance and texture of real stone.
Basement siding under stone
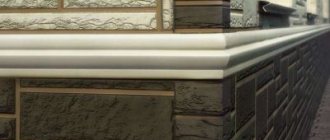
The basement and the house are lined with stone panels
Preparation, necessary materials and tools
Depending on what material you choose, preparation will differ. So, for a brick plinth you don’t need any tricks, you can install it right away, but with other varieties it will be necessary to level the surface, and this will require the appropriate tools. Traditionally, the base is leveled using a concrete screed. For this procedure you will need:
- special sealant;
- primer and a couple of beacons;
- profiles and quick-hardening adhesive solutions;
- concrete solution 1 to 3.
Tools:
- tape measure for measuring distances;
- spatula for applying an adhesive layer;
- level;
- rule.
Don’t forget to prepare the appropriate material
Grouting and finishing
After direct installation, it will be necessary to grout the joints, hiding them from an external observer. Then the finishing begins, when the “sharp corners” of the material are cut off, it is polished and, if necessary, tinted or a protective layer is applied.
How to choose the right artificial stone for a plinth
Before considering methods for laying artificial stone on a plinth, let’s take a look at the recommendations that will allow you to choose a high-quality finishing material that will be beautiful, strong and durable.
Choosing artificial stone
Firstly , pay attention to the price of artificial stone. Please note that although it is cheaper than natural, it cannot be too cheap. If the cost of a material is significantly lower than the market average, then most likely it was made of poor quality, in violation of technological processes. Such a stone will be fragile and short-lived, and it will also have significant differences in color and texture, which will stand out on the base and spoil its appearance.
Secondly , if we are talking about cement-based artificial stone, then ask the seller what form the material was cast with. It is advisable that it is not plastic or rubber, but silicone - with its help, a conscientious manufacturer is able to very accurately convey the texture of natural stone.
Silicone mold for casting cement-based artificial stone and components added to it during manufacturing
Thirdly , inspect the surface of the artificial stone. If there are several elements of different colors on one tile, then their colors should not “crawl” onto each other. Individual stones should look beautiful and not have significant external defects.
Above is an example of high-quality artificial stone tiles. Below there is a defect, you can see that the painting is uneven and “creeps” onto an element of a different color, which is marked with a red arrow
Fourthly , none of the artificial stone tiles should have through holes. This is an obvious defect, a product with a short service life. It shouldn't be on your base.
Water gets into such holes in artificial stone. Subsequently, with temperature changes, it freezes and expands, destroying the finish, spoiling its appearance and significantly reducing its service life.
Fifthly , check whether there are grooves on the back of the artificial stone tiles. Their presence is necessary for better “adhesion” of the finish to the tile adhesive and the base surface of the base.
The grooves are required for better “adhesion” of the finish to the tile adhesive and the base surface of the plinth
Sixthly , if we are talking about rectangular tiles that imitate natural stone only on the outside, the material must have smooth boundaries that fit well together.
And finally, always pay attention to the quality of the external coating of artificial stone. The texture should repeat the natural analogue. Also make sure from the cut that the material is painted to its full depth - in this case, in the future, with chips and under the influence of wind, the artificial stone will not lose its original color and will remain the way you chose it.
In addition, on a cut or chip it should be noted that the artificial stone does not have too large (more than 0.5 cm) foreign inclusions
Important! It is desirable that, in addition to regular tiles, the set includes an artificial corner stone. This will significantly simplify and speed up installation on the plinth.
Corner element made of artificial stone
Price for decorative stone
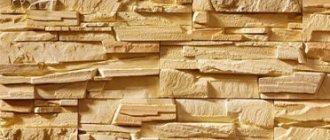
Decorative rock
Cost of installation work per m2
To get a high-quality appearance of the plinth and facade, it is important to choose the services of experienced builders . Craftsmen select suitable materials for a specific situation. Prices for work depend on several factors - the form of construction, complexity of installation, distance for delivery.
The price of artificial facade stone is at the level of 200-1500 rubles per sq. m. m. The exact figure depends on the type and thickness of the material and the complexity of installation. Natural material is more expensive - from 1,500 to 4,500 rubles per sq.m. This takes into account installation work, which costs 1000-2000 rubles per sq. m. m.
Finishing the base with artificial stone using tile adhesive
Let's consider the most common method of finishing a plinth with artificial stone - laying it on tile adhesive. Here are standard step-by-step instructions showing how to work with this material correctly. Everything that is stated in it can be successfully used for finishing the base with artificial stone.
Artificial stone laying works
But first, let’s take a look at the list of tools needed for laying artificial stone:
- building level;
- roulette;
- drill with mixer attachment;
- stone cutting machine;
- spatula and trowel;
- brush;
- a set of several brushes;
- syringe for applying grout;
- wedges for maintaining the position of stones;
- containers for water, tile adhesive, and also for preparing grout.
Step 1. Prepare the surface of the base; if there are significant (more than 5 mm) unevenness, plaster it. Then successively apply two layers of primer, which will ensure better “adhesion” of the tile adhesive to the surface of the base.
Preparing the primer mixture
Applying primer
Important! When working with a plinth made of brick, it will be useful to pre-treat it with a product to prevent salt release. Without this, the adhesion of the tile adhesive to the surface of the house will be significantly worse, therefore, the durability of the finish will suffer.
Step 2. Perform preliminary markings - determine which stones will fit in which places. Pay special attention to the corners and top. It will be useful to first lay out the stones in the same order in which they will be attached to the surface of the base. At the same time, check how well they fit together and whether there are any samples between them that seriously stand out from the general color scheme.
The stones are laid out in the same order in which they will be attached to the surface of the base
The stones are laid out
The presence of corner elements made of artificial stone greatly facilitates the process of laying on a plinth or any other surface
Step 3. Using a brush, clean the inner surface of artificial stones from cement laitance - a foamy light layer.
Cleaning the inner surface of the stone
Step 4. Prepare tile adhesive. To do this, follow the instructions written on the packaging. When stirring, be sure to use a mixer - this is the only way to achieve a homogeneous composition that will hold the finish of your base firmly and for a long time.
Follow the proportions specified in the manufacturer's instructions
Preparation of tile adhesive
Step 5. Apply a layer of tile adhesive 5-8 mm thick to the back side of the artificial stone with a spatula. Do not leave areas on the surface that are not covered with adhesive - this will significantly reduce the service life of the finish.
Glue is applied to the back side of the artificial stone
Step 6. Carefully attach the stone to the desired location on the plinth. At the same time, move it slightly to the sides so that the tile adhesive “adheses” better to the base surface.
Fastening artificial stone
Step 7: Carefully remove excess tile adhesive from the joints between individual trim pieces.
At this point, the instructions for laying artificial stone without “seams” on the base are completed. In the future, you should only repeat the previous steps and attach one tile after another. But if you choose a finish with “seams” created by grout, then be sure to study the second instructions in this section, presented below.
Step 1. Lay individual elements of artificial stone according to the same principle as in the previous instructions, but respecting the gaps to which grout will subsequently be applied. To maintain exact dimensions, insert wedges made of plastic or wood between the slabs.
Laying elements
Wedges for maintaining precise gaps between elements
Step 2. Prepare the grout mixture and put it into a construction syringe.
Step 3. Using a construction syringe, apply grout into the gaps between the artificial stone tiles. Choose the layer thickness yourself, based on personal preferences.
The gaps are filled with the prepared mixture
Step 4. Using a narrow spatula or any other similar tool, smooth the grout applied between the artificial stone tiles.
Smoothing the grout
Finished artificial stone masonry with seam
Artificial stone laid on the plinth in any way requires mandatory treatment with a water repellent - a composition that protects the finish from moisture, sunlight and other factors.
Prices for Ceresit glue
Ceresit glue
Video - Decorative stone. Plinth cladding
Surface preparation
Finishing the basement of a house with artificial stone starts with preparatory procedures. Their absence can lead to poor adhesion quality and, consequently, reduce the service life of the cladding and the structure itself.
To improve adhesion, you need to open the surface of the base with a primer composition, but this should be done only after preliminary preparation.
Surface plastering, leveling
If the surface has no defects, then simply covering it with a primer is enough, but if there are cracks, then they must be repaired.
Also, the uneven base needs to be plastered to bring the surface into one plane. This will guarantee high-quality fixation of the artificial stone.
Finishing the base with artificial stone on the frame
In addition to individual cement-based tiles, artificial stone is available in the form of panels similar to siding. Their installation has serious differences, which you will learn about from the step-by-step instructions given below.
Step 1. Start finishing the base with siding with artificial stone by making a frame. To do this, use either a wooden beam or a metal profile similar to that used for drywall. The frame includes lower and upper frames, vertical posts and intermediate horizontal beams.
The frame for basement siding must be strong - it needs to withstand the weight of panels with artificial stone
Important! Before installing the finishing of the base, it makes sense to use the free internal space created during the manufacture of the frame and insulate the structure with mineral wool or foam panels.
Step 2. Unpack the basement siding and “fit” the panels to the frame. In this case, most likely, solid panels will not fit in height - you will have to cut them off either from the top or from the bottom.
Unpacked panels need to be tried on
Step 3. Install the corner panels of the basement siding and the profiles used to fix the remaining cladding elements.
Installation of corner panels and profiles
Step 4: Trim the left edge of the panel so that it is completely vertical. Install it on the frame. Then install the second panel, securing it to the side of the first with a tongue-and-groove lock. The siding is fixed on top with self-tapping screws; screw them strictly in the middle of the holes in the finishing material.
Attaching basement siding
Important! Screw the screws holding the base siding panel into the frame not all the way, but maintaining a gap of about 1 mm between the trim and the fastener head. This is necessary to compensate for the thermal expansion of the finish created on a polymer base.
Step 5. Using the same principle, install the remaining panels of the basement siding. In this case, the top or bottom rows will have to be trimmed if they do not fit in height.
Installation of remaining panels
Step 6. Separately install artificial stone panels on “difficult” places in the basement - where the ventilation pipe exits, where the gas pipeline enters the house, or where there is a basement window. Then install a metal shimmer on top, which will protect the finish from excessive moisture.
Metal shimmer
At this point, the installation of artificial stone plinth finishing in the form of siding panels can be considered successfully completed.
Sandstone for facade
In modern construction, sandstone is used quite widely, primarily for cladding facades. Such buildings look very attractive, and in addition, they have a number of advantages in terms of operation. True, before choosing sandstone as a facing material, it is necessary to study the characteristics of the stone and the rules for working with it.
Material selection rules
When choosing artificial stone for cladding, you should follow some rules. Attention is paid to the following factors:
- External parameters. Natural stone looks attractive due to the fact that each element has a certain individuality. This creates the uniqueness of the entire coating. Therefore, the imitation should not contain parts that completely repeat each other within a certain segment of the structure.
- Structure of fragments. To achieve the best similarity, the artificial stone should not contain a large fraction. This not only reduces visual perception, but also affects the durability of the product.
- Size. The best solution is heterogeneity. If you choose a material in the form of tiles of similar size, then its texture should hide this parameter.
As practice shows, the simplest way to create a non-uniform, visually non-repeating pattern is to use a slate texture - Manufacturer. Artificial stone for plinths is a frequently counterfeit product. Products produced in artisanal conditions have low quality and hidden flaws. Therefore, it is better to give preference to proven and proven manufacturers.
- Dyeing method. There are two methods: external painting and adding color directly to the solution. The latter option is considered to be of higher quality. This is because surface damage will not affect the overall appearance of the coating.
Material with a color embedded in the solution does not need to be painted, but it is an order of magnitude more expensive than single-color tiles - Condition of parts. Several elements are selected to evaluate this parameter. The outer side should not have cracks or voids. Any uncharacteristic defects indicate a violation of production technology. The back surface should have a rough and grooved structure, especially if installation is done with glue. This will ensure good grip.
On a note! Personal perception is of great importance. The material must correspond to individual ideas and fit the design to the overall design of the house.
The light colors of the base give the building a certain lightness, and the dark stone foundations emphasize the solidity of the structure
Do-it-yourself artificial stone for a plinth
The essence of the method is that a layer of cement-based mortar is applied to the base. Then, using available tools, a surface is formed that imitates the appearance and texture of stone. This method of finishing the base is well suited for those homeowners who, for one reason or another, do not want to spend money on buying ready-made material, and for those who want to do all the work themselves.
To form artificial stone on the plinth you will need the following materials.
- Magnesium glass sheets as a base for a layer of cement mortar.
- Deep penetration primer - for better adhesion of the concrete mortar to the main surface of the plinth.
- Tile adhesive is the basis of the solution for forming a layer of artificial stone. As an alternative, facade plaster or a regular mixture of sand and cement can be used.
- Light and dark paints are necessary to give the cement mortar layer a color that imitates the appearance of natural stone.
Glass magnesium sheet
In addition, to form a layer of artificial stone on the base you will need:
- containers for mixing solution, water and paint;
- drill with mixer attachment;
- building level;
- trowel for decorative plaster or spatula;
- a tool for forming joints between stones - a screwdriver or something similar;
- sponge to create stone texture;
- brushes for cleaning joints and rounding individual elements of concrete mortar;
- brushes and roller for applying paint.
Step 1. Preparation - finish the base with glass-magnesium plates. Due to their better “setting” with concrete, they will ensure greater durability of the layer of artificial stone formed from mortar.
Step 2. Coat the glass-magnesium boards with two layers of deep penetration primer. Apply the second layer only after the first has completely dried.
Step 3. In a separate container, mix a concrete solution from the components that were mentioned earlier. To work with the mixture, use a drill with a mixer attachment. The resulting solution should be thick, plastic and homogeneous.
Mixing the solution
Preparatory stage
There are several ways to lay a natural stone foundation.
In any case, pre-clean the surface. Excess dry mortar is removed and the seams are cleaned if the base is brick. The swells on the concrete foundation are cut down. The surface is washed, if necessary, degreased and dried. Primed with concrete contact, applied with a brush, roller or spray gun. It is better to choose a ready-made primer with a coarse-grained fraction, which will increase the adhesion of the finishing material to the surface. Approximate consumption: 250 g. per square meter. Allow 7 hours to dry completely. Operate at temperatures from +5 to +35°C.
Tip: The primer significantly reduces its quality when dust settles on it. Therefore, they treat the area with which they will directly work. For greater reliability, the base can be covered with a fine metal mesh.
