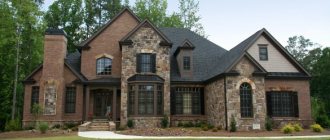
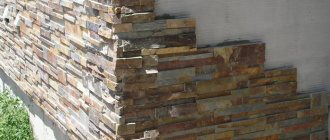
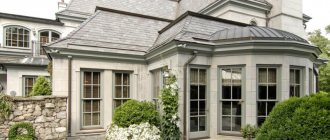
Lately huge Artificial stone is popular for finishing the facade of a house. This is quite fair - it is durable, practical, affordable and looks gorgeous. If you have made a choice in favor of such a façade finish, then in this article you will learn about its basic properties, installation principles and main types of installation.
Finishing the facade with artificial stone is a reliable and aesthetic solution
Features of choosing artificial stone
A huge selection of artificial stone for facade cladding makes it possible to choose stone tiles of various colors, sizes and textures. However, like any other material, it has its advantages and disadvantages.
Disadvantages and advantages of artificial stone
So, the advantages include:
- wide range of materials;
- excellent sound insulation;
- low thermal conductivity (no need for additional insulation);
- moisture resistance;
- environmental friendliness of the product;
- high fire safety;
- strength and durability;
- Several types of installation that you can handle yourself.
The ease and simplicity of installation of artificial stone compared to its natural counterpart is one of its main advantages.
When making the final choice, one should take into account the disadvantages of the material:
- fragility during transportation and construction;
- careful care - it is unacceptable to use abrasive products when washing.
How to unstitch seams
Seal the surface, eliminating the possibility of liquid penetration under the cladding: this way you can avoid cracking and subsequent destruction of the masonry in winter. Jointing is carried out using a construction syringe gun or a special bag for placing the mortar into the tile joints. Typically, such a bag is made at home from a simple plastic bag so that the hole from which the solution comes out is narrower than the seam.
When the solution begins to set, take a spatula, smooth out the seams using pressing movements and remove any remaining residue. While the solution is still fresh, do not try to remove it, as it will leave dirty marks. This should be done after 40-60 minutes using a stiff brush.
Cladding the facade of a house with artificial stone |
Cladding the basement of a house with artificial stone |
Types of materials
Artificial stone for facades is a common name for different types of material. As a rule, these are Portland cement panels to which various admixtures are added, thereby creating the impression of a natural material. However, this is not the only type of material that can be used to line the walls of a house:
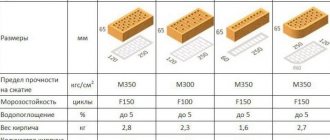
- Clinker. Tiles whose properties are identical to clinker bricks. It has the same appearance, shape and method of laying.
- Ceramics. These are façade panels made of clay that has been fired. They have high protection against temperature changes and are water-repellent.
- Porcelain tiles. This tile is strong and resistant to damage. In addition, the surface of this material can be glossy or matte, which allows you to diversify the design.
- Casting stone. It has a wide range of uses, in addition to facade coating. It is durable and wear resistant.
- Fiber cement. It is made from a cement solution reinforced with cellulose threads, which makes this type of material resistant to almost all types of external influences. Simple installation makes this material almost the most popular in its niche, but the high cost is the main disadvantage when purchasing.
- Polymer. Such materials have only an indirect connection with artificial stone, since they only have external similarities, but do not differ in high characteristics.
Fiber cement panels under stone
All of these materials are characterized by strength and reliability, long service life, and invulnerability to external influences. The only difference is in appearance, which helps to implement all kinds of design solutions.
Production
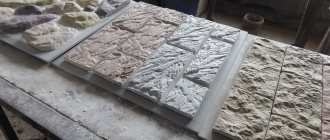
The production process for making artificial stone depends on the type of material. So, for some types, pressing with firing (ceramic granite) is used, others are made by casting the mixture into molds, followed by drying and processing .
Most types of material are created in this way, which is more economical and allows you to create different textures and colors. Moreover, it is quite possible to create artificial stone yourself, you just need to purchase molds from silicone (or make them yourself from plaster), mix the solution and get facade panels.
Sometimes this method becomes the best option, reducing costs, time spent searching for the right material and allowing, if necessary, to make the required number of panels, for example, for repairs.
Quantity calculation
The amount of decorative stone is calculated using a simple formula. Firstly, you initially need to find out the area of all surfaces that need to be covered with the material. To do this, the height of the wall is multiplied by its width. Window and door spaces are not taken into account in this calculation. Next, the area of the entire house is determined by summing the areas of all walls, which is divided by the area of one tile. This method of calculation is applicable only when you plan to buy tiles of the same size.
When purchasing a stone, take into account unforeseen circumstances, so make sure you have a supply in advance.
Installation
All types of artificial stone can be installed in different ways , but the main condition is a competent approach to work and compliance with all rules during installation:
- air temperature during operation – +7-+24°С;
- absence of precipitation, including fog.
Artificial stone for the facade of a house is fixed either to a metal sheathing or with clamps (self-tapping screws).
Layout of installation of artificial stone
If you plan to install additional insulation for the walls, then it is advisable to use the laying method on the sheathing . Installation of this method requires a certain amount of time:
- The sheathing is installed on the walls. First you need to install the corner strips vertically and check the distance from them to the wall.
- A cord is pulled between the corners , thanks to which you can level not only the space to the wall, but also evaluate the correctness of the vertical between the structure.
- The installation of the remaining strips is carried out according to the cord. The distance between them should correspond to the width of the insulation boards. As a rule, it is about 60 mm. Using a level, you need to check that the entire surface of the vertical planks forms an even structure.
- Laying insulation. Try to avoid gaps and unevenness between its plates. They are attached to the wall with dowels and mounted side by side between the planks.
- Horizontal strips (counter-lattice) are attached on top of an additional layer of waterproofing . The distance between them corresponds to the height of the waterproofing panels.
- Installation of the bottom bar , onto which the first row of panels is fixed using self-tapping screws.
- Next, you need to install the remaining rows of stones , the seams between which are rubbed with a special grout material.
Installation on clamps consists of the following steps:
- The assembly of the sheathing and insulation is carried out in the same way as described above.
- The clamps are installed on the axis of the planks.
- By bending the clamps, we fix the installed bar. We install the canvas completely in this way.
- In this case, the seams do not need to be grouted.
When performing work, strictly observe basic safety principles so as not to put your health at risk.
Selecting the type of installation
The exterior of the house directly depends on the style of installation. Often people confuse two completely different concepts - “masonry” and “stone cladding”, which can lead to disagreements if the work is carried out by a hired construction team. Thus, “masonry” is the capital construction of walls, extensions, and partitions. But when you use artificial stone for facade cladding without changing the size of the room and without erecting block structures, this is called “stone cladding.”
From the die
Facade cladding under brick masonry
The style is close to natural. The cost of such cladding is affordable, but you will have to work hard with it. It is quite difficult to adjust the size of the tiles to avoid gaps and holes and to ensure that small tiles alternate harmoniously with large ones.
"Castle"
Stonework Castle
"Castle" is translated from English as "castle". Indeed, the appearance of this masonry is reminiscent of medieval castles. Tiles of this type are created in the shape of a rectangle with an angular texture . Their dimensional parameters can be very different, so when laying stones, you should select stones not only in height and width, but also in texture, so that the design looks natural.
"Plateau"
Stone masonry Plateau
This type of cladding does not pretend to have an exceptional natural look and is installed as a decorative cladding. Most often it can be found on corner and basement designs. You can often find such masonry used as decoration for windows and doors. Although this stone for finishing facades has a regular and even shape - a rectangle or square, it is difficult to lay them. The nuance is this: out of ignorance, slabs in the shape of a square or rectangle are immediately used, but they should be distributed evenly over all the walls that need to be tiled.
"Shahriar"
Shahriar masonry
A simple and common facade masonry. All the plates in it are the same shape and size. A huge advantage is the ease of the process, since all you need is to lay the bottom layer and corner elements evenly , and then everything is quite simple.
"Assol"
Assol masonry
This is a rather voluminous style, characterized by uniqueness and unusualness. The material has the form of thin plates , which have a relief structure on the outside. Laying such a stone is also not easy, but this look really looks very chic.
"Rondo"
Rondo masonry
This is a kind of marine theme. However, few people cover the entire façade with this style. Usually it is used only as decoration for windows, corners or bases and looks quite nice. Installation of "Rondo" is quite simple - large elements are laid first, and the space between them is filled with smaller ones.
Our clients are also interested in:
How much does it cost to order facade cladding with natural stone?
+
It is impossible to answer this question unambiguously. It all depends on the following: the type of stones used, the architectural features of the building (house). If you need high-quality professional finishing of facades with natural stone, contact us by phone 8 (499) 230 24 90. Our employees will answer all questions in detail.
- Publication date:
- 16.09.2021
- Other publications using the hashtag:
- We work with natural stone
Facade cladding: step-by-step instructions for the wet method
The “wet method” is mistakenly associated with moisture and water. However, its principle is to use adhesive mixtures or cement mortar . The “dry” method involves fixing the material using bolts, screws or clamps to the sheathing.
Facing the facade with artificial stone , which uses the “wet” method, has its advantages:
- high work efficiency and time saving;
- does not require special qualifications;
- does not imply experience in similar work;
- low labor costs.
Facade cladding using the wet method
Tools for facade cladding using the wet method
Creating artificial stone facades requires not only certain knowledge, but also the availability of specific tools that are required for the work:
- construction level for leveling the plane;
- pen for marks and ruler for measurements;
- spatula or trowel for applying the solution and removing excess adhesive mass;
- grinder for adjusting the dimensions of the stone;
- paint brush for processing tiles;
- construction mixer for adhesive mixture.
Preparatory work
Priming the walls before facing the façade with artificial stone
You should prepare the surface on which the artificial tiles will be laid:
- The humidity of the facade is the main condition before laying. Its optimal value for cement is 4.5%, for wood and plasterboard – up to 0.5%.
- To reduce the pressure on the walls, you should get rid of paint, various types of cladding and insulation, if any.
- Ensure ideal smoothness of the walls, without transitions or differences. To do this, the entire surface is cleaned until smooth and primed.
- Clean the walls from small debris, including dust layers.
- To strengthen the future structure, the walls of the house must be treated with a deep-penetrating primer.
Wet façade cladding
After all the preliminary work, the next stage is strengthening the galvanized mesh on the wall for subsequent plastering and facing the facade with artificial stone. Level masonry can be ensured by a corner or a long wooden beam , which must be installed under the lowest layer of the first row of stones.
After all the necessary procedures, you can proceed directly to installation:
- Apply glue about 2 cm thick to the reinforced wall.
- As the stone is laid, glue is also applied to its underside. It is important to leave a space of 5-10 mm between the tiles for subsequent filling with grout material.
- Press the tiles diligently against the wall and gently tap them with a hammer, preferably a rubber one.
Grouting joints
When all installation work is completed and the walls are half dry, the seams between the stones should be grouted . To do this, you can take a plastic bag, which is filled with material for jointing. The corner of the bag is cut off and you get a kind of pastry bag, which is very convenient for filling all the seams. Excess glue that appears around the edges is carefully removed with a spatula.
How to treat the stone?
The last stage in finishing the facade with decorative stone is lubricating the artificial stone with a special water-repellent liquid , which will prevent moisture from penetrating into the material and create reliable protection from precipitation.
A special varnish can be applied to the surface of artificial tiles, which not only has protective functions against moisture penetration, but also gives the stone a deep, rich color.
Price list
Design work
| Name of works | Price from, rub. |
| Testing | For free |
| Geodetic survey of the structure | from 20 rub/m2 |
| Creation of working documentation for the installation of a ventilation façade | from 70 rub/m2 |
| Registration of a color passport | RUB 155,000 |
| Issue an OATI order | 10000 rub |
| Project development | 30,000 rub. |
| Development of a work project | 30,000 rub. |
| Creation and approval of TDR for the duration of repair work | 30,000 rub. |
Works
| Name | Price |
| Assembly of the vertical subsystem: | from 500 rub/m2 |
| — galvanized with polymer coating | 400 rub/m2 |
| - aluminum | 600 rub/m2 |
| - made of stainless steel | 800 rub/m2 |
| Assembly of the interfloor subsystem: | 500 rub/m2 |
| — galvanized with polymer coating | 480 RUR/m2 |
| - aluminum | 720 RUR/m2 |
| - made of stainless steel | 960 RUR/m2 |
| Horizontal-vertical subsystem: | 650 rub/m2 |
| — galvanized with polymer coating | 560 RUR/m2 |
| - aluminum | 840 RUR/m2 |
| - made of stainless steel | 1120 rub/m2 |
| Wall insulation in 1 layer | 200 rub/m2 |
| Wall insulation in 2 layers | 300 rub/m2 |
| — basalt heat-insulating slabs, density = 45 kg/m3, m3 | 1850 rub/m3 |
| — basalt slabs, density = 80 kg/m3 | 2750 rub/m3 |
| — penoplex, ground floor | 5020 rub/m3 |
| Installation of the protective membrane: | 100 rub/m2 |
| - windproof membrane | 95 RUR/m2 |
| Fastening of facing material S, m2: | |
| S≥ 1 m2 | 600 rub/m2 |
| 1>S≥ 0.36 m2 | 720 RUR/m2 |
| 0.36>S>0.1 m2 | 900 rub/m2 |
| S≤0.1 m2 | 4200 rub/m2 |
| Cladding material: | |
| - fake diamond | 590 RUR/m2 |
| Installation work: | |
| Construction of a subsystem for a parapet cover | 500 rub/m. |
| — galvanized with polymer coating | 320 rub/m. |
| - aluminum | 480 rub/m. |
| - made of stainless steel | 640 rub/m. |
| Assembly of additional elements: | 350 rub/m2 |
| - metal | 277 RUR/m2 |
| - aluminum-composite | 288 RUR/m2 |
| - aluminum | 550 rub/m2 |
Full price list for ventilated facades
