Issues discussed in the material:
- Advantages of façade cladding with natural stone
- Types of natural stone for cladding the facade of a house
- Preparing the surface for cladding with natural stone
- General recommendations for façade cladding
- Facade cladding technology
- Nuances of facing a ventilated façade with stone
- Methods of laying facing stone
- Finishing of the facade
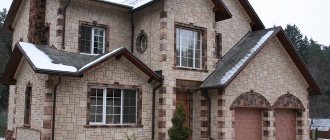
Facing the façade with natural stone is done to make the house look beautiful, protect it from the effects of precipitation, and also increase its durability. There are many materials for cladding, and there are also many ways to lay stone. Therefore, even in those areas where such a facade is a tradition, the houses are not similar to each other.
Working with natural materials is pleasant, but requires a clear knowledge of the technology so that the plaster does not become damp and the stones themselves do not lose their appearance. Read more about how the façade is faced with natural stone in our material.
Advantages of façade cladding with natural stone
The final work on building a house is finishing the facade of the house, which can be done using natural stone.
It is worthwhile to dwell in detail on the advantages of this material:
- Great appearance. Nature always creates the best, including rocks. At the same time, they amaze with their individuality and uniqueness.
- Reliability. Climatic changes and external factors will not cause the destruction of such natural material.
- Naturalness. Rocks created by nature a priori do not contain harmful chemicals, therefore they are not capable of harming a person; on the contrary, they do not have a positive effect on the body.
- Reliability. Facing the façade with natural stone will serve you well for many years. If such short-lived rocks as white and colored marble begin to collapse no earlier than 100 years, there are other rocks that will last much longer.
Even if the stone is mined in the same quarry, it is not a fact that the batches will be identical; they may differ in shade. When purchasing natural stones - granite, marble, you need to accurately calculate how much material you will need so that it all comes from one batch, this will avoid differences in colors.
Materials such as marble or granite are used for exterior finishing work in the form of thin strips, torn unprocessed pieces or huge flat slabs.
The disadvantages of such material are much less than the advantages. But you still need to take into account such disadvantages as density and heavy weight. Consequently, such cladding additionally loads the base of the house. And also, if the façade finishing technology is incorrect, elements may lag behind under the influence of temperature fluctuations.
How to glue stone to concrete walls
Stone is a heavy type of cladding. Weight 1 sq. m of large-format artificial stone can exceed 50 kg. Therefore, additional load will fall on the walls, foundation and soil foundation of the house.
The most rational approach is to build a “box” of solid brick or concrete under the stone cladding . This will give a margin of safety. This is exactly what a portal user with the nickname swin1983 did.
I built a modern house with a flat roof using monolithic technology. The foundation is FBS blocks laid below the freezing depth. Wall thickness – 140 mm. The “box” is insulated with extruded polystyrene foam and polystyrene foam 100 mm thick. The façade was finished with artificial stone. Some stones weigh 25 kg. I thought for a long time about how to stick such a stone so that it would not fall off.
Main stages of construction:
How did you glue the stone onto the façade?
My stone gluing technology step by step:
The user advises gluing the stone at an outside temperature of + 10 degrees Celsius and low humidity. It is better to grout the seams in the morning. The stones hung on the facade for several seasons and did not fall. The strength of the masonry is shown in the video.
Types of natural stone for cladding the facade of a house
Facade stone for external use can be of several types; it is distinguished by its aesthetic characteristics, service life and durability. Home owners who believe in the energetic properties of certain stones prefer to choose them.
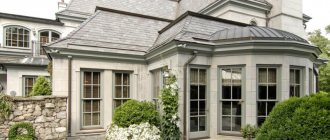
Marble is considered the most expensive and prestigious stone for facade cladding. When polished, it is used for outdoor work. This finishing adds sophistication and uniqueness to architectural buildings. Marble is especially beautiful in sunlight.
This type of natural stone differs in its pattern and degree of polishing. It is believed that medium-density material is most suitable for exterior finishing work.
Granite, a material characterized by durability and strength, has also gained trust among people who want to clad their facades with natural stone. For such work, as a rule, durable and strong granite is used. Its texture is chipped and can be either polished or unpolished. The most common types are paving stones and granite slabs.
The color range of facing granite can be of three types: pinkish, light gray and pinkish with light gray inclusions. It is worth paying attention to the fact that such material is capable of accumulating natural radiation, so you should be wary if you are offered a stone that is too cheap.
Materials such as limestone can also be used for finishing buildings. In shape, it is a rectangular or square polished slab with a chipped surface of white or yellowish color.
The positive properties of this material include its ease of processing, and it is also worth noting that it is the warmest of natural stones. The downside is that it loses greatly in terms of strength, as it collapses when exposed to moisture and frost.
Sometimes it is very difficult to distinguish limestone from sandstone; these natural materials are similar in shape and shade. The difference is that sandstone is stronger and more durable. For laying, oolitic and pisolite types are used.
Not so long ago, slate rusticated cobblestones began to be used for exterior work; such stone had not been sawed before, but only shapeless pieces were used. This material has two subtypes - clayey and crystalline. The only difference is in appearance; the physical parameters are almost identical. However, over time, shale can begin to crumble.
How to properly stick stone on walls made of gas and foam concrete
Is there a way out of the situation described above? After all, in the south of Russia, houses are often faced with stone without ventilation facades and nothing crumbles. In addition, there is positive experience in regions where winter is harsh.
Opinion of FORUMHOUSE specialists
Exactly! This is exactly what they do here.
Under the stone cladding, build structurally sound walls with low vapor permeability . For example, from solid brick. Then take a galvanized metal mesh. Mesh size – 25x25x1.6 mm or 50x50x2.5-3 mm. Attach it to dowels driven into the wall. Drive the dowels under the top rod. So the mesh, under the weight of the stone, will not move down over time.
But what about the owners of houses made of aerated concrete and cold “boxes” that will be insulated? Make thermal insulation part of the wall-stone cladding system .
My house is made of foam block. I want to insulate it with stone wool 10 cm thick, density 145 kg/m³. Next, I beat the dowels through the reinforcing mesh. Then I glue the stone. Can this be done?
My house is made of aerated concrete. Wall thickness 375 mm. I want to make a wet facade from 5 cm thick mineral wool, and decorate some of the walls with artificial stone. The stone is heavy. Weighs 64 kg per 1 sq. m. Will the insulation withstand such weight or is it better to abandon it?
Recommendations from FORUMHOUSE specialists
Preparing the surface for cladding with natural stone
You cannot start cladding the façade of a house with natural stone immediately after completing the construction of the house; you must wait 6 months. But if the stress in the brickwork is up to 0.5 MPa, then you can not delay the finishing and start it after three months. If the stress is even lower - at the level of 0.05 MPa, then the facade can be faced with natural stone immediately after construction work. But it is not advisable to do exterior finishing from natural materials at the same time as laying walls.
In order to begin external and internal cladding, all basic work must be completed so that this does not lead to damage to the finishing material. As a rule, finishing work begins with markings. This means that you need to mark horizontal (in plan) and vertical (at different height levels) lines on the facade in accordance with the structural elements of the cladding. At this stage, the contours of the future pattern corresponding to the finishing design are drawn.
All markings must correspond to the design drawings. For work, special measuring instruments and tools are used, such as levels, levels, plumb lines, steel tapes, tape measures, slats, etc.
It is necessary to first carry out preparatory work before starting cladding. The surface should be cleaned, a metal mesh should be stretched or the wall should be notched. The next stage in cladding the façade with natural stone is the alignment of the masonry planes and the application of design marks for lines, corner axes, pilasters, window openings, and horizontal lines. Using a plumb line and beacons, mark a vertical plane on the wall, which will become the basis of the cladding.
It is necessary to carry out the hanging correctly, it is necessary to completely cover the entire wall - from the foundation to the top point. They begin work from the outer corners of the building, then move on to the walls. If there are protruding elements or niches on the facade, you need to hang their corners and planes.
After hanging one corner and finding how far the wall moves away from the vertical, do the same work with the second corner. Based on these data, the distance from the wall at which the front surface of the facing slab will be is calculated. In this case, it is necessary to take into account the thickness of the material and the minimum gap between it and the wall. The measured position is marked with a beacon wire fixed on two pins.
TOP 5 articles on construction:
- Is it possible to build a second house on the site: we understand the legislation
- Location of the house on the site: taking into account cardinal directions, distance to neighbors and regulations
- What is the best material to build a house from: a review of popular materials
- House for 2 families with different entrances: layout and advantages
- Maternity capital for building a house: how to get and spend
Vertical markings are done sequentially for each floor. Moorings are stretched along the lintels of the openings. The pins on which the wire is fixed are placed in vertical seams, and the wire should touch the beacons in the corners. When the entire facade is hung and marked, you need to find the smallest gap between the mooring and the wall on each individual section of the wall, limited by structural elements.
Next you need to install the brands. They are placed in such a way that the slab can be checked anywhere with the one and a half meter rule. The marks are subsequently removed as the cladding is attached.
To fix the slabs when cladding the facade with natural stone, it is convenient to use special metal fasteners (without reinforced frames), but in this case it is necessary to first prepare the surface of the walls.
As described earlier, the walls are hung - in the corners, along the planes floor by floor in increments of 2-3 m, covering the entire surface of the wall from the foundation to the top point.
If necessary, wash the wall by directing a strong stream of water from a hose onto it. Then the cord is pulled horizontally at the level of the first row of cladding - it will mark the line of the outer surface of the slabs. Drill holes in the wall of the appropriate diameter into which fasteners are installed. The step is chosen based on the parameters of the finishing elements.
The natural material is suitable not only for outdoor work; it is also successfully used in interior design. Only after the load on the walls becomes at least 65% of the design value, you can begin cladding the internal walls of the house with natural stone slabs using mortars and mastics. It must be remembered that by the time this work begins, it is necessary to complete the installation of the roof or the construction of a temporary covering that can protect against the ingress of water onto the covered part of the building, install door frames, glaze windows, and perform hidden wiring.
It is worth starting to install clean floors after finishing the walls. It is necessary to observe the thermal regime in the premises not lower than +10 °C if the work is carried out in winter, and the humidity should not exceed 70%.
Advantages and disadvantages
Among the positive aspects of this finish are:
- Great looks. The modern market offers a large selection of different types of natural stone, ranging from smooth tiles to strip-shaped tiles.
- You can implement any design ideas, for example, create the effect of a wall made of wild stone, brickwork and the like.
- A façade made of natural stone is easy to maintain and is also resistant to various types of precipitation. Such a facade will be durable.
Often, individual sections of walls are made from natural stone, for example, corners, plinths, and the perimeter of windows and doors.
Facing the base
As for the disadvantages of this technology, the following can be highlighted:
- Natural stone in its structure is quite dense and weighty, so if a house has a weak foundation, then the stone can have a negative impact on it, and in some cases the foundation will be subject to deformation.
- If the installation technology is not followed, some parts of the stones fall off the facade. This can be influenced by the degree of thermal expansion of the mortar and stone.
General recommendations for façade cladding
Before you start cladding the facade with natural stone, you need to sort the material by size and select those plates that have a right angle. This painstaking work must be done because all slabs of finishing material may differ in size and shape.
If you use a vertical plumb line when performing finishing work, the masonry will be neat and even. The technology of cladding the facade with natural stone is that work begins with laying large stones. You need to try to ensure that they fit tightly together, in the future it will become easier for you to pick up smaller stones.
In addition to the fact that the implementation of these works is based on the use of a certain sequence of actions, the use of high-quality materials is also important. Larger and medium-sized stones are placed in the middle of the wall, and then, like a mosaic, smaller parts are selected to frame window and door openings.
You should not save on high-quality mortar, since the reliability and strength of the cladding depends on it. Remember that a stingy person always pays twice. Spare no expense in using special glue that contains plasticizers. You can, of course, use cement-sand mortar. In any case, you need to pay attention to the plasticity and frost resistance of the material.
You should not clad the façade with natural stone if the weather is damp outside, as this will lead to the material sliding off the surface. First, you should spray the solution, only after it has set on the wall surface can you begin to do the work. As a rule, no earlier than two days later.
Today there is a large selection of different solutions for cladding facades with natural stone. They differ in their properties and price category. Some materials can be attached with mastic, liquid nails and epoxy glue.
If you choose a light-colored stone, buy white glue for it, because using cement or gray glue can cause gray-yellow stains on marble, sandstone or other stones.
2. Why is it dangerous to finish gas and foam concrete with stone?
I built a house from D400 aerated concrete. Region of residence – Rostov region. I want to decorate the walls with natural stone, sandstone or shell. Have questions:
Opinion of FORUMHOUSE specialists
The walls of the house are made of material with high vapor permeability. Therefore, such exterior finishing cannot be used. Otherwise you will get moisture accumulation in the block!
I will glue the sandstone with glue. Stone has greater vapor permeability than aerated concrete. The question is not about vapor permeability, but about masonry technology. I need a durable façade. How to make it?
Opinion of FORUMHOUSE specialists
The vapor permeability of sandstone is lower than that of aerated concrete. If you stick a stone onto aerated silicate, the condensation zone will be in the aerated concrete, and the stone will not allow moisture to escape. Moisture will collect on the inner surface of the sandstone. In winter it will freeze and begin to tear the block. Therefore, according to technology, aerated concrete is finished on the outside not with ordinary cement plaster, but with special compositions for cellular concrete with high vapor permeability. As an option, make a ventilated façade.
Strange. SNiPs indicate that the vapor permeability of sandstone is greater than that of a gas block. Or I'm wrong?
You are confusing something. Sandstone has lower vapor permeability than foam and gas blocks. If you initially wanted to decorate the house with sandstone, you had to think at the design stage about what would be best to lay the walls for this type of finishing. In your case, only a vapor barrier mounted on the inside of the house will help. Or consider an alternative finish.
An important point that many people overlook! When finishing walls with stone, you install it with a special adhesive composition, and the glue, in the aerated concrete wall-stone finishing system, works as an additional vapor barrier . This leads to moisture accumulation in cellular concrete.
The summary is summed up by Dmitry Galayuda, a consultant in the ventilation section at FORUMHOUSE. Nickname on the Gaser portal.
The problem is this. Water vapor from the house passes through the aerated concrete, but cannot pass through the stone cladding, which is practically impenetrable to it. At low temperatures, steam condenses, and frozen moisture breaks the boundary of the layers of the wall pie. I believe that you cannot glue stone directly onto gas silicate. Or make a vapor barrier from the inside of the house. But then why build a house from aerated concrete?
Facade cladding technology
With a huge selection of natural stones, there are uniform requirements that must be observed when cladding the facade. Let's look at each of them in detail.
- A natural material with an untreated surface always weighs more than polished granite, marble or sandstone. Both are placed on a cement-sand mortar, and a sealant is used to seal the joints.
- You should not use additional fasteners if the tiles are small in size and light in weight.
- The cladding elements are not laid closely, but with gaps.
- Darker material should be used on the base.
- Before facing work, it is necessary to prepare the surfaces. Next, slabs of natural stone are attached to the walls, and the openings of windows, doors and cornices are trimmed with them.
When cladding a façade with natural stone, the surface on which the slabs are attached plays an important role. For example, if a material such as brick was used during construction, and the surface is rough, then there is no need to carry out preparatory work. If the wall is smooth, for example, made of foam block, gas silicate block, then for better adhesion it is necessary to nail a metal mesh. If your walls are plastered, you should thoroughly clean them of dirt and dust.
Seam cutting is an important component. The process of jointing is as important when cladding a facade with natural stone, like the cherry on the cake. It is this operation that allows you to give the work a finished, neat look.
Today there are different options for seam jointing. If you carried out masonry with a rough fit of stone, then it is worth using concave jointing; when using flat pebbles, a double-cut convex pebble is suitable; If you happen to work with flat slabs and their fit is poor, then the option with super-convex jointing is most suitable.
Facade of a house made of aerated concrete: finishing and insulation Go
When this stage of work is completed, you need to wait until the adhesive has completely dried and wash the stonework thoroughly using a soapy water solution. The remaining grout should be removed, and lo and behold, your façade has been transformed and has an attractive appearance.
Installing the mesh and securing it. To ensure better adhesion of the material to the surface, a special galvanized welded metal mesh with increased corrosion resistance is used. It is fastened with dowels at the rate of 10 pieces per 1 m2. Carrying out such preparatory work will create a good basis for more reliable adhesion of the material to the mortar or glue.
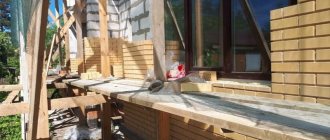
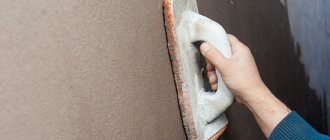
Laying slabs. When starting installation work, first mark the starting level. This will serve as the basis for the first row. You should lay out the stones at the corners, and then stretch a thread between them, this will allow you to lay the stones evenly. Coat not only each stone with mortar or glue, but also the wall, this will allow the slabs to hold firmly and not fall. The first few rows can be laid along the thread, then you should use a building level. From time to time, be sure to check the angle of the stones against a plumb line.
Cladding of windows and cornices. And now the work on the facade cladding has reached the window and door openings. What is the best way to design masonry in such places? You need to use fishing line. In this case, it is worth choosing the smallest and shortest fragments of material, this will allow you to more accurately lay out the required area, and in this case it is more difficult to work with large elements. Try to lay the stone evenly, then the wall defects will not be visible.
The appearance of the window edging and cornices of the house will depend on your design decision. There are ready-made stone products that can be used for finishing: slopes, window sills, platbands.
Final processing of the facade. The final step in completing the work of cladding the façade with natural stone is its treatment with a water-repellent agent. This composition protects the stone from fungus and moss, prevents fading and repels liquid.
Price list
Design work
| Name of works | Price from, rub. |
| Testing | For free |
| Geodetic survey of the structure | from 20 rub/m2 |
| Creation of working documentation for the installation of a ventilation façade | from 70 rub/m2 |
| Registration of a color passport | RUB 155,000 |
| Issue an OATI order | 10000 rub |
| Project development | 30,000 rub. |
| Development of a work project | 30,000 rub. |
| Creation and approval of TDR for the duration of repair work | 30,000 rub. |
Works
| Name | Price |
| Assembly of the vertical subsystem: | from 500 rub/m2 |
| — galvanized with polymer coating | 400 rub/m2 |
| - aluminum | 600 rub/m2 |
| - made of stainless steel | 800 rub/m2 |
| Assembly of the interfloor subsystem: | 500 rub/m2 |
| — galvanized with polymer coating | 480 RUR/m2 |
| - aluminum | 720 RUR/m2 |
| - made of stainless steel | 960 RUR/m2 |
| Horizontal-vertical subsystem: | 650 rub/m2 |
| — galvanized with polymer coating | 560 RUR/m2 |
| - aluminum | 840 RUR/m2 |
| - made of stainless steel | 1120 rub/m2 |
| Wall insulation in 1 layer | 200 rub/m2 |
| Wall insulation in 2 layers | 300 rub/m2 |
| — basalt heat-insulating slabs, density = 45 kg/m3, m3 | 1850 rub/m3 |
| — basalt slabs, density = 80 kg/m3 | 2750 rub/m3 |
| — penoplex, ground floor | 5020 rub/m3 |
| Installation of the protective membrane: | 100 rub/m2 |
| - windproof membrane | 95 RUR/m2 |
| Fastening of facing material S, m2: | |
| S≥ 1 m2 | 600 rub/m2 |
| 1>S≥ 0.36 m2 | 720 RUR/m2 |
| 0.36>S>0.1 m2 | 900 rub/m2 |
| S≤0.1 m2 | 4200 rub/m2 |
| Cladding material: | |
| - a natural stone | 2500 rub/m2 |
| Installation work: | |
| Construction of a subsystem for a parapet cover | 500 rub/m. |
| — galvanized with polymer coating | 320 rub/m. |
| - aluminum | 480 rub/m. |
| - made of stainless steel | 640 rub/m. |
| Assembly of additional elements: | 350 rub/m2 |
| - metal | 277 RUR/m2 |
| - aluminum-composite | 288 RUR/m2 |
| - aluminum | 550 rub/m2 |
Full price list for ventilated facades
Nuances of facing a ventilated façade with stone
The creation of a ventilated facade allows not only the natural nature of the stone, but also the special technique of its laying. In this case, square or rectangular slabs with a thickness of 18 to 40 mm and an edge of 300 to 1200 mm are laid on a metal frame. If the slabs are square in shape, then calculating the area and amount of material is greatly simplified compared to the use of rectangular, and even more so complex shaped elements. But the latter, nevertheless, are also often used for decoration due to the opportunity to obtain interesting effects.
The facing block is a structure consisting of the stone slab itself, a vapor barrier layer, and metal brackets (supports). Each element is equipped with fasteners and clamps. Let's look at all the parts in more detail.
The basis of the block is a metal frame, which bears the weight of the stone. It consists of two parts:
- main;
- response.
In this case, the main part is the one that is adjacent to the load-bearing wall; large diameter anchor bolts are used to secure it. A stone slab is fixed to the counter, it is possible to select the angle of its inclination. When a façade is faced with natural stone over insulation, the technology involves first installing layers of vapor and thermal insulation on the wall, and only then attaching the stone to the metal frame. A metal profile is fixed to the mating part. The following can be used as fastening elements:
- spherical washers;
- steel rivets;
- gaskets for thermal insulation.
To achieve uniform distribution of the load over the entire surface, special spherical washers are placed under the anchors and screws. Steel rivets make it possible to close the joints that form between the counter and the main part of the structure to prevent cold bridges; thermal insulating gaskets are used.
Natural stone cladding is secured using special brackets made of stainless steel, they are called clamps. Today they can be purchased in 3 types:
- initial (with their help the first row is mounted);
- ordinary (used for elements inside rows);
- end (used for installation of the last row of finishing).
The clamps are inserted into the edge cuts at the corners of the slabs on one side (at least 2 clamps) or along the entire length. Clamps are made of expensive stainless or galvanized steel (this option is more economical).
Before installing a ventilated facade, it is necessary to take measurements and draw up a detailed drawing, which should reflect:
- direction of laying metal profiles;
- mounting points for brackets.
When choosing the length of the bracket, you should pay attention to the height of the building. If the structure is tall and the insulation layer is thick, then the fastening should be longer. However, do not forget that the air gap between the stone layer and the insulation must be at least 20 mm.
At the preparation stage, try to think about a design solution for the design of slopes and ebbs, their depth and other dimensions, as well as how the corners and plinths will be finished in order to maintain a unified style of the estate.
The first stage of work should be the installation of brackets. According to the previously developed plan, the wall is marked. At the installation points of the brackets, where L-shaped plates will be attached using anchors, special signal beacons are placed. The vertical distance between the brackets depends on the weight and thickness of the panels - the larger they are, the more frequent the attachment points. Choosing brackets of different lengths will solve the problem of blocked walls; this method will visually level the plane.
Insulation of the facade of a house: technologies and materials Go
It is worth remembering that if the walls are destroyed, installing a ventilated facade made of natural stone will not solve this problem.
If your building has weak walls, then such an “outfit” of natural slabs will become an unbearable burden, so before lining the facade with natural stone, you need to carry out a series of works to reconstruct the surface.
An important role is played by the correct execution of work with the installation of anchors in brickwork. Do not attach anchor bolts directly to seam joints. Each type of plates and brackets has its own requirements for the minimum distance of the installation point from the seam.
When laying thermal insulation material, technology and safety precautions must be observed. When working with mineral wool, you cannot do without protective gloves and a mask. The work is done moving from top to bottom. This way the material shrinks better. When using two layers of insulation, be sure to tie the seams and not leave any cracks or air gaps anywhere.
Each slab is secured with plastic dowels (minimum two), and after laying a layer of PVC, vapor barrier membranes are additionally secured. If a material such as polystyrene foam is used as insulation, then it is not worth laying a layer of film. The plates are placed with an overlap of 10 cm, secured to each other with tape, and the base is secured with staples.
The stone tiles are placed on vertical metal profiles, which are secured to the brackets with steel rivets. When carrying out cladding, do not forget to constantly check that it lies strictly vertically; an ordinary plumb line will help with this.
At this stage, special attention should be paid to ensuring that there is a gap between the insulation layer and the profiled pipe. Without such an air cushion, condensation may accumulate inside.
Steel clamps are attached to the guides using special rivets. Special tapes need to be glued to the profiles (on one side there is already a layer of glue applied). They perform the function of protection against moisture, being at the same time a thermal insulating layer. In addition, the tape prevents the slabs from slipping during the natural shrinkage of the cladding. The slabs are inserted from the side into special clasp clamps; work begins from the lower left corner and moves to the right, mounting upward row by row.
The clasps cannot be completely hidden under the panels; some part will remain outside, but in the future they can be designed to match the general style of the house facade.
Facade cladding with natural stone can be done in another way, for example, using elastic glue, it is applied pointwise to the joints on metal profile pipes. When choosing the type of stone and method of its installation, you need to proceed from a number of factors: climate characteristics, foundation properties, soil stability, strength and condition of the walls.
Installation of ventilation façade under stone
Increasingly today, in order to decorate the walls of a house, a ventilated facade is used - this is a ventilated facade on a frame made of steel or aluminum, especially convenient for cladding public buildings.
It is highly vapor permeable, which creates a healthy indoor microclimate. Has high thermal insulation properties. Fire resistant.
It is worth noting that a ventilated façade is not a cheap pleasure. Today, a popular type of such facade is a ventilated facade made of granite. It is durable, concise and aesthetic.
Video of drilling stone for a hidden Keil bolt and installing the frame
The video shows a method of attaching natural stone using an aluminum structure. You can get acquainted with the nodes connecting to the window. The stone is mounted not on a plank - in our usual way - but using Keil hidden fastening bolts.
Methods of laying facing stone
When decorating the facade of your house with natural stone, you need to maintain naturalness and avoid mistakes in the masonry. The durability of the work depends on this.
There are three types of stone you can find on the market today:
- simple;
- decorative;
- art.
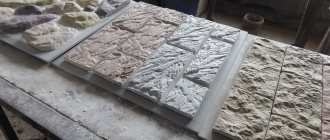
Die masonry. This type of masonry, such as a die, belongs to the artistic type; it is closest to the natural style. Despite the fact that this kind of cladding is not too expensive, the appearance of the facade in this style looks presentable. For finishing they use cheap stone, usually sandstone, limestone, dolomite, slate.
sovetproraba.com
The cladding is carried out using flat, untreated material. Die is a simple type of masonry that you can do yourself. The work, of course, is labor-intensive, since you need to select and join elements of different sizes, but it is entirely within the capabilities of a non-professional.
Castle masonry The name itself evokes associations with a medieval castle. This type of masonry uses rectangular stones with torn or chipped relief. The shape of the elements is the same, but the size may vary.
You can clad the facade of a house with natural stone in this style with almost all types of natural materials, including using granite and marble. It is difficult to make cladding with such natural stone yourself, but there is an alternative in the form of artificial materials, which are much easier to work with and can be handled independently.
Plateau laying. If we previously described masonry options that are as close as possible to natural ones, now we will talk about the decorative type of facade design. A method such as a plateau is used on corners and plinths, as well as when framing door and window openings.
Stone elements are made small, of the same size and regular shape: square or rectangle. Each side of the stone is processed using the rustication method, resulting in either smooth or chipped edges.
Despite its small size and regular shape, working with such material is not as easy as it seems at first glance. The difficulty lies in the fact that square and rectangular elements are used simultaneously in the work, evenly placing them on the wall. It is very difficult to assemble such a mosaic and at the same time achieve a neat aesthetic appearance.
Shahriar masonry. This option is most widespread because of its simplicity, because it uses the same rectangular elements. The front surface of the plates has a wide variety of relief: smooth (polished, ground), varying degrees of rough (chipped, torn).
When covering the facade of a house with such masonry, the main thing is to lay the first row and corners evenly. Once the work is completed, your building will look like an ancient fortress.
Assol masonry. Volume and unusualness are the two main highlights of this type of masonry. The work uses slate and sandstone, sawn into thin plates. The elements are laid flat on top of each other so that the end is on the front side of the facade. Due to this, the wall looks as if it is made entirely of stone slabs.
The difficulty in performing cladding work using this method is that the plates used come in different thicknesses.
Rondo masonry. If you decide to capture the memory of the sea coast for centuries, then you should definitely consider the option of laying a rondo. For work, untreated sea or river pebbles are used. All elements are different in shape, size and color.
Such masonry made from natural pebbles will perfectly decorate the corners of the house. Despite the fact that performing work in this style is not difficult, additional financial costs must be taken into account. This material will require much more adhesive and grout.
