Extruded polystyrene foam (colloquially - polystyrene foam) is produced by foaming styrene granules under pressure. It consists of small air bubbles with thin walls, glued together. Plates formed by such bubbles are very light, have low thermal conductivity, and are resistant to corrosion and rotting. Despite the fact that in everyday life, slabs of extruded polystyrene continue to be called foam plastic, their properties differ. Simple foam plastic is less durable, absorbs more water, and is practically not used in modern construction.
Advantages of extruded polystyrene foam
Expanded polystyrene (EPS) is a heat-insulating material consisting of 98% air.
Outwardly, it resembles polystyrene foam, but other characteristics of these insulation materials differ. Expanded polystyrene boards are used for insulation and partial sound insulation of walls. Advantages of expanded polystyrene:
- high degree of thermal insulation;
- vapor permeability;
- moisture resistance;
- strength;
- does not react with cement, which makes it possible to plaster PPS boards;
- does not support the development of mold and fungi;
- If the installation technology and operating rules are followed, the service life of the material is up to 30 years.
Features of working with extruded polystyrene foam
Plastering extruded polystyrene foam has a number of differences due to its physical characteristics.
The most characteristic properties that show the nuances of working with this material are:
- moisture is not absorbed into the insulation boards, so all the water from the facade remains inside the finishing layer;
- the coefficient of expansion (temperature) of polystyrene foam does not correspond to this indicator for plaster mixtures, therefore, due to temperature changes, the coating applied to the slabs may crack and fall off;
- The surface of the insulation is smooth, dense, irregularities and micropores are virtually absent, which makes it difficult for the solution to adhere to it.
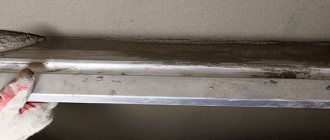
If the material is too smooth, it is roughened
Before starting work, you need to apply a small amount of plaster mortar to the slab and wait a day. If the coating was difficult to apply, cracked or fell off after drying, then additional treatment of the contact layer should be carried out.
It consists of increasing the roughness of the interacting part of the slab using a needle roller or small plastic brushes. Afterwards, a special primer and reinforcing mesh should be applied. The latter is fastened either with a special adhesive composition or with the residue left over from working with insulation.
Due to the low adhesion ability and weak adhesion, the thickness of the applied layers of the solution should not exceed 3 mm.
Extruded polystyrene foam requires a plastering technology that differs from the standard process.
Preparing walls for laying thermal insulation
Before installing insulation, the following steps are required:
- Sealing irregularities, gaps or cracks, depressions in the wall plane. Differences of more than 1 cm per 1 m of length must be leveled.
- The plane of the wall is covered with a contact primer (especially necessary for severe shedding).
- Installation of sheathing. This is done for subsequent installation of the casing (if planned).
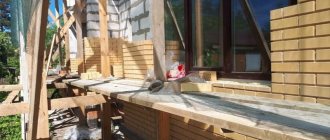
The sheathing is made from wooden blocks or from drywall guides and forms a flat plane. The thickness of the planks corresponds to the thickness of the insulation (no less!) , the pitch of the planks is recommended to be about 40-50 cm from each other (in practice, a step is chosen that is a multiple of the width of the PPS sheet for greater efficiency).
Why is it necessary to plaster a facade insulated with polystyrene foam?
The popularity of extruded polystyrene boards for external insulation of facades is associated with its properties:
- low cost;
- high heat and sound insulation properties;
- a simple installation technology that allows you to cover the façade of your home with them yourself.
But with all the advantages, this material has several disadvantages:
- the slabs are extremely unstable to ultraviolet radiation, wind, precipitation and may lose their properties over time;
- a house insulated with extruded polystyrene foam does not look aesthetically pleasing.
To compensate for these disadvantages, the foam is covered with a finishing material.
Additional tips from the experts
It happens that after completing the process, the plaster may crack or fall off. This means that the technology was not followed during the work, or low-quality materials were chosen. There are some more tips from the experts that will help you avoid mistakes:
- When plastering walls near doors, it is better to install the mortar flush. And seal the adjacent parts of the doors with masking tape.
- Some people feel sorry for throwing away the remaining mortar, and they apply it to an already dry wall. There is no need to do this so that the new layer does not fall off from the old one over time. The reason for this is the layer thickness and temperature.
- You cannot work if there is a draft in the room. The optimal temperature inside is from 10 to 20 degrees.
Penoplex is an excellent option for insulation. And if you know how to plaster it correctly, the house will be reliably protected from negative influences. And thanks to the decorative layer, it will be transformed and will delight its owners for a long time. The main thing is to follow the technology, do the work slowly, carefully and efficiently. If possible, ask a friend or relative for help.
Types of finishing mixtures
Plastering work involves leveling and protecting the surface with a small layer of a special mixture. The difference between mixtures for expanded polystyrene is that they contain substances that penetrate well into the porous structure of the foam. Such mixtures can be used for interior work and exterior facade finishing.
There are two main types of plaster mixture for polystyrene foam: mineral and acrylic.
Mineral plaster mixture:
- consists of a mixture of cement, lime and mineral aggregates;
- resistant to precipitation and temperature changes;
- has a high level of adhesion;
- service life is about 10 years.
The main disadvantage of this type is that it is not very elastic and over time the façade may become covered with cracks.
Acrylic mixture:
- consists of a mixture of acrylic resins and minerals;
- elastic;
- resistant to atmospheric conditions and temperature fluctuations;
- has a high degree of adhesion;
- service life up to 25 years.
The main disadvantages of this type of mixture: high price and ability to absorb dirt.
Facade plaster on penoplex and polystyrene foam preparation, grouting and application technology
Facade plaster on penoplex and expanded polystyrene
The insulation of any important element of the structure is carried out taking into account technological standards and is aimed at reducing the impact of the insulated surface from the environment. But few homeowners and careless builders think about the fact that the thermal insulation layer itself also needs reliable protection
But few homeowners and careless builders think about the fact that the thermal insulation layer itself also needs reliable protection.
Facade plaster on penoplex and expanded polystyrene is one of the ways to protect heat-insulating boards from the harmful effects of low temperatures and increase their service life.
The fact is that although insulation can be a good heat insulator, its other properties still leave much to be desired. For example, exposure of some insulation materials to precipitation and moisture can lead to a drop in their properties to zero.
To protect penoplex and expanded polystyrene, the best, if not the only worthy option, is warm facade plaster.
General scheme for finishing the facade and walls with plaster mortar and insulation
In this article we will try to talk about the entire technology of plastering over insulation, starting from preparing the mixture and ending with the finishing touches. Read about the thermal insulation technology itself in the corresponding article on insulating facades with polystyrene foam.
So, facade plaster on penoplex is applied in the following sequence:
- Preparation of plaster mortar;
- Installation of the reinforcing layer;
- Grouting over the reinforcing mesh;
- Leveling surfaces with plaster;
- Grouting the plastered surface;
- Primer;
- Application of decorative finishing.
Blend selection
Many developers do not know how to plaster polystyrene foam outside the house, and are constantly wondering whether it is possible to plaster polystyrene foam with cement mortar.
Plastering a polystyrene foam surface with a solution based on sand and cement is not allowed, as it begins to quickly peel off from the slab surface
In this regard, the first layer is made with a plaster composition specially designed for this purpose. In addition to cement material and sand, it contains an adhesive composition and other additives that ensure reliable adhesion to the surface. By applying such a mixture to the insulation, it is possible to create a base coating from a traditional solution.
Basic materials and accessories
Work related to construction and finishing is constantly accompanied by quite serious financial costs. It is quite difficult to calculate and purchase exactly according to the estimate several types of plaster mixtures and adhesive compositions at the same time, as is done by professional builders. This gives rise to an irresistible desire to simplify the process by laying façade plaster over foam plastic.
The building materials market today offers consumers a huge number of adhesive mixtures. Well-known manufacturers produce not only universal compositions, but also special mixtures based on acrylic and cement. The first option is cheaper, but it is not recommended to use it. As a rule, the following building materials are purchased as plaster for exterior use for finishing polystyrene foam:
- glue for constructing a reinforcing base on polystyrene foam. The material is special and is not suitable for fixing ceramics or foam;
- a mesh made of fiberglass material, the density of which is 150 - 160 g per square meter, used in an alkaline environment. It has a special coating that improves the adhesion of glue and fibers.
The adhesive composition used to create the reinforcement contains additives that take part in an alkaline reaction, which allows the mixture to reliably adhere to walls lined with polystyrene foam boards.
A PVA glue solution will improve adhesion to the glue
Finishing foam with putty
Before starting work, my friend and I laid out the slabs, diluted store-bought PVA glue with water, and went over all surfaces, including the ends, twice with long-nap rollers. The solution was applied generously. Then they left everything to dry.
The next day we continued insulating the façade. Vadik was interested in why we primed the slabs before installation.
When you cover loose material with PVA glue diluted in half with water, a protective film is formed. It strengthens the surface and increases adhesion. The glue will adhere better to the foam when attached to the wall.
The first composition penetrates into the material, strengthening the bond between the factions. The second layer creates a durable film that can bond with various materials and reduce their consumption.
Puttying the walls of a balcony covered with foam plastic
The slabs coated with soil are held more firmly by glue on the wall. How to properly plaster and putty walls before painting? Fiberglass mesh is easier to fix to the surface. If accidentally skewed, the sheet will not break.
Insulation process
Following a certain order will help you understand exactly how to insulate external walls with polystyrene foam. That is why the first stage should be the installation of panels on an already cleaned and carefully prepared, primed wall.
The correctness of fastening can be checked using a special level. And only after this can the structure be hammered with dowels.
A special adhesive developed for slabs will help guide you on the question of how to glue polystyrene foam to the wall. It is applied with a notched trowel evenly over the entire working area. Do not forget that the insulation thickness is selected depending on the purpose:
- Indicators from 30 to 50 millimeters for residential premises;
- Indicators of 60 millimeters for walls of other industrial structures.
Disc-shaped dowels will be an excellent assistant in all work, since it is necessary to attach polystyrene to the wall as securely as possible.
Plastering walls made of polystyrene foam helps to level and decorate the formed surface.
By following all technologies when carrying out insulation work, you can achieve the highest quality result, as well as avoid possible heat loss. Do not expose the surface to sunlight or high temperatures.
Spraying of polyurethane foam
Spraying polyurethane foam or polyurethane is the creation of a layer of thermal insulation on the outer surface of the walls. First, two components are mixed together in special equipment - a polyol and a polyosicion. Here, simultaneously with heating, carbon dioxide is foamed. Next, the mixture is fed into a mixer or spray gun.
Thermosetting plastic is sprayed onto walls under pressure. It is fixed on the surface without the use of any adhesives.
After the spraying is completed, a 6 cm reinforcing layer - a fine fiberglass mesh - is mounted on the surface, and finishing material is laid on it.
Cost of 1 sq. m of PPU insulation (work + material)
| Name | Cost of 1 sq. m |
| Spraying density from 15 to 25 kg/cubic. m | 300 |
| -“- 30 kg/cu.m. m | 400 |
| -“- from 40 to 50 kg/cubic. m | 500 |
For walls, the most suitable density of polyurethane foam is 30 kg/m3. The structure will not be overloaded, and the thermal insulation characteristics of such a layer are quite high.
By insulating the external walls of your house with any of the listed materials, you will keep the house warm in the most severe frosts and save on heating costs.
Types of plastering materials
This material requires the selection of a special plaster composition. Not all plasters are suitable for polystyrene foam. Some options contain components that destroy the foam immediately. Therefore, in the store, be sure to check with the consultant whether the composition will be suitable for work on this insulation or not.
Facade
For exterior plastering of polystyrene foam, special compositions are used, which include various frost-resistant and moisture-proof additives. Foam plaster for facades is divided into two types:
- mineral;
- acrylic.
Mineral
The most affordable option. It consists of cement, sand and mineral fillers that improve the properties of the layer after hardening. It is sold in the form of dry mixtures, which must be diluted with water in a certain ratio before starting work. The manufacturer must indicate the proportions on the packaging.
It is quite possible to make such a solution yourself. In this case, sand and cement are purchased separately and during the preparation process the required volumes of each component are measured separately. So, it’s more difficult to work, especially if you need to prepare half a portion to finish a small area.
Mineral plaster is of lower quality. Difficulties arise during application, since it has poor adhesion with polystyrene foam. To increase adhesion, the insulation is treated with a special primer and small cuts are made across the entire surface.
Acrylic
A more expensive option for plaster mixtures, but at the same time higher quality. This type of plaster on polystyrene foam does not require special preparatory work, since it has high adhesion rates to any materials.
The main components are acrylic resins along with chemical additives. Such mixtures were created exclusively for finishing facades after insulation. Therefore, it can withstand various loads well. The treated surface remains attractive for a long time and is easy to clean.
Using acrylic plaster, you can create textures or immediately use decorative compositions. For example, the “bark beetle” has inclusions that, after rubbing, form grooves. Using different grouting techniques you can create an original design.
Plaster for interior decoration
The coating for interior work does not require the addition of frost-resistant and especially moisture-resistant ingredients, so the mixture is much cheaper than the façade coating.
Just like facade finishing, interior plaster has a mineral and acrylic base.
If suddenly plastering of polystyrene foam inside the room was done with a facade composition, then this will not cause harm. Otherwise, when the plastered walls are coated with a product for interior work, the finishing layer will quickly collapse.
How to calculate the thickness of insulation
Calculation of material thickness is carried out according to a two-step scheme:
- First, the thermal resistance of the wall is determined . This refers to the general value, together with the insulation. If there are many layers of the pie, all are taken into account. The value is standard, determined according to SNiP tables for a given climate zone.
- Then the thickness of the PPS is determined - the product of the thermal resistance of the wall and the thermal conductivity coefficient of the material.
It should be borne in mind that theory is largely corrected by practice, since it’s all about subtle effects, which are individual in each case and cannot be taken into account in calculations.
Therefore, during private construction, they do not go into complex theoretical research , being content with generally accepted standards for a given region.
If in doubt, you can always use an online calculator (preferably several) to find out the desired value. You just need to substitute your data into the required columns of the attached table and get the finished result.
Wall pie device
Plastering technology
The difficulty of plastering foam boards is due to the fact that a wall covered with this material has a number of features:
- smooth and dense texture of the surface of the slabs with a small number of irregularities and micropores;
- low permeability to liquids;
- the difference in the coefficient of thermal expansion of the foam, the plaster layer and the material from which the wall is made. This may result in cracking of the finish;
- low absorbency.
All these features complicate the finishing of a façade insulated with polystyrene foam.
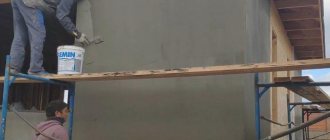
The work of plastering an insulated facade can be done with your own hands at ambient temperatures from +5°C to +35°C. The lower temperature limit is understandable: a wet facade at a lower temperature will not dry out, and the upper limit is due to the fact that at a higher air temperature, moisture quickly evaporates from the plaster mixture and it will be impossible to work with it. After installing polystyrene foam slabs on the facade with your own hands, finishing should be done as early as possible so that the polystyrene foam is not exposed to atmospheric factors.
Calculation of plaster mixture
There are special mixtures designed for pre-gluing reinforcing mesh and applying plaster for polystyrene foam.
They perform a number of functions:
- protect foam boards from ultraviolet radiation;
- smooth out temperature differences and compensate for differences in thermal expansion coefficients;
- protect fragile insulation from mechanical damage.
Glue consumption is usually 4 - 6 kilograms of dry mixture per 1 square meter. m. facade. For those who perform such work for the first time, it is better to buy the mixture with a reserve . Whole packs of dry glue can be returned to the store if you have a receipt. Mixtures from different manufacturers cannot be used on the same façade. The result may be unpredictable.
Preparation of glue
The dry mixture must be diluted according to the instructions on the package. It is better to cook in small portions so that it does not have time to dry out.
For the first stage of work (gluing the reinforcing mesh), it is better to dilute the mixture somewhat thinner than indicated in the instructions . It is better to mix the glue in two stages: mix, let stand for 5 - 10 minutes, and mix again.
Preparing an insulated facade for plastering work
After diluting the plaster mixture (or before this), the facade must be prepared for plastering:
- Make sure that the caps of all the “mushrooms” that were used to secure the foam to the wall are evenly recessed into the material. Protruding dowels must be driven deeper. If you cannot hammer in a dowel, it is better to replace it.
- Fill the gaps between the foam plates with special foam for insulation.
- Treat the uneven surfaces of the slabs that protrude above the general surface with a special grater.
- Cover the slopes and corners first with reinforcing mesh, then with a perforated metal corner.
After preliminary preparation, you can begin gluing the mesh.
Pasting with reinforcing mesh
The technology of plastering work using extruded polystyrene foam is very different from conventional plastering of a stone surface. Firstly, a glass reinforcing mesh must be secured to the foam boards to ensure reliable adhesion of the plaster layer to the insulation. Secondly, the slabs must be processed to ensure reliable adhesion of the mesh to them, so that later the mesh along with the plaster does not fall off the facade.
The procedure for gluing fiberglass mesh:
- For reliable adhesion of the mesh to the insulation, before gluing the mesh, the foam must be scratched with a sharp tool (you can use an ordinary nail), making dash-shaped vertical stripes every 8 - 10 centimeters and forming small indentations.
- Cut the mesh into strips of a size convenient to use.
- Apply a 3-5 mm layer of adhesive mixture on top of the slabs, then carefully straighten the mesh strips over the glue with your hands, lightly pressing it into the mixture. Glue the mesh with an overlap of 10 - 15 cm.
- Go over the entire surface covered with the mesh with a trowel, evenly pressing the mesh cells into the adhesive composition.
To secure the plaster mixture on the facade, the size of the mesh cell is important: a cell that is too large holds the mixture worse, and a cell that is too small is difficult to glue . The best option is a mesh with a medium cell size. When gluing the mesh, you need to do it as carefully as possible, so that later you have to level the facade as little as possible.
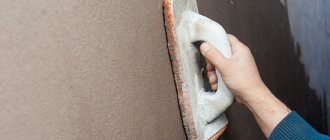
After gluing the mesh is completed, the mixture must be dried for at least 24 hours. When it dries over the entire surface, you need to go over it with a plastic float covered with sandpaper. This is the first stage of grouting.
Leveling the surface
After pasting the facade with mesh and drying the mixture, it is necessary to level the surface before applying the final layer of plaster on polystyrene foam. To do this, the adhesive composition that fixed the mesh is applied with a spatula over the entire facade in another layer about 3 mm thick. When applying this layer, you should try to level out the remaining unevenness before finishing the plaster. Then, the facade is left to dry for at least a day.
Final alignment
We understand how and how to plaster polystyrene foam on the façade. Let's proceed to its final alignment. For this work, we prepare a solution of liquid consistency so that it flows freely from the spatula blade, leaving a solid translucent mark on it.
The mixture is collected with a tool and carefully applied to the surface in a layer of one to three millimeters. For convenience, it is recommended to divide the entire area into square sections and prepare the mortar mixture in small portions, preventing it from hardening. Having completed the process, you should wait for the plaster to dry and re-grout.
The prepared façade is cleaned of dust and covered with a primer mixture, which is applied with rollers or wide brushes. Priming is carried out in one or two layers.
Finishing plaster on polystyrene foam
Work on applying the finishing layer of plaster to polystyrene foam slabs is carried out in several stages:
- First, the facade prepared for finishing is covered with a layer of primer. The primer is selected depending on the properties of the finishing layer of plaster and applied with a short-pile roller.
- The solution for the finishing layer must be prepared without lumps, with the consistency of sour cream.
- Using a wide spatula, apply the solution on top of the soil and carefully level it. If necessary, the procedure can be repeated twice, allowing time for the first layer to dry.
When the last layer of finishing plaster has dried, the facade can be painted.
Insulating the facade using extruded polystyrene slabs, followed by plastering, of course, is a labor-intensive process. It is necessary to strictly adhere to all technological stages of the process, observe the temperature conditions for the work, and use high-quality materials. But the achieved result is worth the time and effort spent.
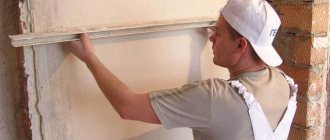
Mesh installation
To significantly increase sound and heat insulation in a private home, it is advisable to apply the plaster in a thick layer. But the low adhesion of polystyrene foam does not allow a thick layer to be firmly fixed; the plaster will fall off faster than it has time to harden. Even if it dries, a slight blow to the wall can cause it to peel off and fall off. That is why installing the mesh is an important step in plastering if you choose to finish the facade with foam plastic.
First of all, this element is installed on corners and difficult areas around window and door openings. Measure the width and length of the desired area, cut the appropriate piece of mesh.
Now apply the first layer of plaster to the wall - a relatively small one, a couple of millimeters is enough. Level it out. You need to act quickly, because a thin layer will set in a matter of minutes; if you don’t have time to do all the work in this time, you will end up with unnecessary trouble.
Immediately after this, press the cut mesh against the wall covered with plaster and press with a wide spatula from top to bottom. The mesh will be pressed into the soft plaster, covered on all sides with an even layer of the mixture and will provide a reliable base for the subsequent thick layer of plaster.
After this, the work is done in exactly the same way on the rest of the surface. The process of installing the mesh is simple, the main thing is to do it quickly and in small areas - you should not hope that you will have time to apply plaster to the entire surface of the facade, and then install the mesh.
When installing two parallel meshes, it is necessary to make a slight overlap, 3-5 centimeters is enough for reliable fixation. At the same time, it is undesirable to leave even small areas of the mesh without a layer of plaster; after applying the final finish they will be noticeable.
Recommendations for finishing
It is advisable to perform plastering on foam plastic immediately after the seams have dried. The longer the insulation is exposed to atmospheric influences, the lower its thermal insulation properties. Moreover, such a house cannot be left unfinished for the entire winter.
Plastering should be done in dry, warm weather and on a dry surface. The presence of moisture, dust, and greasy stains on the foam negatively affects the adhesion of the plaster to the base, as a result of which the coating very soon falls off in pieces.
When mixing the solution, strictly follow the proportions and do not add anything other than water. Factory mixtures already contain all the necessary components, and the presence of foreign impurities will only worsen the quality of the plaster. Also follow the specified application thickness - it is better to do 2 thin layers than one thick one.
Plastered surface
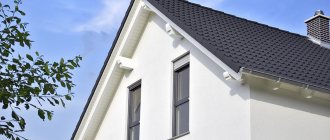
Decorative plaster can give a house a unique exterior
Decorative plaster
The soil has dried, we proceed to applying a decorative plaster layer. The solution is prepared in accordance with the instructions, the dry mixture is combined with water and mixed. It is recommended to apply the solution with a tool with a wide blade, moving from bottom to top and ensuring uniform distribution of the material.
The thickness of the applied solution in most cases is determined by its grain size, and the manufacturer indicates such information on the packaging material.
To ensure that the surface looks uniform and has no stains, plastering is done at one time, breaks are taken only for mixing the next portion of the mortar mixture.
Having distributed the plaster, we begin to form a relief surface. This is done with special graters, brushes, sponges and even a spatula. The main thing is to achieve a uniform texture throughout the entire area, avoiding noticeable transitions. If the shade of the plaster can be covered with paint, then the relief of the surface remains always visible.