Published: 07/1/2012 Heading: Materials and technologies, Carpentry works Views: 9782
Wood finishing materials and methods
There are many types of finishing materials, but only a few are used for wood . It is better to focus on types rather than brands, since the differences between brands within each type are small. There are five common types of wood finishing materials.
- Oils
- Oil varnishes
- Shellac
- Varnishes based on organic solvents
- Water-based varnishes
Oil-based coatings are easy to distinguish from other coatings because they do not harden or produce hard films. Other types of finishes cure to form a hard film, the thickness of which (and the degree of protection) depends on how many layers you apply. Oil-based coatings are easier to apply than film coatings, although, on the other hand, film coatings provide more reliable protection.
Wood finishing oils
There are two types of oils: those that harden and those that don't. Hardening oils can be used for final finishing as they seal the wood and give a nice shine. Non-hardening oils are not very suitable for final coating as they either continue to soak into the wood leaving the surface unprotected or the surface remains sticky. Typical examples of non-hardening oils are mineral, vegetable and machine oils. There are two types of hardening oils available for sale that are suitable for finishing furniture: linseed oil and tung oil.
Flaxseed oil is obtained by pressing flax seeds. Raw linseed oil takes a week or more to cure, making it very impractical for use as a final finish. To speed up hardening, manufacturers add metal-containing siccatives to it, under the influence of which the oil hardens within 24 hours. This oil is called “boiled linseed oil,” although in fact it is not boiled at all.
Tung oil is obtained by pressing the nuts of the tung tree, which is native to China. Pure tung oil does not contain driers. Pure tung oil takes two to three days to harden if all excess is removed from the surface being treated. Thus, pure tung oil hardens faster than raw linseed oil, but slower than boiled drying oil. No type of oil provides either a high degree of moisture protection or high wear resistance, although tung oil is better than boiled linseed oil. Both oils are easy to apply and this is the main reason for their popularity.
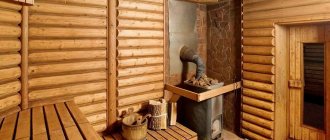
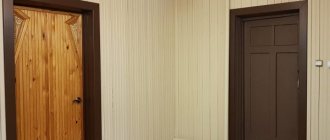
Lining
By lining we mean a collective concept that unites all finishing materials equipped with a locking system. Fastening is carried out using the tongue-in-groove method and can be “butt” or “overlapping”.
The peculiarity of the use of this material is its exceptional ease of installation, which allows you to complete the interior decoration of the house in a short time. Having information about the area and shape of the room that you plan to cover, you can accurately calculate the required amount of lining.
The material has practicality, versatility and high decorative properties, thanks to which it can be perfectly combined with any design direction. Cladding with clapboard can be carried out in vertical and horizontal directions.
With proper care and treatment, lining can last a very long time. Its popularity is only growing over time, not inferior to more modern finishing materials. In its production, carefully dried wood with both a smooth and untreated surface is used.
Oil coating
All you need to apply the oil is a rag or brush. After application, allow the oil to soak in for 5-10 minutes (during this time, re-go over the areas that have dried out), and then remove any excess. Allow the boiled linseed oil to cure overnight and the tung oil for about three days. Then lightly sand smooth with sandpaper or steel wool and apply the next coat. Use 220-grit sandpaper (or finer) and No. 000 or No. 0000 steel wool. Two or three coats of linseed oil will give an attractive "worn" gloss finish. By the way, there is no need to rub in the oil. It penetrates the wood perfectly without rubbing. Unlike linseed oil, a tung oil finish should be applied five to six times to achieve a nice shine.
The first tung coatings do not shine and feel rough to the touch. Sand between coats with very fine sandpaper (220 grit or higher) until coats are smooth when cured. Although oil-based coatings are not as water-resistant or wear-resistant as other types of coatings, they are easy to repair if they become scratched or lose their shine. Simply apply another coat of oil (no need to use the same oil as first) and wipe off any excess. If the surface feels slightly rough, lightly sand it with very fine sandpaper before applying oil.
Wall design options
The construction market is replete with various offers, forcing the modern consumer to rack his brains over the choice of finishing material.
Some opt for the simplest and most affordable methods, which are suitable both for finishing an old country house and new houses, which will be discussed below.
Painting
To implement this finishing option, you can use various types of paints (see photo), among which the most common are water-based and acrylic materials.
The advantages of this finishing method:
- painting is a very simple procedure that does not require special skills and tools;
- the painted surface can be easily repainted in a different color if necessary;
- an endless selection of colors and shades;
- ease of cleaning and disinfection.
Now about the disadvantages:
- Before painting, the walls require careful preparation, since if there is a rough surface, the paint will lie in an uneven layer, which will lead to the formation of peeling over time;
- the painted surface needs systematic wet cleaning;
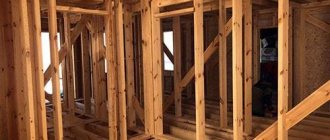
Drywall
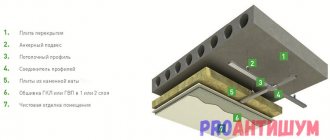
Installing drywall will not only allow you to perfectly align the walls in the room, but also lay thermal insulation material between the sheets and the main wall, if necessary.
Advantages of using drywall:
- quick and easy installation;
- the ability to construct structures of any complexity;
- drywall makes it easy to disguise wiring and various communications;
- Possibility of finishing with various finishing coatings.
Flaws:
- the usable area of the room decreases;
- low resistance to mechanical stress;
- the need for additional puttying of seams and joints after installation, as well as puttying of the material over the entire area;
- Drywall is susceptible to high humidity, which negatively affects the service life of the material.
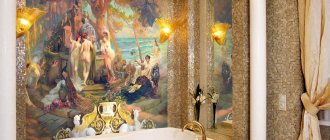
Textile
This finishing method was often used in the old days, but now it has received a rebirth. Both natural textiles and artificial materials are used to cover walls.
The fabric is attached in various ways: pasted like regular wallpaper, stretched onto pre-constructed wooden frames, which are then installed on the wall, and fixed to the wooden wall with a stapler.
Advantages of the method:
- there is no need to level the walls (except for those cases when fabric is glued instead of wallpaper);
- resistance to various mechanical damage - textiles simply stretch under load without being subject to ruptures or cracks;
- the room acquires a special chic thanks to the texture of the material;
- fabrics for wall decoration are made in a wide range, so there are many options to choose from, as well as the possibility of combining the material with curtains and bed linen.
Flaws:
- the fabric absorbs a large amount of dust, so the material must be vacuumed regularly;
- textiles quickly lose their appearance, get dirty and rubbed easily.
Wallpaper
A traditional option that provides the modern consumer with a wider range of options than in the old days.
Today you can purchase not only paper wallpaper, but also vinyl, duplex, non-woven, textile and other types of materials.
Advantages of wallpapering:
- walls require less thorough preparation, unlike painting, which requires repairing even the smallest cracks and irregularities;
- large selection of different types of material;
- the ability to independently carry out finishing work with minimal skills.
Flaws:
- the need to replace wallpaper (except liquid wallpaper) after 5-7 years, as they quickly lose their appearance;
- susceptibility to mechanical damage;
- difficulties in removing dirt, even when it comes to washable wallpaper.
Wall panels
Wall panels are products intended for decorative finishing of walls. They can be made from various materials (chipboard, fibreboard, PVC, wood) and in different shapes - in the form of slabs, sheets and slats.
They are mounted like drywall on a frame, which in this case can be either steel or wood.
Advantages of panels:
- relatively simple installation;
- the possibility of equipping the wall with sound insulation, which is laid behind the panels;
- there is no need to level the walls before installation;
- the ability to dismantle the panels for use in another location.
The disadvantage of this finishing method is that it reduces the size of the room, since the lathing on which the panels are installed takes up a lot of space.
Oil varnishes
Oil varnishes are made by cooking oil (linseed, tung or modified soybean) with resins. Nowadays, synthetic alkyd, phenolic and polyurethane resins are used to make oil varnishes. The product called "polyurethane" is simply an oil-based varnish made from polyurethane resins. Polyurethane resins slightly increase the moisture resistance and wear resistance of this varnish compared to other types of oil-based varnishes. If more oil and less resin are used in the production of varnish, the resulting varnish is softer and more flexible. This type of varnish, called "saving," is best suited for outdoor applications because it better adapts to the deformations common in outdoor woodwork.
Oil varnishes come in various types - from glossy to matte. Semi-matte is probably the most popular because it imitates the finish that can be achieved by sanding with steel wool. Since matte additives settle to the bottom of the varnish can, the varnish should be stirred well before use. Oil varnishes provide high moisture resistance and wear resistance. Of course, three or four layers of coating provide greater moisture resistance and wear resistance than one or two. However, due to its very slow curing, oil-based varnish creates a dust problem: it quickly settles on the coating and sticks to it.
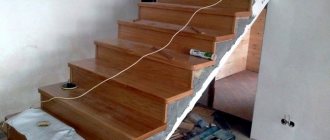
Floor surface design
The choice of floor covering for a wooden house should be durable and reliable. Natural boards can emphasize the style of a room, acting as a harmonious addition to it. Special treatment with varnish and antiseptic will protect the coating from moisture and prevent the development of pathogenic microorganisms.
Finishing the floor with laminate has a number of advantages, reducing installation time and providing a high degree of decorativeness.
Experts recommend using insulation, which is laid on the rough coating before finishing. Thermal insulation will reliably protect you from the cold. Foil insulators, mineral wool, or bulk materials are successfully used. Laying is carried out between the main beams. A gap of about two centimeters should be left between the subfloor with insulation and the finishing finish.
Application of oil varnish
Usually oil varnish is applied with a brush. It's too thick to apply with a rag, and it's not very pleasant to spray because small droplets of varnish end up on everything, including you. The varnish is applied with a brush in the same way as paint. The only major difference is that cleanliness is more important here because dust and dirt are more visible on clear coat than on paint. Therefore, make every effort to keep the room where you work as dust-free as possible. Use a clean brush, pour the varnish into a separate jar if you are not going to use all of it (this will prevent dust from getting into the remaining varnish), and thoroughly clean the surface of the wood from dust before starting work. If the varnish you are using contains particles of dust and hardened varnish, strain it through a varnish strainer or harsh cheesecloth before starting work. To remove dust from wood, first vacuum it or wipe it with a special sticky cloth, which you can buy in paint departments. Do not brush or brush away the dust or blow it off the wood, as it will later settle back onto the damp surface. Just before applying the varnish, run your palm over the wood. You can feel if there is any dust left on the surface. When there is no dust on the surface, you can begin to apply varnish.
To mask the veneers, hold the brush almost perpendicular to the surface and move it without pressure in the direction of the wood grain.
At the beginning of work, you can apply varnish to the wood in any direction. When moving from section to section or when covering a larger surface, apply the varnish with long strokes in the direction of the wood grain. To do this, hold the brush almost vertically and only lightly touch the wood. This is done so that the lasses coincide with the direction of the wood fibers and are less noticeable. When varnishing horizontal surfaces, start from the far edge and move the brush from left to right so that dust from your hands does not fall on the applied varnish.
To avoid drips when machining vertical surfaces, you should view the work in reflected light
Always work in lighting that allows you to see the light reflected from the surface of the wood. Reflection is especially important when treating vertical surfaces, where the varnish is most likely to form streaks. It is very difficult to apply varnish to a vertical surface without drips. The secret is to see streaks and streaks as they form and remove excess polish until they disappear. To do this, free the brush from excess varnish by running it along the clean edge of the can. Then smooth the applied varnish with the brush, continuing to remove excess from the brush. Work on one area until there is no streaking left.
To make brush marks less noticeable and get rid of air bubbles, add 5-10% thinner to the varnish. Thinned varnish will have more time to spread before setting, and air bubbles will have more time to burst. Bubbles are caused by turbulence (swirling air currents) generated by the brush, and not due to shaking or stirring the varnish, as is often claimed. The occurrence of bubbles cannot be avoided. The trick is to get them to pop before a crust forms on the surface of the varnish film. It is impossible to completely get rid of dust that settles on the varnish. If the dust marks are very noticeable, between coats of varnish, sand the surface with 220-grit sandpaper or finer (gray sandpaper containing lubricant works best), and sand the final coat with 600-grit sandpaper. With this paper, you can use water or petroleum jelly as a lubricant. Then wipe the surface with 0000 steel wool to give it an even, semi-matte sheen.
Wood panels for wall decoration: varieties and classification
There are many finishing materials made of wood on the construction market, which are classified according to the following criteria:
- Form. Slats and plates. The slats are 2.5-3.7 meters long. The width is also different. The slats are assembled using tenons and grooves. Installation is carried out in different ways: horizontally, vertically, diagonally. The slabs are square in shape. Will they line the wall from the floor to the middle? And also used as a separate insert.
- Material. The facing material is made from natural wood, fiberboard, chipboard, MDF.
Cladding has different costs. It depends on the material being made - it will be a valuable type of wood or chipboard.
Decorative slatted
These are long slats, up to 3.7 meters long, up to 30 cm wide, their thickness varies. They are made from wood, PVC, fiberboard and other materials containing wood shavings.
They are used to decorate small rooms where there are many protrusions (corners). If the decoration is light in color, its use visually enlarges and brightens the room or corridor.
Fixing the slats horizontally stretches the room lengthwise; vertically fixes it to visualize a high ceiling. Installation is carried out on the frame base with staples or self-tapping screws.
Made from natural wood
Cladding material made from various types of wood is valued for its unique pattern, shades and play of colors, as well as for its warmth and comfort. During processing, the wood is handled carefully to preserve its textured pattern and shade. In most cases, the panels are not painted, but coated with colorless varnish for expressiveness and protection from external factors.
Wood material can be called capricious - it does not tolerate moisture or sudden temperature changes. Constant exposure to hot air is also unacceptable. Humidity and temperature must be optimal.
The cladding is attached to the created grid of metal profiles or wooden slats.
Pressed panels
Cladding made from pressed wood chips today is non-toxic. Thanks to new technologies, the composition does not contain phenol glue. Production takes place under great pressure. The pricing policy has not changed. The panels are still affordable to the middle class and perfectly decorate the premises.
The facing material is produced in various colors, with patterns or “wood-like”, plain.
Some of them are coated with clear varnish, while others can be painted yourself, adding individuality and achieving the desired result.
There are three ways to mount the material on a rough base: frameless: with glue, screws and a frame.
Artificial wood-look wall panels
The cladding is made of polyvinyl chloride. Painted to match the color of wood. The textured pattern can be exactly like a tree in cross-section. These panels are used for finishing wet rooms, balconies, corridors, living rooms in private houses, loggias and attics. In places where natural wood may swell or crack, PVC will retain its original appearance for a long time.
This material has basically a slatted shape. It is attached to glue and a frame base.
Self-adhesive panels
Self-adhesive panels are made from PVC and MDF. They are easy to install (without dirt, dust, without reducing the space of the room), and they are also durable.
The material has a number of features, including the influence of humidity is unimportant, improved sound insulation, long service life without loss of appearance. Shape: different, slats, squares
Mounted on the entire wall or partially, randomly
The shape is different: slats, squares. Mounted on the entire wall or partially, chaotically.
The manufactured material is safe for human health.
Diluted varnish
Oil varnish can be thinned as desired with paint thinner and still be used for finishing. When the varnish is diluted approximately in half, it is easy to rub into the wood, which is why it is called diluted varnish. Unfortunately, on the labels of many manufacturers, diluted varnish is called tung oil, which leads to various misunderstandings. Oil varnish and tung oil are two completely different types of finishes. The varnish, diluted or undiluted, hardens overnight and turns into a hard, smooth film on the surface of the wood. Tung oil takes months to cure and produces a soft and wrinkled film.
Due to the confusion in names, you will need to try the product to find out what it is. To do this, pour a little varnish onto a non-porous surface (such as glass or plastic laminate) and leave overnight in a warm room. If the puddle hardens and becomes smooth, it is regular or diluted varnish. If the product becomes soft and wrinkled or does not harden at all, it is tung oil or a mixture of some kind of oil and oil varnish. The diluted varnish can be applied to the wood with a brush in the same way as regular undiluted varnish, then leave it to harden.
You can also use it as an oil, rubbing it into the wood with a rag or applying it with a brush and removing the excess. However, you will have less time than when working with oil, since the varnish sets much faster than oil. In this case, you can apply some excess varnish to the wood to obtain a thicker film and, as a result, more reliable protection against moisture. This cannot be done with oil. Thinned varnish provides superior moisture protection and wear resistance and is similar in this regard to undiluted varnish, but you will have to apply many more coats to achieve the same thickness of finish. You can prepare diluted varnish yourself by diluting any oil or polyurethane varnish in half with paint thinner.
Barn board
For those who want to fill the interior with a breath of antiquity, the modern market offers barn boards. The idea of reusing wood is not new at all. Already 15 years ago on the market you could find cabinets, doors, frames and other interior items made from time-worn boards. Such unusual raw materials were collected during the demolition of old wooden houses, piers, barns, etc. This is why the material got its name.
The reader may have a completely logical question: why, in principle, buy recyclable materials if you can age a “young” board? The reason is the amazing beauty of wood with history. Over many decades (and even centuries) of use, time leaves many imprints on it, turning it into a real antique. Darkening, cracks, woodworm passages, paint residues, warehouse stamps - all this gives the barn board a unique charm. No stains, paints or brushing technologies can achieve this effect. No matter how you process a freshly planed board, it will still remain a new piece.
Another reasonable concern: How durable is a board that has lasted 30, 50, or 300 years? Will it fall apart when cutting and hammering nails? As hard as it may be to believe, wood can remain strong for many centuries. Proof of this is the piles on which medieval castles stand to this day. In those distant times there was no need to rush. Houses were built slowly, allowing the wood to dry naturally. Since the moisture was released gradually, the material did not deform (which happens today when drying in ovens). And after a few years, builders were provided with a stable and durable material that no longer “performed” with fluctuations in temperature and humidity.
Barn board has stood the test of time and is much stronger and more stable than modern lumber.
So, where can you use time-tested wood? First of all, in interior decoration. Note that the floor will require lumber with a thickness of at least 50 mm. For walls and ceilings, the requirements are not so stringent. By the way, false ceiling beams made from old wood are very popular. And if you wish, you can order a mosaic from this amazing material.
Of course, barn wood is great for making furniture. And not only cabinets, cabinets and other complex products. A simple shelving unit with “antique” shelves will become a real decoration for your office or living room. The same goes for mantels, mirror frames and other decorative items.
External walls can also be covered with barn boards, but such a finish will be truly “golden”. The first, main and, perhaps, only drawback of this amazing material is its high price. One square meter costs an average of 2000-5000 rubles. And the cost of products made from centuries-old wood amounts to tens, and sometimes hundreds of thousands. However, it is not necessary to cover the entire house with antique wood from roof to base. Sometimes a few boards are enough to turn a faceless modern interior made of plasterboard, glass and plastic into a cozy home with history.
Read more in the material “Old School”
2
A mixture of oil and oil varnish
Oil varnish can also be mixed with linseed or tung oil in any ratio. This mixture protects the wood from moisture somewhat better and is more wear-resistant than pure oil, but it still hardens slowly and produces a soft, wrinkled film. Remove all excess mixture after each coat. Oil and oil varnish mixtures are very popular for finishing because they are very easy to use. Most blends are sold under the name "Danish oil" or "teak oil" to hint at a relationship with furniture imported from Scandinavia. In fact, that furniture is finished with a two-component varnish with a catalyst, not oil. Such mixtures are applied in the same way as boiled linseed oil. Allow the first layer to soak in for 5-10 minutes. The next day, lightly sand the surface with sandpaper or steel wool until the surface is smooth to the touch. Then apply one or two more layers of the mixture.
There are many recipes for making your own oil and oil varnish mixtures. The most common one suggests mixing equal parts of oil varnish, boiled linseed oil and turpentine or paint thinner. Turpentine differs from paint thinner by its origin, not its properties. Turpentine is obtained by distilling pine resin. White spirit is a product of petroleum distillation. Until the 20th century White spirit was not produced. You can modify this recipe as you wish. For example, you can replace tung oil with linseed oil, or you can use both oils. Polyurethane varnish can be replaced with another type of varnish. You can vary the ratio between oil and varnish, for example, add such an amount of thinner so that it is convenient for you to work with the mixture. No matter what you change, the protective properties and gloss will remain approximately the same.
Main stages of finishing work
The finishing of a wooden house must be carried out in stages in compliance with all the rules for carrying out work. The main stages of finishing activities are:
- caulking;
- finishing of walls;
- headliner;
- laying flooring;
- stain treatment;
- coloring.
Caulking the seams of a log house
Before starting finishing work, mandatory measures should be taken to treat the base of the walls for biosecurity and fire protection of the house. Special compounds are used to protect the surface from various influences. High-quality processing can also provide a decorative finish.
A feature of wooden houses is the need to hide communications using interior decoration. Walls cannot be grooved or concrete screeds used, so it is the finishing coatings that must properly hide utility networks. The work must also take into account the need to strengthen and insulate the surfaces of the building.
A modern wooden house with properly selected and executed finishing will provide unlimited comfort of living, preserving the best traditions of naturalness and environmental friendliness. High-quality work will give durability and beauty to interior solutions, emphasizing the luxury and sophistication of unique wood patterns.
Shellac
Shellac is the only naturally occurring resin still used to make varnishes. Shellac is produced by insects from the family of lac bugs that live on some trees in India and Thailand. Shellac was once the main varnish for wood. Almost all furniture made between 1830 and 1930 was finished in shellac. In the 20s of the XX century. In furniture factories, shellac was replaced with varnishes based on organic solvents, since such varnishes are slightly more wear-resistant and are better suited for spray application. DIYers continued to use shellac until the 1940s.
Unfortunately, shellac has undeservedly acquired a reputation as a varnish that is not resistant to water and does not harden very well. Once you understand what shellac is, you will understand the injustice of such statements. In fact, shellac is quite waterproof. True, its water resistance is lower than that of oil-based varnishes, varnishes based on organic solvents or water-based varnishes. Water stains, which are often seen on old furniture coated with shellac, are largely caused by the aging of the coating rather than by its quality. All coatings become more porous as they age and, as a result, more susceptible to water. So, shellac is still great for most types of furniture. However, it is not the best choice for surfaces that are subject to harsh testing, such as the top of a dining table or a cabinet in a child's room. Incomplete drying is due to deterioration of the shellac in the jar before it is used. Shellac begins to deteriorate immediately after being dissolved in alcohol. Deterioration occurs slowly, but after a year or two you will notice that the shellac now takes longer to dry and the resulting film is not truly hard. Always buy the freshest shellac you can find.
Most cans of shellac are marked with the date of manufacture. Try to find shellac that was produced no more than six months ago, or at most a year ago. If a can of shellac doesn't have a release date on it, don't buy it. The color of shellac varies from colorless to yellow-orange. Yellow-orange shellac will add a warm tone to walnut, pine, maple and oak wood. In older homes, the woodwork of pine, maple and oak is almost always finished with yellow-orange shellac. Clear shellac should be used if you do not want to change the shade of the wood. Shellac's ability to dry quickly is a great advantage when dealing with dust problems. Shellac dries as fast as the alcohol evaporates from it. In most cases, this happens so quickly that the dust does not have time to settle on the fresh coating. The disadvantage of fast drying is obvious - applying shellac with a brush is not so easy.
flexible tree
The idea of a flexible tree, simple as all ingenious things, belongs to the German designer Elisa Strozyk. While studying at London's Central Saint Martins College of Art and Design, she began to think about how waste from the wood industry could be used. Or rather, a small carpentry workshop that was located nearby. The student collected pieces of plywood “to throw away” in the workshop and, using laser cutting services, turned them into equilateral triangles. After which all that remained was to glue them onto a durable fabric sheet.
The result, which, by the way, became a thesis work and brought fame to the author, exceeded the wildest expectations. Essentially, the result is a tree that can be bent, twisted and folded in any direction.
A simple and elegant idea became the starting point for a new direction in design. Other designers have appeared with their own take on this amazing material. For example, Wood-Skin places spot lighting in the seams between the boards, and in addition to the actual wooden triangles, it uses parts made of ceramics, metal, plastic and even stone. The Designboom company cuts out diamonds rather than triangles, making the canvas look like scales.
Wooden textiles, just like regular wood, can be stained, tinted, or painted.
Another obvious advantage of the material is its accessibility, because it is easy to make with your own hands. You just need to cut thin boards or plywood into triangles, squares or diamonds and glue them onto the fabric. Almost everyone can do this task. If you don’t want to do figure sawing, any workshop that works with wood will be happy to take on this work. Finally, you can purchase a ready-made wooden textile product, although such a solution can no longer be called economically profitable.
How can you use this amazing material?
The first is the carpet. Let’s imagine that the tiled floor covering turned out to be too cold, and you don’t want to remove it to install a heated floor system. A covering made of thin wooden planks will be an excellent way out. In fact, it will be something like parquet. Only if necessary, it can be removed and put in another place.
Another option is wall decor. Real wooden mosaic tiles are expensive and difficult to install. A wooden carpet will look almost the same, but will cost much less. By the way, you can curtain the window with it. Why not? A dense, light-transmitting canvas will be an excellent alternative to a heavy, dusty curtain.
lampshades, tablecloths, furniture upholstery and even handbags made from wooden textiles In short, the options for using wooden textiles are limited only by the owner’s imagination. And if the natural color of a natural material seems too boring, you can change it with stain or paint.
Read more in the material “More plastic”
7
Applying shellac
Shellac is difficult to apply with a brush straight from the can. It is thick, not too runny and dries very quickly. Dilute the shellac by half with denatured alcohol (sometimes sold as shellac thinner). The more you dilute the shellac, the easier it will be to brush on without leaving brush marks, and the thinner each coat will be. Since shellac dries much faster than oil varnish, the application procedure will be slightly different.
Shellac dries quickly, so you should work quickly and avoid applying it to areas that are already coated with varnish.
Start applying shellac with a brush from the places where you want to apply parallel lasses. You will not have time to go back and level the lasses, which is possible when working with oil varnish. The secret is that you need to work quite quickly so that each new las has time to overlap with the previous, still wet las. If the previous lasa has already started to set, your brush will drag it along with it, leaving ridges in the finish. To get rid of any ridges, let the shellac harden. Then sand the surface until it is smooth and apply another coat of shellac. You can apply 3-4 coats of shellac per day if the weather is warm and dry. Like all finishing materials, shellac dries more slowly when it is cool and humid.
Options for interior decorative wall decoration
Popular types of wall decoration.
Wallpaper
A fairly common finishing material, which is distinguished by a wide variety of types, textures, photo prints, color schemes and a wide pricing policy.
Dye
High-quality, resistant, durable paints with high decorative qualities provide an excellent opportunity to create a truly amazing interior in any style direction.
Laminate
It has countless shades and textures, allowing you to choose the perfect design for any room. Laminate brings additional comfort, warmth and at the same time elegance and style to the environment.
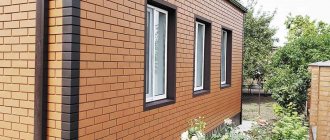
Brick
Using brick you can create a contrasting accent that attracts attention. Rough texture, due to its naturalness, always looks very advantageous
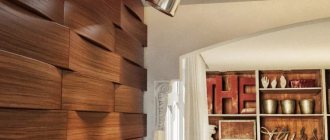
Panels
They have an unlimited number of options and are particularly practical and highly aesthetic, which makes them a very popular finishing material.
Decorative plaster
It can be a self-sufficient type of finishing or can be combined equally well with other materials. Decorative plaster can significantly transform a room and make it look impressive and expensive.
Tile
Among other types of finishing, tiles occupy a leading position, since with their help you can easily create elegant accents in the room and create both a calm and bright design.
Cork
Natural, unique and having no artificial analogues, cork undoubtedly becomes the most expressive detail of the entire interior.
Wood finish
Lining, aged board, block house or panels made from valuable wood species are an excellent option, providing the opportunity to experiment with design.
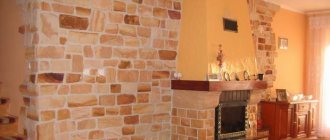
Decorative rock
Decorating with decorative stone is the most optimal option for decorating walls, which always looks very impressive and adds a certain naturalness to the atmosphere.
Under concrete
A publicly available, wear-resistant and environmentally friendly material with a large number of positive characteristics. The concrete surface, complemented with bright and stylish accessories, allows you to get a very interesting and inspiring result.
Varnishes based on organic solvents
These are the varnishes that are used by the furniture industry and professional finishers. They dry very quickly, making it easier to solve dust problems, and are easy to apply using sprayers. However, solvent vapors that fill a room when sprayed are harmful to health, so using a spray gun is only justified if you have good exhaust ventilation. In this regard, only a few home craftsmen use these varnishes.
However, there are varnishes that cure slowly enough to be applied with a brush. Although the smell of the solvent used in them is quite strong, applying such varnish with a brush is no more difficult than shellac. The procedure for applying this varnish with a brush is the same as when using shellac. If you can tolerate the increasing smell of solvent and want the finish to last as long as possible, this brushable varnish will be just the ticket. You can buy the polish in an aerosol can, although it will cost more. Aerosol cans are very convenient for finishing small products.
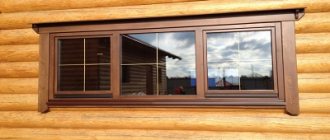
Eurolining
The manufacturing quality of eurolining is strictly controlled at all stages. For its production, the highest grade raw materials are used, obtained from coniferous wood, often grown specifically for these purposes. Eurolining is divided into 1-3 quality classes and meets all accepted European standards.
The material is manufactured in accordance with European standards
This material differs from ordinary lining in its precisely adjusted dimensions, as well as the presence of a special groove that provides ventilation and moisture removal. This design feature increases durability and prevents deformation and swelling of the cladding when used in a damp environment. The excellent quality of the material makes it possible to assemble with the smallest tolerances. Thanks to this, the result of the work is highly decorative.
In industrial production conditions, the surface of the eurolining is coated with a special composition, which frees home owners from the need for additional treatment with paints and varnishes.
The difference between eurolining and conventional lining:
- significantly smoother surface; strict adherence to quality standards; minimum humidity level (12% versus 15-28% for lining); plastic packaging; the presence of a special protective coating; larger tenon size; the presence of a groove at the joint; more ventilation grooves.
Water-based varnishes
Due to strict clean air laws in some parts of the United States, water-based, latex varnishes have entered the market. These products are often sold under the names "oil varnish", "polyurethane" or simply "varnish", causing confusion with products under the same names but based on non-aqueous solvents. However, water-based varnishes can always be distinguished by the inscriptions on the can, which indicate the possibility of washing your hands and tools with water. Water-based varnishes still contain organic solvents, but there are fewer of them than in most other products.
Water-based varnish is, one might say, water-based paint without pigment. It doesn't really matter whether the resin in this varnish is polyurethane or acrylic. The main difference is the type of finish rather than the chemical nature of the resin. The situation is exactly the same as in the case of oil and water-based paints. Water-based varnishes have many of the advantages and disadvantages of water-based paints. The main advantages are the low smell of solvent and the ease of cleaning tools and hands. The main disadvantages are clearly visible brush marks and low wear resistance. Compared to oil-based varnishes, water-based varnishes spread less easily and are much less resistant to heat, solvents, acids and alkalis. In addition, water-based varnishes are even more prone to forming air bubbles than oil-based varnishes, and these bubbles are more difficult to burst. Thinning the varnish with water doesn't help much. Some manufacturers make a solvent that reduces the tendency to bubble and improves flow, but it is difficult to find in stores. In addition, adding a solvent to the varnish deprives the water-based varnish of one of the main advantages that justify its use.
How to cover the walls of a wooden house inside
The problem of how to cover the walls of a wooden house inside often arises. Perhaps only laminated veneer lumber and rounded logs meet high decorative requirements, and walls made from them do not require interior decoration. In other cases, additional processing is needed, especially since a wooden house may have shortcomings in the curvature of the walls, and internal cladding using lathing or frame allows them to be compensated for.
Application of water-based varnish
To achieve good results when working with water-based varnish, the weather is of great importance. Ideal working conditions are a temperature of about 21 ° C and air humidity of about 40%. Use a brush with synthetic bristles and do not brush over the same area multiple times. This leads to the formation of bubbles. It's best to try to apply an even layer in one brush stroke and keep the layer as thin as possible. In a thin layer, air bubbles burst more easily. In all other respects, applying water-based varnish is similar to applying shellac. Try to apply the lasses along the grain of the wood as this will give you a little time to straighten the lasses. Apply the lass quickly enough so that the previous las does not have time to dry when you overlap its edge with the next las.
Pros and cons of wood in the interior
The advantages of wood in the interior are:
- strength, durability;
- wear resistance;
- easy cleaning;
- beauty;
- possibility of combination;
- environmental friendliness.
The material also has disadvantages. He is afraid of water, dampness, and often has mold and bugs in him. Wood catches fire easily and is susceptible to rotting. Carrying out special processing eliminates these disadvantages and makes wood the most popular raw material for construction, finishing and decorating homes!
Finishing after finishing
The appearance and texture of any finishing coatings can be improved by rubbing them with an abrasive after hardening. It would be wise to first practice on a scrap piece of wood and only then start sanding the finished product. You will have to determine from your own experience how much of the finishing material can be rubbed off with an abrasive without rubbing through the coating. If the coating wears through, this will only add extra work to you in restoring it, especially if you have previously stained the wood. Sometimes recovery is extremely difficult or even impossible. The easiest way to sand the finish is with No. 0000 steel wool or synthetic steel wool. Using one or two hands and applying medium to heavy pressure, rub the finish in long, straight strokes along the grain of the wood. Try to maintain even pressure throughout the entire surface and overlap each lath by 80-90%. Be careful not to go over the edges or you will wear the finish down to bare wood.
To avoid going over the edges, first sand the coating at the edges with short lasses. Then use long lasses to rub the entire length of the product, stopping near the edges. After treating the entire surface, remove the dust to see the result of your work. It is best to blow off the dust with compressed air or remove it with a vacuum suction. Then lightly run your palm along the grain to make sure no dust remains. If you do not have a source of compressed air or a vacuum, wipe the surface along the grain with a damp cloth. If you wash dust across the fibers, you risk leaving noticeable scratches on the coating. Inspect the surface in reflected light. If you don't like the way it looks, determine what's wrong and sand it again to correct the defects. Common defects are incomplete rubbing and random scratches caused by uneven pressure on the cotton wool or semi-circular movements.
Decorating a house with wood: interior design
Each room inside a private house has a specific purpose, which undoubtedly influences its design. Therefore, when choosing a wooden finish, you need to focus on the room in which it is used:
- Living room and personal office. Here the wood emphasizes the status of the homeowner, so it is better to give preference to expensive wood and species with an unusual texture.
- Bedroom. Light woods are used for decoration, creating a cozy and relaxed atmosphere.
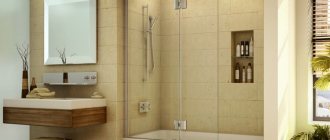
- Bathroom. Finishing is carried out with moisture-resistant materials treated with hydrophobic mixtures. The best option is a combination of stone and wood.
- Kitchen. The amount of wood varies; it is better to give preference to light-colored species that have been treated with protective agents.
- Children's room. Eco-friendliness is important in this room, which means that wood can be used not only to decorate the walls, but also to completely decorate the room, including the floor and ceiling. As for the color scheme, it is better to give preference to calm and soft shades that do not cause aggression or anxiety in the child.
Types of paints
Never buy cheap paint because it is never good. Expensive paints also come in different quality. Good stores sell expensive, very high quality paint. You can save money by purchasing well-known brand paints by purchasing ready-made paints in standard colors. They are cheaper than custom paint colors that are mixed right in the store. Study the labels on the jars and compare the ingredients. The heavier the can, the better the paint.
Oil and water-based paints
Paint consists of pigment, binder, solvent and additives. All of them affect the fluidity and drying speed of the paint. In water-based paints, the binder is a water emulsion, in oil-based paints - natural or synthetic (alkyd) oil. A new type of paint is water-based with the addition of alkyd resins.
Water-based paint
DIYers and professionals alike love water-based paint: it dries in a few hours and is easy to clean off hands and tools. Quick drying allows you to apply it in two layers in one day. Hands and tools can be washed with warm water and soap. Water-based paint is more environmentally friendly than oil paint: it does not emit volatile organic compounds. Water-based paint does not require the use of toxic solvents like white spirit to clean tools. Compared to oil paint, water-based paint is less harmful to vision, smell, breathing and skin. In the past, many professionals balked at using water-based paint in favor of oil-based paint, especially for areas where the paint must resist scratches, such as kitchens and bathrooms. Even the best water-based enamel does not produce the hard, smooth, and shiny finish of oil-based paint.
Water-based paint does not flow off the brush as smoothly as oil-based paint. But recently, as more states pass laws to limit the use of volatile organic compounds, manufacturers have begun investing in the development of improved water-based paints. Today, many professionals use oil paint only as a primer or to restore old oil paints.
Oil paint
If you choose oil paint, you'll need mineral spirits or turpentine to clean your brushes, rollers, screens, and yourself. These solvents are relatively expensive, smell bad, and irritate the eyes, nose, lungs, and skin. And after washing your tools and your own skin with white spirit, you will also need to wash them with soap and water. You usually have to wait until at least the next day to apply the next coat of oil paint. This can be inconvenient, especially if you can only work on weekends. You will have to wait a whole week to finish the job. Most municipalities have regulations regarding the disposal of solvent and oil-based paint residues. You may end up with half-empty jars on your hands that you won’t know what to do with. You may have to pay the same amount to dispose of leftover paint products as you would pay to dispose of hazardous waste.
Unedged board
An unedged board is distinguished by the presence of wane (bark) along the unsawed longitudinal edges. That is, unlike edged, it is not calibrated in width. It is made from the same raw materials as edged lumber (pine, spruce, fir, larch, oak, etc.), so in terms of its physical and mechanical properties it is in no way inferior to it. But it looks, of course, less attractive, but it costs noticeably less. In this case, before use, the board will have to be cleared of bark in order to remove along with it spores and pest larvae, which can quickly turn a healthy body of wood into dust.
Unedged board of the 1st grade (category B) should not have signs of putrefaction, cracks, curvatures and other defects that reduce the structural strength of the material. Having the same load-bearing capacity as an edged board, it will allow you to save money during construction where “appearance” does not play a role. First of all, these are the hidden strength elements of buildings - frames, subfloors, roof truss system, floors, lathing. Unedged boards are also used for the construction of scaffolding, sheds, stairs, temporary fences and decking; walkways, sides of high beds, and compost bins are made from it.
However, if you approach the task creatively, the aesthetic imperfections of an unedged board can be turned into a great advantage. The very “irregularity” of its shape, the natural curvature of the edges, being deliberately emphasized, can create an original decorative effect. It will be especially expressive on large planes - for example, such as spans of fences (by the way, category B boards are classified as fence boards, in contrast to class A material - carpentry, which does not have knots or other defects and is used for the manufacture of floor coverings, furniture, window frames, etc.). Of course, if you simply install the boards vertically with a slight indentation from each other, like a picket fence, then such a fence will hardly decorate the area and will only be suitable as a temporary option. The most interesting look are fences in which the boards are arranged horizontally and overlapped, either at an angle to each other (like blinds), or staggered - alternately on the front and back sides of the posts. Moreover, the gaps between the elements in the case of unedged boards turn out to be different in size, which becomes another highlight of the design.
All load-bearing and rough wooden structures must be subjected to deep impregnation with fire-retardant compounds, since they will be hidden under the cladding and it will no longer be possible to re-treat them
Unedged boards look great in cladding facades and walls of premises (in particular, baths), as filling openings in gazebos and terrace fencing, in pieces of garden furniture and elements of landscape design. This decoration carries a touch of “rough” rustic style, naturalness, and brings into the interior an atmosphere of antiquity or, as they say, “a house with history.” To reinforce this message, the material is brushed. Of course, this requires both effort and time, but the result is worth it. For example, you can treat the surface of the board using a grinder and a brush. Removing the soft fibers of the wood will reveal its pattern, making it more voluminous. Sometimes, in order to add age to the board, they even specially imitate the moves left by the bark beetle. Then the material is ground to remove burrs, tinted and rubbed with fine sandpaper. Finally, the board is coated with varnish, oil or wax, depending on future operating conditions.
For decorative purposes, you can also use unedged board of the 2nd grade (category C), which is not used as a structural material and is used for the manufacture of building supports, formwork, pallets, etc. The permissible volume of wane for such a board is up to 10 % of its area, but, as you know, aesthetic defects are the same advantages, the main thing is to present them correctly. After debarking and appropriate processing, the material can be used to decorate the head of a well, porch, gates and doors, to create original garden and interior decor.
Read more in the material “Top Grade!”
4
Selecting the gloss level
You will have to choose not only the color and type of paint, but also its gloss level. The gloss varies from matte to glossy. Different degrees of gloss are inherent in both interior and exterior paints, as well as oil-based and water-based paints. The degree of gloss is determined by the amount of resin in the paint. The resin determines how well the paint is absorbed by the surface being painted and how much pigment is left to film on the surface. The more resin, the less absorption and the more gloss.
Matte shine
Matte paint masks surface defects. Since the painted surface is slightly rough, it is not as easy to clean with a wet sponge as a glossy one. If you scrub a surface painted with matte paint with a hard sponge, the dirt may smear, leaving a stain.
Semi-matte gloss
Such coatings have a stronger shine than matte ones and are better resistant to abrasion.
Semi-gloss gloss
Semi-gloss paints are moderately resistant to abrasion, they come in water-based and oil-based paints.
Glossy shine
This is the highest gloss level. These paints contain the most resin, and they are absorbed by the surface of the wood less than others. Gloss paints resist abrasion well and are the easiest to clean. But the more gloss, the more visible the defects.
Enamel
Previously, this word was synonymous with oil paint. Today it is a term referring to the degree of gloss. If you see a can of paint and the label says “enamel,” that paint is gloss or semi-gloss. Enamel from different manufacturers may vary in degree of gloss.
These articles may also be of interest to you:
- Varnishing of wood. Applying varnish with a brush
- Toning dense wood
- Secrets of painting wood products
- Wood Finishing Basics
Tree species used for exterior cladding
Different types of wood have different colors and textures
The most popular tree species used for facade cladding are pine and spruce
. Their wood, easy to process, fairly durable and relatively inexpensive, contains resinous substances that provide good resistance to rotting. Pine rocks are especially valued for their resistance to cracking and their malleability to the cutter, beloved by all carpenters.
Thermally modified wood has increased moisture resistance properties and is almost resistant to rotting
Larch
famous for its durability. Its wood, with a characteristic yellow-red tint, has very high strength and is easy to dry and process. Time gives the tree an even more noble silver-gray or brown-black hue. In the northern regions of Russia there are still quite a lot of old larch buildings that were built 100 years ago and have preserved their appearance.
Tropical decorative species are also used for cladding.
, as well as
thermowood
- a material unique in its properties that has undergone special heat treatment. Thermally modified wood is practically resistant to rotting.