Often, builders neglect rules such as drying tile grout in order to quickly complete the work. Is it possible to violate the drying time, how long does it take for the grout to dry?
We'll tell you in this article.
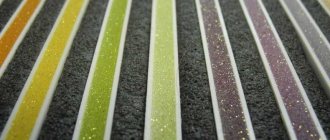
There are two types of tile grout mixtures - cement-based and (different) resin-based
The drying process of the grout is influenced by several factors - the type of material from which the grout is made, the technology used during the work, humidity, temperature of the tiles and air in the room, the thickness and depth of the joints, the quality and suitability of the mixture itself.
What grout is best for tiles?
Which grout is better for tiles - epoxy or cement? The best grout for all performance characteristics is epoxy.
Interesting materials:
How to make laminate shine? How to make terry towels soft? How to cook buckwheat overnight? How to make ginger tea in a thermos? How to cook morels? How to glue cobwebs to tulle? How to attach a cable channel to the wall on wallpaper? How to attach a screenshot? How to attach tulle to glass? How is the indexation factor applied?
Drying process
After the seams are filled with grout mixture, they need to dry.
- This will take 5 to 7 days.
- In the first day the putty sets. On the second day, the seams can be moistened with water to prevent cracking.
- On the third day, the putty dries completely, and on days 5-7 you can load the surface, that is, drill holes and wash the walls with cleaning agents and plenty of water.
High-quality work in compliance with all technological operations will protect the seams between the tiles from moisture and destruction.
Ceresit
Ceresit grouts are now popular and well-known on the market; there are six main types of grout of this brand.
Ceresit grout is used on vertical and horizontal surfaces
- Ceresit CE 40 Aquastatic. Suitable for laying widths up to 10 mm, withstands high and low temperatures and their differences, suitable for heated floors and outdoors.
- Ceresit CE 43 Super Strong. High-strength fugue, seams from 4 to 20 mm thick. Suitable for any weather and temperature conditions, not recommended for use with marble and glazed tiles.
- Ceresit CE 35 Super. Thickness from 0.4 to 15 mm. Suitable for grouting tiles in swimming pools, combined with marble and stone.
- Ceresit CE 33 Super. For seams up to 5 mm, suitable for kitchens and bathrooms. Can be used for external walls.
- Ceresit CS 25. Silicone-based fugue, can be used in bathtubs and showers, joint thickness from 4 to 30 mm.
- Ceresit CE 79 UltraPox. Epoxy fugue. Resistant to chemical and mechanical influences.
The disadvantage of Ceresit grout is the frequent difference in color before and after application, so it is better to buy it in stores where the grout can be tested before installation.
—>
Influence of application conditions
It is necessary to strictly follow the recommendations for preparing seams and subsequent cleaning, to prevent damage to the seam and weakening its strength characteristics.
There are many more conditions for the correct use of grouts than might seem at first glance. The optimal time for completing the work is from 24 to 48 hours after finishing laying the tiles, since at this time the solution on which it is glued has already dried and does not take moisture from the environment, including the grout, and does not affect the timing of its drying. If it is late, the seams can be moistened, but not just before applying the grout; they must be clean and not wet, so as not to dilute the grout with moisture.
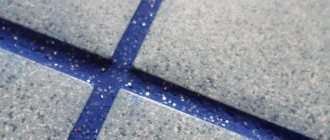
The purpose of grouting joints with a fugue is to seal tile joints
We will briefly consider the stages of sealing joints with a fugue to indicate errors that affect the drying process.
- Preparation of grout joint. When mixing the mixture, you must strictly follow the instructions for the fugue - poor mixing or adding excess water has a negative impact on the drying time and reliability after completion of work.
- Excerpt. Often fugu, especially cement fugu, needs to be kept after mixing and before use. Don't neglect this, as it has a positive effect on the seams in the end.
- Prepare the seams. Check the cleanliness and moisture of the tile joints.
- Fugue filling. When performing work, make sure that the tool, hands and tile surface are free of dust, dirt and excess moisture.
- Primary removal of excess. You should immediately try not to leave a lot of excess on the tile, since after 15–30 minutes, and when using a silicone base no later than 6–8 minutes after application, they will have to be removed before they have yet “set.” In this case, we use a clean and damp (squeezed until semi-dry) sponge.
- Final drying. The final drying time is about 7 days for simple cement fugues, 10–15 days for fugues with acrylic and latex additives, and 15–20 days for epoxy mixtures and silicone bases.
After drying, the seams can be coated with the necessary protective compounds to give better characteristics.
It is recommended to do damp, but not wet (!) cleaning no earlier than 24–48 hours after completion of the work; Thorough washing, as well as heavy loading, can only be done after the final drying time has been allowed.
How to form a seam
Depending on how long it takes for the grout applied to the tile to dry, you have some time to form a beautiful and even seam. Ideally, it should not extend onto the tile itself; this is only permissible if you need to hide small defects.
In order to form the correct seam, pay attention to the type of tile cut. In order to be able to walk on the floor and not leave dirt in the seams, it is recommended to completely compare the surface. For wall tiles, it is important to follow the following rule: a straight end means a straight seam, and a beveled or rounded end means a concave seam.
To form a beautiful and even seam, you need to wait until the mass sets a little after laying the rough layer on the tile adhesive. Excess grout is removed with a damp cloth. The edges are carefully trimmed with a scraper. To create an effective and even rounding, you need to press the mass inside the seam using a wire or scrape out the excess with a molding spatula. To smooth out unevenness after all manipulations, you need to walk over the tile with a damp sponge and wipe the surface. This can only be done after the glue has completely fixed the tile.
Main types of mixtures
Modern manufacturers annually fill the market with new, more advanced products. Today we can distinguish the following types of tile grout:
- Cement fugue - based on fine sand and Portland cement with the addition of modifying components.
- Latex is a more advanced version of cement grout; it has water-repellent properties, making it ideal for the bathroom.
- Furan is a chemically stable, ultra-dense mixture of black color.
- Epoxy is a viscous putty containing epoxy resins, which make it more durable and water-resistant.
Furan mixtures are not used at home; latex and cement mixtures are mainly in demand.
All of them dry quite quickly, and therefore it is necessary to work with mastic quickly.
Properties
- Available in 30 colors, including white;
- has an enhanced antifungal effect (Trio Protection “Micro Protect” formula);
- water-repellent (Aquastatic effect);
- resistant to dirt, easy to clean;
- elastic, resistant to deformation;
- has high color fastness;
- perfectly smooth;
- water- and frost-resistant;
- can be used on heated floors;
- suitable for indoor and outdoor use;
- environmentally friendly.
Options for applying seams between decorative stones
There are several interesting varieties of how you can decorate seams using grout. We offer several options:
- Flush. One of the simplest methods that an inexperienced builder can handle. The solution is filled into the seams, and its remains are removed with a trowel. When all the cracks are filled and the grout has hardened a little, go over them with a stiff brush.
- Concave. For this purpose, use a special narrow spatula; it should not be very long. After cleaning the gaps, fill the grout with a jointing tool.
- Convex. For this purpose, a special arc-shaped tool is used. To do this, it is leaned against the wall with an arc and the seam is filled. Gradually move the spatula as the seam fragment is filled.
- Rectangular. To do this, first clean up to five millimeters of mortar in the cracks, even if it has frozen. Afterwards, grout is filled into these spaces to the very edge of the gap.
- Beveled. It involves making seams not straight, but at an angle. The approximate cutting angle is 3-5 mm. This effect will be convenient for rooms with high humidity, since water is easily drained through the seams.
Each method of applying grout is not suitable in all cases. For example, a convex one will not look beautiful on a wall with decorative trim in a small room.
Grouting joints between white gypsum decorative bricks Source vash-remontik.ru
How to avoid mistakes and not affect the drying time?
To avoid thickening of the layer of material in the space between the tiles, you should use special tools for applying grout:
- Rubber spatula - used in most cases, but due to its small width it is not recommended to use it if you plan to perform a large amount of work. A spatula with these characteristics is suitable for applying different materials.
- Grater - used when finishing mosaics, since in this case the use of a spatula increases the installation time. A construction float is also suitable for filling joints in large areas, which allows you to speed up work.
- Syringe gun - designed for filling deep seams. This tool is often used for applying polyurethane and silicone mixtures; thanks to it, neat seam joints are obtained.
- A cone is an alternative to a pistol. This option is suitable for cases where it is necessary to protect porous base material.
How to work with the mixture
You can continue finishing work after exactly as long as the tiles on the floor, fixed with tile adhesive, dry. Previously, you cannot walk around the room, as the integrity of the masonry may be damaged, the tiles will move and spoil the surface level.
First you need to prepare the tool. You will need a rubber spatula; it can be used to conveniently apply mastic and distribute it over the joint. You may also need a foam sponge, cord to fit the joint, or a special seam shaping tool.
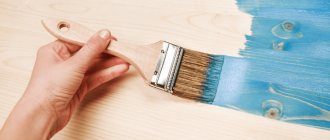
In order for the tile adhesive to dry quickly, it must be prepared strictly according to the manufacturer’s recipe
Prepare the solution. If you are using ready-made grout, it is advisable to put a small amount of it in a separate container and tightly cover the remainder with a lid so that it does not dry out too quickly.
For the powder mixture, you need to prepare clean water. Mix dry ingredients in small portions. Add water according to the instructions, but little by little, so that the mass does not turn out too liquid, it should be plastic and not crumble into lumps.
You need to apply the grout inside the seam, pushing it with a spatula, having previously cleaned off excess glue and dust. To improve shrinkage, it is recommended to moisten it after the top layer has dried a little, and then repeat the application. You should work quickly and confidently.
When to start cleaning
At the final stage of finishing, cleaning should be done and any excess material should be washed off. It is recommended to do this only after the applied grout has completely dried.
Wet cleaning is done on the third day, and general cleaning a week later. You can see whether to wet the joints or not by looking at the remaining frozen mass on the lid of the jar. If it has brightened by several shades, you can start cleaning.
Drying of the grout occurs in several stages. It is difficult to see from external signs whether the composition has hardened well. The most correct thing to do is to focus on the average time frame for each type of grout.
Briefly about the main thing
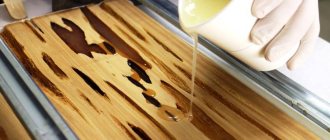
Epoxy grout is most often sold on the market from two components: a base base with resin and a hardener.
The main advantages of epoxy grout are its high strength, resistance to various operating conditions, and durability.
Disadvantages include high cost, short working life and difficulty in removing excess (a special cleaner is used).
The grouting process includes several actions: application, rubbing, washing.
Surface cleaning is carried out in stages: impregnation with the product, removal of the top layer, rinsing, final wiping with microfiber.
The facing coating is ready for use after 4-5 days.
Ratings 0