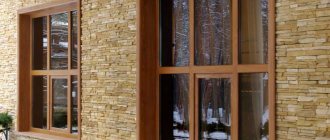
The final stage of the process of installing modern windows is finishing the slopes. A thick profile, multi-chamber double-glazed windows and reliable fittings provide excellent thermal insulation, but the interface between the window frame and the apartment wall remains a cold and unattractive place. If this area is not given proper attention, condensation, mold, and wall destruction may occur. Therefore, let's find out which slopes are best suited for plastic windows.
What requirements must slopes meet?
Before considering window framing options, their advantages and disadvantages, let’s determine what is required of these elements.
Expert opinion
Anton Tsugunov
Construction expert. Entrepreneur. 17 years of experience. More than 100 completed objects.
Hello, friends!
First, I will talk about all types of slopes, as well as their pros and cons. I will describe the subtleties and share my experience. At the end of the article I will give recommendations on which slopes are the best choice, and in which cases one should give preference to one or another material and finishing method.
Important!
When applying for a slope installation service, be sure to enter into an agreement with electronic correspondence , then you can resolve all issues with the builders promptly and without headaches. Here is a link to my contract >>>
If you have problems with the quality of the slopes or with the timing of their installation, then you will need to write a claim. Here are samples of claims by deadline >>>
Enjoy reading!
Slopes should:
- Not inferior to the durability of the window design. Modern double-glazed windows are designed for a minimum of 15–20 years of operation. Slopes must withstand no less time without loss of basic qualities. Few people would like to redo them every two or three years.
- Comply with the general style of the window, forming a single whole with it.
- Maintain or even improve the performance characteristics of plastic windows.
- Withstand mechanical loads and impacts of the doors.
- If possible, be repairable.
Forming a smooth opening
Repairing openings in the bathroom, or near the front door, which will be discussed later, is a completely different matter. In these places there are no plasterboard partitions, but rather thick load-bearing walls.
The front door opening is often filled with one frame with two panels or several bindings. This is justified by the fact that one door, for example, can be metal, and the second wooden.
The space between them is called the stub. Considering that the thickness of a load-bearing wall can be quite impressive - say, two bricks (51 cm), then it is natural that even a double frame does not completely fill the opening. Most often, the door is placed flush with the wall on the outside, and slopes are created on the inside.
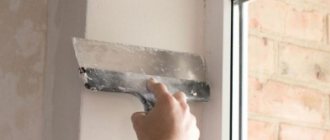
Slopes can be plastered and thus get rid of curved surfaces. Then everything needs to be puttied
Sometimes they are covered with wood or MDF, but most often they are plastered with cement plaster. In any case, after replacing the door, or during a major renovation of the walls, when the plaster needs to be knocked down to the base, the geometry of the slopes is significantly disrupted, and you have to think about how to level the opening.
Methods for leveling slopes
Now we have come to the most difficult stage of wall repair. By the way, invited craftsmen charge separate money for plastering slopes, and the price, I must say, is rather high - about 250-300 rubles per linear meter.
Thus, the slope of one door measuring 2.1 * 0.9 m will cost at least 1,300 rubles. Although, such work may not take too much time - it all depends on the initial state of the opening.
- Try to do it yourself, especially since you can use a variety of available materials for the work. Aligning the side walls of an opening without a door is carried out according to the same principle as plastering rectangular columns. On the sides of the slope, checking the level, two long aluminum rules are fixed on both sides, extending them beyond the plane of the surface to the thickness of the plaster.
- The rules, in this case, serve as beacons, but in principle, you can do without them. The role of the rules is just as successfully performed by ordinary profiles for drywall, which are mounted on self-tapping screws or dowels, with their backs to the side surface of the opening. Just like the rules, they need to be moved forward by the thickness of the screed.
Template for removing excess plaster
- If there is a door in the opening, then the beacons are mounted only on one side. In the first case, excess mortar is removed with a short rule, a small spatula, or a wide spatula. If there is a door in the opening, you need to make a template from scrap materials, which is shown in the picture above.
- It can be made from a piece of plywood, hardboard, plasterboard or even thick cardboard. The main thing is to make a recess on the template that exactly fits the protrusion of the door frame. This will allow you to make a clear line of the plaster layer around the perimeter of the door. After the solution has set, but has not yet hardened, the beacons are carefully removed and a corner is formed, cutting off all excess with a spatula.
- When the leveling screed, which is made with a base mixture with a coarse dispersion of components, has dried, a perforated plaster corner is mounted on it. And then they putty. If there is no major damage to the slopes, then a thick layer of plaster will not be necessary.
Perforated corners to protect external slope corners
- In this case, you can do without beacon profiles and install the corner straight away. By the way, when plastering walls and slopes with specialized mixtures, you can simplify the leveling process by using the same drywall. If you cut long narrow strips and glue them onto putty along the uprights of the box, you will get a perfectly even junction.
- Aligned in level, these strips will serve as beacons for applying a leveling layer. There is no need to remove them, since after the starting layer has dried, the strips of drywall will be hidden under the putty. By the way, it is also more convenient to level the upper slope with plasterboard.
Plaster mixtures, especially when a thick layer has to be applied, do not adhere very well to horizontal surfaces. You have to install the mesh, apply several layers, and each time wait for them to dry.
And the wall plasterboard itself has a thickness of at least 12 mm, plus a thick layer of glue, which allows you to level the slope in one step.
Slope finishing options
When renovating an apartment in a new building or replacing windows, you will have to choose how to finish the openings after installing modern structures with double-glazed windows.
Window slopes can be finished using the following materials:
- plaster;
- drywall (gypsum plasterboard);
- gypsum fiber (GVL);
- plastic panels.
We recommend
Open type roller blinds.
Attaches directly to the frame, no drilling required.
Excellent protection from the sun and heat.
They don't take up space.
Many colors and sizes.
Price from 600 rubles for a complete set. Delivery is free from 3 days.
Lots of positive feedback. Verified seller! Read more >>>
What are they for?
On a note ! Before proceeding directly to the description of the methods, we will familiarize ourselves with several reasons for the need to install window slopes.
- Decorative . A window without slopes will not look very beautiful, to put it mildly. That’s why it is framed with plaster, drywall, plastic or metal.
- Protection of the opening from precipitation, cold and drafts . High-quality and correctly mounted slopes will prevent moisture penetration and also provide good thermal insulation at the installation seam. They will also increase the sound insulation properties of the windows.
- Protection of polyurethane foam and frame edges from temperature changes and dampness . If you do not take care of the slopes, then over time the installation seam will begin to deteriorate and eventually become unusable.
There are several main types of slopes:
- plastering;
- plasterboard;
- plastic;
- metal.
In the image you can see a detailed diagram of a slope made from a sandwich panel installed along a leveling profile, with insulation and fastening to a decorative corner and polyurethane foam
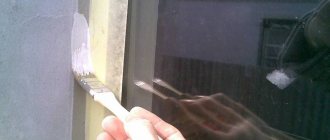
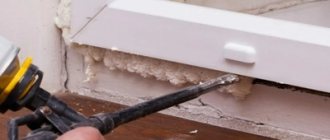
Plaster slopes
The manufacturing technology consists of installing beacons, plaster corners and applying plaster. After drying, the slopes are puttied, sanded and painted. It is extremely difficult to do high-quality insulation, since the connection between the solution and the wall is lost.
Finishing a window opening with plaster has the following advantages:
- Versatility. This material is used in rooms with different humidity and temperature levels.
- Reasonable price. Plaster is an inexpensive material, and you can also save money by doing the work yourself.
- Strength. Plaster slopes are more resistant to mechanical stress compared to other types of finishing.
- No seams. Perhaps the main argument of supporters of such a coating is that there is no need to additionally process the joints and interfaces of the opening planes.
- Possibility of updating and repair.
USEFUL INFORMATION: Plastering window slopes with your own hands
But a number of serious shortcomings have led to the fact that plaster is used less and less for work of this kind:
- Duration and complexity of the process. Finishing takes considerable time: each layer of the plaster mixture needs to dry.
- A large amount of dust and dirt, risk of scratching the window.
- Low thermal insulation properties of plaster. Such slopes are prone to freezing in winter and condensation. In addition, when installing them, you have to cut the foam one or two centimeters inward, weakening the thermal insulation seam.
- Detachment from frame. It is impossible to firmly connect the plaster and the PVC frame. There are no sealants with equally good adhesion to both materials. This leads to the formation of cracks between the window block and the plaster layer.
USEFUL INFORMATION: Adjacent profile for window slopes
The last two drawbacks can be eliminated by insulating the opening with penoplex before plastering and using an adjacent window profile with reinforcing mesh.
USEFUL INFORMATION: How to putty the slopes on windows?
Expert opinion
Anton Tsugunov
Construction expert. Entrepreneur. 17 years of experience. More than 100 completed objects.
Today this is the dirtiest and longest finishing method. To avoid problems with condensation and mold, I recommend choosing this method only in warm rooms, for example, when a window is installed between a heated balcony and a living room, then freezing of the slopes is excluded. And also if there is simply no room left to install sheet material. For plastering warm slopes, I have been using Rotband plaster from Knauf . I buy it only from a trusted supplier.
This is better than going to the store, standing in lines first at the checkout, and then at checkout. The mixture is delivered to me directly to the site at the agreed time. It’s more convenient and safer!
Useful tips
Remember that plastering can be carried out in a room where the temperature is at least 6 degrees Celsius.
If this rule is not followed, the quality of the slopes will be low. Carefully read the instructions for preparing the solution that the manufacturer puts on the packaging. The expiration date is also important, since after its expiration the mixture will not have the necessary characteristics. The expiration date that is close to expiration may also not have a very good effect on the final result.
When working with plastic windows, do not forget to make a groove along the entire perimeter between the frame and the slopes, 5 mm deep. After the solution has dried, the recess is filled with silicone sealant. This ensures that in extreme heat, when the volume of plastic increases, the slope will not crack.
Source
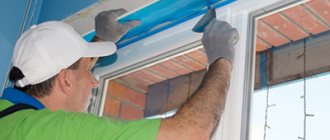
Drywall slopes
To make them, pieces of gypsum board of the required size are used, which are screwed to a profile frame or glued to the sides of the opening. Then the surface of the drywall is primed, puttied and painted. In the case of laminated gypsum board, no further finishing is required. The space between the wall and the new slopes is insulated with polyurethane foam and insulation.
Attaching gypsum boards is easier and faster than creating a flat surface with plaster. But we must not forget that after installation, finishing is required, which will take several days. If you use laminated gypsum board, then the installation of the slopes is carried out in one day.
USEFUL INFORMATION: Drywall slopes: do-it-yourself installation
Advantages of using drywall:
- Low cost.
- Easy to install. Requires very basic construction skills.
- The ability to easily create perfectly smooth surfaces.
- Additional insulation.
- If preparation for staining and painting was carried out, then a simple repair, suitable for repeated repainting.
- If you use a good semi-gloss and gloss paint, you can wash the slopes many times.
- During finishing preparation and painting, it does not require the installation of plastic corners.
We recommend
Roller blinds of closed type.
Attaches directly to the frame, no drilling required.
Excellent protection from the sun and heat.
They don't take up space.
Many colors and sizes.
Price from 1,700 rubles for a complete set. Delivery is free from 3 days.
Lots of positive feedback. Verified seller! Read more >>>
USEFUL INFORMATION: How to putty the slopes on windows?
Flaws:
- Inability to firmly bind the slope material and the PVC frame (as with the plaster version). This leads to the appearance of cracks at the joints.
- Fear of moisture. If the windows “cry”, under the influence of condensation the drywall, even moisture-resistant, gradually collapses and swells near the frame. Regardless of whether the plasterboard is laminated or painted. Judging by the reviews, this is the main reason for refusing to use gypsum boards in the manufacture of slopes.
- Risk of sagging, dents and crushing. Still, drywall is a fairly fragile material.
To avoid the finishing stage, you can take laminated gypsum board instead of the usual one. But in this case, you will have to use special corners to cover the ends of the sheets.
Expert opinion
Anton Tsugunov
Construction expert. Entrepreneur. 17 years of experience. More than 100 completed objects.
I use moisture-resistant Knauf plasterboard with dimensions 2500x1200x9.5 mm . It is important to use smooth and dry sheets.
Cutting and installation
After measuring the depth and height of the edges of the opening, a plasterboard sheet is cut. To do this, cut a line along the marked points on the top layer of cardboard with a knife. Break the workpiece along it and cut off the paper from the bottom side. You can use a hacksaw or jigsaw.
Important. When fastening with self-tapping screws, the caps are slightly recessed into the canvas so that after puttying they are invisible.
Polyurethane foam or gypsum glue is applied to the part from the back side and pressed against the wall. After hardening, the voids are carefully filled with sealant. When expanded, it increases in volume by 3 times and can tear off the panel, so it is important not to overdo it.
Installation using profiles is carried out according to the following scheme:
- Along the perimeter of the window, U- or L-profiles are installed with the short side in the center of the block.
- The plasterboard blank is inserted into the groove of the profile, bending it to the desired angle of dawn. Cut out a template from available materials to mark the edges of the remaining windows.
- The gap between the slope and the wall is measured and the workpiece is removed. Install a rail, brackets or metal profile around the perimeter of the opening.
- Glue insulation to the wall.
- The plasterboard part is inserted into the groove of the profile again, and the other end is secured with self-tapping screws to the rail or brackets.
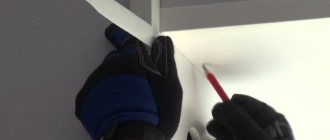
The side and top slopes are installed sequentially. The ends are plastered, the joints are covered with sickle tape and putty. All that remains is to complete the finishing touches.
How to make slopes for plastic windows if there are no profiles? In this case, the installation groove for drywall is selected in the mounting foam adjacent to the window frame. The depth of the recess should exceed the thickness of the frame by 2-3 mm.
Slopes made of gypsum fiber (GVL)
The technology for installing slopes made of gypsum fiber sheets is practically no different from attaching drywall, the advantages will be the same. At the same time, GVL does not have the disadvantages of GCR: it is much stronger and stiffer, and its moisture-resistant version is not at all afraid of a wet environment.
Expert opinion
Anton Tsugunov
Construction expert. Entrepreneur. 17 years of experience. More than 100 completed objects.
I believe that when installed correctly, gypsum fiber board slopes are superior to other options in terms of performance and appearance. But their use is justified only when finishing from scratch or during a major overhaul. Since during finishing it is necessary to install painting corners and putty not only the slopes, but also the adjacent wall.
USEFUL INFORMATION: GKL or GVL, which is better: differences, what is the difference, what to choose?
Advantages of gypsum fiber slopes:
- Fairly simple installation.
- High strength and rigidity.
- Possibility of high-quality insulation.
- Ideal design geometry.
- Long service life - more than 10 years.
- Maintainability: a damaged element can be easily puttied and tinted.
- Moisture resistance.
- The paint is easy to clean.
- Any decorative coverings can be mounted on GVL: from wallpaper to tiles.
Making a slope from gypsum fiber
GVL installation process
USEFUL INFORMATION: How to choose high-quality plastic windows and not overpay: professional advice
Flaws:
- Relatively high price (compared to gypsum board and plastic).
- The need for finishing.
- Cutting gypsum fiber is more difficult than cutting drywall.
If, after priming and puttying, you paint the GVL slopes with high-quality latex paint, then they can be washed without fear. And repainting will be required no earlier than after 5–8 years.
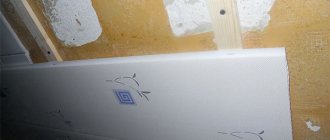
Sandwich panels
You can install slopes on plastic windows using sandwich panels yourself in the same way as described above.
Installation diagram of sandwich panels on a slope
The photo shows a method for attaching sandwich panels without a starting profile. With this method, a 1 cm deep slot is made in the assembly seam into which the panel is inserted. From the outside it is attached to the leveling profile.
Advantages of sandwich panels:
- it is a durable material with low dead weight;
- this is a modern finishing material, the plastic surface of which can be made in any color;
- is an energy-efficient material due to the use of expanded polystyrene foam as the inner layer;
- the panels are easy to process, install and subsequently use;
- they do not rot or become moldy.
Repair of slopes from GVL
In this case, the slopes were installed more than 8 years ago. During the process of cosmetic renovation (dividing the room into two parts), the slopes were partially puttied, sanded and painted. The work on the slopes took 2 days, the cost of the work is insignificant (compared to installing new slopes - even when compared with budget plastic ones). The walls were also painted, so no corners were needed.
An entire corner of the slope was missing. Crushed from being hit by a window for 8 years.
The slope has been completely restored and painted in 2 layers.
Expert opinion
Anton Tsugunov
Construction expert. Entrepreneur. 17 years of experience. More than 100 completed objects.
I use moisture-resistant GVL Knauf-Supersheet with dimensions 10x2500x1200 mm. One sheet is enough for several windows. I order and pay with a card with 33% cashback .
Surface preparation
First you need to close the window block. The best way to do this is to use construction tape and cover the window sill with film. The surface of the side opening of PVC windows must be cleaned and then leveled. Previous layers of plaster will also need to be removed. The old mixture will fall off if you tap it on both sides. It is convenient to help yourself with a construction knife.
Brick walls are treated with a solution of hydrochloric acid and then washed with water. If there are oil stains, you need to apply oily clay to them, let it dry, and rinse with water.
For better adhesion of the composition to the surface, it is better to use a deep penetration primer. Then install beacons to ensure the job is done smoothly. Visual perception will not help here. Finishing of slopes with plaster is carried out strictly according to the guides. The primer must dry well.
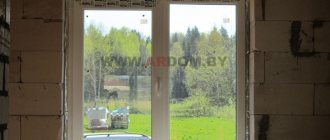
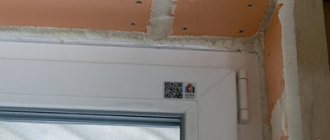
Plastic slopes
Another way to get aesthetic and reliable slopes is to cover the opening with double-sided sandwich panels. They have not only good thermal insulation properties, but also sufficient rigidity.
It is not recommended to use one-sided sandwich panels and decorative wall panels made of thin cellular plastic for finishing the window opening. They do not have the necessary strength, wear resistance and thermal insulation qualities. It is better to use special panels for making slopes.
USEFUL INFORMATION: Choosing the best window sill for plastic windows (prices)
Plastic finishing is gaining increasing popularity. The material of the slopes not only visually harmonizes with the window frame made of PVC, but is also securely fastened to it using special sealants. This method of finishing the opening has other advantages:
- Low price.
- A smooth surface that retains its properties for many years and does not require additional finishing or regular maintenance.
- No cracks or temperature changes due to the use of the same material from which the frame is made.
- Additional thermal insulation that strengthens the weak point of the window opening - the seam between the frame and the wall of the room.
- Fast installation. Plastic slopes are installed faster than plasterboard and especially plaster ones.
- Minimum amount of dirt and dust when facing with plastic.
- 100% moisture resistant.
- It is possible to replace part of the slope if damaged.
- The frame covering the outer contour reliably protects the junction of the wallpaper and the window opening.
Minuses:
- Susceptibility to mechanical damage.
- Impossibility of local repairs. If it breaks, you will have to replace the entire panel.
- Low quality of additional elements, such as corners. Often these small parts are made from recycled plastic, which turns yellow over time and stands out unattractively against the background of snow-white slopes.
- Incompatible with interior. Glossy plastic will look unnatural in a room decorated in a classic style, as well as in any other design direction where natural materials are used.
USEFUL INFORMATION: Blinds on plastic windows: install them yourself
To avoid adding others to these disadvantages of plastic slopes, you need to choose the material wisely, guided by two main rules:
- Panels must be made from virgin plastic. Only such products are absolutely harmless even when heated in the sun and will not turn yellow after a year.
- The PVC layer must be thick enough. This will help avoid damage to the slopes.
When choosing between matte and glossy plastic, you need to take into account that stains and fingerprints are more visible on a glossy surface. Matte panels look more natural and are similar to classic painted slopes.
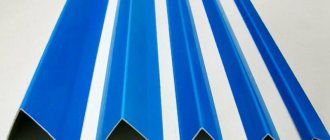
Glossy plastic
Matte plastic
Expert opinion
Anton Tsugunov
Construction expert. Entrepreneur. 17 years of experience. More than 100 completed objects.
Depending on the width and length of the slopes, I use different plastic slopes. Here are the common sizes:
Slope width 250 mm
Length 1.5 m - Insulated window slope 1500x250x10 mm
Length 2 m - Insulated window slope 2000x250x10 mm
Length 3 m - Insulated window slope 3000x250x10 mm
Slope width 400 mm
Length 1.5 m - Insulated window slope 1500x400x10 mm
Length 2 m - Insulated window slope 2000x400x10 mm
Length 3 m - Insulated window slope 3000x400x10 mm
Slope width 600 mm
Length 1.5 m - Insulated window slope 1500x600x10 mm
Length 2 m - Insulated window slope 2000x600x10 mm
Length 3 m - Insulated window slope 3000x600x10 mm
What is it, photo
The side part of the window opening is called the slope. They are located inside the frame part of the window on the sides and top. Located between the frame and the wall. This applies to the outside and inside. Design of slopes is a mandatory stage in the installation of the overall structure.
When an old window is replaced, severe destruction of the old parts occurs during dismantling. If work is underway to install a new window, then to complete it it is also necessary to install slopes. This will significantly improve the quality characteristics of the product.
You can install these elements yourself . To do this, you need to study the features of the technology and prepare the necessary tools.
Important! If you need to decorate the outside of a window located high off the ground, then this task should be entrusted to professionals.
Plastic slope:
We make slopes and drywall:
Simple plaster slope:
What are they needed for?
When located on any side of the window, the plane performs important functions for the operation of the window structure:
- Decorative . Allows you to hide all irregularities and defects after installing the frame.
- Warming . The product protects the room from the penetration of cold and moisture.
- Steam and waterproofing . Prevents the formation of condensation, mildew and mold.
- Soundproofing . This is very important if the building is located near tram tracks, highways, or busy streets.
Important! It is necessary to install slopes made of high-quality material.
Which slopes are best for plastic windows?
All slope finishing options have pros and cons. There is no ideal material that is better than others in every respect. Therefore, when choosing, you need to decide which properties and characteristics are more important in a particular case.
| Requirements for slopes | The most suitable material |
| Speed and ease of installation | Plastic |
| Durability | Plaster, gypsum fiber |
| Strength | Plaster, gypsum fiber |
| Moisture resistance | Plastic, gypsum fiber |
| Natural material, natural look | Plaster, drywall, gypsum fiber |
| Tightness of the structure | Plastic |
| Practicality, no need for maintenance and care | Plastic |
| Best maintainability | Plaster, gypsum fiber |
| Low price | Plastic |
| Original finishing options (decorative plaster, tiles, mosaic) | Plaster, drywall, gypsum fiber |
| No corners or visible frame elements | Plaster, drywall, gypsum fiber |
| Possibility to change the design | Plaster, drywall, gypsum fiber |
Specifics of the material
The structure of the mixture for work is a viscous, whitish composition with some inclusions, in which granules of different structures are visible. The surface treated with it has a characteristic rough base, the degree of which depends on the components of the solution.
Modern types of textured cladding have a rich range of colors, as well as the ability to imitate the texture of stone, wood, leather, etc.
Using the selected type of plaster allows you to realize the most daring design ideas. This could be a composition that allows you to create the structure of wood eaten away by insects, or to achieve the effect of crumpled paper or snake skin.
If the mixture contains large particles, then its application requires some preparatory measures and certain skills from the master.
To do this, use a steel grater or trowel. The layer of plaster should be equal to the size of the granules. The composition with small particles has a lime base and a more liquid consistency. Therefore, its application is quite simple. To do this, use a roller or vacuum cleaner.