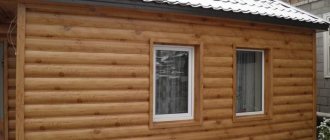
Finishing walls with plastic panels has a number of advantages, which include high installation speed, excellent technical characteristics of the material, and no need to pre-level the walls. It is quite possible for people who do not have professional construction and repair skills to carry out such work. But if the installation of PVC lamellas does not cause any particular difficulties, then during the installation of the lathing a number of questions arise. How to make a sheathing for plastic panels will be discussed in our article.
Example of wooden lathing for plastic panels
Plastic ceiling cladding technology
Installation of supporting frame
Wooden frame for covering the ceiling with plastic
Before you line the ceiling with plastic panels with your own hands, you need to build a supporting structure to which the plastic finishing elements will be attached. The installation process will look like this:
- Before installing the frame, the ceiling base is cleaned of the previous, poorly adhering finish. If it holds securely, you can install it directly on it.
- The installation direction of the frame strips is chosen perpendicular to the direction in which the plastic panels (lining) will be installed (see Foam ceiling panels: lightness and simplicity in one bottle). Before attaching them to the ceiling base, parallel marking lines are drawn, indicating the places for future laying of the frame strips.
- If wooden beams are chosen as load-bearing elements, then they are fastened directly to the ceiling, using a hammer drill and dowels with self-tapping screws. At the same time, be sure to ensure that the bars ultimately form a flat horizontal plane. To level the beams, if necessary, use thin wooden backings and control the degree of evenness using a building level.
Installation of hangers according to markings
- When choosing a profile frame system, the planks are fastened using special metal hangers. In addition, a guide profile is first mounted strictly horizontally along the perimeter of the room under the ceiling, which serves to more easily create a flat plane of the frame system.
- Suspensions are attached to the ceiling along each marking line in increments of 0.6 m. After this, the main profile strips are inserted on both sides into the guide and attached to the hangers along its entire length. If necessary, the length of the profiles is adjusted using metal scissors.
Now all that remains is to consider how to sheathe the ceiling with plastic - the video lesson will allow you to understand all the intricacies of the sheathing process with your own hands (see Plastic ceilings: installation features).
This is what the frame will look like, prepared for plastic covering.
Covering the frame with plastic
So, let's describe how to sew up a ceiling with plastic panels with your own hands:
- Elements of plastic lining or panels are cut using a fine-tooth hacksaw (for metal) or an electric jigsaw to the required length. The cut must be perpendicular to the axis of the element.
- Sheathing the ceiling with plastic begins with the ceiling plinth (corner) being horizontally attached to the walls under the guide profile (or beams). A small gap is provided between the profile and the plinth (the thickness of the plastic panel or lining). The plinth is fastened to the wall using dowels and self-tapping screws.
- Install the first element of plastic sheathing, introducing its tenon between the plinth and the guide profile (beam) attached to the starting wall (see Ceiling sheathing with plastic panels, features, advantages, do-it-yourself installation). The ends of the element are inserted in a similar way into the gaps of the walls adjacent to the starting one.
Alternative means of attaching plastic to the ceiling
- Once the positioning of the first panel is completed, it is rigidly attached to the frame slats. This is done using a construction stapler or self-tapping screws. The fastener is inserted into the groove wall of the plastic element closest to the frame and screwed (hammered) almost flush. The panel must be fastened to each of the perpendicularly extending frame strips.
- Next, insert the tenon of the second into the groove of the first element, and also hide the ends of the panel (lining) behind the plinth, and perform the fastening in the same way.
The diagram of how to attach plastic to the ceiling surface should already be clear for a simple and understandable covering of the entire ceiling surface. The last plastic panel (lining element), if necessary, is cut to width, inserted with a tenon into the groove of the penultimate panel, and the other side is hidden behind the baseboard, mounting the element in tension. In this case, there is no need for rigid fastening of the last plastic element.
https://youtube.com/watch?v=tNx2Tcy3qTY
We can assume that we have figured out how to mount a plastic ceiling with our own hands. Let's hope that you will understand this simple technology and implement it in practice without any difficulties. And to consolidate the material presented, we once again recommend watching the video presented on our portal - how to sheathe a ceiling surface with plastic panels.
Installation of sheathing
Preparing the walls of the house for installation of sheathing
Before making sheathing for siding (no matter - wood or metal), it is necessary to prepare the walls of the house itself. Preparation is carried out according to the following algorithm:
- We remove the trim from windows and doors, as well as all elements protruding beyond the plane of the wall.
- We clean the walls of the house from contamination, if possible, remove the remnants of the previous finishing, especially those that are peeling and falling off.
- If the outside of the house is lined with wooden clapboards, check how securely the boards are fastened. If there are loose cladding elements, we fix them with self-tapping screws.
- We treat the walls of the house with an antiseptic. This is done in order to prevent the development of mold fungi under the siding in case of possible moisture penetration under the sheathing.
Option for placing profiles After preparing the walls, you need to mark them.
The pitch of the sheathing under the siding depends on what kind of material we plan to use: the denser and heavier the siding panels, the smaller the pitch between the beams or sheathing profiles should be. As a rule, when installing vinyl siding, sheathing is used with a pitch of 40-60 mm. Also at this stage we determine the direction of the sheathing: if the siding is attached horizontally, then the sheathing will be installed vertically under the siding, and vice versa.
Vertical lathing Lathing for basement siding can also be either vertical (maximum step - 90 cm) or horizontal (step up to 45 cm). An exception is Dolomite basement siding - its panels can be mounted exclusively on vertical sheathing.
Installation of metal sheathing
The metal sheathing for fastening with siding is made from a U-shaped profile. The most commonly used profile is a section of 27x60 mm and a length of 3 m.
The profile is fixed to the base using hangers - perforated plates made of galvanized steel (pictured). Sometimes, instead of suspensions, special brackets are used - they are much more durable.
Suspension for the profile The lathing from the profile under the siding is mounted according to the following scheme:
- We begin installing the profiles from both edges of the wall - they will serve as guides for leveling the plane.
- Using a hammer drill, we drill holes according to the markings on the wall. We insert plastic dowels into these holes, after which we fix the brackets for the profile, or metal hangers.
Installation diagram
- If you plan to insulate the facade, then before installing the main profiles it is necessary to install slabs of heat-insulating material. To do this, we cut holes in the slabs opposite the brackets and put the slabs on the fixed brackets.
- Using the same technology, a windproof membrane is placed under the sheathing.
- We attach profiles for the sheathing to the outer brackets. We stretch a cord between them - we will use it to align the remaining profiles.
- We continue to install the frame elements. To add rigidity, we connect the main profiles of the sheathing with perpendicular jumpers from scraps of the same profile.
- To attach the vertical sheathing, you may need a 28x27 mm profile. We will use it as a starting profile into which we will insert the ends of the main profile.
Metal sheathing The installation of sheathing for siding must be completed by checking the resulting plane. For control, you can use a water or laser level.
Installation of timber sheathing
As we noted above, wooden sheathing for siding is somewhat cheaper: almost anyone can do it with their own hands, so you will also save on labor costs for craftsmen. The wood for sheathing must be thoroughly dried and treated with an antiseptic. In addition, it is better to choose even beams, since even a slight curvature of the tree complicates the work and makes it difficult to align the sheathing.
Assembling the wooden sheathing Installation of the sheathing under the siding is done as follows:
- We cut the beams for the sheathing in advance, so that the length of the beam matches the dimensions of the wall. If the length of one beam is not enough, you will have to join it, which is undesirable.
- We begin fastening the beams in the same way as when installing metal sheathing - by installing brackets. We apply the sheathing beams to the brackets, align them on a plane and fix them with self-tapping screws.
- If insulation of the space under the siding is not planned, then it is possible to attach the sheathing directly to the wall. When fastening in this way, the bars are drilled through with a hammer drill, and then attached directly to the wall through these holes. To level the sheathing, we use wooden or plastic mounting wedges.
Selection of lathing material
The material for the sheathing should be selected based on financial capabilities and preferred service life.
Wooden blocks
Straight and smooth slats, without various defects, with a cross-section of 20x20 mm are suitable for lathing. There will be no particular difficulties during installation, since they are easy to process and can be secured in any suitable way.
To prevent mold or mildew from forming on the surface, you need to apply several protective layers: antiseptic and varnish or paint.
In addition, it is recommended to use hardwoods such as acacia, beech or aspen, which are resistant to high humidity and have high strength.
The service life of the structure, provided the optimal humidity level is ensured, will be up to 5 years.
Metallic profile
Provides high structural strength. All elements have standard sizes and therefore there is no need to adjust them.
Besides:
- The profiles are highly protected from moisture and elevated temperatures, so their service life can be up to 15 years, provided that there was no damage to the outer layer during installation.
- The products have significantly less weight than when using wood, and therefore do not create critical loads on walls and ceilings during their installation.
Also interesting: How to grout the seams of ceramic tiles in the bathroom
The cost of installing metal profiles will be minimal, so this option is optimal in terms of price/quality ratio.
Plastic elements
This type of lathing material appeared relatively recently, so it is not widely used.
Plastic structures have maximum protection:
- from moisture;
- from mold;
- from pests.
They are distinguished by extremely simple installation due to clip connections. No additional processing, adjustments or protective layers are required.
Plastic slats have plasticity, so they can take the shape of a wall.
However, this does not mean that the installed PVC panels will be installed crookedly or skewed, since the advantage of the clips is the inability to respond to such installation errors.
Plastic slats can be installed on any type of ceilings and walls. The disadvantages include their high cost and relatively low strength.
We recommend reading! Collection of 3d PVC panels for the bathroom
Marking and installation
Be sure to use a level when marking.
Lathing made in a single plane is the key to a high-quality plastic-lined wall.
The most significant advantages of finishing walls with plastic panels include the ability to carry out installation without first leveling the rough base. The wall and ceiling may have significant unevenness and roughness. However, this does not mean at all that you will not have to carry out high-quality measurements and bring the sheathing into a single plane.
In multi-storey buildings, the same height of walls at all points in the room, as well as right angles, are the exception rather than the rule. Therefore, with the help of panels it is necessary not only to decorate the surface, but also to give the room the correct geometric shape.
Fastening PVC panels to the ceiling
To begin, mount the installation profile by attaching its large “shelf” to the guide rails using self-tapping screws. It can be installed both around the entire perimeter of the room and in the places where the starting and finishing PVC panels are attached.
Fastening PVC panels to the ceiling
Now you need to cut the PVC panels according to the previously developed plan and markings. Many experts advise making the length of the sheet slightly shorter than the width of the room, since polyvinyl chloride can expand even at low temperatures, which means that installation “back to back” can lead to future deformations of the suspended ceiling.
If you are planning to make built-in lighting for a suspended ceiling, it’s time to make cutouts for lamps in PVC sheets.
Installation of spotlights in a ceiling made of PVC panels
Once the material is completely prepared, you can begin attaching the first (or starting) panel. To do this, you and an assistant need to insert the launch panel into the installation profile from the side of the mounting shelf, and then secure it with self-tapping screws on the rails. At the same time, make sure that they do not go too deep into the PVC, otherwise there will be a risk that the screws will damage the sheet.
Next, carefully “join” the next panel using the mounting shelf with the starting one, and secure it with the fasteners. Thus, the PVC panels are fastened to each other one by one. They should be connected to each other with great care to prevent damage. Also, no gaps or cracks should be left; PVC panels must fit tightly to each other. If necessary, you can make an “adjustment” using gentle blows with a rubber mallet.
Installation of panels with self-tapping screws
Before installing the last PVC panel, measure the remaining uncovered ceiling space with a tape measure - often the plastic panel does not fit there completely, so it needs to be cut. At the same time, make sure that the cut is as smooth as possible, and there should be no gaps between the finishing PVC panel and the installation profile.
Scheme for gluing ceiling plinths
The final stage is to glue the ceiling plinths onto the glue. After this, the suspended ceiling made of PVC panels can be considered complete. Then you can install lamps, decorate walls and remove construction waste.
Video - Making a ceiling from PVC panels
As you can see, attaching PVC panels to the ceiling is a fairly simple task that does not require much knowledge and experience in construction from you. Therefore, for self-finishing a room and, in particular, a ceiling, plastic panels are the best possible option.
How to make a beautiful corner from a PVC panel
PVC corners turn out beautiful and practical if you bend them. They do it as follows. Measure the distance from the previous panel, which is already installed, to the corner. Place a mark and draw a line along it with a pencil. Next, use a sharp knife to cut 1.5-2 cm from the line to the right and left. In this case, the knife is placed at an angle of 45 0 and is not recessed too much, so as not to completely cut through the panel. As a result, when the panel is bent, a rounded corner of 900 is obtained. In this case, there will be no gaps or fallen off corners. This method is used when installing boxes and turns.
Important! The inner corners are slightly foamed so that the casing holds more firmly without dips and dents.
Required materials and tools
To avoid downtime during the installation process due to searching for missing parts, you should prepare all the necessary tools and materials in advance. For work you will definitely need:
stepladder or stable bench; level or laser level; screwdriver or screwdriver; hammer drill or impact drill; It is important to make sure in advance that you have the necessary plumbing tools; pencil for marking; tape measure or meter; grinder or hacksaw.
The following materials are used for installation of the sheathing:
- wooden blocks;
- galvanized profile;
- plastic guides.
Each of these samples is quite easy to install and has proven itself during operation. There is no single recommendation on how to choose the right material for installation; preference should be given based on your financial capabilities or available remnants from previous repairs.
What will you need?
To install the sheathing you will need:
- portable circular saw;
- hacksaw for metal;
- cross saw;
- knife-cutter;
- roulette;
- rope level;
- metal carpenter's hammer;
- level;
- pliers and crimping pliers;
- a screwdriver or hammer with a nail puller.
Preparing the wooden beam
The calculation of the quantity depends on the selected distances for installing the timber, the number of windows, doors, and ledges.
Let's talk about the choice of size and material in more detail.
Wood lathing is mainly used for finishing dilapidated or wooden houses, and less often for brick houses. Wood frames are more often used to install vinyl siding. The cross-section of the bars can be different: 30x40, 50x60 mm.
If there is a large gap between the wall and the finish, timber with a thickness of 50x75 or 50x100 mm is used. And for insulation, you can use a strip that matches the thickness of the insulation itself.
The selected timber must withstand the siding. It must be dried, the length and cross-section must correspond to the documents, smooth, as few knots as possible, and no traces of mold. Preference should be given to wood species that are resistant to moisture, such as larch. Dry planed timber does not move or twist; the siding will lie flat on it.
The length of the beam must match the dimensions of the wall. If they are short, you will have to dock them.
Preparing fasteners
Purchase self-tapping screws with the appropriate length or dowels if you need to attach the sheathing to a wall made of concrete or brick. It is required to prepare wooden blocks for mounting to the wall of the house.
Features of installing plastic panels on the ceiling
Now let's look at ways to attach plastic panels to the ceiling. Before installation, you need to determine the distance between the panels and the ceiling. This gap will depend on the type of lighting. If you plan to install built-in lamps, then the distance should be at least 10-15 cm, so you can completely hide the wiring. Mark the locations of the lamps in advance with a pencil, cut out the holes and install the lamp bases.
Metal lathing for mounting plastic panels on the ceiling in the bathroom.
Next, you perform the same steps as when installing the panels on the walls. In a room with a flat ceiling, you can do without lathing. Install the ceiling plinth on three walls before starting work. Use a building level to position the panels evenly.
When installing plastic panels in a room with high humidity, fill the ceiling gaps with silicone sealant to achieve complete waterproofness.
Calculation of materials for the frame
Do not forget to calculate in advance the required amount of materials.
Any construction and installation work begins with preliminary calculations of the required materials and drawing up an estimate. Regardless of the materials used, the installation process and layout remain unchanged.
To assemble the sheathing, on which the panels will not bend or sag, you will initially need to install profile frames (bars) along the perimeter of each wall, and only then install the transverse slats.
Please note that the installation of slats around the perimeter of window and door openings is also a prerequisite.
- Before making the sheathing, measure the height and width of the walls, as well as the perimeter of the doors and windows. You will also need these measurements to calculate the required number of plastic panels.
- The specific gravity of the panels allows you to assemble the sheathing with a pitch between the slats of 50 cm or more. The distance between them depends on the quality and thickness of the plastic. The more durable the material is supposed to be used, the larger the gap can be left.
- On a wall 250 cm high, you will need to fill the frame around the perimeter and place 4 transverse slats in it every 50 cm or 3 slats every 62 cm.
- To attach the slats to the wall, use self-tapping screws (for wooden or adobe surfaces) or dowels and nails (for concrete and brick bases) with a pitch of 20–30 cm between them.
Based on the measurements obtained, you can easily calculate the required amount of consumables.
Material used for installation of sheathing
Since the lathing performs two main tasks - the basis for fastening the panels and creating a flat surface for them, the material for it must be strong, stable and durable. Today, the construction industry offers fasteners in order to mount the ceiling sheathing under plastic panels made of:
- Tree.
- Become.
- Plastics.
Each of them has its own pros and cons. More about this. Wood is the most popular material for making ceiling lathing under PVC panels. This material has proven itself over many years of use. The tree is characterized by:
- strength;
- durability;
- pliability and ease of processing.
With appropriate processing - resistance to rotting, burning and mold. The negative qualities of wood include its ability to change shape when drying. Considering that the PVC panels are attached rigidly to a wooden frame, if the rail moves, this will cause the surface of the plastic to bend. Steel profiles are a great success among builders due to the positive properties of this material, such as:
- high strength;
- durability;
- possibility of manufacturing structures of any complexity.
The disadvantage of steel products is their lack of resistance to corrosion, which in damp rooms can lead to the appearance of dirty streaks on the plastic. Cost is also not the least important. The ceiling lathing for plastic panels, made of plastic, is characterized by:
- precision of forms;
- possibility of use for laying electrical wires;
- immunity to corrosion, rot and mold.
Plastic profiles have a fairly high cost and a narrow range of applications. In addition, they will not be able to withstand heavy weight.
Tips for choosing
Universal advice is to ask the seller for a package of accompanying documents. But it always works: either the seller does not show invoices and certificates, then substandard goods are sold under the guise of one batch of good goods, or the consumer is embarrassed to defend his rights. There are several external signs by which you can most likely distinguish a counterfeit from a licensed product.
It is best to buy PVC panels in large construction stores, where all products are licensed
Table. The main differences between high-quality and low-quality panels
| Name of criterion | Quality panels | Low grade panels |
| Number of stiffeners | 29 pieces at perfectly equal distances from each other | 20 pieces, you can notice the unevenness of the step by eye |
| PVC thickness | 2 mm | 1.5 mm |
| Linearity Options | All surfaces are smooth, the planes do not have depressions or bumps | Traces of shrinkage are clearly visible on the surface. Excessive shrinkage is explained by the use of low-quality secondary raw materials for production. |
| Mechanical strength indicators | The panels bend and can withstand relatively heavy physical loads. After removing the stress, the panels completely restore their original performance. | The strength of the panels does not allow them to bend; the thin side strips for fixing the lamellas are very fragile and often crack when driving in staples. The plasticity of the panel surface is minimal. |
Good quality panels have a uniform pattern, straight cuts, stiffeners are located at the same distance from each other
Soft sheathing
Double-sided foam tape
Installing plastic panels over a soft sheathing seems flimsy, but in fact it is precisely these sheathings, which came out of the hands of the greenest but neatest beginners, that last for 10-15 years without signs of damage. Why? The soft sheathing is made of double-sided foam tape, see fig. In terms of thermal deformation properties, it exactly matches PVC, and its adhesive layer is very viscous and elastic: it stretches behind the board and then returns it to its place.
For soft sheathing to be truly reliable, three conditions must be met:
- Clear the wall of wallpaper, paint and level it with a rough, durable putty (Hercules, Prospector, etc.) to within half the thickness of the tape, 2-4 mm. Sharp small protrusions and depressions are acceptable, so puttying, which is already not difficult, is even easier.
- Stock up on a high-quality finishing profile; without it, sheathing over soft sheathing cannot be done. However, see the penultimate section.
- Reduce the contact time of the adhesive layer of adhesive tape with air as much as possible, up to an instant. This is something we need to talk about in more detail.
Installation of sheathing
The lathing scheme is the same as for the others. It is better to take the width of the adhesive tape from 25 mm, and best of all – from 60 mm. Technology:
- From the initial end of the tape in the roll, 300-350 mm of the upper (outer) protective tape is removed, and the tape with the bottom tape is cut off, as shown in the figure;
- The master (it’s him!) presses the initial end against the wall, and the assistant pulls the final strip;
- The master peels off the lower (adjacent to the wall) end of the protective tape and carefully pulls it out from under the tape, immediately pressing the tape against the wall;
- At the final end, a tail of the upper protective tape of 100-120 mm is left;
- The remaining strips of tape are applied in the same way.
Installing profiles
The principle is the same - the shortest possible contact of the “bare” tape with the air:
- The long tails of the protective tape are pulled back and the strips are stuck to the “back” with ordinary, narrow and cheap stationery tape;
- Apply the upper installation profile (horizontal), carefully pull out the protective tape from under it by the tail, immediately attach the profile with pressure, and an assistant supports it;
- The lower installation profile is also glued;
- The starting profile (vertical) is applied, the assistant holds it, and the master one by one pulls out the protective tape from under the profile, immediately pressing the profile to the tape, the operation proceeds from the bottom up so that the profile does not hang on the tape even for a short time;
- The finishing profile is also installed.
Panel installation
The panels are mounted similarly to profiles, but with some subtleties:
- You need to cut to size very cleanly and precisely to avoid jamming.
- The next panel is brought into place by hand using two ends in agreement; You cannot use a mallet and rule.
- After installing each board, the tails of the protective film are re-glued, and those that are too long so as not to interfere with work are cut off.
Step-by-step installation instructions
The installation process is divided into several stages, pay due attention to each of them.
Step 1. Installation of the sheathing. The structure is made of wooden slats with a cross-section of 20×40 mm, the walls are lined with foil polypropylene foam insulation 4 mm thick. By using this layer, it is possible to reduce heat loss from the premises and provide additional sound insulation. Additionally, the foil reliably protects the wooden elements of the sheathing from the negative effects of high humidity.
Lath lathing is mounted on top of foil insulation
During the manufacture of the sheathing, the following rules should be followed.
- The slats are fixed to the wall with self-tapping screws or dowels; the specific choice depends on the material of manufacture.
- The sheathing must have a perpendicular direction to the location of the plastic panels. In our case, they are vertical; the slats should be fixed horizontally.
- The distance between the elements of the sheathing is no more than 50 cm; the thinner the lamellas, the smaller the distance should be. The fact is that the lamellas cannot withstand significant forces and, under their influence, are greatly deformed, and this causes a violation of the fixation strength.
- Before starting work, the horizontalness of the wall is checked; if necessary, wedges are placed under the slats to level the position. Each wall is checked with a bubble level.
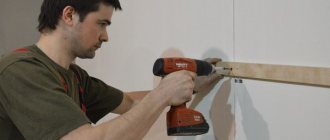
The slats are fixed with self-tapping screws
At the bottom, the slats are nailed at a height of no more than five centimeters from the floor; not only panels, but also baseboards will be fixed to them. The same slats are installed at the top for attaching ceiling decorative elements. All window and door openings around the perimeter are also covered with lathing; this is a mandatory installation requirement; the slats should not sag.
Slats are also placed around the perimeter of the openings
Practical advice. For wet rooms, it is strongly recommended to impregnate the wooden elements of the sheathing with antiseptics; they quite effectively protect them from the negative effects of moisture. The specific names of the impregnations do not matter; they all meet existing requirements.
Step 2. Installation of the first panel. This is a very crucial moment; if the starting lamella is incorrectly laid, the accuracy of finishing the entire surface of the room is disrupted.
- Replace the inner or outer corner depending on the location of the first panel.
- Push the lamella into it and very carefully check the vertical position using the level.
- Secure the panel with a self-tapping screw with a press washer, a nail or a stapler. The latter option is preferable to the former; it is much simpler, lighter and faster.
Attaching the first panel
Step 3. Installation of row panels. After attaching the first one, you can easily put the next ones in place. If the lathing is made according to the requirements of the instructions, then no problems should arise during installation work. The panels are snapped into a special groove along their entire length, and the connection to the sheathing is made in a similar way.
The edge of the panel is inserted into the groove and snaps into place
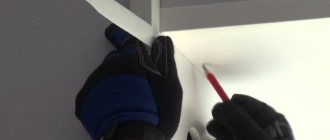
Step 4. Finishing windows and doors. In these places the panel must be cut. This is done in several steps.
- Take exact measurements, draw on the panel the area that needs to be cut.
- Using a sharp mounting knife, carefully cut the panel along the contour, do not allow burrs, work carefully.
- Using a hacksaw, cut off the selected section of the lamella and remove it. Experienced craftsmen often use a grinder instead of a saw; it speeds up the process much more. But for this you need to have practical experience; if you lack it, you can not only completely ruin the panel, but also get very serious injuries.
Carry out panel cutting
Place the prepared panel in place and attach it. If everything is done correctly, it will fit the first time, no final adjustment is required.
Installing the finished panel in place
Step 5. Installation of the corner profile. This element is used to improve the appearance of the wall. The wide side is inserted under the panel, the narrow side is located on the front surface. Next, the profile is fixed on one side with self-tapping screws and press washers. Continue inserting panels into the attached element and completely finish the adjacent wall of the room.
Installation of the final profile
Step 6. Installing the last panel. Most often, it needs to be cut to width; this is done with an ordinary mounting knife under a metal ruler or wooden strip.
The last panel can be cut if necessary
Carefully snap it into the groove of the previous lamella, constantly monitoring the position.
Step 7. Installation of the F-profile. It is used at the junction of slopes with panels and covers uneven open honeycombs. The profile is placed on the skin and pressed until it stops.
A profile is installed around the perimeter of the openings
This completes the wall paneling. Check the strength and correctness of fixation again.
Installation of suspended ceiling with insulation
A suspended ceiling covered with clapboard or plasterboard allows for additional insulation of the structure. How to make a lath for a ceiling with insulation, the stages of work for installing such a ceiling are performed in the following steps:
- make markings on the ceiling for installing part of the frame, taking into account the width of the heat-insulating material;
- The lathing made of wooden elements is attached to the main ceiling with screws;
- The metal profile is secured with hangers. This design allows the frame to be lowered to a distance that takes into account the thickness of the insulation;
- strengthen the insulation between the bars;
- mineral wool is distributed over the entire ceiling area without gaps. Insulation in the form of strips and blocks is installed using polyurethane foam. It fills the gaps between the frame and the insulation block;
- The vapor barrier film must be mounted on top of the insulation. The vapor barrier is secured to the wooden sheathing with a stapler. Scotch tape is used on the metal profile.
Correct execution of all stages of work will result in a house or apartment with ideal living conditions in cold or hot weather.
Installation work
Installation of lathing in the bathroom for installing PVC panels begins with markings. Take two guides and attach them parallel to two opposite sides of the wall or ceiling.
Then, in the places where the structural elements are attached, threads are pulled, which will serve as a reference point for the zero level. If the walls are smooth, then this stage consists of simply drawing lines with a marker on the plane at the locations of the guides.
If there is high humidity in the bathroom and in order to prevent the appearance of dampness on the walls, it is recommended to lay a vapor barrier layer before marking.
How to carry out further work:
- A metal or wooden sheathing is installed, starting with the installation of guides from left to right along the wall or from the corner opposite the door.
- The first plank is placed in a strictly horizontal or vertical position, depending on the type of structure, and then fixed on both sides with dowels or screws.
- After this, additional fasteners are screwed in at intervals of 30-40 cm.
- Then take the next guide and install it in the same way. This method is used to install all the elements of the sheathing.
The plastic sheathing is attached to a special tape or an adhesive base. In this case, you need to clean the surface of the wall or ceiling from dirt and grease in advance to improve adhesion.
Types of plastic panels for wall decoration
This type of finishing material is made from PVC - polyvinyl chloride. In a semi-liquid state, this polymer is squeezed into a mold. A drawing is applied to the finished panels. It can be first printed on film, then glued and varnished (laminated panels). Moreover, these panels may not have a smooth, but a textured surface. The design applied using this technology retains paint for a long time, but similar materials cost about twice as much.
Several samples of laminated PVC panels for wall decoration
Another technology is to apply the design directly to the plastic, then cover it with two layers of varnish. Cheaper technology, but the service life and quality of the drawing are lower.
Ceiling and wall
There are two types of plastic panels - for ceilings and for walls. Those intended for the ceiling have a thickness of 5 mm and thinner partitions, and those for walls have a thickness of 8 to 10 mm and thicker walls and partitions. You can determine which species is in front of you by looking at the cut. This type of finishing material is distinguished by the fact that it has a smooth surface and, when joined tightly, the seams are not very noticeable.
Plastic panels for wall decoration
There is another standard size, which is also called plastic lining - with a thickness of 10 mm, the panel has a width of 10 cm and shaped edges that are more characteristic of plastic lining. If you decorate the walls with this material, the surface will not be flat, but embossed, similar to wooden lining.
Sizes and prices
| Title/photo | Parameters (width/length/thickness) | Type of staining | Manufacturer | Price for 1 panel |
| Pink violet | 250 mm * 2700 mm * 8 mm | V-Plast, Russia | 120 rub. | |
| Kanamala | 250 mm * 2700 mm * 9 mm | lamination | Vivipan | 220 rub. |
| PVC Panel Mosaic Turquoise | 950 mm * 480 mm * 3 mm | Russia | 128 rub. | |
| Scarlet | 250 mm * 2700 mm * 8 mm | Cronoplast (Russia) | 215 RUR |
Thin PVC wall panels
Above we discussed products that consist of two layers of plastic connected by jumpers. Along with a lot of advantages, they have a rather serious drawback: if you apply enough force, they can be pushed through. This is often the reason for refusing to use them. Therefore, thin plastic wall panels appeared on the market not so long ago. Their thickness is 3 mm and there are no cells. Only a layer of plastic with a pattern applied to the surface. Accordingly, there is nothing to push. The dimensions of this type of panels are 950 * 480 mm or so.
Their installation method is different - they are glued to the walls. Due to the fact that this finishing material has a very small thickness, it is cut with scissors and, moreover, takes up very little space from the room - 3 mm.
Preparatory work
Preparatory work consists of assessing the evenness of the walls and the need for their partial alignment.
Typically, in panel or brick houses, significant wall defects are quite common, caused by non-compliance with construction standards or caused by a long period of operation of the facility without major repairs.
Significant unevenness is most often found near the floor or ceiling corners of the bathroom.
You can estimate the size of unevenness using a laser level. If the size of the unevenness is more than 5 mm, then it is recommended to perform leveling by sanding the existing layer or applying a new one.
If there is no laser level, then you can use the traditional method: apply a flashlight to several points at the junction of the walls, mark the places of shading, and then level them.
There is no need to achieve perfect evenness - it is enough to obtain deviations of no more than 1-2 mm per linear meter of wall or ceiling.
To save money, you don't have to level the walls.
In this case:
- You will need to determine the most convex point on the surface using a laser level and take it as the zero level.
- Then make marks of the leveled plane on the perpendicular walls with a marker.
- During installation, you will have to mount the guides at the zero level.
- It is convenient to do this only when installing metal sheathing, since it is provided with elongated steel fastening brackets, which can only be bent to certain dimensions.
Also interesting: How to grout the seams of ceramic tiles in the bathroom
The disadvantage of this method is the loss of useful space in the bathroom.
How to make openings for windows and doors
To attach the plastic panel from the window to the corner, it is better to mount a horizontal profile. If the gap between the window sill and the wall is too small, then ordinary planks are used instead of a profile. They are glued to the wall using liquid nails. As the glue cools, additionally:
- foam the joints;
- When the material has set, the boards are attached to the wall using dowels.
The rail is installed vertically to the window in the same way.
To better fit the window, the panel is placed as follows. The part where the fasteners are screwed is cut off. This creates a beautiful factory edge. This edge is used to attach the panel to the window. That is, then there will be no need to design the joint, it will look complete. The other sides of the panels adjacent to the window can be trimmed:
- with cross-cutting with broach;
- on a regular tile cutter.
Door slopes are made in the same way.
Lathing for basement siding
If this type of cladding is planned to be used according to its name, that is, for cladding the base or under-pile space, it would be better if the siding sheathing is positioned horizontally. This refers to situations where the distance between the top and bottom of the plinth is within 20-50 cm. In the case of covering large surfaces, such as walls or gables, it is better to use the vertical arrangement of the slats.
For basement siding, it is more preferable to use a metal profile, at least when it comes to the lower part of the structure. However, cases of using wood also occur due to the well-known positive qualities of this material.
The method and procedure for installing siding depend on the presence of insulation. Source megapolis-sc.ru
Methods for arranging the structure depend on the specific situation and are determined locally, preferably by a specialist who will be directly involved in the installation.
DIY installation of plastic panels in the bathroom
If you have decided on the purchase and selected the appropriate panels, and you are going to carry out the installation yourself, then you need to carry out the preparatory stage, with measurements of the room. It is necessary to purchase materials in reserve. During work, damage to polyvinyl chloride sheets is possible. Therefore, it is advisable to purchase 10-15% more.
What do you need
Covering a bathroom with plastic panels begins with the preparatory stage. To work you will need the following tools and things:
- Building level or plumb line;
- Hammer or drill;
- Marker or pencil;
- Roulette;
- Hacksaw for working with metal;
- Construction stapler;
- Screwdriver;
- Marking cord;
- Adhesive or liquid nails.
Additionally, you need to purchase a ceiling plinth and materials for the frame if you plan to attach it to the sheathing.
Required set of tools
Marking walls and ceilings
Do-it-yourself installation is carried out with markings only if you plan to install a frame. If the walls are fairly smooth and you are going to use an adhesive for installation, then you can skip this step.
Ceiling markings
For lathing, it is enough to mark the places where wooden or metal profiles will be fixed. For walls, the distance between the planks should be less than 50 cm, for the ceiling, less than 30.
How to mount on the ceiling
Before starting work, you need to choose the distance between the sheets and the ceiling. If you need to install additional lighting, you will need to provide a distance of at least 10cm. To do this, you will have to assemble a full-fledged metal frame, which provides space for laying wires. Mark the locations of the fixtures with a marker or pencil, then cut holes for them and install the base parts of the fixtures.
Plastic panels on the ceiling
After which, the installation process repeats the work with the walls. If the ceiling in the room is flat, you don’t have to install the sheathing. Before work, attach the ceiling plinth to three walls. After each placed panel, check the condition with a level.
Ceiling mounting
If there is high humidity in the room, it is worth purchasing additional sealant to fill the cavities. This way you can protect yourself from moisture penetration and damage to the structure.
What is the best way to mount it on walls?
How to glue plastic panels to the wall in the bathroom? The best method for fastening is direct installation, without installing sheathing. However, this is only feasible in rooms with smooth surfaces and low humidity, which is rarely the case in bathrooms.
Finished bathroom finishingTherefore, it is necessary to install a sheathing or metal frame. Wood as a material does not withstand moisture well. After installing the frame, the sheets are secured with construction clamps, which greatly simplify the dismantling of the wall structure if the element has been damaged.
Installation in the bathroom
When installing a frame made of a metal profile, it is worth considering that the material expands when heated. Therefore, during adjustment you need to leave a gap.
How to sheathe faster
To fasten the facing materials faster, you can additionally prime small irregularities. Compared to the process of installing sheathing or frames, installation with glue is much faster. Therefore, get rid of the old tiles and level the walls. After which you can attach the cladding using liquid nails.
Bathroom plastic cladding
For faster installation, you can also use plasterboard structures, which greatly simplify the work.
Installation
Installing plastic sheathing is a simple process, but in order to cope with it as efficiently and quickly as possible, you need to know some installation nuances.
Features of installing lathing for PVC panels
When installing the frame, it is necessary to install the element strips at the same distance, which can be from 30 to 50 cm
It is very important that the slats are installed strictly perpendicular to the panel elements
In the case of vertical fastening of panels, the slats are installed horizontally. And, conversely, when installing panels horizontally, the slats are secured vertically.
Sheathing elements should be located at the beginning and end of the working surface, as well as around door and window openings. Installation of the panel frame does not require preliminary surface preparation.
To install the panels, the contractor will need the following tools: an electric drill, a screwdriver or a screwdriver, a building level, a plumb line, a miter box, a hacksaw, chalk, screws and a tape measure.
Installing a frame for PVC panels is rightfully considered the most important stage of their installation, since the aesthetic appeal of a surface made of this material will directly depend on the correct installation of the supporting structure and the straightness of the elements themselves.
When using lumber, you must carefully inspect it for cracks, knots, rot or any other damage.
When arranging the frame in a room with high humidity, it is necessary to make small cuts in the wooden slats, which will ensure normal air circulation and prevent deformation of the elements. It is necessary to start installing slats from the most protruding areas of the walls.
At the initial stage, it is necessary to mark using a tape measure, level and chalk. Then, using a plumb line and level, the first rail is installed and secured to the working surface with screws. If the working surface is far from ideal, then its leveling is done using wooden or plywood spacers.
As a rule, when installing panels, a free space is formed between the wall and decorative elements, which can be filled with any insulating material that provides a more comfortable temperature in the room.
Nowadays, the ease of installation work, a wide range of colors, affordable prices, as well as high performance and technical characteristics make PVC panels one of the most popular materials in the modern construction market.
Recommended by
How to properly install plastic panels on bathroom walls
In order to fix the panels on the walls, you can use two different methods, each of which is widely used today.
The first method is to install plastic ones along the sheathing, and the second is to use “liquid nails” glue directly on the wall. As you understand, panels can be attached to liquid nails only if the walls are fairly smooth, which is extremely rare. Therefore, the installation method with a sheathing device made of a plastic profile is more often used, to which PVC panels are attached. In addition, when installing the finishing using sheathing, under the sheathing you can hide electrical wiring, as well as pipelines supplying water to plumbing fixtures - toilet, shower, washbasin, bidet. Installing the sheathing does not require any special skills, and you can do everything yourself. The main thing is to check with a level and a rail whether it is mounted evenly enough. Let's look at how the installation is done step by step.
Selection of PVC panels
When purchasing such materials, it is necessary to pay special attention to their quality, since a PVC ceiling assembled from defective components will look untidy and may also emit substances hazardous to health. In order not to purchase a counterfeit made at home, you need to ask the seller for a certificate for the product. You should also inspect the panels for unevenness, foreign inclusions and snags.
You should also inspect the panels for unevenness, foreign inclusions and snags.
In order not to purchase a counterfeit made at home, you need to ask the seller for a certificate for the product. You should also inspect the panels for unevenness, foreign inclusions and snags.
Panel selection
The thickness of high-quality material should be 8-10 mm, the length usually reaches 3 meters, but if necessary, longer copies can be ordered.
In any case, it is almost impossible to distinguish high-quality material from low-quality material by eye, so it is best to purchase PVC panels in trusted specialized stores.
How to make a sheathing
From slats
The sheathing is a frame used for installing slabs. Using it, you can avoid such preparatory issues as leveling the surface to be finished. But it all begins with the procurement of material for the structure.
Lathing materials
Traditionally, the frame is made of slats with a minimum shape of 20x20 mm. The slats are chosen with smooth surfaces, without any flaws. It will be almost impossible to remove broken components from the assembled structure and replace them. Having prepared the slats, you can begin the step-by-step installation of the frame:
- First, the slats are conscientiously impregnated with antiseptic material;
- Then they are placed around the perimeter of the surface to be finished. A quadrangle of slats forms the basis for the frame;
- The plates are fixed perpendicular to the guides, placed at a distance of at least 50 cm from each other. Self-tapping screws are usually used for installation. The fastening pitch is no more than 400 mm.
Important! Using a special level, the frame slats are aligned parallel to the boundaries of the walls. To allow the rail to be fixed at a certain distance from the wall, you can use a butterfly mount.
Making the sheathing
Made from plastic components
A frame made of plastic boards is slightly more expensive than wooden sheathing for PVC panels. Its advantages include absolute immunity to fungi, quick assembly and impeccable design. Ready-made standard strips are equipped with a double-sided groove-to-groove lock. This makes assembly easy and gives a graceful beauty when finished.
Starting bar
Plastic is not subject to antiseptic treatment, so installation begins immediately with surface cladding. At the first stage, a plastic profile is installed, which is called “latten molding”, also known as “PVC mounting strip”. To increase the strength of the structure, in addition to plastic guides, side racks are mounted around the perimeter of the room. The strips must be perpendicular to the installed panels.
According to the technology, the clip-latches do not work at the slightest deviation of the panel - in this case, the entire structure must be redone. Such a frame is mainly installed in small wet rooms such as a bathhouse, steam room, where, due to high humidity, wood is not used for the frame.
Important! The quality of the plastic covering of the panels depends on several factors, including the installation of the sheathing. A rash decision or an unsuccessfully mounted frame should not be finished with plastic panels - such installation is subject to rework
PVC profile
Made of metal
Metal lathing under PVC panels can be mounted on any surface, including those with roughness and defective slopes. Metal profile battens for fastening plastic panels in wet rooms are considered very popular. Metal lathing under PVC panels is made in the same way as from wood:
- Install a starting profile along the walls or ceilings;
- Perforated metal guides are inserted into it;
- Plastic fittings are installed.
After installing the frame, proceed to the main installation as follows:
- the frame is attached to hangers, the optimal number of which for each profile is approximately 3-4 pieces;
- maintain a distance between profiles of at least 600 mm;
- level the frame with a building level;
- panels are attached.
At the corners of the walls, one profile is attached, installing them strictly according to the level. Then a strong twine is pulled between them and the remaining profiles are installed, focusing on the beacon threads and checking with a level.
The first panel is a little more difficult to insert than the next ones, because it is necessary for the panel to fit into all corners and baseboards at the same time. Correct and level the panel with a regular spatula. When the panel goes all the way, a characteristic click is usually heard.
Frame installation
What to make the sheathing for installing PVC panels from
Today, a common option for cladding a room is to decorate the walls of the toilet with plastic panels. A similar option is often used in the bathroom. We cannot ignore a few comments regarding the appropriateness of this decision. PVC panels, as the name suggests, are made from polyvinyl chloride. This polymer is not very stable; its use in the USSR was strictly limited. The breakdown process, called depolymerization, can be triggered by a number of factors:
high temperatures; mechanical deformations; ultraviolet radiation; aging.
Many videos on construction topics mention that finishing a sauna with polymers should not be done. One foreman even demonstrates what happens to polyurethane foam insulation when heated by an ordinary incandescent light bulb. In this case, harmful substances begin to be intensively released into the environment. Now let’s move on to how the interior walls are decorated with plastic panels in this case.
Creating a sheathing
Usually, when entering a store, the average citizen's eyes widen at the variety. Let's say that we are going to do the tiling ourselves in the bathroom. The question is, from what? In this case, it is logical to make the sheathing from metal profiles, and they come in basically two types:
The UD profile is a guide. In cross-section, this is the Russian letter P. This profile is laid out along the perimeter of the sheathing and serves as a frame into which the load-bearing one is inserted. The technology is extremely simple. If there is no cutter, then the nodes are fastened with self-tapping screws. The CD profile is load-bearing. Its shape is implied in the name. That is, in a U-shaped section, the ends of the legs are bent inward. It turns out "C". Due to this, the lateral strength increases. The CD profile is usually quite wide. The sidewall is tightly inserted into the guide.
Installed large panels
In addition, you will notice that guides and supporting profiles are available in several designs. In particular, can be found for ceilings and walls. They differ, first of all, in size. The wall profile is thicker and more durable. Which one should you choose? It would seem that the answer is obvious. There are instructions. For the ceiling we take a ceiling profile, and for the walls a wall profile. But in fact, there is one nuance (and even more than one) that we must discuss.
Sheathing for drywall usually consists of a contour, many vertical posts and crossbars between them. Something like a chessboard is formed (for moisture-resistant reinforced plasterboard, the side of the cage is no more than 60 cm). These are endless intersections. To make each cross, a part is used, called in the professional environment a crab. They are single-level or two-level. In both cases, quite complex technological operations will be required to carry out installation, which not everyone can do.
Decorative PVC panel
In the first case, the verticals are assembled row by row with the simultaneous installation of crossbars. That is, a vertical is installed, equipped with the required number of crabs, according to the number of bulkheads. The installation of the crossbars is also carried out here. You can perform the operation in a slightly different sequence, but in this case the legs of the crabs will have to be straightened first. As for two-level structures, there are no less problems here. In particular, you will have to bend the crabs in place in the required way and mount a supporting profile on them. In addition, self-tapping screws are used for additional strength. But is all this necessary when walls are being decorated with plastic panels? Let's get a look.
Installation of ceiling panels
To finish the ceiling, a frame is usually always made to level the surface and lay wiring for lighting. PVC sheets are cut to fit the length of the ceiling. Installation of PVC ceiling panels always starts from the corner of the room.
The parts are attached with self-tapping screws to the transverse profiles of the frame. Each subsequent panel should fit tightly into the groove of the previous one.
- During the installation process, holes are cut in the panels for lighting fixtures.
- It is not necessary to make them perfectly even, since spotlights are always equipped with decorative overlays.
- You can use a regular stationery knife to cut holes.
You can visually study the process in the video of installing PVC panels with your own hands. The main difficulty usually lies in installing the last sheet. Often it does not fit in width. In this case, you need to apply precise markings to the panel itself and cut it lengthwise.
After installation, the joints with the walls are covered with a special edging profile or foam baguettes. Ceiling plinths are mounted using liquid nails.
Installation of moldings and corners
After the sheathing is ready, the fittings and guides necessary to hide the corner joints of the panels are installed. The joint with the floor is covered with a PVC plinth; if desired, you can choose a model with a box for electrical wiring. To fasten the guides, you can use nails, mounting clips, and self-tapping screws. If the fastening is carried out on a metal profile sheathing, only self-tapping screws will do.
types of moldings and corners for plastic lining
Installation of wall panels
Installation of PVC panels on walls is carried out in several stages:
- Assembling a frame from plastic or metal profiles. Wall panels often weigh more than ceiling panels, so sometimes it makes more sense to use a metal frame.
- Install the first panel on the right side of one of the corners (left end of the wall). It is also allowed to start installation from the doorway.
- Installation of the remaining panels by fixing with grooves. The elements must fit tightly into each other, forming a strong locking connection.
- For additional fixation, special plastic latches and gluers are often used.
- Attaching the last panel. Its right side must first be inserted into a special decorative U-shaped profile.
- Next, the surfaces are finished - installing corners, cornices, skirting boards, etc.
If installation of electrical sockets is necessary, holes for them are made at the stage of installation of the panels. It is more convenient to install the socket box even before fixing the PVC sheet.
This way you can quickly and inexpensively clean almost any room. But, PVC panels should not be used in bedrooms, other living rooms and rooms where exposure to high temperatures is possible (sauna, bathhouse). When heated, plastic can release substances harmful to health.
Required Tools
To install PVC sheet panels you will need the following set of tools and accessories:
- Drill or hammer drill, depending on the material of the walls and/or ceilings.
- Saw for metal. Due to its fine teeth, it allows you to carefully cut PVC panels. You can also use a wood saw with fine teeth, but the cut will be less even.
- Roulette.
- Building level.
- A sharp knife with a fine edge.
- Hammer.
- A stepladder if you plan to install it on the ceiling or finish high walls.
- Self-tapping screws or special nails for fastening plastic parts. Frameless fastening can be done using liquid nails.