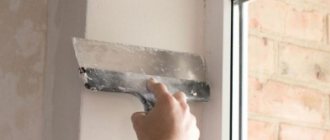
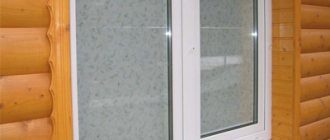
Plastic windows are now installed in every apartment or private house. They have firmly established their presence in the construction market and have become indispensable in the life of any person. For an impeccable appearance, you need not only to install the windows correctly, but also to properly process the slopes. At first glance, everything is quite simple, but when it came time to finish them, I encountered some subtleties. I decided to use the f profile for slopes and I want to tell you about the technology for using this plank. However, there are several more ways to finish window slopes.
F-profile for finishing the slope
Application of products
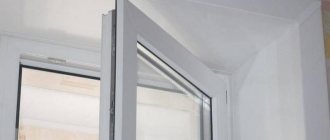
There are two types of slopes: one of them is located outside the building, the other is located on the inside. Both types require proper finishing. The slope is intended not only to give the windows an aesthetic appearance, it performs important protective functions.
Plastic windows are attached to the opening using mounting foam. It deteriorates under the influence of moisture and is gradually carried away by the wind, which is why it is important to install a slope profile that can protect the structure from adverse weather conditions. Otherwise, the foam may become deformed and damage the window frame.
Application of F-profile for finishing the external slope
Read more on our website about the types of platbands for metal-plastic window structures. How to finish the slopes of plastic windows with your own hands, see the link. We choose the most “correct” slopes for plastic windows. Prices for different types of slopes, consumer reviews
When replacing windows yourself, do not forget about installing sills for plastic windows.
How to screw a sill onto a plastic window. Types of tides for windows
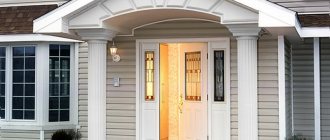
Any windows from the outside are equipped with a flashing - this is a special board mounted at the bottom of the window opening. It needs to allow rain or melt water to flow down it. This is probably why this part is sometimes called drainage.
Installing window sills is the final stage of proper installation
Window sills can be:
Plastic. Concrete. Stone (granite, marble). Facade tiles.
If you install the window sill correctly, the wall will not be damp
- Read more →
Finishing methods
There are several ways to tidy up your window. These may be the following options:
- Finishing with plaster. This method is quite old. Its main disadvantage is the complexity of the work. Plastering is time-consuming and requires careful cleaning of the area after finishing. When a house shrinks, it may crack.
- Application of drywall. This option is not bad, but it is only suitable for interior work. The room must be dry and warm, otherwise the sheet of drywall will begin to collapse.
- PVC profile for slopes is the best option. It is not afraid of moisture, temperature changes, is easy to install, and can be used both outside and indoors. This is an excellent solution for plastic windows, as it matches them perfectly in terms of material; the PVC F profile for slopes is very easy to install. It is quite possible to do this yourself. With other materials, for example, wood, the profile may not look so harmonious, although you can order wood lamination, and the differences will not be noticeable.
PVC profiles for slopes
Features of application
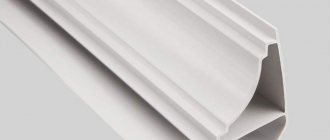
Finding out the desired profile is quite simple; it looks like the Latin letter “F”. The material is fixed using special plates that are fixed in its grooves. The starting profile for slopes has two important functions:
- Decorates the ends of windows, giving them a decorative look.
- Levels the surface without the use of complex structures and plaster.
Classification of starting structures
Starting forms differ from each other in cross-sectional shape. Plastic slopes are installed by analogy with constructors. All parts need to be unified as much as possible to make the design functional. Each part has its own function and purpose. Starting profiles for slopes are used to fasten plastic panels to the load-bearing base and join them to each other. They are made from both PVC and their metal.
Depending on the design, they can be designed for fastening decorative elements using different methods and in different parts of the opening. They are designated by letters. The following varieties are available on the market:
The I-profile has a cross-section in the shape of the letter I - one central shelf and two side ones. It is installed directly on the wall and plasterboard or plastic slopes are attached to it. Thanks to its special shape , such a part can be attached to the opening in almost any position.
The most common type of plastic starting profiles is the one made in the shape of the letter F. It is equipped with one long shelf and two short ones, which are adjacent to the long one at one edge.
Using these forms you can install slopes made of various materials. For example, sandwich panels, PVC, wood-based composite materials or plasterboard sheets.
The design of this profile allows it to perform two functions at once:
Thanks to the second narrow shelf, you can close the joint of the facing panel without the use of putty, decorative corners and other additional elements .
Using the L-profile, you can install standard plastic or plasterboard slopes with a thickness of 10 mm. The section includes three shelves - one wide and two narrow. It should be fastened perpendicular to the window plane, while the wide shelf will be adjacent to the wall of the opening, the narrow shelf will be adjacent to the window frame, and the long narrow shelf opposite is used as a mask for the joining seam where the panel fits. And the U-profile in terms of use and design is similar to the previous one, but the difference is that such a part has two wide shelves, which are connected by a narrow one. It can be used to cover uneven or wide seams.
Ready solution
The F-shaped profile for slopes is a convenient solution for cladding. It creates a perfectly flat surface, free of imperfections, protects the opening from moisture and sunlight, as well as wind, dust, and other mechanical influences.
The starting profile is attached to a plastic window without the use of glue. The design not only helps to make the slopes visually attractive, but is also perfect for places where different materials meet. The starting profile is most often mounted in this way: one side of it touches the wall, the other touches the plastic structure. If the size of the material does not correspond to the required parameter, it can be cut using a stationery knife; for the same purpose, a grinder or a metal file is sometimes used.
Varieties
In addition to the starting one, there are other types of moldings. F-shaped is used when it is necessary to beautifully “close” the joining of the ends. For example, these could be corners where two sheets of PVC, windows or doors, or other slopes meet, or they could be joints of two different materials, for example, plastic panels and wallpaper. In other words, it is used when moving to another plane. Judging by the name, you can guess that this connecting profile is shaped like the letter F.
The next mounting molding - connecting - is selected in situations where two panels need to be connected to each other. For example, when it turns out that the height of the panel is much smaller than the walls, and you have to “grow” it. This profile resembles the letter H and is therefore also called H-shaped.
External corner, as the name suggests, hides the places where the panels form external right angles. The outer corner is considered to be the outer corner. The internal corner, in turn, masks the joining of sheets in the internal corners, which are always straight.
A general-purpose universal corner has approximately the same characteristics as a decorative corner. It is available on the market in several sizes: its sides can be from 10 to 50 millimeters. It is used to hide those places where the panels meet at right angles. This molding can serve both external and internal corners; thanks to its design, it bends in the desired direction.
Galtel, also known as ceiling plinth, is used at the joints of the ceiling and the upper edges of PVC panels. It masks this transition and adds completeness to the overall picture. This molding can be colored and thus fits perfectly into any interior. In addition to the fillets, you can also find profiles at the top called external corners. They are used when peculiar protrusions are created at the top, for example, columns or beams. Finally, interior corners on the ceiling are mounted where the walls form the interior corner.
If necessary, the ceiling plinth is supplemented with a connecting element. This detail secures two skirting boards together when one is simply not enough. It is worth noting that the length of a standard plinth is 3 meters, but in large rooms this may not be enough. Guide rails for sheathing, according to some experts, are also considered a type of profile. The purpose of this element is to simplify the installation of PVC panels. If the sheathing, like the sheets themselves, is made of plastic, then they are connected using special clips.
Finish molding, as again you can guess from the name, is used to secure the last panel. It “completes” the entire structure.
Advantages
The starting profile for PVC windows has several obvious advantages:
- Ability to resist ultraviolet radiation. The profile does not fade even for ten years.
- The material is durable, looks good, and can fit into any interior without standing out.
- Suitable for use both indoors and from the facade.
- Moisture resistant.
- The chalk content in the composition is minimal.
- The semicircular end of the tail allows you to lay the profile on the most uneven wall.
- Hides wall imperfections, levels slopes without the use of other materials.
- The plank can be safely cut, no chips or cracks will appear on it.
- Installation is carried out independently; this does not require special skills.
- No glue is used.
Fastening sandwich panels to special brackets for slopes
The difference between this method is that to fasten the panels, brackets are attached to the end of the window frame, which, instead of a “U” shaped profile, hold the base of the panel to the frame.
Installation of slopes made of sandwich panels with fastening to special brackets.
Positive features of this fastening method:
- The slopes look aesthetically pleasing and beautiful.
- Installation time is reduced.
A negative feature of this method is that if there is strong pressure on the base of the slope in a place where there is no bracket, the slope may come off the frame.
Despite this nuance, preference is given to mounting slopes on brackets, because the desire to improve the appearance exceeds the desire for reliability!
PVC windows and slopes
The starting profile for a PVC window sill is ideal, but it can be used not only with it, but also if the walls are made of sandwich panels. The material will help protect the inside of the panel, easily attach to it and last a long time.
Do not put the profile on glue. This action will cause it to crack when exposed to low temperatures and begin to leak moisture.
PVC fabric that is too cheap may also be excessively soft. This will make it fragile. The soft fabric does not last long and is not suitable for outdoor use. It easily deforms from any touch.
You should not save on materials; once you save and purchase low-quality PVC panels, you risk not only spending extra money on replacing them, but also incurring more serious costs if the window frame is deformed.
Have you replaced your plastic windows, but decided to make the slopes yourself? Read our article “Finishing window slopes inside an apartment.” Read prices for different types of slopes, consumer reviews, and how to choose them correctly in our article “Choosing the most “correct” slopes for plastic windows.” When completing the finishing yourself, do not forget to insulate the slopes of plastic windows.
Preparatory work
Before installing slopes on windows, it is necessary to carry out preparatory work related to the preparation of walls. This work is not long, but it is necessary. After dismantling the old window, a lot of dust and dirt remains, which must be swept away with a broom, or better yet, removed with a vacuum cleaner. In some cases, it is necessary to knock down old plastered slopes, because they can interfere with the correct installation of new ones. It may be necessary to plaster the cracks between the bricks with a thin layer, because in old houses cold air from the street blows very strongly from these cracks! After this, the surface must be treated with a primer or plain water.
The most common methods of installing plastic sandwich panels for slopes is mounting on a U-shaped (starting) profile.
Photo of a “U” shaped (starting) plastic profile for installing slopes on windows.
And fastening to special brackets for slopes.
Photo of brackets for installing sandwich panels on plastic windows.
What is required for finishing
The starting profile is the main component. If the window is standard, you will need 6 meters (the fact is that the panels are sold in lengths of 3 and 6 m). In addition, you will need a drill or screwdriver, as well as metal cuts.
The F-profile is attached using liquid nails. Before its installation, a starting profile is attached. This is easy if the windows are level. Pay attention to the joints: they must be cut to fit exactly together. You need to start work from the side slopes. Insulation can be placed between the wall and the profile.
The most affordable and easy to install is the plastic profile for slopes. It will significantly reduce your costs, save time and money.
Docking profiles
Corner profile 3 mm
Name
: PR SC003 Angular profile for 3 mm, anod., 6.1 m, 1.64 kg.
The profile is used for installation, joining at 90° of Composite panels and sheet materials with a thickness of 3 mm, as well as for constructing three-dimensional forms.
Widely used in construction, design and advertising production.
H-shaped profile for 3 mm
Name
: PR SH003 H-shaped profile for 3 mm, anod., 6.1 m, 1.36 kg.