In a building's design, the space for a window is called a window opening. During construction, to save time, the installation of windows is carried out after the construction of the main load-bearing structures of the building. For houses built using monolithic frame technology, the insertion of frames is done after the building is completely constructed.
Before installing the double-glazed window, the opening looks like this:
- below there is solid brickwork 50-70 cm wide;
- on both sides of the opening there is a brick wall;
- There is a concrete floor beam at the top.
On both sides of the opening, there is a small protrusion of brickwork on the outside. The same protrusion is also present on the concrete beam located above it. This design allows you to insert the frame and make it securely fixed.
The supporting frame of the glass unit is inserted from the inside of the opening. It is 4-5 cm wider and higher in size than the outer size. This allows you to securely fix the frame during installation and ensure a tight fit of the box to the brickwork.
During installation, the structure is first fixed using wedges, then fastened with anchor bolts. And after this, the voids are sealed with mounting foam, which securely fixes the window to the wall.
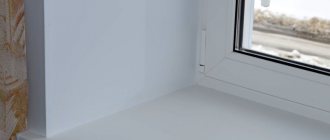
After installing a metal-plastic window, the inside of the opening - the window slopes - remains unfinished.
The need for interior decoration is not only an aesthetic issue. Having untreated brickwork inside an apartment is not entirely pleasant. Yes, and it’s never superfluous to insulate the window. A window, even with a three-chamber double-glazed window, will constantly fog up due to cold bridges formed along the entire perimeter of the opening.
Tools and materials
To finish slopes using sandwich panels, you need to prepare the following:
- A tape measure, a level, a pencil and a sharp mounting knife or grinder;
- plastic U-shaped and edging profile, liquid nails + construction gun for tube;
- rule and miter box;
- screwdriver and screws;
- liquid plastic or white sealant, primer for concrete bases + brush and antifungal agent;
- plaster mixture + spatula (if the slopes are uneven), a construction float or a block with medium-grain sandpaper, a construction mixer and a drill.
Advantages of finishing with sandwich panels over other types
Finishing slopes with sandwich panels is an excellent solution that has many more advantages than using other types of finishing materials.
- Window finishing with gypsum plasterboards. This option is considered quite labor-intensive. It is convenient to work with sheets of plasterboard when you plan to cover walls or construct a frame. Otherwise, you have to purchase much more material than is needed for the window slopes.
- Using plaster. This method is loved by many due to the fact that it does not require any special financial costs. But it must be taken into account that finishing areas using solutions is a very labor-intensive process. If you don’t have certain skills, it’s almost impossible to create a smooth surface. Also, we must not forget that the work is accompanied by dust and dirt.
- MDF products. Of course, they perfectly imitate natural materials, for example, cut wood, but using them for cladding plastic windows is not quite the right decision. After all, you need to take into account that the products must be combined with each other.
Indeed, sandwich panels for installing window slopes are an option that deserves special discussion. Although many have not yet appreciated the advantages that this material provides.
What methods of slope treatment are used today?
Several construction technologies are used to finish slopes. Each method solves the issue of thermal insulation of a window unit in a different way. For some materials, additional layers of polystyrene foam or stone wool are used, others, for example, sandwich panels do not need such an addition.
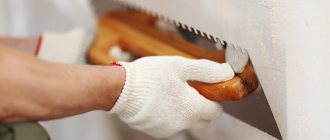
The most common method of sealing is plaster or putty. The disadvantage of the method is also manifested in the fact that the plaster can be applied in one pass in a layer of 1.5-2 cm. The drying time of one layer is 24-36 hours.
The method of installing plasterboard sheets significantly reduces work time, and the surface is even and smooth. The disadvantage of this method is the need to install thermal insulation under the plasterboard sheet. The drywall itself is attached to the walls with mounting adhesive. The setting time of the solution is 3-4 hours. After this you can do putty.
Cladding with clapboard is the easiest to do. It is enough to install the frame and profiles - starting and finishing, cut the lining and insert it into the profile. But in this case, you will have to fill the cavity under the casing with thermal insulation material - foam plastic or mineral wool. The disadvantages of plastic lining appear after 3-5 months - the lining will turn yellow from the sun, dampness will seep through the joints of the plates.
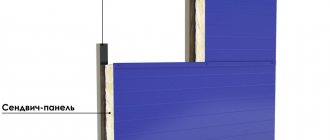
Installing sandwich panels solves several problems at the same time. The sheets have an internal thermal insulation layer, which eliminates the need for an additional layer of insulation. The elements can be attached to mounting foam, which hardens within a few minutes.
Installation of sandwich panels
Installation of strips of sandwich panels
The top panel is inserted into the starting profile already secured with screws.
After this, 4 more parts of the starting profile are cut off. Its length is determined by the width of the slopes. The segments are inserted into the side starting profile at the top and bottom on both sides. Then they are secured with self-tapping screws to the top of the sandwich panel and to the window sill.
A caveat: most craftsmen specializing in these types of finishing work exclude this stage. In this case, the sandwich panel strips simply adjoin the top strip and the window sill. The gap at the joints is closed with a special agent - liquid plastic. It, in turn, hardens and acquires the same characteristics as ordinary plastic. There are also negligent workers who use conventional sealant, and after a short time the slopes lose their appearance: the joints treated with sealant darken and become dirty. Any of these two methods reduces work time and material consumption, and has its supporters and opponents. Therefore, the choice of option is a matter of taste.
Next, a sandwich panel strip is installed into a kind of structure fixed on three sides (along the window opening, at the top on the sandwich panel and at the bottom on the window sill), from the starting profile. The process of working with the panel on the other side is completed in a similar way. As a result, the plastic slope is almost ready. All that remains is to give the appearance to the outer sections.
What is liquid plastic
Liquid plastic has recently appeared on the construction market. It has found application in many areas, including the installation of plastic slopes.
Liquid plastic is used for gluing plastic slopes
Liquid plastic is a type of modern sealant that can be used as glue when attaching plastic slopes. The content of liquid PVC in its base gives this material many positive qualities.
Mode of application
Using this glue, you can guarantee strong adhesion between the material and the surface.
Using liquid plastic when processing joints and seams, you can be sure that it will never turn yellow, as happens with silicone analogues. This ensures a neat appearance of the window opening.
When temperature changes indoors, plastic panels secured with silicone may lose their joint tightness. And the panels, placed on glue in the form of liquid plastic, will stay in place for many years.
When working with this material, it is important to consider that it hardens in one minute . This is the interval during which it is necessary to apply it and distribute it over the surface. You need to work quickly and efficiently the first time.
It is also worth considering that liquid plastic is quite toxic due to the chemical reaction that occurs, so when working with it you must use a respirator and ensure a flow of fresh air into the room.
It should be noted that after liquid PVC-based glue dries, it will become absolutely harmless to the environment and people.
Positive qualities of liquid plastic
The appearance of this modern material did not go unnoticed by specialists involved in the installation of metal-plastic windows. For them, the question of how to glue plastic slopes has disappeared forever. Liquid plastic is characterized by the following positive qualities:
- When processing joints, the highest degree of sealing is achieved;
- It cannot be washed off with water, like its silicone counterpart;
- It does not turn yellow over time, does not emit or absorb foreign odors;
- The material does not change its qualities even after 10 years;
- It is moisture resistant;
- Does not rot or become moldy;
- Does not collapse or fade when exposed to sunlight;
- Resistant to mechanical stress;
- Has an affordable price.
If you glue the slope onto liquid plastic, you will get a neat monolithic structure.
Mounting method on polyurethane foam
You can glue the slopes to the windows using polyurethane foam. This is a universal material with a high degree of adhesion. How to glue plasterboard slopes in this way is shown below.
- On the window opening, the width and depth are measured from above. On the sides, the height is measured twice - at the window and at the wall;
At the side openings, the external and internal heights are measured. In accordance with the obtained dimensions, details are drawn on a sheet of drywall;
Marking the part Using a construction knife, cut out the necessary parts;
Cutting parts The polyurethane foam is applied to the slope, the plasterboard part is pressed for a few seconds, then it is separated from the wall and wait until the foam expands again . Then the part is put back and fixed in the required position. In this case, you can use self-tapping screws, which are removed after the polyurethane foam has dried;
The part is glued using polyurethane foam. Metal corners with perforations are installed on the plasterboard corners;
The corners of the slopes are covered with perforated corners. The corners are finished with putty and left until completely dry;
Finishing corners with putty At the final stage, the surface is painted.
Option 3. Silicone sealant.
Despite the fact that the sealant is designed to seal holes between seams, its scope is extremely wide.
p, blockquote 18,0,0,0,0 —>
p, blockquote 19,0,0,0,0 —>
An excellent option for gluing PVC panels is a non-expanding sealant based on polyurethane foam - its adhesion to plastic is quite high. Before use, carefully read the composition and what it is suitable for.
p, blockquote 20,0,0,0,0 —>
One of the distinguishing features of sealant before adhesive is its ability to withstand large temperature changes while maintaining elasticity.
p, blockquote 21,0,0,0,0 —>
Tip: To make the job easier, choose a sealant with a gun-shaped applicator.
We recommend choosing products from well-known manufacturers:
p, blockquote 23,0,0,0,0 —>
- "Moment";
- "Tytan"
- "Denbraven"
- "Ceresit";
- "Soudal";
- "Silka"
Advice: if, due to inexperience, you carelessly applied the sealant and it came out from the outside of the plastic panel, do not wipe it off immediately. Wait until it dries, and then carefully remove it with a spatula or knife.
p, blockquote 25,0,0,0,0 —>
Making a sandwich panel with your own hands
Sometimes it is necessary to finish non-standard openings (or in non-residential premises). To save money, you can make sandwich panels yourself. Of course, you need to prepare for this stage and check the availability of the necessary materials.
The general procedure for manufacturing is presented below:
1. Prepare foam plastic of the required thickness.
2. Cut the plastic to a specific size.
3. The inner layer of plastic is coated with glue and foam is glued.
4. Glue a second sheet of plastic on top.
5. The structure is placed under a press.
6. After the glue has dried, the structure is ready for use.
Preparatory work
After dismantling wooden windows and installing metal-plastic ones, it is necessary to prepare the surface for installing a slope made of sandwich panels. You need to do the work step by step, the preparation instructions are as follows:
- The wall is coated with an antifungal agent.
- The mounting foam that gets in the way is cut off; if necessary, the cracks can be foamed and then the remaining foam can be cut off.
- The frame is measured, points need to be placed along the perimeter, retreating from the edge by 5 mm. 2-3 dots are drawn on each side. After that, a level is placed on them and everything is connected. The lines must be in a plane.
- The dimensions of the opening are taken at the top and bottom. By the way, during preparation you can also insulate the window sill. Insulation will make the house warm and cozy.
The preparation of slopes from sandwich panels with your own hands is completed, now you need to install the system on the window.
Features of PVC sandwich panels
PVC sandwich panels made of plastic are a high-quality, beautiful and inexpensive finishing material, which consists of a stable and reliable material that can withstand mechanical damage from polyvinyl chloride. Decorative patterns applied to the front side using monochrome thermal printing or decorative lamination are covered with paint and varnish materials, and they do not create glare and reflections; they can also be covered with glossy paint and varnish materials. The protective varnish layer increases the strength of the structure against mechanical damage and UV radiation.
Please note that the panels can be divided into ceiling and wall panels. The latest panels are characterized by high strength, great thickness and resistance to mechanical loads. Ceiling options include thin panels that are quite flexible.
Among the large number of advantages, professional builders can highlight the most significant positions:
- Versatility and wide range of use - the ability to use any surfaces for various purposes for finishing work - floors, canopies, window and door slopes, interior items.
- Moderate cost.
- Vapor-tight and moisture-insulating properties.
- Long term of use.
- Resistant to liquid cleaning agents.
- Strength.
- High levels of sound insulation and thermal conductivity.
- Large assortment - production of materials with different textures, colors and sizes.
- Ability to hide surface defects, pipes and electrical wiring.
- Environmental safety - there are no phenol-formaldehyde resins in the technological process and the sheets are coated with water-based paints and varnishes.
- Speed and ease of installation - special glue is used for fixation on smooth surfaces, and to mask defects on the working surface, the panels can be attached to a metal or wooden frame.
- Aesthetic appeal.
But the disadvantages are:
- Seamless - have a smooth surface with invisible joints.
- Fire in an open fire, which releases toxic and poisonous substances.
- Changes in color when exposed to ultraviolet rays.
- Unpleasant odor from the new design.
- Not recommended for use in bedrooms and children's rooms.
By the way, manufacturers produce different types of panels with different connection methods:
- Seamless - have a smooth surface with invisible joints.
- Embossed - have slight differences.
- Rustic - seamless type panels with a removed chamfer.
PVC finishing coatings can be varnished, plain, laminated or printed. The building materials market can offer the buyer a wide range of panels.
To correctly select the required material, certain characteristics should be taken into account:
- Product dimensions.
- There are no defects.
- Number of stiffeners.
- Type of fastening.
- Weight.
- Compound.
- Cost range.
- Manufacturing company.
PVC panels are a budget option for finishing various types of premises, where simple installation methods can be used.
Details
Types of adhesive composition
How to glue sandwich panels? Installing the coating with a special glue is an inexpensive and easy way for novice craftsmen to carry out finishing work.
Adhesive compositions for this type of finishing work must have the following properties:
- Resistance to moisture - for reliable fastening of the structure in a room where there is a high level of humidity.
- Resistance to temperature fluctuations and ultraviolet radiation.
- Elasticity.
- Antiseptic properties and resistance to fungi and mold.
- Convenient and economical packaging.
- High percentage of setting, adhesion and transparency.
- No unpleasant aroma or harmful substances.
Manufacturers of adhesive compositions indicate on the packaging what specific types of work and materials they are suitable for. The wrong choice of adhesive composition or poor quality of the composition greatly reduces the service life of the structure, and can also lead to changes in structure, color and shedding of the fixing agent. The building materials market can offer two types of adhesive compositions - one-component and two-component. The first type is a ready-made solution, which is easy to use and apply. The second is a set made of a thickener and an adhesive base, a reliable and durable composition for professionals.
Depending on the properties, adhesive compositions can be:
- Fixing - fasten elements to the working surface.
- Reactive - used to perform work with large-sized elements.
- Contact solutions are reliable and durable.
- Dispersion - glue can be applied only to the surface of the base, which will greatly reduce the consumption of the composition and also reduce the finishing time.
It is interesting that the most popular products on the shelves in construction stores are liquid nails from this, or the adhesive composition “Moment Installation”, cold welding “Second” like T (for multi-layer and multi-component types of surface), and also polyurethane foam.
The most popular adhesive for sandwich panels and slopes is liquid nails, because they have the largest number of positive reviews.
It has the following universal properties:
- Environmental Safety.
- The composition is resistant to water - used for finishing bathrooms in the pool or kitchen aprons.
- Antibacterial composition - will prevent the development of fungi and mold in a humid and warm environment.
- Low consumption - only 0.05 kg per square meter.
The rules for applying the adhesive composition are as follows:
- Before starting work, be sure to degrease the surface with an alcohol-based solution.
- An adhesive based on vinyl chloride polymer is used for plastic, and thermoplastic compounds are used for rubber fastenings.
- The product should be applied in an even layer.
- The use of high temperature increases the percentage of setting of the structure, as well as the working base.
- Loading the surface should be avoided during the first 24 hours.
What are the mistakes when choosing an adhesive composition?
- The effects of load on the surface of the structure were incorrectly calculated.
- The adhesive composition does not match the type of coating.
- The temperature range is not respected.
Let's take a closer look at how to choose the right compositions?
How to choose?
When choosing an adhesive composition, buyers should take into account the type of surface, conditions of use, price range of goods and certain requirements for the adhesive composition.
Please note that the glue must have the following qualities:
- Maintain colorlessness after drying.
- Have high fixing performance, as well as securely attach the structure.
- Resistant to temperature, humidity and sun rays.
- Ecological safety type.
For wall panels, a hot glue gun with hot glue works well, as do liquid nails or polyurethane-type sealants that don't expand. To perform finishing work in the bathroom, craftsmen advise using only special compounds. The bathroom is a room that has a complex microclimate with a high degree of humidity and temperature changes. Adhesive for sandwich panels must have characteristics such as resistance to temperature changes, ultraviolet radiation, and also have increased antibacterial properties. Particular attention should be paid to mounting the mirror in the bathroom. It is better to attach a mirror to tiles or concrete using special adhesives based on resin and rubber, which will not damage the mirror surface, are resistant to moisture, have a short period and a high degree of setting, and do not emit toxic substances.
For gluing sheet materials for finishing and flooring, modern manufacturers offer customers several types of adhesive compositions:
- Polymer – durable, elastic, resistant to aggressive environmental influences.
- Polymer-cement is a reliable and durable composition.
- Acrylic - helps strengthen the surface and allow steam to pass through.
- Polyurethane - made of rubber, universal type compounds.
- Epoxy is an installation-type composition for technical and outdoor use.
And now a little about use.
Step-by-step installation guide
Preparatory work
To install slopes from sandwich panels, you need to equip yourself with the necessary set of tools and materials. The following will be useful for work:
- Sandwich panel.
- P-profile, which is the starting profile.
- F-profile is the so-called device cover.
- Plastic in liquid form (preferably).
- Construction tape.
- A sharpened knife.
- Self-tapping screws measuring 2.5 * 7 mm.
- Several screwdrivers with different tips; the drill can be replaced with a screwdriver.
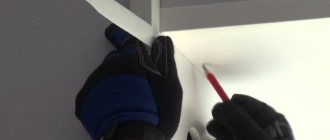
Armed with a tape measure, take measurements of the length and width of the slopes; this is the main guideline that determines the final dimensions of the sandwich panels for the slopes. Taking these values into account, cut out several strips with a knife: one will be located at the top of the window, and the remaining two will be on the sides.
Now let's talk about how to correctly cut the elements of a sandwich device:
- The width of the elements is 10 mm larger than the initial dimensions of the window, this will ensure closer contact with the frame.
- A hole should be cut around the window frame directly in the hardened foam, the depth of which is 100 mm and the width is 1 mm.
- On the edge where the sandwich panel will be located, measure 10 mm and draw a line. Cut the material strictly along the line, but only cover the upper and insulating levels. How to cut a sandwich panel for slopes? You don't need a special tool for this; you can use an ordinary kitchen knife.
- Cut from the end, remove excess layers.
If you plan to finish slopes with sandwich panels in one place, you can try to save money and buy ready-made, cut strips without purchasing a whole panel.
Main part of the work
After preparing the necessary tools and materials, we move on to the main part of the slope installation process. First we install the frame:
- We carefully process the window frame - get rid of excess polyurethane foam, go over the structure with a cloth to clean it of dust and debris.
- We distribute vapor barrier material over the entire area of the slopes. If you want to further insulate the openings, use foam strips.
- Using a brush, aerosol or directly from the tube (depending on the packaging), apply an antiseptic agent to the coating, which in the future will protect the window from mold, fungal growth and other harmful substances.
- Focusing on the inside of the device, following the perimeter, install the sheathing made of wood. The dimensions of the slatted material are 20*40 mm. The lath is secured with dowel nails. Maintain a distance of 40 mm. In the areas of the seams where the side and top battens of the sheathing meet, leave a gap of 10 mm or more - this will be needed for installing PVC elements on the slopes at the top. If the frame cannot be fixed, the sandwich panel cladding is fixed with foam.
The outer strips are overlapped.
Installation of the panels is always done from the top of the window frame, moving to the bottom. Place the protruding element into the formed groove so that the part fits snugly against the window. Fill the free space with a material that will maintain temperature and insulate the window structure from drafts; for this it is better to use isover.
The outer side is secured using self-tapping screws; check the correct position of the top trim using a building level. The finishing of the side slopes is a special edge finishing.
