Home — Articles — Rotgypsum — what is it? Instructions for using plaster The material is a dry mixture for plastering based on gypsum with the addition of special additives. The mixture is intended for plastering work in residential premises with normal air humidity, including kitchens.
Suitable materials for applying plaster: brick, concrete, chipboard, polystyrene foam, and similar materials, as well as cement plasters. Particularly suitable for smooth concrete wall and ceiling surfaces.
How to thin Rotband gypsum plaster
Before working with the material, carefully read the instructions for use. On the back of the package, the manufacturer indicates how to properly dilute the mixture. True, there is practically no information about the complexity of working with the composition. To begin, you should prepare the following tools:
- scales,
- electric drill with mixer (for mixing the construction mixture),
- measuring container for dry composition,
- graduated water container,
- container for finished plaster,
- spatula (trowel).
Plaster must be prepared in the quantity required to complete a certain amount of work. Do not dilute the entire mixture at once. The viability of the solution does not exceed 30 minutes, after which it begins to harden.
Important! Professional craftsmen recommend diluting 2-4 kg of dry mixture at one time.
The exception is when, for example, it is necessary to eliminate a significant difference in height or close a crack. In such a situation, work must be done very quickly.
Before mixing the components of the composition, place an additional container of water next to it, into which you can immerse the mixer attachment. A distinctive feature of Rotband is its high adhesion. Plaster adheres to all surfaces. Therefore, after use, the instruments are immediately immersed in water.
How to breed Rotband - proportions
To dilute the Rotband Knauf dry mixture you will need regular tap water.
Algorithm of actions:
- We weigh the empty container, then use a trowel (trowel) to fill in the dry dough, weigh again (without the container);
- pour 80-90% of the volume of water calculated according to the proportion specified by the manufacturer into a measuring glass;
- Pour water into a plaster container and add the dry mixture and the remaining water in parts, constantly stirring with a drill and mixer;
- It takes 2-3 minutes to mix (if the composition is too thick, you can add a little water);
- let the solution sit for a couple of minutes, then stir again. The mixture is ready for use.
- The absence of lumps indicates the high quality of the composition.
Important! During the plastering process, you can no longer add components to the finished solution.
Features of gray, rose and white Rotband plaster
The German-made gypsum mixture contains a gypsum binder and special polymer additives, which facilitate faster and more convenient application. Products are supplied in paper bags of 5-30 kg. The mixtures are available in gray, white, pink colors, which does not affect the practical characteristics of the composition. But experts note that the solutions behave differently in their work. For example, if a layer of gray or white plaster is applied too thickly, small waves may form. Pink spots do not have similar characteristics. This is explained by the different size of the composition. In a gray-white mixture of grains there is no more than 0.5 mm, in a pink mixture - 1.2 mm.
Characteristics and composition
The name "gypsum plaster" is not entirely accurate. Gypsum is a mineral from the sulfate class. It has a double structure: fibrous - selenite, granular - alabaster. It is from alabaster that the plaster mortar is obtained, which everyone knows as gypsum.
The technological process is not very complicated:
- the mineral is fired at high temperatures for a long time;
- crushed to a powder state - the smaller the particle fraction, the higher the plasticity and better binding properties;
- additives are introduced:
- fillers with granules no more than 1.5 mm - reduce the weight of the solution. For these purposes, the smallest particles of polystyrene foam, foam glass, vermiculite, and perlite are used;
- plasticizers and modifiers - reduce the speed of setting of alabaster (without additives, after 5 minutes the mixture becomes stone) and improve the level of adhesion.
- bleaches - lime (used before), titanium or zinc based white;
- polymer additives - increase the viscosity and strength of dried plaster.
Available for sale in bags of 5, 15, 25 and 30 kg.
Crushed alabaster.
This is the composition of the dry mixture. Water and retarding agents are added to the ready-to-use paste, as a result of which the solution does not harden without access to air. Pasta is sold in plastic buckets.
Technical characteristics depend on the density of the material and the size of the component fractions. Therefore, specific numbers may vary. The main indicators are:
- color - can be white, gray with different shades, pink and beige;
- The proportion of water for mixing is on average 2:1, where 2 is gypsum, 1 is water. But different manufacturers have deviations - from 0.4 l per 1 kg of mixture to 0.6 l / kg. You need to look at the recommendations on the packaging;
- the thickness of the base layer without reinforcement is from 2 to 5 cm (different for each manufacturer);
- compressive strength - 25-40 kg/cm2 (according to GOST 31377-2008 - 2.45 MPa);
- work is allowed at a temperature of - +5-+30oC;
- solution lifetime - 1 hour (according to GOST - 45 minutes for manual laying, 90 - machine);
- complete drying time - 3-7 days (depending on the thickness of the layer);
- composition consumption per 1 mm of layer - 0.8-1.2 kg/m2 (hand laying - 0.85-1.0 kg/m2, machine - 0.75-0.9 kg/m2;
- adhesion force to the base - 0.3 MPa;
- moisture retention without dripping - 90%. Solutions with 95% appeared on sale, which is much better;
- density - 950 kg/m3;
- vapor permeability - 0.11-0.14 mg/ (m*h*Pa);
- shrinkage of the base layer is not allowed.
How to remove construction dust
The renovation is complete, but the apartment or house is covered with a layer of fine and ubiquitous dust. This image is familiar to many. How to remove construction dust? Let's say right away that you will have to clean it more than once. You will need a good spray bottle, a powerful vacuum cleaner, a bucket and lots and lots of rags. It is best to use a construction vacuum cleaner with a long hose and a telescopic nozzle. It is possible for families, but most likely it will not withstand such a load. Once cleaned, it may need to be thrown away as fine dust will clog the engine and burn it.
It's nice to have helpers
If you have a humidifier with an ionizer, you can use it instead of a spray gun. But it needs to be left in each room for a couple of hours. Too long if there are several toilets.
Cleaning the floor from dust
Close the windows/doors in the apartment, then you can start cleaning up construction dust. If the ventilation is working properly, you can cover it while cleaning. Let's say right away that you will have to repeat everything more than once; you will have to clean all the rooms, moving from one to another. The technique is as follows:
- We set the sprayer to the finest water powder and spray a certain amount higher in the air. The fog settles, trapping dust particles in the air. A wet crust forms on the floor. If there is a significant layer of dust on the floor, it is better to wait until it dries and vacuum it.
You need a good vacuum cleaner - We leave the room for at least an hour to let the water dry. We make sure that there are no drafts that can raise dust accumulated in the air.
- The vacuum cleaner is in the next room and we bring a hose with a nozzle into the room and collect the dust with a vacuum cleaner.
- We repeat the “event” until the air becomes relatively clean and there is a minimum of dust left on the floor.
Next you need to wash the floor. If the air was clean enough that the next vacuuming didn't blow dust devils into the air, you can't spray. We take a lot of water, a lot of rags. Clean the floor. The rag and water should be changed as often as possible. If possible, it is better to rinse the rag under running water every time. Of course, you run to the bathroom, but cleaning is more efficient this way. Don't try to wash it off completely just yet. The main task is to remove flying fines. It can only be removed with water and a cloth. If you have a cyclone washer vacuum cleaner (with a water tank through which air passes and the sucked dust settles in the water), you can adapt it. We cope with the task perfectly, quickly and efficiently.
We remove residues from walls, windows, doors
Then we clean the vacuum cleaner, wash the brush or put in a clean/new one. The second option is preferable. We remove dust from the ceiling and walls with a vacuum cleaner. You can walk several times. Then - the floor again, then - windows and doors. Don't forget to clean the top of the door. There's a lot of dust there. When the doors are closed, it is sprayed into the room.
You don't need expensive cleaning products to clean the floor after renovation.
Having removed dust from all vertical surfaces, clean the floor again, often wiping with a cloth. If there are white spots on the doors and windows, add vinegar or citric acid to the water. You can add a little dish soap. After treatment with this composition there should be fewer stains.
How to clean the floor after renovation
While you are simply washing the floor with water, it seems that the dust is simply smeared. White streaks remain on the floor. When the walls and ceiling have already been washed, you can try cleaning the floor better. You need to add to the water:
- A little vinegar. Regular food alcohol is 6-8%. Half a glass per bucket of water.
- Table salt. In a bucket of hot water about 1/3 cup or so. Stir until completely dissolved.
- A couple of tablespoons of vegetable oil.
Water with vinegar and/or salt is quite effective in combating white stains from construction dust.
To get rid of white stains on the floor, you can try all three remedies in turn. Every “additive”—salt and vinegar—works, but in some places it turns out to be more effective, in others. It depends on the composition of the powder (more precisely, on its source). For faster results, you can immediately use salt and vinegar. They don't interfere with each other. Vinegar has an unpleasant odor; it can be replaced with citric acid.
These simple home remedies will help you quickly remove dust from your floor after renovation and get rid of stains. In practice, as soon as the layer of dust on the floor has become very small, you can add salt and vinegar. There will be fewer streaks, but the water will need to be changed frequently. Finally, water with vegetable oil will help remove white deposits from the floor: linoleum, laminate, tile. It's so strange, but it works. Check it out. And the floor is non-greasy and non-slip. So, to wash the floor after renovation, you don’t need any miracle products that cost a lot of money.
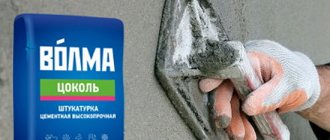
Technical characteristics of "Rotgips"
Mixture consumption 25 kg (with a layer of 10 mm) per ~ 3 m2. Pot life of the mixture: 20-25 minutes after mixing. Minimum thickness of the plaster layer: 8 mm. Mixing ratio: 0.7 liters of water per 1 kg of dry plaster. Final setting time: 70 ± 10 min (depending on temperature and humidity) Mixture storage conditions: in a dry place on a pallet. Shelf life: 6 months.
Instructions for use
1. The plastered surface must be clean and dry. 2. If the surface is highly absorbent, it must be treated with Grundalmittel, Tiefengrund or their analogues. Dense and non-hygroscopic surfaces (eg concrete) must be treated with Betokontakt or its equivalent. 3. Plaster work should be carried out at an air temperature of at least + 5 ° C.
4. To prepare the plaster, pour the dry mixture into clean cold water and mix well until a homogeneous mass is formed. 5. The prepared plaster is applied to the surface with a thickness of 10 mm and leveled. In cases where it is necessary to obtain a thicker layer of plaster, it is necessary to make notches on the first layer while it is still soft. The second layer should be applied no earlier than 24 hours later. 6. Surfaces made of polystyrene foam and DSP must be plastered with 5x5 mm fiberglass mesh over the entire surface. 7. After the surface of the plaster has begun to “set”, it should be slightly moistened with cold water and rubbed in a circular motion with a hard or sponge felt spatula. 8. After completing the above steps, the plastered surface can be used for wallpapering or painting (if a smooth surface is not required). 9. To speed up the drying of the plaster layer, it is necessary to ensure good ventilation of the room. 10. Immediately after finishing work, the tool used should be immediately washed with water.
Gypsum starting or finishing plasters are widely used for leveling the walls of residential premises with normal humidity. The main component of this material is considered to be the natural component of gypsum. This component is made from a special pre-crushed and heat-treated material. The purpose of the plaster will depend on the size of the grain fraction.
In addition to gypsum, the mixture contains polymer additives and plasticizers, as well as special substances that slow down the hardening process of the solution. Polymers are used to improve the adhesion and elasticity of plaster. This material is supplied to hardware stores in the form of a dry mixture in special paper bags of various capacities. The working solution is prepared according to the instructions on the package.
Types of gypsum plaster
The criteria for classifying plaster by type are:
- size of component fractions;
- method of application;
- appointment;
- release form;
- color.
Fraction size
When doing plastering work with your own hands, it is important to select the correct mixture according to the particle size of the components. After all, the purpose of the solution depends on the fraction:
- coarse-grained - intended for thick layers of plaster (5-8 cm) when eliminating large surface defects. Difficult to find on sale. You definitely need a reinforcing mesh - without it it will shrink and crack;
- medium-grained is the most popular type of dry mortar. Used to level small differences in height, up to 3 cm. The maximum possible layer thickness is 5 cm, but from individual manufacturers;
- fine-grained - applied with a thickness of no more than 8 mm onto existing layers of previous types. With a thicker layer, extensive cracking is possible. Can be used for putty for painting.
Application method
You can plaster walls in different ways:
- manual - used in small areas or when performing work independently;
- machine - the solution is quickly applied to the walls. The quality of the dried surface is almost perfect. However, to mechanize the process of leveling walls, a stirring station and a pneumatic blower are needed. The equipment is expensive, which is why the prices are high. They can be reduced to an acceptable level only by increasing the volume of work.
Purpose
According to their intended purpose, solutions can be:
- starting ones - applied directly to the walls, hiding defects;
- finishing - laid on an existing layer of plaster. The only function is to make the surface smooth to a mirror shine;
- universal - can be used for any purpose.
Attention: finishing solutions can be applied to drywall without an underlying layer of coarse or medium-grained mixtures.
Release form
Gypsum solutions are offered for sale in the form of:
- dry mixes - sold in bags;
Dry mixture.
- pastes - ready-to-use solution. Packaged in plastic buckets. Weight can be from 1 to 18 kg.
Paste.
Color
Gypsum plaster is associated with the color white. However, you can find dry mixtures on sale:
- white;
- gray, with different shades;
- beige;
- pink.
Colored gypsum mixture.
Stages of work:
- The surface of the plaster base must be dry, free of dust, formwork compound, paints, masonry mortar residues and other substances that weaken the adhesive properties of the material.
- Highly absorbent surfaces, such as bricks and foam blocks, must be treated with a deep penetration primer.
- To obtain a flat surface and create the correct geometry of the room, as well as to minimize the plaster layer, it is necessary to install corner profiles on the external and internal corners and install the headlight profiles on a straight plane, taking into account the fact that the level marks were previously set.
- Pour the dry mixture into a bucket of clean cold water and mix by hand or with a concrete mixer until smooth. Pause for a few minutes and stir the mixture. Do not add water or dry mixture to the prepared solution.
- Using a metal spatula, apply the required amount of plaster to the wall with sharp jets.
- When plastering a surface in two layers, it is necessary to apply a notch to the first layer, which has not yet hardened (you can use a notched trowel), then apply the second layer to a dry surface. The thickness of each layer ranges from 8 to 30 mm.
- Alignment of the applied solution is carried out using an H-shaped ruler along the previously set beacon profiles. The length of the rule should be selected taking into account the distance between the beacons.
- You can add plaster to the surface to be smoothed by working with the rule.
- It is better to apply the plaster and smooth it from top to bottom so that excess material does not fall on the smooth surface.
- After the plaster layer begins to lose mobility (approximately 65 minutes after mixing the mixture), it is necessary to trim the surface using the trapezoidal rule. This quality of the treated surface is sufficient for tiling with ceramic tiles.
- If the plastered surface is to be prepared for wallpapering, after the surface of the plaster begins to harden (appearance of a matte surface, approximately 90 minutes after mixing the mixture), it should be moistened with a generously dampened sponge spatula. Take a break of approximately 3-5 minutes to allow the water applied to the surface to be absorbed.
- Using a sponge float, melt the surface in different directions. To make the surface more flexible for further processing with a metal spatula, let it stand for about 3-5 minutes.
- After the thin top layer of plaster softens when exposed to a metal tool, a putty mass (gypsum milk) is released. Then smooth out any remaining rough edges.
- Use an angled spatula to process joints. Once completely dry and treated with a deep penetration primer, this surface is ready for upholstery.
- It is necessary to prepare the surface for high-quality painting within 24 hours, but not earlier than 2 hours after mixing the mixture; the surface of the plaster must be thoroughly wetted again, and the surface must be grouted again.
- The lighthouse profiles and corner plaster are made of galvanized steel. During surface treatment, the galvanized coating can be damaged. Therefore, to prevent subsequent rust formation after drying of the plastered surfaces, it is recommended to protect them from corrosion by treating them with anti-corrosion agents. The alternative is to delete the beacon profiles.
Rotgips plasters: basic categories - standard and standard+
- 14.6.2013
- 5634
- video (1518)
If you need to make inexpensive but high-quality repairs, you will need good gypsum-based plaster.
Gypsum is used in large quantities for cladding walls and ceilings. It doesn't burn and holds heat well. High-quality plaster is distinguished by categories. The basic categories are “standard” and “standard +”. Let's see how they differ. Plasters of the “standard” and “standard +” categories differ in cost. But the difference between them is small.
Gypsum plasters allow you to obtain surfaces of different quality. For example, if a design project involves tiling with ceramic tiles, then it is worth using plaster of the “standard” category. But if you need a surface for delicate materials, thin wallpaper or pastel paint, it is better to use plaster of the “standard +” category.
The thickness of application depends on the curvature of the walls. If the wall is flat, 6 mm is enough. If the surface is more complex, the thickness of the plaster can be up to 30 mm.
This parameter is typical for both “standard” and “standard +” class plasters.
Ilya Dubrogryzov, construction materials specialist:
“Standard plasters are suitable for rough leveling of walls for facing with ceramic tiles or for finishing putty.”
Ekaterina Shupyankova, building materials specialist:
“And plaster of the “standard +” category does not require additional work, such as puttying, since it has a finer fraction, so it can be immediately painted and wallpapered.”
The foundation of the design project must be strong. If the plaster begins to peel, the repair will have to start again. That is why the most important property of plaster is called adhesion.
Ilya Dubrogryzov, construction materials specialist:
“Adhesion is the property of a material to adhere to a surface. Plasters of the “standard” category have good adhesion; they are able to adhere to any surface of walls and ceilings, be it brick, concrete, or aerated block.”
Ekaterina Shupyankova, building materials specialist:
“And plaster of the “standard +” category has a higher level of adhesion.”
The economical consumption of the mixture is considered to be a proportion of 9 kilograms per square meter with a layer thickness of 10 mm. When the gypsum mixture is combined with water, complex chemical reactions occur and the plaster hardens. A good mixture can allow the job to be completed before the curing process begins.
High-quality plaster dries quite quickly. However, it is recommended to proceed to the next stage of work after the plastered surface has completely dried. This time is up to 7 days. Gypsum is one of the materials that are called environmentally friendly. No chemical raw materials are used in its production. In its finished form, the plaster “breathes”, i.e. does not create a “thermos effect” in the room. And this is another contribution to the health of your own family.
Multi-brand recommends RotgIps, a mixture of the standard category and RotgIps Standard, the Standard-plus category. Universal means for leveling surfaces of the Gipsopolymer brand. The Rotgips family of plaster mixtures - in any quantities from the TSK-group warehouse in Yekaterinburg.
Head office: Ekaterinburg, st. Uralskikh Rabochikh, 28 Warehouse-sales department: Ekaterinburg, st. Armavirskaya, 28
Subscribe to news:
s powered by Hypers
Types of plaster compositions
The following plaster compositions are used to finish the starting wall:
- cement-sand or cement-lime - for leveling the surface, ensuring high durability of the coating for finishing materials;
- gypsum - for leveling walls in the interior of living rooms, corridors, kitchens and other rooms with normal humidity;
- limestone - only for external decoration;
- clay-sand - universal compositions for external and internal processing;
- cement-lime-clay is a universal cladding of facades and walls inside the house.
Attention: Depending on the operating conditions of the walls and the required qualities of the coating, one or another type of plaster mixture is used. Some are used only for interior decoration, others only for plastering the facade.
We invite you to watch a video about the types of plaster for finishing work and the features of its application:
A little history
Until the 1960s, all gypsum solutions were mixed on site in proportions determined by the craftsmen “by eye” based on their experience. In addition, due to the properties of gypsum, the mixtures were prepared almost instantly, in very small batches, in order to have time to process them in a short time. This affected both the speed of work and its quality, since the mixture quickly lost its plasticity and was poorly distributed over the surface.
The situation changed after the invention of a substance that, when added to the gypsum mixture, slows down its setting. It was named Alenal after its inventor.
And in 1962, the Knauf company, at its production located in West Germany, began producing Rotband dry mixes, the consumption of which per batch increased significantly compared to the previous technology and it became easier to use a ready-made solution. The company's engineers have developed a precise recipe for mixing the mixture with precise proportions of dry matter and water, holding time and application.
Briefly about the main thing
Gypsum plaster, used for interior work, is a dry mixture based on gypsum with the addition of filler and additives that improve the characteristics of the material. It is sold in paper bags.
This material differs from the cement variety not only in the use of a completely different component, it is cement. But also the high plasticity of the finished solution.
Gypsum plaster is not used in wet rooms and outdoors due to the low moisture resistance of the material. The same cannot be said about the cement variety.
Dry plaster is plasterboard and gypsum fiber sheets.
Ratings 0
Features of different colors of Rotband plaster
As the manufacturer warns on the packaging, the mixture can be of different colors: gray, white or pink, and this in no way affects the technical characteristics of the finished solution. However, during operation they behave differently, and this point must also be taken into account at the preparatory stage.
For example, a thick layer of white or gray plaster drips a little after application. As a result, small waves are formed on the surface. Pink plaster lacks this feature. This is explained by the graininess. For white and gray plaster, the grain size does not exceed 0.5 millimeters. It's bigger in pink. Here the particle size can reach 1.2 millimeters.
If you need to level the walls with wallpaper of suitable quality for pasting wallpaper without additional application of putty, it is better to use a gray or white mixture. In this case, it will be necessary to grout and smooth again so that the surface becomes perfectly smooth.
Therefore, it is better to decide on the color in advance. The packaging doesn't say anything about this, but as it turns out, there's a catch. You can find out the color of the plaster by looking at where it is made. Pink color is produced by KNAUF GIPS CHELYABINSK LLC and KNAUF GIPS KOLPINO LLC. Bely - KNAUF GIPS KUBAN LLC and KNAUF GIPS Baskunchak CJSC. Gray plaster is produced by Moscow LLC KNAUF GIPS. However, there may still be exceptions to the general rules, although they are quite rare.
Rotband plasters are very popular in the field of renovation and construction due to their versatility and affordable cost. Such materials can be used to process almost any surface - from brick walls to chipboard. Universal gypsum plaster is suitable for use in rooms with normal humidity, as well as in bathrooms and kitchens. The quality and durability of the finish are greatly influenced by the quality of application and the method of preparing the composition.
PRESS SERVICE:
ROTGIPS® plaster is intended for high-quality leveling of walls and ceilings by hand. A special feature of this mixture is the possibility of surface treatment without the use of additional putty material. The surface is simply glossed using so-called “gypsum milk”, providing a perfectly flat, smooth surface without puttying. Therefore, renovation professionals emphasize the versatility of ROTGIPS® plaster, which makes it possible to carry out both plastering and puttying at the same time. And what is very important is that it saves money and time.
Gypsum is a unique material, as if specially created by nature for arranging human homes. Surfaces made of gypsum materials play the role of a natural regulator of humidity in the room; thanks to their porous structure, they “breathe”. The acidity of gypsum is similar to the acidity of human skin; it is odorless and has no toxic components. Dry gypsum mixtures are an ideal material for the home; there is hardly any other building material so suitable for coexistence with humans.
How to breed rotband in small quantities
If you only need to dilute a small solution, be aware of HCV (see above). We measure the calculated volume of water (based on the proportion). For balance, we prepare the amount of CC that will be enough. The cooking process is similar to that described. The container can be taken in a smaller volume.
Example:
You need to plaster an area of 2 square meters, 1.5 cm thick. On the packaging (30 kg) we read that the yield of the finished product is 40 liters. Consumption of SS Rotband per square meter is 8.5 kg. This is with a layer thickness of 10 mm. Therefore, to cover 1.5 cm per square you need 8.5 x 1.5 = 12.75 kg, and for two squares - 25.5 kg. Including HCV: 25.5 x 0.64 = 16.32 liters of water (remember you need to add some reserve water).
There is a small nuance. The container must contain the required amount of solution. Taking into account the fact that the gypsum mass increases in size during mixing, the container is selected so that the poured water does not occupy more than half of the internal volume. Preferably a third party.
Alternatively (at a low cost) the gypsum plaster can also be thinned with half a rubber ball.
Is it possible to glue tiles to these walls after leveling the walls with gypsum in the bathroom?
I knew one tiler—by the way, he was a very high-class specialist—who preferred to glue tiles to generally unleveled walls, laying a layer of tile adhesive about five centimeters thick, if not more. As a tile adhesive, he used a mixture of M-150 with the addition of a fair amount of PVA. Of course, each master has his own way of working. But the general rule is to use as few layers of dissimilar materials as possible. Because every layer boundary is a potential point of delamination. In addition, the introduction of a layer with reduced mechanical strength - and gypsum-containing compositions are always fragile (although they are widely used because they do not shrink and are easily leveled) - can lead to delamination of the coating not even along the boundary of the layers, but directly along the layer. The result is still the same: your tile will fall off along with the layer of what it was glued to.
What solution is needed?
The plaster solution is prepared using standard technology, regardless of the main components. For clay, sand, gypsum, cement and other dry mixtures, the introduction of clean water and some additional components is required, depending on the desired qualities of the composition and the final functions of the plaster layer. This alignment is "rough" and requires additional finishing.
Plaster is used only on wall surfaces where the maximum permissible height difference along the entire length does not exceed 3-4 cm. In other cases, the use of wall panels is required, for example, plasterboard sheets for interior decoration or facade slabs for interior exterior decoration.
The durability and strength of the coating depend on the quality of the raw materials from which the solution is prepared. Therefore, when choosing the type of gypsum mixture, you need to pay attention to the following indicators:
- Microclimate of the room - expected temperature fluctuations, level of maximum permissible humidity, presence of direct sunlight, etc.
- Selected type of finishing composition.
- Finish type: front or interior.
The main components of any solution can be divided into several groups:
- binding component - clay, gypsum, lime or cement (most often);
- filler - river sand, less often quarry sand, but of medium and fine fraction;
- water - only clean, sometimes heated to room temperature;
- additives and plasticizers - their total share should not exceed 10% of the total volume of the solution, since exceeding this figure can significantly deteriorate the quality of the gypsum mixture.
Depending on the area of application of the solutions, there is the following distribution:
- cement-lime, cement-gypsum or cement-sand are used for finishing facades, cladding walls in the basement or toilet, bathroom and other surfaces that require increased strength and durability;
- gypsum or lime plaster is suitable for interior decoration of living rooms, in which stable temperature conditions and normal humidity are maintained without fluctuations;
- combined and clay mixtures - for working with wooden walls and other surfaces.
Important: in order for the quality of the solution to provide the necessary strength and strength of the plaster layer, it is necessary to use clean, fine or medium sand from the river bottom. It is necessary to monitor the degree of purification of the material, since inclusions of earth or lumps of clay will create points of reduced strength.
When choosing quarry or sea sand, the material must be carefully sifted. To prepare the mixture, it is recommended to take water at room temperature with the highest possible purity.
Application area
Alabaster-based plaster was originally intended for plastering walls and ceilings inside residential premises made of any materials: concrete, brick, aerated concrete, plasterboard, etc. under wallpaper and paint. Later, they began to putty on slopes, use it to seal seams between sheets of drywall, and with the advent of fiberglass reinforcement, to strengthen the joints of concrete ceilings.
You cannot plaster metal, facades, walls and ceilings in damp and damp areas. There are two reasons:
- acidic environment corrodes metal structures;
- At high humidity, gypsum plaster actively absorbs water vapor, softens and floats or collapses.
But there are exceptions here too. So, gypsum plaster is used under tiles in the bathroom, but not under wallpaper or painting. Gypsum mixtures also appeared for facades. But the amount of polymer additives there is so large that it is not correct to talk about gypsum solutions. These are rather gypsum-polymer plasters.
How to knead Rotband
Rotband plasters are very popular in the field of renovation and construction due to their versatility and affordable cost. Such materials can be used to process almost any surface - from brick walls to chipboard. Universal gypsum plaster is suitable for use in rooms with normal humidity, as well as in bathrooms and kitchens. The quality and durability of the finish are greatly influenced by the quality of application and the method of preparing the composition.
How to mix Rotband plaster correctly
To work you will need the following tools:
- possibility of measurement,
- container for the finished composition,
- mixer or drill with an attachment for building mixtures,
- teacher is good
- headlights,
- primer
- scales.
It is advisable to wear overalls and safety glasses. You can easily find all the necessary materials and tools at any hardware store.
Before mixing Rotband, find out the proportions from the instructions for use indicated on the package. Shows that approximately 3.5 liters of water are consumed per 10 kg of dry mixture. A 30 kg bag consumes 18 liters of water. If you need to mix 5 kg of material, add 3.3 liters of water.
80-90% of the total volume of liquid is poured into the bucket. Then the dry mixture is gradually introduced into it, thoroughly mixing the composition with a drill. It takes 2-3 minutes to mix the solution. If everything is done correctly, the mixture is not expired and is not a fake, you should get a homogeneous composition, without lumps or separations. The resulting solution should be allowed to brew for 5 minutes, then moved again. The mixture is ready for use. The pot life of diluted plaster is 25-30 minutes. The consumption (per 1 sq.m) of the finished composition when applied to walls or ceilings in a layer of 1 cm is 8.5 kg.
Rules to follow when mixing plaster:
- The water should be at room temperature. Do not use water that is too cold as this may cause lumps to form. The water must be clean and have a neutral chemical composition. Rotband gypsum plaster contains special additives that can react with chemical components contained in process water,
- All working tools must be clean, without the remains of old building mixtures,
- Strictly follow the Knauf manufacturer's instructions on the back of the package. It is important to maintain the proportions of water and mixture, apply the mixture correctly and remember the fragility of the solution,
- The dry mixture is added to the water, and not vice versa. It is important! When stirring, first add a small amount of material to the water, mix thoroughly and only then pour in the remaining mass. Stir for at least 3 minutes,
- When mixing large batches, you can use a mixer with two beaters. The movement of the whips occurs towards each other, which allows you to mix the components much faster,
- The consistency of the solution depends on the thickness of the applied layer and the angle of inclination of the treated surface,
- It is not recommended to choose rectangular containers. It is best if the container is round. This will eliminate the formation of “dead zones” in which mixing does not occur,
- The crusty plaster mixture must be sifted before use, eliminating sinuses,
- If it is necessary to extend the service life of the plaster, use cold water when mixing.
How to knead Rotband by hand without a mixer
If you need to make a small batch and don't have a mixer on hand, use a spatula or spatula. A 15 liter bucket is enough for breeding. Fill the container a third with water and gradually add the dry mixture, stirring constantly. The finished composition should resemble thick sour cream in consistency.
Once the solution is ready, let it “mature” for 5 minutes, then mix thoroughly again. You can start working. Plastering the surface must be done indoors at an air temperature of + 5 to + 30 ° C and humidity not higher than 60%.
Attention! During the work process, you cannot add components to the finished plaster!
Depending on the volume, Rotband plaster can be mixed manually or using a special construction mixer. By strictly observing the proportions and dilution technology, you will receive a high-quality blend. If all rules are followed, it will give the plastered surface high practical characteristics and guarantee durability.
Do-it-yourself leveling
Before carrying out work, you should select and prepare a mixture for plastering the walls. Dry plaster mixtures contain two binding materials - gypsum and cement. Calculate the amount of material, taking into account the area to be leveled and the number of layers applied.
If you work in residential premises (living rooms, halls, bedrooms), we recommend a gypsum-based mixture that is more environmentally friendly and maintains a favorable microclimate in the room. Cement mixtures are quite suitable for kitchens, bathrooms, pantries and other utility rooms.
Tools
Buy tools:
In addition, you should buy work clothes, a headband, and gloves.
Surface preparation
Apply a building level to the wall horizontally and vertically to see all the irregularities.
Then they look for defects, for this they put the rule against the wall. So, where there are defects, they put a mark.
Next, they retreat from the corners of the room by 0.3 m, and then draw straight lines vertically in the direction from the ceiling to the floor. Then they step back 1.6 m from each drawn line and make another line vertically. They determine the length of the beacons; to do this, step down from the ceiling by 150 mm in the corners, and up from the floor by 150 mm, drill holes, and insert dowels with self-tapping screws.
Then they pull the cords horizontally from one corner to another, one slightly below the ceiling, the other cord 15 cm below the floor. In places where the cord will intersect with the lines drawn vertically, drill holes and insert dowels without self-tapping screws. As a result, 2 rows of dowels are formed, with a distance of 150 mm from the ceiling and floor.
Prime the wall
If the wall is brickwork or it is made of cellular concrete, then it is primed with a deeply penetrating compound; if the wall is smooth, then you can choose “Betonkontakt”.
Installing beacons
Carrying out work: master class
Wall unevenness up to 3 cm can be eliminated with just one layer of plaster, but sometimes plasters are used that can be used to apply a layer of up to 5 cm.
To mix the mixture, you will need a bucket or other suitable container, a mixer or a drill with an appropriate attachment. The mixture is placed in a container, diluted with water and actively mixed. After this, take a short break and mix again until completely homogeneous. The proportions for mixing the mixture with water are usually indicated on the packaging. To avoid misunderstandings, they should be followed. Otherwise, the mixture will either be too liquid and will not be able to stay on the wall, or will be too thick and will not stick well to the wall.
After appropriate preparation of the wall and installation of beacons, the mixture is thrown onto the wall with a large spatula and leveled using the rule. It is convenient to apply the plaster onto a large spatula using a small narrow spatula.
If there are broaches, holes and depressions left on the surface, then you should not get carried away with beauty at this stage, because all this can be corrected by grouting and puttying. If you do not want the formation of broaches, then more often remove the solution from the rule with a spatula and clean it with a brush, which will not be superfluous to moisten in water. When working in corners, certain difficulties will certainly arise, so the best option for resolving them would be to sequentially plaster first one wall, and then, after it dries, the second wall.
How best to level very crooked walls: how to level with plaster
If the maximum unevenness of the wall is more than 3 cm, then two or even three layers of gypsum plaster will be required.
The second layer usually needs to be applied a day later, after priming the first layer with water. The rule is to lead from bottom to top along the beacons. The solution remaining on the rule is cleaned off and placed in those places with which the rule did not come into contact. By repeating such movements, the space between adjacent beacons is finally filled. If bumps form, it is recommended to apply the rule from top to bottom, and they will disappear.
Proportions and technology for preparing the mixture
When preparing a plaster mortar, there is a basic principle: first, mix the dry ingredients until they have a uniform consistency and color, then add water as needed. Consequently, it is possible to control the viscosity of the solution.
If a mixture is selected for finishing surfaces in rooms for different purposes, the recommended compositions for spraying, primer and coating may differ slightly:
| Lime, part | Chalk, part | Sand, part | |
| splash | 1 | 1 | 2 |
| Primer | 2 | 1 | 4 |
| Covering | 1 | 1 | 5 |
For interior decoration, many manufacturers offer ready-made dry compositions that need to be diluted only with the addition of water. The dough is kneaded strictly according to the manufacturer's recommendations, which are indicated on the packaging with the material.
Advice Gypsum plaster is used for interior wall decoration, and if there are areas with complex geometry and relief, then gypsum.
We invite you to watch a video on how to prepare a gypsum solution:
From cement
Cement plaster is mainly used for facade work or for finishing rooms with a more aggressive environment and microclimate, for example, a bathroom, toilet, cellar, cellar, storeroom. For different stages of finishing, the proportions may differ.
| Cement, part | Sand, part | |
| splash | 1 | 2,5 — 4 |
| Primer | 1 | 2–3 |
| Covering | 1 | 2 |
This difference in the range of sand amounts is due to the different strength of the plaster layer. To plaster the surfaces of rooms, 3 or 4 parts of sand are enough. For facades or basement floors, it is necessary to reduce the proportion of this component to 2-2.5 parts per portion of concrete.
We bring to your attention a video about the characteristics of mixing cement mortar:
Read our other useful materials on plastering work:
- How to calculate plaster for different types of mixtures?
- How to plaster foam blocks and drywall?
- How to repair plaster and how to check the quality of work?
- How to get rid of mold
Silk
Another name for this type of plaster is “liquid wallpaper”. To prepare the gypsum mixture, you must follow all the recommendations that are indicated on the packaging of the material from a specific manufacturer. This finish is used for interior work only.
Mixing the composition of silk plaster is allowed only by hand, since technical means, even at low speeds, can damage the fibers and texture of the wallpaper.
Material dilution technique:
- The recommended amount of water is added to a container whose volume corresponds to approximately 1 bag of material (indicated on the packaging of the specific manufacturer and brand of product).
- If glitter or other decorative fillers are used, they must be poured into water and mixed well by hand. They are not harmful to health, so you can dispense with gloves.
- The entire package of dry mixture is poured into a container and gently kneaded with hands until a homogeneous consistency is obtained.
- In most cases, it is necessary to hold the material after mixing so that it acquires a more uniform structure. This time is also indicated by the specific manufacturer in the instructions for their product.
Marking and installation of beacons
Before installing beacons, regardless of their type, you need to measure the walls for deviations from the vertical. If geometry is required (clear 90 degree angles), then axes and perpendiculars are drawn on the floor - these lines will be guidelines when installing beacons. Based on the drawn axes, it will be possible to judge the acceptability of the geometry in general. After all, huge deviations occur and in order to make 90-degree angles, sometimes you need to apply layers of 10 cm or more. In such cases, the question arises: is geometry needed at all? Often there is no need for it.
You may find it useful to read the guide on marking right angles and perpendiculars using a tape measure.
A reasonable question: initially, when the geometry of the room is not known, how to draw the base axis? You should focus on the longest and outwardly smoothest wall. By laying a parallel line from such a wall, the rest are assessed. The axes may have to be adjusted to achieve minimum layers on all walls.
*The distorted geometry of the walls is shown for clarity. .
The peak of perfection is the layout of all rooms into a common geometry. However, it is worth remembering about expediency - these are often useless body movements.
So, to install beacons from a special profile or from a plaster mixture, it is necessary to mark out future beacons. Practice shows that it is more convenient to carry out plastering work in vertical stripes 1-1.2 m wide. Therefore, walls are marked with vertical lines. In internal and external corners, you should deviate from the corner by 10-20 cm. In general, beacons can be placed horizontally, followed by stretching from left to right (or vice versa), but this should be done for good reasons - plastering in this way is less convenient, rather than bottom-up.
For both rubbed and profile beacons, it is recommended to install self-tapping screws, which with their heads will prevent a crooked installation. We will look at this point a little below. Self-tapping screws are aligned vertically and plane; some do this using a regular level or a laser level - this is a relatively suitable method. This method will allow you to reasonably plaster under tiles or other coatings that do not require a perfect plane.
For high-quality installation of beacons, it is necessary to build a frame.
The frame consists of: four nylon threads (black in the picture) forming a frame, at the ends of the threads there are loops that allow them to be moved on nails (four black dots). The frame is aligned in a precise vertical plane using threads with plumb lines (blue lines with orange tips) - instead of plumb lines, you can use a laser level. The horizontal blue line is the thread on loose loops, allowing it to ride along the frame. Using a moving thread, the entire rough wall is assessed for protruding areas. The red dotted lines are future beacons; the frame should extend beyond the outermost beacons.
To align the frame in accordance with the geometry of the room (if one is planned and the axes are marked on the floor), the plane of the frame is aligned with the markings on the floor using plumb lines or a laser level.
When the frame is installed and adjusted, the moving horizontal thread serves as a guide for setting the beacon screws, more on them below.
In general, marking the vertical lines themselves where the beacons will be installed should be done before placing the frame. Corner beacons should be placed with gaps from the walls of 15-20 cm or more for comfortable positioning of the frame, and for more convenient work as a rule when plastering. The corner beacon and the one following it must be marked at such a distance that when leaning on them, the rule reaches the corner.
The distance between beacons should not be made too large, even if the length of the rule allows it. The optimal distance between plaster beacons is 100-120 centimeters. With a larger distance, the complexity of the process increases and sometimes quality suffers.
Also, before stretching the frame, along the marked lines of the beacons it is necessary to drill holes for self-tapping screws, which will be the basis for future beacons. Of course, this can be done after setting the frame, depending on who it is more convenient for you. The number of holes for self-tapping screws depends on the type of beacons.
There are two main types of beacons for plastering: a beacon profile or made from a plaster mixture. It is difficult to say which type of beacons is better; it is rather a matter of personal preference of the plasterer.
Beacons made of beacon profile
They are quite easy to install and do not require any rules. However, they require mandatory removal from the walls after the base solution has hardened. Also, these beacons are thick (6 or 10 mm), so the minimum layer of plaster is 6 mm. In problem areas with a thin layer, you can “drill” under the beacon to reduce the layer.
These profiles are placed on special fasteners (clips) created specifically for this profile or simply on patches of gypsum mortar (under the patches there is a self-tapping screw). In both cases, self-tapping screws are placed at intervals of 30-40 cm; a less frequent installation will lead to sagging of the profile during plastering. The actual support self-tapping screws are aligned in one plane using the frame described above.
When the frame is made and adjusted to the plane and vertical, the support screws are adjusted using a moving thread. Ideally, the head of the screw should barely reach the thread - so that you can be sure that the screw does not touch the thread and at the same time be as close as possible. Thus, all twisted screws will be in the same vertical plane with their heads.
When aligning the heads of the screws, it is necessary to take into account the thickness of the beacon itself, and in the case of clips, its thickness is also 1-2 mm. In other words, when adjusting the frame vertically, it is necessary to move it towards the wall by a beacon thickness of 6 or 10 mm. (two types of beacon profile).
“Rubbed” beacons made of plaster mixture or putty
It is possible to set it to any layer thickness from 0 mm. There is no need to remove anything from the walls after leveling. Disadvantages include: more movements during creation, shuffling as a rule when overzealous. The main drawback is that you can start plastering work only the next day.
However, the “rubbing” technology is rightfully considered to be of higher quality, subject to some experience.
There are various ways to create beacons from a plaster mixture; let’s look at the most reliable one (in my opinion). The PN27*28 plasterboard profile is used as auxiliary elements; it is advisable to take them from thicker metal. Profiles can be used many times and ultimately used for their intended purpose.
The profiles are cut according to the height of the walls; if they do not have factory-made holes for mounting dowels, you need to drill holes Ø 5-6 mm. at intervals of 50-70 cm. The profile is applied to the place designated for the lighthouse and marks are placed on the wall through the holes - these are the places for future temporary fastenings. Just a couple of centimeters from the marks, another hole is marked. As a result, several paired dowels for self-tapping screws should be inserted on the wall for each beacon - one screw for aligning with a frame or laser in a clear vertical, the other for attaching the PN profile.
Then the screws are aligned vertically and plane (frame or laser level). The guide profiles are fixed with a second pair of screws, so that the fasteners do not fall into too large holes in the profile; you can use improvised “washers” from pieces of the suspension. Beacons are ready to be filled.
A gypsum mixture is driven into the space between the wall and the profile - the same one that is planned to be used for plastering or fugen putty. You need to carefully approach the filling, pressing the mixture with a trowel so that no voids remain.
The next day, the profiles are removed, the supporting screws are unscrewed, and the plaster beacons are lightly cleaned around the edges. Everything is ready for applying plaster.
On walls where there are external corners, you can simplify the task - screw on drywall or a wide profile, the end of which will serve as an outer beacon. The method is good for plastering columns and walls.
Cooking technology
80-90% of the water prepared for the dough is poured into the container, “Rotband” is poured in, wait 1-2 minutes until it begins to absorb moisture, then start mixing with a mixer, gradually adding the rest of the water until the mixture of the desired consistency is obtained. The finished plaster is left to sit for a few more minutes, after which they begin to apply it to the walls.
The ratio of water and dry powder is indicated on the packaging, as well as other tips for preparing and working with this plaster mixture. But slightly change the proportions of the components if, for ease of work, you need a thicker or, conversely, thinner solution.
Dilute as much of the solution as you can use within 20-30 minutes, because after this time the plaster begins to harden and becomes unsuitable for application to the surface of the walls.
Materials and tools
To work with gypsum dry plasters you need to have:
- dry mixture;
- primer;
- reinforcing mesh made of fiberglass, basalt or plastic;
- metal profile for beacons;
- self-tapping screws;
- special clamps for attaching beacons: “Kremmer”, “Ushastik” or clips. What they are and how to use them can be found here.
Tools and equipment needed:
- stepladder or strong table;
- container for mixing the solution - a 10 or 12 liter bucket;
- electric drill or powerful screwdriver with different attachments (mixer, drill and cross-shaped bit);
- grinder or metal scissors;
- trowel (trowel) for applying mortar to the wall;
- h-shaped rule - for leveling and redistributing the solution;
H-shape rule.
- trapezoidal rule for pruning;
- spatula, even better two: wide and narrow. The first is used for polishing the solution and instead of the falcon, the solution is collected, the second is for processing hard-to-reach places;
- primer cuvette;
- roller or mat - walls are primed;
- sponge grater for polishing the surface. You can take P400 sandpaper and wrap the block;
- laser level or building level;
- roulette;
- plumb line;
- fishing line or twine for hanging walls;
- simple pencil.
How to work without a mixer?
Carefully! If the mixture is diluted incorrectly or deviates from the recommended technology for a particular composition, cracks, peeling and other serious defects may soon appear on the surface of such a wall.
Most often, the requirements for diluting gypsum compositions are as follows:
- depending on the specific manufacturer, unconditional compliance with the recommended proportions, mixing method and other conditions for working with the solution is required;
- Apply only to clean and specially prepared surfaces;
- applying a primer will ensure reliable adhesion to the wall or ceiling and increase adhesion to the surface. After such treatment, it is necessary to dry the wall for at least 6 hours;
- for a better finish, it is necessary to apply at least 2 layers of plaster, and the second coat is used simply to smooth out minor defects in the thicker first layer;
- the plaster must dry for at least a day, since applying the next layer of material to a wet surface will cause various negative consequences in the future.
The level of viscosity and texture of the plaster must correspond to the finish: facade, starting or finishing.
Instructions on how to prepare plaster without a mixer:
- To work with plaster you will need a clean and dry container.
- Depending on the required portion, the dry composition is poured, and the number of measured portions should be observed to make it easier to work with the required volume of liquid and other components.
- To dilute gypsum plaster of the highest quality, a simple technique is used. About 7 small dry spatulas are filled with a small volume of water and mixed until smooth.
- If necessary, add the required amount of dry composition per serving, followed by the required amount of liquid. The solution is mixed until smooth.
- The prepared solution must be allowed to stand for at least 3 minutes for the dry particles to “swell.” So it is advisable to do a remix.
Important: if you first pour water and do not pour in the dry ingredients, the mixture will consist of lumps that will be very difficult to break and dissolve.
Preparing the walls
Surface preparation before applying gypsum plaster solution is carried out in several stages.
- Cleaning the wall of old coating. It is especially important to remove oil paint, which will not adhere to gypsum plaster. The paint is cleaned off using a metal brush or a special attachment on a drill. If there is old plaster with defects, problem areas are cleaned to a hard base.
- Removing dirt and dust. When cleaning walls from dust and small debris, it is convenient to use a wide brush.
- Treating walls with primer. This is done to improve adhesion - the adhesion of the solution to the surface and reduce the hygroscopicity of the walls. For concrete surfaces, the “Concrete-Contact” composition is suitable. For brick or block walls with increased absorbent properties, you need to select a deep penetration soil. There are also specialized primer compositions for wooden or painted substrates.
USEFUL INFORMATION: Types of putty for walls: materials for interior work
Important! To obtain a high-quality result, you need to prime not only the original surface, but also each layer of the solution after it has been applied and dried.
Features of working with Rotband plaster
Currently, the choice of building materials in retail outlets is very large. Thanks to this, you can always find the best option at a reasonable price. If we talk about plaster, then this is what Rotband is today. It is produced by a number of Russian enterprises with the participation of the German company Knauf Gips KG. This patch is packaged in 5, 10 and 30 kg bags, the latter being the most common. At the same time, the manufacturer made sure that consumers could work with its products correctly. On the back of the bag you can see instructions for using Rotband plaster, including how to dilute it correctly, but practically nothing is said about the complexity of the work.
Before you begin directly plastering the walls, you will need to dilute the mixture. To do this, you should prepare some tools:
- steelyard - you can use it to find out the exact weight of the dry mixture;
- electric drill with a special stirrer (mixer)
- container for plaster;
- measure for water;
- basin or bucket for the prepared solution.
Pros and cons of gypsum plaster
Gypsum plaster has gained popularity due to its advantages :
- high plasticity - easily applied and stretched in a thin layer onto horizontal and vertical building structures;
- good adhesion to almost all building materials, including concrete, brick, aerated concrete and clay bases;
- formation of a smooth surface after drying - no further processing is required: grouting and sanding with finishing mixtures;
- absence of shrinkage with a plaster layer of up to 3 cm, and, therefore, the entire surface - no microcracks form;
- excellent soundproofing properties - absorbs indoor noise, weakens structural noise;
- prevents heat loss due to the low thermal conductivity coefficient - 0.23-0.3 W/m*K;
- low weight - no serious loads are created on the walls and foundation;
- environmentally friendly - sanitary standards allow use in any room of a house or apartment (children's room, bedroom);
- ability to pass vapor molecules (vapor permeability). Thanks to this, a comfortable microclimate is maintained in the plastered room;
- economical consumption - allows you to completely offset the higher price compared to CPR;
- fast setting - the following stages of the technological process are not delayed;
- short drying period - from 3 to 7 days, which significantly reduces repair time;
- does not serve as a basis for the development of fungi and mold;
- thinner base layer than cement mortars - 2 cm versus 3 cm;
- fire safety - fire-resistant partitions are manufactured.
The list of strengths is impressive. However, the existing disadvantages narrow, however significantly, the scope of application:
- afraid of moisture - cannot be used outside (on facades) and in rooms with high humidity (basement, bathroom, open balcony or loggia, etc.);
- having an acidic environment, it corrodes metal, even galvanized;
- has low surface hardness - can easily chip or leave a deep scratch;
- Quick setting for beginners in plastering creates problems: they do not have time to work out the batch. But this is the other side of the coin, because... for professionals this is an undoubted advantage;
- Do not work in unheated rooms in winter. Only at positive temperatures - from +5oC or more.
Checking the quality of the solution
it is necessary to determine the fat content of the solution. To do this, a small amount of the finished composition is collected on the tip of the spatula. The mixture should be an even layer, not overflow or separate. If not, you need to align the texture in the right direction.
The applied layer must be of appropriate thickness, depending on the functions assigned to it:
- for simple leveling of walls with small defects up to 1.2 cm - simple plaster;
- when leveled with a layer of 1.5 cm - an improved plaster coating provides greater strength;
- no more than 2 cm - called a high-quality finish with high strength of the outer layer and its necessary uniformity.
Sources
- https://vg-repair.ru/drugoe/chem-rastvorit-gipsovuyu-shtukaturku.html
- https://GrossBuilding.ru/raboty/kak-razvesti-rotband.html
- https://skolkogramm.ru/info/kak-razvodit-shtukaturku-rotband-proporczii-instrumenty
- https://KupitFaneru.ru/drugoe/pochemu-rotband-bystro-zastyvaet-2.html