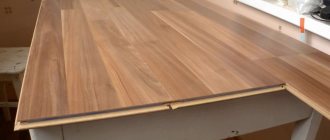
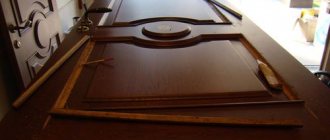
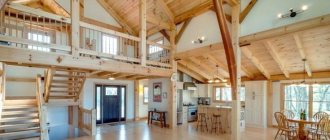
Cladding materials have always been in great demand. One of their varieties is lining. It has established itself as a high-quality product with many positive properties. There is a wide variety of profiles on the market, which allows you to create different textures and attach panels anywhere. Almost any type of wood can be used as a primary raw material. Lining has become a common material for finishing steam rooms, but it can also be found in expensive private homes. The styling pattern is selected individually. It can be horizontal, vertical, diagonal, combined. Complex configurations are popular these days. Eurolining has a good reputation. It has a neater appearance and improved properties. If you have basic knowledge, clapboard cladding can be done on your own.
Advantages and disadvantages of finishing
Initially, lining was used to decorate train interiors. Even then, people paid attention to its ability to soften changes in humidity and temperature. It was quickly attached with profiled joints - this is another plus. Then the lining was improved: the shape and grooves changed, and the design characteristics improved. Finishing with modern lining has many advantages. First of all, this is the convenience and speed of installation thanks to the tongue-and-groove system. Another advantage is environmental friendliness. And one of the main advantages can be considered a low price with a fairly presentable appearance. Clapboard finishing has several negative aspects. The material can be spoiled by parasites. Rotting also causes deterioration in the appearance of the cladding. Wood also absorbs a lot of moisture and heat and deteriorates because of this. However, in doing so it improves the indoor air.
Nuances to consider
Lining is a board (of different thicknesses) that is made from various types of wood. The material got its name because of its original place of use. Namely, train cars, the internal surfaces of which were lined with small wooden slats, which created an excellent microclimate. Currently, wood products are returning to their former popularity, which decreased slightly when plastic and MDF options began to appear.
The modern construction market offers a wide range of types of lining
It is necessary to take into account that covering walls with clapboard with your own hands requires a balanced approach.
Therefore, it is important to pay attention to the product at the stage of its purchase. Pay attention to the following points:
- Correct storage of purchased goods. Packages must be stored horizontally on a support.
- The humidity level of the warehouse should be within normal limits.
- It is not allowed to place the product in an open space, exposed to sunlight.
You should also pay attention to the expiration date on the label. All information about the storage and shelf life of the lining must be indicated on the packaging of the material
All information about the storage and shelf life of the lining must be indicated on the packaging of the material
This precaution is necessary in order to mitigate possible risks. The fact is that work with the lining is carried out only after they are completely convinced that the material meets all standards
It is necessary to purchase material with a margin of 10%
Types of lining
Conventional lining is characterized by the following dimensions: thickness - 1.2-2.5 cm, width - up to 15 cm and length - up to 6 m (this is basically what it was in the old GOSTs). Standard lining has a smaller tenon - 4-6 mm, compared to 8-9 for Euro lining. The humidity of ordinary material is 8-12%, 25-35%, the European version is up to 12%. The old type of lining is made from material with natural moisture. Eurolining is a high-quality cladding board for external and internal wall decoration. It masks imperfections well and is capable of leveling surfaces. In addition, it performs sound and heat insulating functions. Eurolining has certain fixed parameters. The thickness is 1.3, 1.6 and 1.9 cm. The width is 8, 10, 11 or 12 cm. The maximum length of the board is 6 meters, but this figure depends on the manufacturer and varies greatly in different cases.
Types of wood from which eurolining is made:
- oak;
- Linden;
- pine;
- spruce;
- aspen.
Types of lining profiles
Variety is important in finishing, so manufacturers produce different variations and modifications of the lining. Traditional eurolining forms distinct seams after installation. If this type of lining has a rounded chamfer, then it is “Softline”. Its outer part is devoid of corners, which allows you to protect the wood from burrs and chips for a long time. "Softline" is well suited for saunas. The Shtil lining does not have a chamfer near the tenon, and, as a result, there will be no pronounced seams after assembly. The thickness reaches 2.5 cm, so it can be used for decorating facades. “Landhouse” is a lining with a complex rounded shape at the edges. Finishing with this coating will make the interior more “expensive”. Another interesting option is “Blockhouse”, which features a rounded front side. This material can be used to finish the surfaces inside log houses and facades.
Several more types of lining:
- "American". Has a sloping surface. The elements are overlapped.
- Double-sided. Both sides are obverse. It is used not only for finishing walls, but also for constructing partitions.
Painting after installation
Upon completion of the work on installing the finishing in your home, another important question arises - what solutions to protect the cladding of your house with, how to cover the lining to extend its service life, to avoid the appearance of insects, and also to protect against rot and mold?
It would be unreasonable to neglect such an issue, especially due to the fact that nowadays hardware and construction stores have a truly huge assortment. Therefore, it is very easy to choose any variation of impregnations and protective solutions for your lining.
Type of lining depending on the type of wood
The lining is made from coniferous and deciduous trees, as well as from exotic species (for example, mahogany). Among the coniferous species, it is worth highlighting spruce, pine, larch and cedar. Spruce is endowed with softness, which is important for making boards with rounded shapes. This material looks great in a modern interior. Pine lining is a budget option that has many important qualities, including high strength. Larch is one of the most expensive coniferous species. Cedar boards have a pleasant natural smell that has a beneficial effect on the body. Among hardwoods, the most popular are oak, alder and linden. Oak wood is a durable and sought-after material. Lining made from this wood is considered a classic option. Alder is suitable for use in damp rooms as it does not absorb moisture. Linden is very resistant to deformation and mechanical damage. Lining from it is relatively inexpensive.
Which material to choose
To decorate a house with clapboard from the inside, it is better to opt for the following materials:
- Tree;
- MDF panels;
- LDSP/LDVP;
- Plastic panels.
When listing the material, it was no coincidence that plastic ended up in last place, despite the fact that the cost-effectiveness and rich color palette, as well as ease of operation, are obvious. But environmental performance and resistance to mechanical damage relegate the quality of such cladding to last place. Another disadvantage of the plastic profile is its low fire resistance; already at a temperature of 100 ° C, the material begins to emit an unpleasant chemical odor, and with a further increase in temperature it can begin to smolder.
Metal lining is very heavy to decorate a room with. And in the summer, a room covered with such a profile will quickly and strongly heat up.
Wood is the most popular type of interior cladding. A chipboard product will have to be painted or coated with varnish that imitates the texture of wood. And this will lead to a delay in the progress of work, and will not give the desired result.
When choosing a wooden material, you should focus on the highest grades of lining - “Extra” and grade “A”. As a last resort, you can use “B”; class “C” material is only suitable for finishing utility rooms, such as a pantry.
Type of lining
There are 4 varieties:
- Extra;
- Class A;
- Class B;
- Class C.
The boards are sorted depending on the presence of resin pockets, pronounced blueness, knots, cracks, and roughness (poorly treated areas). The extra grade is characterized by the complete absence of prostrog or minor defects on the front side. There may be one light knot per linear meter. For class A, the presence of microcracks and small untreated areas is allowed. At the longitudinal ends, cracks no longer than the width of the board are allowed. There should be no more than a fifth of all boards made of core profiles. It is acceptable to have 3 knots on one linear meter. As for class B, the presence of 2 falling knots is allowed on one such board. Cracks up to 3 cm are allowed on the front side, and cracks of any size on the front and back sides. All panels can be made from core, with resin pockets. Class C includes all boards that are not included in the categories from extra to class B, but are suitable for use. Rottenness is not allowed.
Fastening with finishing nails
Finishing nails are special nails of small thickness. They easily enter the material without causing cracking. Their distinctive feature is a reduced cap, which is easily recessed into the thickness of the part. Unlike construction nails, finishing nails cannot withstand increased loads and are used only for hidden fastening of finishing materials in structures that will not be subject to shrinkage, tearing and bending. This installation method is not suitable for installing temporary coverings, since it is almost impossible to remove a thin nail from the panel.
Where to apply
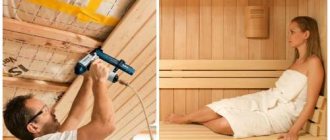
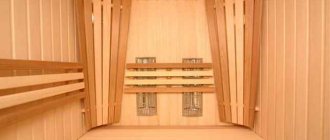
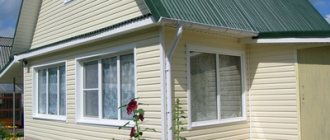
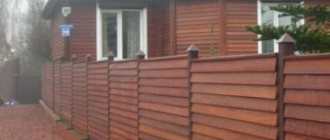
Clapboard finishing is often used in steam rooms and other bathhouses. In this case, choose panels made of linden and alder (for steam rooms) and coniferous wood (for other places). These types of wood are endowed with healing properties, thanks to substances that are released when heated. Boards with knots cannot be used in steam rooms, as the corresponding areas become hotter. For a good aroma, it is recommended to install several pine boards in the area of the stove. The lining treated with protective compounds is suitable for cladding facades; the type of wood in this regard is not particularly important. Interior decoration is a complex task; panels in a uniform color scheme are required. Mahogany lining is used for cladding walls in expensive mansions. The panels are also used to make partitions to divide space: both in apartments and in open areas.
Examples of cladding
- There is an opinion that lining is more suitable for a bathhouse or cottage than for an apartment or cottage. This misconception is successfully refuted by designers who harmoniously integrate wood cladding into a wide variety of trends and styles.
- Wood lining in the interior harmoniously combines with wallpaper, tiles, and plaster. With a professional combination of textures, you can create a stylish and elegant interior.
- Lining can become an integral part of an interior in Scandinavian style. In this design, it is in harmony with artificial or natural stone and large beams on the ceiling.
- Anyone who is in love with Provence will certainly suit the walls made of wood in natural tones. In this option, the combination of wood with plaster and rough board floors looks nice and relaxed.
- Another style that requires the use of natural wood cladding is Russian. The walls, lined with a block house, look like the walls of a log house.
- You can also use lining in high-tech style. In this version, the materials are painted in neutral white or gray colors and are used as a background for rich accessories.
- Fans of minimalism will most likely like the combination of lining with a strict cladding made of ceramics and stone.
See below for more details.
Sheathing schemes
There are two ways - using external fastening and hidden. With the external method, the boards must be fixed with fasteners. In the second case, the panels are attached to the sheathing from the groove side, where there is a joint with a tenon. The appearance with this option will be more aesthetic. The lining can be mounted vertically, horizontally and, if necessary, in a non-standard way. When laying panels horizontally, the teeth must be directed from the lower element to the upper one, and not vice versa. When sheathing a log wall, staples and nails for them and lathing are used. To clap a room with smooth walls, you need to use bars. They are placed at a distance of no more than 50 cm between adjacent elements and perpendicular to the panels. The cladding is framed with decorative skirting boards and fillets
Basic fastening methods:
- nails;
- screws;
- staples;
- kleimers.
Preliminary work
Before the upcoming finishing of the room with clapboard, it is necessary to treat the material with fire retardants and other antiseptics. And taking into account your personal wishes, you can cover the panels with stain or even use paint (but in this case you will hide the texture). Then you should allow the treated material to dry thoroughly and bring it into the room in which your coating will be installed. The panels will have to rest for at least a day before laying the lining, thus the wood will adapt to the conditions and atmosphere of the interior, which will subsequently eliminate the possibility of subsequent deformation.
Then you should begin installing the sheathing on the surface to be covered. You can make the bars for the sheathing yourself, but this is only possible with a special machine, so it is easier to purchase such slats. The section of the bar for the sheathing is 50x50 mm and is considered optimal. The frame elements are installed in increments equal to the width of your insulation minus 10-30 mm. The frame is attached using self-tapping screws; less often, screws are used for this. Using special tools, you should check the correct, level installation of your sheathing; the further operation of the coating and its service life depend on this.
Before installing the lining, the third step follows, which consists of covering the frame with waterproofing materials, this is a film that is fixed with a construction stapler. Next, insulation is placed in the cells of the sheathing, of course, if it is required, for example, it is not required in a bathhouse. Mineral wool can be used as insulation; it should be laid tightly, avoiding the appearance of gaps. The thermal insulation layer is covered with a vapor barrier material, which, like waterproofing, is stapled to the sheathing.
Next, a frame designed specifically for installing the sheathing is attached to the sheathing, adapted for insulation. The sheathing is installed perpendicular to how you are going to attach the lining itself; accordingly, this frame should be installed perpendicular to the previous sheathing.
For this reason, the fastening option should be determined for yourself before starting work, so as not to make a mistake when attaching the first sheathing.
After which the frame should be treated with antiseptic solutions and allowed to dry.
How to sheathe it yourself
You will need to complete the following stages of work:
- Prepare the lining.
- Prepare the wall.
- Assemble the sheathing.
- Attach the clapboard to the lattice frame.
- Finish the covering with skirting boards and, if necessary, other elements.
The panels are processed first. Depending on the place of application, any class of lining can be processed. It is always necessary to prepare the surface of class C products. The same applies to lining made by yourself. Preparing the walls consists of leveling them and applying markings for the sheathing. It is not necessary to level it; instead, you can do other manipulations. The crucial point is the installation of the sheathing. The timber itself and the distance between the elements are selected. The configuration completely depends on the planned method of laying the lining. Different approaches are used to fix the panels. The main thing in the work is caution, because inaccurate driving of the fastener can lead to the appearance of serious defects in the material. When the sheathing is ready, installation of baseboards and finishing begins.
How to prepare the lining
If necessary, the panels are treated with fine-grained sandpaper to eliminate roughness. Further processing begins with cleaning the surface of the material. If you plan to apply wax or varnish to the lining, stain is first used. It will preserve the color of the wood for a long time. There are 3 types of stain: oil-based, alcohol-based and water-based. Antiseptics will protect the wood from moisture penetration and mold. If the installation location is a bathhouse, waxing will be required. It is applied in small quantities, in the direction of the fibers. This procedure must be repeated several times. Then the products are polished. Among other things, the color of the boards will become deeper. There is a large selection of wax impregnations on sale, which are also suitable for preparing lining. The last stage is applying varnish. You will need at least 2 layers. The material must be perfectly dry before installation.
Grease stains can be removed using a 25% acetone solution.
Preparing the walls
You will need to make markings on the wall for the sheathing. This action is performed using a pencil and level. The configuration of the cladding and the direction in which the lining will be placed are determined in advance. The bars are always placed perpendicularly. If everything has already been decided about this nuance, you can start treating the walls with antifungal agents and marking the surfaces. If something happens, the pencil is replaced with chalk. The width of the sheathing step is selected depending on the purposes. For strength, it is advisable to make it as small as possible. Usually this figure is in the range of 35-60 cm. If in the future it is planned to insulate a room, the step is determined based on the size of the insulating material and should be slightly less than it. To ensure that the frame structure is level, you will need to use a plumb line and fishing line. A visualization is created, along the edges of which bars are then placed.
We create a sheathing for fasteners
This is one of the most important stages, which has a significant impact on the final result. Only sometimes the lining is attached directly to wooden walls; in other situations, lathing is necessary. At the very beginning, we select the timber. For this sheathing, a block with a cross section of 40×20 mm is the best option. We install the frame one level at a time. If necessary, we level each individual wall. You can use another method - determine the most protruding place on the wall. Then a small piece of timber is placed there and the sheathing is mounted from it. From this point the thread is pulled parallel to the planned direction of laying the panels. At the extreme points of the wall, 2 load-bearing beams are placed. If necessary, install spacers between the wall and the beam. If a row of lining will be mounted from 2 boards, another beam is needed at the junction.
Other important nuances:
- when securing the structure, you need to check the level;
- if there are door or window openings, the beams must be fastened around them;
- Installation of lathing on the ceiling is done in the same way as on the walls.
Fixation methods
The lining is secured using staplers, clamps or fasteners (screws, nails). During installation, care must be taken to avoid splitting the wood and causing cracks. Full insertion of the nail head into the material and accuracy of work are ensured with the help of a hammer. When installed in a hidden way, the panels are nailed to the frame at the junction of the tongue and groove. The simplest and easiest assembly method is to fasten with small nails in any places, but it is better to prefer a neat method that involves hammering nails into the grooves to hide the connection. The highest quality fastening is ensured by metal clamps. They come in different sizes, shapes and are designed for a certain board thickness. The fasteners are connected to the sheathing on one side, and cut into the grooves on the other.
Fastening the lining to the ceiling requires careful steps, so it is better to do this together with a specialist!
The process of fastening the lining
If the sheathing is installed correctly, the process of installing the lining will go without complications. A level may be needed when attaching the first panel. The first question before installation is which side to start laying the boards on. You can determine the answer by finding out how smooth the surface is. If it corresponds to the level, then you can start laying from any side: top, bottom, right, left, corner. The first board is then placed level. If the surface is slightly “overwhelmed” or some corner is uneven, the boards cannot be installed this way. Otherwise, they will visually emphasize the curvature. The lining will need to be assembled in a different way. The first board is attached flush to the corner, the rest - with a slight inclination in the desired direction. Sooner or later some panel will become level. All boards “fill up” to the same extent. The first one needs to be placed with the spike towards the corner.
Rules for installing skirting boards on a wall with lining
For an aesthetic appearance, the sheathed walls are decorated with floor and ceiling skirting boards. Sometimes they need to be mounted on the wall (corner). When finishing corners, they are guided by the following rules: if there is an adjacent unsheathed wall, then the plinth is installed on it, and when placed between two sheathed ones, it should be attached to the shorter one. These measures should not prevent thermal deformation and drying out of surfaces that are most susceptible to them. If the wall is decorated with clapboard, then the baseboards are fixed using finishing nails. They hammer it through the body, the narrow cap goes into the mass. These areas are then treated with a wax pencil. If the surface is not flat (for example, log), nailing a regular baseboard will not always be possible. Gaps may remain. It is likely that in the corners the baseboards will not meet at all. Instead, you can use flat platbands. They fit tightly on the wall, and you can make them yourself, including from clapboard.
Preparation for installation
Before installing the lining, it must be thoroughly treated with chemicals that will prevent mold and also prevent the appearance of rot and pests. The material must dry well and sit in the house for at least a day so that the wood gets used to the atmosphere of the room.
Next, you need to make internal markings of the room, determine the location of sockets, switches and take into account window and door openings. This should be done to avoid unnecessary consumption of material and masking of unwanted joints.
DIY installation tool kit:
- Hammer;
- Level;
- Kern;
- Stapler;
- Hacksaw for metal;
- Plumb;
- Screwdriver;
- Screwdriver.
But you should be prepared for the fact that more tools may be required; this list does not include consumables such as screws, dowels, varnish and various putties.
Decorative finishing methods
If installation is carried out in a hidden way, it is recommended to use decorative fasteners. A hammer will ensure accurate fixation and decoration of the nail in the wood. You can decorate the corner between the boards using treated timber - this way there will be no gaps in the opening. If the natural color of the wood does not fit into the interior or does not add any color, then the lining is coated with paint. It’s better to match the decor or white. The nail heads that secure the starter board are covered with decorative corners. If there are no decorative slats, then the tops of the fasteners are removed with side cutters. All joints, internal and external corners must be closed. Bottom and ceiling plinths are also used for decoration. The interior can be radically changed by installing false beams on top of the lining.
There is old clapboard on the walls. How to clean it? Restore original color?
To do this, you can use a flat pumice stone or an abrasive wheel. As a result of sanding, the shalevka loses all its protective properties, which means it must be coated with an appropriate antiseptic solution, which not only plays a protective role, but also preserves all the properties of the paint.
Once the preparation is complete, the paint can be coated.
If you use classic paint, it will preserve the original upholstery pattern and will not require additional finishing. If the coating is opaque and completely hides the wood grain, to achieve an attractive and original look, you should take care of additional decorations, for example, elements for decorating windows and floors.
