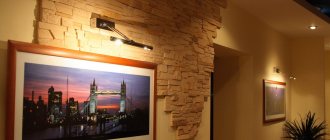
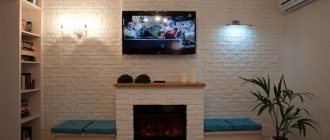
Decorating the walls inside an apartment, as well as the facade of a house, with decorative brick or a material that imitates brickwork has never gone out of fashion. However, unfortunately, it is not always possible to use real brick for interior decoration, as it will weigh down the floor slabs of multi-story buildings. In addition, making ideal masonry “for jointing” is not so easy, because this requires at least minimal experience as a mason.
Imitation brick for interior decoration
It is much easier to use other interesting methods to achieve the desired result. Imitation brick for interior decoration can be produced in different ways and, characteristically, can be installed by anyone, even a novice finisher.
Features of decorative material
One of the ways to make a building unique is to cover its facades with tiles. The rectangular, strict forms of this material create visual appeal against the backdrop of the urban ensemble. But decorative tiles are most suitable for indoor interior design.
It can be used as a solid canvas covering the wall, or as individual elements of a design ornament. Moreover, you can veneer not only the walls themselves, but also fireplaces, niches, shelves, door and window openings.
Types of tile patterns
The pattern of brickwork differs not only in the size of individual blocks. In addition to the usual horizontal position, a herringbone laying appeared, reminiscent of a parquet pattern on the floor. Or a masonry of bricks of different sizes: different sizes from square to elongated alternate in a complex repeat.
Sometimes the manufacturer imitates sloppy masonry with bricks protruding forward or with a slightly shifted pattern. This gives the tiles realism and originality.
There are entire mosaic ornaments made of brick.
Advantages of brick cladding
- ease of installation, which is ensured by the ability to easily file a fragment and adjust its dimensions to the desired location on the surface;
- due to the ease of processing individual rectangles, external and internal corners acquire an attractive appearance;
- the ability to separate different zones in an apartment or room, emphasizing their aesthetic appeal;
- allows you to eliminate internal surface defects in the room, for example, you can easily remove unevenness and other imperfections on the walls;
- the ability to choose the color and texture to suit every taste, place an order for production according to the sample you like;
- strength and durability in use;
- ease of care and the ability to be used in decorating various premises.
Design techniques for laying tiles
Many people refuse to use stone-like tiles for interior decoration in their apartments, for fear of making the room gloomy. However, these fears are unfounded, because there are many compromise design solutions when you can not cover the entire room, but only one of the walls, a niche or a ledge. The main thing is to think over the overall design concept for the entire room.
Imitating protruding brickwork from broken plaster is an interesting idea, but it must be consistent with the overall style. Sometimes protruding corners are trimmed with brickwork, but such a design decision depends entirely on the wishes of the apartment owner.
Decorative wall decoration using imitation brickwork
If the room has a fireplace or stove, then you should take care of the appropriate decoration of the space around it. Designers do not recommend completely covering walls with imitation brick for interior decoration; it is better to do this around the hearth or in a small area.
Helpful advice! Completely brick walls near the fireplace blur this decorative element, and it is completely lost. A combination of several finishing materials will help highlight the hearth and give it charm.
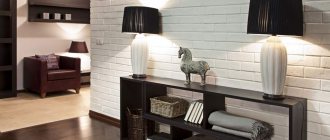
When choosing tiles for a room, do not forget about its color. Too dark colors will make the room gloomy and barracks-like. Sand tones, on the contrary, will add warmth and space. Supporters of conservatism may prefer red tones of natural masonry in the living room, and choose white brick-like tiles for the bedroom.
Do not forget about such an important point when choosing a tile as its surface. It can be either smooth or matte. Experts truly believe that a shiny surface looks unnatural. However, if it is combined with the corresponding elements and decoration of the rest of the room, the result can be unexpected and interesting.
Brickwork combined with white kitchen furniture looks impressive
White glossy brick tiles are actively used for tiling kitchens or bathrooms. The smooth surface is easy to clean and does not absorb moisture or various contaminants.
Ceramic tile
Many people unfairly accuse this type of solution of having little originality. But that's not true. Clay is used for production. It is mixed with quartz sand, as well as various carbonates and dyes. Products can be given a wide variety of surfaces and colors that are most suitable for a specific interior can be selected.
For interior decoration, you can purchase a “brick-like” material that has a smooth, glossy or rough surface, and also add an antique effect to the interior.
General Features
Matte with wear and small irregularities reminiscent of the texture of real masonry, tiles with brick patterns look realistic. The smooth glossy surface looks noble and solemn in appearance. The tile is easy to apply and maintain.
For your information. The black glossy finish retains fingerprints and water droplets. Gray and white shades are less susceptible to such contamination.
Advantages of ceramic material
- lightness in weight;
- increased strength and durability;
- low water absorption rates;
- excellent frost resistance and resistance to fading under the influence of sunlight and aggressive environments;
- safety for humans.
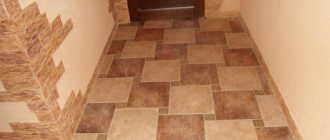
Ceramics are used in the kitchen, in hallways, and in places where brick imitation is required, since using real brick would be irrational. For example, for decorating loggias, balconies, fireplaces or arches.
Types and materials of tiles
The building material used for interior finishing work is not exposed to intense sunlight, temperature changes, high humidity, etc. However, this does not mean that you should approach its choice inattentively and frivolously. This is due not only to the quality of the tiles, but also to the features of their laying, which differ significantly from the laying of ordinary tiles.
Before choosing a specific type, it is necessary to answer the question of what is planned to be obtained as a result: a complete imitation or a fairly distant similarity? The answer to this question will allow you to choose the appropriate tile, which is produced in the form of one brick or several rows.
The latter option is easier to install, because it is large in size, and the joining occurs according to the checkerboard principle. In this case, the brick wall will differ from the usual texture, but this will allow you to get an unusual effect and give the room a unique look.
Brick-like tiles look impressive when decorating a kitchen backsplash
Note! When choosing the type of tile in the form of panels, you must remember the increased fragility in places where seams are imitated.
It is worth noting that the choice of material from which it is made has a significant impact on the strength of decorative brick tiles. For these purposes, clinker, ceramics, polymer cement or gypsum can be used. Each of the materials has its own characteristics, which must be taken into account when choosing tiles for finishing various rooms.
Clinker finishing
The high strength of the material made from refractory clay, combined with increased lightness, allows it to be used for cladding facades and foundations.
Clinker tiles are very elastic and resistant to external aggressive environments. It will help you give the facade an original look, significantly saving on costs.
But even indoors, such decoration will look very original. You can easily verify this by looking at various photos of such brick-like tiles.
It goes well with many interior design styles and can be used together with other types of finishing - plaster or wallpaper. For example, white products are widely used in the arrangement of premises where the loft, modern or country style was implemented.
Homemade wall design options for brickwork
If you want to save money by making an imitation of brickwork on one of the walls of an apartment or house with your own hands, you can use original techniques developed by folk craftsmen.
There are interesting technologies that allow you to imitate brickwork completely independently.
There are several common options that do not require special costs for the purchase of facing slabs or panels, and also do not create any particular difficulties in installation:
- Self-production of polystyrene foam tiles with a thickness of 10÷12 mm. For this purpose, it is recommended to use extruded material with higher performance indicators than conventional white foam.
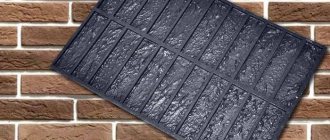
- Creating a brickwork relief using a stencil.
- Reproduce the desired design on the wall using masking tape.
Brick-like tiles made of polystyrene foam
If you plan to use the process of melting the edges of foam plastic in the manufacture of tiles, then the work should be carried out outdoors, protecting the respiratory tract with a respirator, since this material is flammable and releases toxic substances when burned and melted.
To be honest, using polystyrene foam for interior decoration is still not a reasonable solution.
- The first step is to mark the “brickwork” on the prepared, leveled and primed wall surface using a ruler, plumb line, building level and a simple pencil. The wall is drawn into horizontal stripes and vertical partitions, which determine the size of the bricks and the seams between them and the masonry rows.
- The second step is to mark the sheet of polystyrene foam into tiles of the selected size.
Sliced polystyrene foam rectangles are the future “bricks” of finishing
- Then the material is cut into individual elements with a stationery knife. The number of such blocks must correspond to the number of bricks required to decorate a certain section of the wall on which the marking was made.
Smooth tiles will not give the desired effect, so they need to “spoil their appearance” a little
- Next, in order to achieve the most reliable effect of imitation brick, you need to work on the resulting tile - this can be done in different ways. Its surface is treated with sandpaper in different or one direction, and notches and grooves are made on it with a knife or other sharp instrument. You can also use a heated soldering iron for these purposes.
Melting the edges of the tile using the fire of a lighter
Another option is to melt the edges and outside of the tile using a regular lighter or torch. In this case, the front surface takes on soft, smooth shapes.
Expanded polystyrene processed tiles arranged in “brickwork”
- After painting the tiles in the chosen color, its relief will be more pronounced. Paint can be applied before installing the tiles or after the wall cladding is completely completed.
Painting can be done using a brush or spraying the coloring composition from a can. The main thing is that the paint does not cause dissolution or softening of polystyrene foam - it is better not to experiment with organic-based compositions, giving preference to water-soluble ones.
The same “brickwork” but after the painting operation
- Laying of foam tiles is carried out according to wall markings using “liquid nails” glue, which is applied to the back surface in three points with a thickness of 3–4 mm.
- The final stage will be the design of the seams between the bricks and rows.
- It should be noted that if the design does not provide for highlighting the tile joints with a different color, then painting the cladding can be done after the grout solution has dried.
Imitation of brickwork using a stencil
In order to make an imitation of brickwork using a stencil, you will need a cement-based mortar. It is best to purchase it in the form of a ready-made dry building mixture for plastering work, since it already has all the necessary additives that make it plastic and convenient for work.
Stencil for “brickwork” and the relief that should be obtained in the end
The solution can be made independently from two materials - this is a plaster and adhesive cement mixture, which are taken in proportions of 1:1. To increase the plasticity of the solution, add a tablespoon of liquid detergent per 5 kg of the finished mixture.
- The wall must be well cleaned, primed and dried.
- The solution can be applied to its surface using a wide spatula or simply with a rubber-gloved hand. The thickness of the applied layer should be equal to the thickness of the stencil strips. This moment will depend on what kind of surface the brick should have - smooth or rough.
- Further, so that the stencil does not have “stickiness” with the layer of applied solution and is easily separated from it, it should be moistened with water - this can be done with a sponge or damp cloth. If the stencil is made of rubber, then you can simply dip it in a basin of water, but in this case you need to wait for the excess to drain, otherwise excess moisture can ruin the whole work.
- After this, the stencil is pressed against the applied fresh plaster and carefully pressed so that the relief of the brickwork remains on it.
- Next, the stencil is removed and applied further, next to the just pressed relief. Here you need to try and apply it so that the masonry is even and its horizontal seams do not become distorted.
- When the relief has been applied to the entire surface, it is left until completely dry.
- After drying, the wall should be completely covered with one color - usually light shades are chosen for this, since it will be easiest to apply any color to them, as well as highlight it with a dark shade or leave all the masonry seams light.
It is recommended to use acrylic paints to paint the surface, and it is best to cover the relief wall with a layer of primer before applying them.
Painting imitation brickwork is already a creative process, so you can allow yourself various fantasies. In this case, of course, it is necessary to keep in mind that the chosen color will set the mood for the entire interior of the room.
Creating a brickwork relief using plaster and masking tape
For this technology of reproducing imitation brickwork on the wall, you will need the above-mentioned composition of cement plaster mortar and masking tape. Some craftsmen even use electrical tape, however, it does not adhere to the wall well, while high-quality masking tape has excellent adhesion to any surface.
This “brickwork” relief can be made using regular masking tape
The width of the tape should be no more than 14 mm, and if you couldn’t find tape of that width, you’ll have to buy a wider one and carefully cut it in half right in the skein. If its edges are not perfectly smooth, this is not a big deal at all, since this factor will not affect the accuracy of the relief, but rather will even play into your hands.
First of all, the wall is marked
- The first step is to mark the prepared surface of the wall to be tiled for brickwork.
Painting tape is glued to the wall along all marking lines
- Next, masking tape is glued along all the marked lines on the wall. It should be secured so that the edges of the horizontal pieces of tape extend beyond the edges of the surface being designed, and the solution should not be applied to them, and the vertical pieces should be well glued to the horizontal ones, always on top of them.
- Then, on the surface of the wall, on top of the glued grid of adhesive tape, using a wide spatula, apply a solution with a layer thickness of 5-6 mm - the height of the relief will depend on this parameter. Do not apply too thick a layer, otherwise you will have to cover the seams with grout.
- After applying the solution completely to the entire wall, you can walk over it with a damp rubber glove to create a textured surface. If you plan to leave the surface of the “bricks” flat, then you should not touch the mortar layer.
Carefully removing the “cobweb” from the tape will create a “brickwork” pattern on the wall.
- The most interesting stage in this method of simulating brickwork is removing the masking tape, since after this operation the relief of the wall will be immediately visible. Several strips of tape are picked up from one of the free sides and begin to be carefully peeled off from the wall, and as a result, in place of the peeled tape, seams are formed between the “brick tiles”. After removing the tape from the entire surface, the wall should be left until completely dry.
All that remains is to apply the final decoration with the selected paints
- It is recommended to prime a dry wall before painting - this operation will make the surface more pliable for the next stage - painting, since the paint will lie flat on the surface and will not be absorbed into the plaster layer. Which shades to choose for the wall depends on the preference of the master.
Video: How to imitate brickwork using plaster and masking tape
From all of the above, we can conclude that the construction market has an oversupply of various materials that perfectly imitate brickwork or other stone surfaces. Sometimes the quality of the imitation is such that when finished, it is impossible to distinguish it from real brick by texture and color. Well, if ready-made tiles or panels do not fit into the family budget, then you can use one of the more economical methods and decorate the wall using affordable materials.
Preparing the base
The smoother the surface, the better quality of cladding you will be able to carry out. All things and furnishings should be removed from the room or carefully covered with protective film. After this, you need to remove the old decorative layer, and evaluate the exposed surface for the degree of strength and smoothness.
Any loose layer of plaster must be removed. It is recommended, if necessary, to plaster the surface and then prime it. After drying, you can begin work on laying tiles under the brick.
Main types of brick imitation and technology for working with them
Considering the fact that brickwork has remained popular for decades and is used to reproduce various interior styles, manufacturers did not miss this moment and developed several types of material that can replace natural brick.
The modern range of finishing materials allows you to choose one of several options presented.
Such finishing is made in different forms - it can be flexible or rigid tiles, the size of the end side of a brick, or large wall panels that cover an entire section of the wall at once, made from polyvinyl chloride (PVC), MDF or fiberglass cement.
Flexible brick-like tiles
Flexible tiles that imitate brickwork are great for interior and exterior wall decoration. This modern material is not only decorative, but also a protective coating for surfaces and has a number of positive qualities - this includes resistance to external atmospheric influences, impact resistance, vapor permeability, inertness to microorganisms, as well as ultraviolet radiation, and, of course, aesthetic appearance and a fairly simple processing and installation process.
Modern finishing material – flexible brick tiles
“Flexible brick” is easy to install not only on straight, level surfaces, but also perfectly bends around external and internal corners of rooms.
This material is used to decorate walls inside apartments and houses, in particular, in rooms such as hallways, corridors, kitchens, living rooms, loggias. It is also suitable for external, facade walls. It is very convenient to use such tiles for cladding columns, fireplaces, small architectural forms, as well as in any areas where such a design is planned. Regardless of the complexity of the surface configuration.
Flexible tiles can be used to cover interior parts of complex geometric shapes
The tiles can be used to finish the entire wall or attached to individual sections. Since the material has many colors, it is possible to make the finish monochromatic or use tiles of different shades, harmoniously combining them with each other.
Installation of “flexible brick”
Installing flexible brick cladding does not require any complex tools.
Installing flexible tiles does not require complex electrical tools. You will only need to prepare:
— an even spatula 120÷150 mm wide – for mixing and applying glue;
- a notched trowel with a ridge 4 mm high and 150÷200 mm wide;
— building level 1000÷1500 mm long;
— a ruler 1000÷1500 mm long;
- colored marking cord for marking lines;
- a simple pencil;
- powerful scissors;
- a brush 12 mm wide for leveling the mortar in tile joints.
For materials other than tiles, you will need a primer for the walls and a special tile adhesive.
Ready-to-use adhesive for wall cladding with flexible tiles
For installation, a dry construction mixture can be used - ordinary tile adhesive, but it is more convenient to use a ready-to-use composition packaged in plastic buckets. In any case, when purchasing tiles, you should immediately consult with the seller regarding the adhesive suitable for a particular material.
In order for the masonry to be smooth and neat, the wall must be put in order before installation, by cleaning and leveling its surface. After the leveling solution has dried, the wall must be primed with an antiseptic composition, which will give the materials higher adhesion and will not allow mold to appear under the cladding layer in the future. Once the primer has dried, you can proceed to installing the tiles.
In addition, you need to take into account that installation work must be carried out at a temperature not lower than +5 degrees, otherwise adhesion between the materials will be insufficient, and the tiles may subsequently begin to peel off from the surface of the walls.
Prices for imitation bricks
brick imitation
- The first step is to outline the wall surface into even zones along which glue will be applied and the tiles will be fixed. If the entire wall is to be covered, then it is necessary to beat off the upper and lower limiting lines.
- The glue is not applied to the entire surface, but to individual, marked zones of about 1000×500 mm. The layer of adhesive mass should be approximately 2÷3 mm - it is applied using an even spatula, and then distributed over the entire area to be covered with a notched trowel to create grooves of the same height.
Distributing the adhesive over the surface of the wall to be finished using a notched trowel
- The tiles are glued in order, and if the first row starts with a whole tile, then the second - with half or one third of the “brick”, depending on the desired location of the masonry seams.
Cutting tiles to the required size is not difficult - ordinary large scissors can handle this.
Dividing the “flexible brick” into parts at any angle, without using any power tools, is quite simple: it is marked and cut along the line with ordinary scissors.
When gluing “flexible bricks”, it is necessary to control the evenness of the rows and maintain a uniform thickness of the seam between adjacent tiles
- The seams between the rows can have different thicknesses - this parameter will depend on the preference of the master, but usually the gap is left at 10 ÷ 12 mm. The selected size of the seams is taken into account immediately when marking the wall into zones for installation.
Have you reached the corner? - It's OK. The tile can be bent and glued in this form.
- “Flexible brick” easily bends around protrusions formed at any angle, as well as internal corners or rounded walls, if they exist on the surface to be finished.
The seams are neatened with a medium-hard brush moistened with water.
- When the intended surface area is covered with tiles, you need to immediately level the mortar in the horizontal and vertical joints, otherwise the glue will set and it will not be possible to accurately level it. Smoothing the solution is carried out using a relatively thin brush of medium hardness, slightly moistened with water.
The fact that flexible tiles do not require additional purchase of grout for joints can also be safely called an advantage of the material, since you do not have to incur extra costs.
When using “flexible bricks”, it is recommended to remove the material from different packages and mix each other before starting work. With this simple method you can achieve an even distribution of different shades of tiles over the entire surface of the wall.
Video: flexible facing tiles with excellent clinker brick imitation
Rigid facing tiles “brick-like”
Decorative tiles are made from various materials, such as gypsum, cement, clay, as well as from a mixture of some of them with the addition of fiber fibers, coloring additives and special plasticizers. Some finishing tile options can be made independently. In addition, imitation of brickwork can be done in other ways.
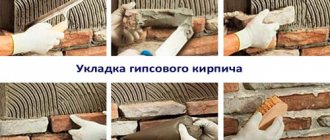
The technology for laying hard tiles from various materials is almost the same, only adhesives suitable for them are used to fix them on the wall. The process of installing trim on a wall will be discussed after a brief description of the types of rigid wall tiles.
Gypsum tiles
Gypsum tiles for interior decoration, imitating brick, can easily be called the most affordable cladding option. The material is light in weight, so it will not be difficult to fix it on the wall, but for high adhesion, when fixing it to the surface, you must use gypsum-based glue. The main disadvantage of such tiles, which do not have a protective coating, is the fairly high hygroscopicity of the material, so it is not recommended for use in rooms with high air humidity.
One of the most affordable materials is gypsum brick-like facing tiles.
If the gypsum finishing material has special additives and moisture-proof protective layers, both on the outside and on the back, then it can be used not only in any premises, but even for facade cladding. Such tile options are mounted with tile adhesive intended for external work (you can often find the term “for complex substrates”).
Gypsum figured element for cladding the outer corner of the wall
For the convenience of finishing corners, special shaped elements are produced that will not only make these areas of the wall neat, but also protect the main walls from chipping.
Using this “brick-like” finishing option for wall cladding, you will need to purchase not only the materials mentioned above, but also grout, which is used to fill the seams between the tiles, creating a single sealed layer that protects the entire surface of the wall.
Cement wall tiles
Facing tiles made from cement mortar owe their popularity to the variety of colors and textures, as well as the affordable price of the material. In addition, this type of finishing has good performance characteristics, thanks to which it can be used in any room, even those not equipped with heating for the winter period.
Wall lined with brick-like tiles made on a cement base
The molding solution for the production of such tiles consists of Portland cement and sand with the addition of water. Typically, brands of Portland cement M400 and M500 are used for it, which is taken in a ratio of 1:2 or 1:3 relative to sand.
Silicone molds for casting brick-like tiles
The solution with a creamy consistency is poured into special silicone molds, and after it hardens, finished products are obtained that are already painted in the mass or require external decoration and the application of a protective coating. It is quite possible to make facing material from cement mortar, as well as from gypsum, yourself. Moreover, if it was not possible to find a matrix form of the desired format, then you can also make it yourself.
For those who like to do everything themselves...
Artificial stone, including the shape of masonry bricks, does not have to be purchased in stores. Everything from making molds to casting tiles can be done on your own. “How to make artificial stone with your own hands at home” will help the reader with this .
Clinker tiles
Clinker tiles are not used for interior wall cladding as often as other types of material that imitate brick, as they have a fairly high price. It is often purchased for facades, given its highest performance characteristics. However, it can also be used for interior decoration, especially if you are going to cover a stove or fireplace.
Various color options for brick-like clinker tiles
It is made from natural highly plastic clays, without the use of artificial dyes and plasticizers. The raw materials are pressed and fired at high temperatures, reaching up to + 1150÷1200 degrees. Thanks to this, clinker tiles are an environmentally friendly material with unsurpassed natural qualities of durability and reliability, which are multiplied during the production process.
This finishing material is excellent for both interior and façade cladding. It has a very low moisture absorption coefficient, high frost resistance and wear resistance, inertness to temperature changes and almost any chemical influences.
The decorative effect of clinker tiles is not inferior to its physical and technical characteristics, since the variety of design options allows you to choose a material to suit every taste and style of the interior of the premises or the facade of the building. The finish can have a rough, glazed or natural, untreated surface. Tiles of different sizes and shapes are available for sale, and this factor also allows you to bring the most daring design ideas to life.
Installation of brick-like facing tiles
As mentioned above, all tiles that have a certain rigidity are mounted on the wall in approximately the same way. For the work you will need the same tools as for “flexible brick”, and in addition, to cut this material you will need to prepare a hand-held circular saw or a grinding machine with a stone disc.
Laying rigid tiles “like a brick” is more complex than the flexible option
The work of laying cladding from this type of material is more complex, since the finishing already has significant weight, and after installation it requires careful sealing of the seams between the tiles.
The cladding process is carried out in the following order:
- Laying should be done on a prepared, primed and relatively flat wall.
- Marking the wall surface is carried out in the same way as for installing any piece of cladding material: straight lines are struck along the upper and lower levels of the masonry, then it is recommended that the entire distance between them be calculated and divided horizontally so that the intended number of rows can be accommodated in this area masonry, with mandatory consideration of the thickness of the seams between them. It is especially important to carry out this process if you do not have sufficient experience in wall cladding - marking will help make the masonry perfectly even.
When marking, you need to allocate 10÷12 mm to each of the seams between the rows.
- Next, an adhesive mass is prepared, which is selected in accordance with the type of material on which the finishing tiles are made.
Basic techniques for laying brick tiles
- Laying begins from the bottom row, which is carefully verified by the building level, since the accuracy of the entire wall cladding will depend on its horizontalness. If the first row starts with a whole tile, then the second and all subsequent even rows start with ½ or ⅓ tiles.
- Next, glue is applied to the wall with a spatula in a layer of 3 ÷ 4 mm. After this, the mass is distributed with a notched trowel, which leaves grooves of equal height, ensuring the most uniform distribution of the adhesive when pressing the tile. When laying some heavy types of tiles (the same clinker), it is additionally recommended to apply glue to the back side of the facing material. Therefore, before starting work, you should be sure to study the instructions included with the package, which clarify the nuances of installing a particular material.
Don’t be lazy to check each row with a level to ensure it is horizontal - an error can creep up unnoticed
- During the installation process, it is necessary to monitor the evenness of each of the laid rows.
Uniform seam thickness can be ensured by using one or another calibrating temporary inserts between rows
- To ensure that the width of the seams between the tiles on the entire tiled surface is the same, some craftsmen use special calibrator tabs of the same size. They are temporarily installed between the rows, and after the adhesive mass has set, they are removed and installed again, but on the upper rows. As such calibrators, you can use a wooden bead or silicone posts.
External corners will turn out very neat if you use special curly elements
- To cover external corners, special shaped elements are used that can disguise existing chips and make the corners neat and protected.
Filling seams using a homemade “syringe” from a plastic bag
- Upon completion of the masonry and after the glue has completely dried, the seams between the tiles must be securely and accurately sealed using grouts specially designed for this purpose. You can fill the seams in different ways:
— Use ready-made formulations in tubes using a special gun.
— Place the mixed grout in a plastic bag, and then cut off one of its corners diagonally to the width of the seam and carefully squeeze the solution into the gaps between the rows.
In any case, the grout should not get on the front surface of the cladding - tiles made to look like bricks usually have a pronounced relief texture, and if the solution gets on it, it will be very difficult, and sometimes even impossible, to remove the stain. So accuracy during this operation should be in the foreground, even at the expense of the speed of work.
Leveling the mortar in the joints by jointing
If this is necessary (most often this happens), the seams are then smoothed using a special tool - a jointer.
The mixed grout composition should be plastic, easy to fill the seams and level. Since such a mixture sets quickly enough, you should not knead a large volume - aim for 15-20 minutes of work.
The process of tiling imitating brick is similar to installing conventional ceramic tiles. Therefore, if you have previously acquired experience in working with tiles, then facing the surface with brick-like material will be successful.
Interior panels for brickwork
For interior decoration, ready-made panels with a “brick-like” relief are produced, which greatly facilitate the installation of finishing, since they immediately cover a large area of the wall and are assembled together using the puzzle principle, end-to-end or other connections.
Special cladding panels allow you to quickly cover large areas of walls with a “brick-like” finish.
PVC and MDF panels
Panels are made from different materials, but the most popular of them are those made from polyvinyl chloride, a very common and safe polymer for humans, and from modified wood fiber boards - MDF.
A wide range of brick or wild stone panels are available for sale.
These materials are very easy to work with, as they are easy to cut using a hacksaw or electric jigsaw. Thin panels made of polyvinyl chloride can be cut even with an ordinary stationery knife or scissors.
Such cladding can disguise even the most uneven walls - there is no need to carefully plaster and putty them until they are smooth.
Decorative boards for internal cladding of surfaces are capable of masking any flaws and unevenness of the walls, and if they are mounted on an equipped frame, they help to hide various utilities - pipes or wiring.
In addition to the above options, panels with brickwork relief are also made from hardboard, fiberboard, fiberglass, gypsum, and other materials, but PVC and MDF remain the most popular.
In the catalogs of companies producing such panels, you can choose an option that is ideal for the planned interior
The color scheme of the panels is very diverse, the size of the imitation bricks can also differ, so from them you can choose exactly the option that will ideally fit into the interior design of the room.
Prices for decorative bricks
decorative brick
Entrance hall, finished with PVC panels that reliably imitate brickwork
PVC panels have many advantages that allow them to be used in rooms with different levels of humidity. They do not require additional painting or leveling of the surface for installation. Some panel models are supplemented with thermal insulation material - mineral wool, polystyrene foam or polyurethane foam. They are called thermal panels, but they are mainly used for external insulation of walls on the facade side. If necessary, these types of slabs can also be used for finishing balconies - they will not only become good insulation, but will also make a significant contribution to the sound insulation of rooms.
Brick-like MDF panels were used for the lower part of the wall
Unlike PVC panels, MDF finishing is not recommended for use in rooms with high humidity, but it is perfect for lining the walls of hallways, corridors, insulated balconies, and living rooms.
Manufacturers also thought about the design of the corners, making special shaped elements for this.
Glass fiber reinforced concrete panels
Special mention should be made of glass fiber reinforced concrete panels. This facing material is made on the basis of ordinary cement with the addition of glass fiber, which increases the strength of the slabs tens of times. For external decoration, panels can additionally be reinforced with metal elements, which increase the weight of the structure, but make it resistant to mechanical stress.
Brick-like facing panels made of glass fiber cement - excellent strength and wear resistance
Reinforced only with fiberglass, the panels do not have a particularly intimidating weight, and their dimensions are still compact in thickness. The solution for their manufacture is colored in the mass, so the slabs are not afraid of small chips and abrasions. When producing molding sand, some manufacturers add colored glass fiber to it, which is slightly darker or lighter than the main tone, but is in perfect harmony with it - this gives a very interesting effect. In addition, additional application of paint to the surface of finished and assembled products is allowed.
This finish is especially good in places where abrasion loads are possible (hallways, corridors, entrances), as well as for cladding real or imitation stoves and fireplaces
The facing material is well suited for interior decoration, but still more often it is used to transform the façade of the walls of a building.
Environmentally friendly slabs do not weigh down the walls, as they have a small mass. They perfectly protect surfaces from moisture and mechanical influences, as well as from the penetration of radio emissions into the house, and have a number of other attractive advantages. However, the cost of such facing materials is quite high, so not every owner can afford such finishing.
Installation of brick panels on the wall
If the wall surface is fairly flat, then the panels can be fixed to it without installing a frame structure. Lightweight PVC boards are glued to a cleaned and primed surface using one of the polymer adhesives. For example, “liquid nails” are well suited for this.
Panels can be attached to flat walls using “liquid nails”, strengthening the fixation, if necessary, with self-tapping screws or dowels
Finishing panels based on MDF have significantly more weight, so in addition to glue, they are fixed to the wall with dowels in four to five places.
GRC panels can be fixed to a flat wall using cement-based tile adhesive.
In the case where the wall surfaces have significant distortions, they are corrected by securing a frame structure consisting of metal guides or wooden beams positioned exactly in the desired plane according to the building level. Some manufacturers make special subsystems for their products, mounted on the wall or on an installed frame. In this case, the panels are hung on special elements of the subsystems.
It is very convenient when facing panels can be fixed to the frame using standard subsystems
Subsystems may have different designs, therefore, when purchasing facing slabs and fastening systems to them, it is necessary to check the compatibility and availability of the attached installation instructions.
The spacing of frame guides when using subsystems is determined by the manufacturer and is indicated in the installation instructions
It is clear that if you plan to install panels on a subsystem, the frame elements must be located in accordance with the features of this model.
The simplest type of fastening is provided by plastic panels made according to the principle of siding construction. They have a special perforated mounting strip in the upper part, through the holes of which the slab is fixed to the wall or frame. In this case, horizontal sheathing elements are fixed to the wall surface, at a distance from the visible part of the slab.
Prices for facing bricks
facing brick
Such “brick-like” panels are very easy to install, and it is quite difficult to make a mistake with their installation
Installation of any facing panels begins from the bottom of the wall, usually from the corner elements.
Photo of brick tiles
Did you like the article? Share

0
Types of material
Decorative tiles that imitate brick are made from different materials. Some turn out to be durable, while others have a more presentable and unusual appearance. The main classification includes five types:
- Ceramic tile. A traditional, ageless option that has stood the test of time and has shown excellent results in terms of durability.
- Clinker. Frost-resistant material, which is often used for finishing the facades of houses.
- Gypsum tiles. A beautiful material that can be adjusted at the manufacturing stage.
- Concrete tiles. It is made using the technology of pouring a liquid composition into a mold until it is completely hardened. Concrete is strong, durable, easy to paint, but it makes the room very cold. In general, it refers to materials for rough finishing and is used to create another type of tile - paving.
- Flexible. An innovative option that has a small thickness, but at the same time reliably protects the wall surface.
Not only these materials are used to create decorative bricks. Various hardening mixtures are used, which can be made from natural or synthetic components.
Flexible tiles
Flexible tiles really bend well and their name is not at all an advertising ploy to attract buyers. In terms of plasticity, it resembles foam rubber. The material is made from sand and acrylic with the addition of pigments. The main advantage of flexible tiles lies in the ability to lay them in corners without disturbing the integrity of the fragments, that is, they are simply bent and fixed on the wall. When it is necessary to cut off some part for finishing the edges, the material can be easily cut. Flexible tiles reliably imitate brick and reliably protect the wall surface. It can be used as a finishing material and for decorating the facade of a house, but the difficulty in removing dirt from the surface becomes a serious obstacle to such decoration. Flexible tiles are environmentally friendly and non-flammable, but they cannot be treated with detergents containing alkalis.
Despite its external “unreliability,” the material will last for many years, and its installation will seem easy even for beginners.
From plaster
This option is popular because of its low cost, but in terms of quality it is much inferior to ceramics and clinker. You can make gypsum tiles yourself by first purchasing molds for pouring. The surface of each fragment will have to be treated with a special composition. Unfortunately, the protective layer will not be able to save the material from the harmful effects of moisture for a long time. In addition, any mechanical impact (even a blow with a fist) will cause fragments to split. Plaster is beautiful, but completely impractical. It can only be used as decor for interior decoration in rooms where the air is always dry. Due to the fragility of the material, its surface, after manufacturing, can be decorated with chips and roughness that are characteristic of real brickwork.
Clinker
Clinker is classified as bricks. It is based on a mixture of refractory shale clays and feldspar, which, after firing at ultra-high temperatures, become incredibly hard. The original name was given to the material by the Germans because of the special sound that the elements make when they collide with each other. Clinker tiles are universal and are used for both external and internal finishing work. The material has all the advantages of ceramics, but is stronger and more durable.
Ceramic
Ceramic tiles are no different from regular tiles used in kitchens and bathrooms, except they have a rectangular brick shape rather than the standard square one. The material is made from a special type of clay, which is mixed with quartz particles, pigments and carbonates. Ceramic tiles are relatively light in weight, retain their color even with constant contact with sunlight, and do not react to changes in humidity in the room. The material is durable and strong. Ceramics can have different textures, but matte and glossy surfaces remain the most popular options. The color range allows you to select tiles for a specific interior scheme.
Brick Styles
Brickwork is not suitable for all directions. It has become a kind of calling card of the loft. The “combed” industrial style due to this decor emphasizes the laconicism of the interior and the close “kinship” of the room with the workshop. The tiles usually have a rough surface and imitate rough brown brick. In minimalism, such cladding will decorate a practical environment without frills. For this direction, materials of calm tones (gray, white) with a smooth surface are chosen. High-tech also uses neutral shades. A stylish solution would be brick tiles with a glossy surface that imitates metal. With country and Provence, the option is combined “creatively”. In the style of the French countryside, bricks are used only in delicate tones, while country style accepts a rough texture, as in a loft. In the Gothic direction, tiles with the effect of Venetian plaster are used, that is, with a surface that resembles marble with chaotic patterns.
Laying technology
The installation method includes four stages:
- Preparatory work and surface treatment.
- Application of the composition.
- Fastening the tiles.
- Final grouting of joints.
Even a beginner can handle installing any type of tile. You must first take measurements of the room and calculate the required amount of material. When laying individual bricks, you need to focus on a straight line, which is applied to the wall, so that the rows are even.
Preparing the base
The wall must be cleaned of dirt or a layer of old paint, and the previous finishing material must be dismantled. If there are large defects, they must be repaired with putty and the surface thoroughly leveled. After the composition has dried, an additional layer of primer is applied. It will ensure good adhesion between the adhesive and the wall. After the primer has dried (it is advisable to wait a day from the moment of application), it is coated with a bonding agent. Its role can be construction adhesive or cement mortar. The thickness of the layer should not exceed 0.5 cm. The composition can be applied only to the wall, to the back side of the tile, or both options can be used at once. In this case, the treated piece of the surface to be decorated should not exceed 0.5 m in area. Keep in mind that the composition can harden quickly, so you will have to glue it quickly. Cement mortar is used for cladding fireplaces, since other substances may not withstand heat.
If the back side of the fragment is smooth, then a spatula with jagged edges is used to apply glue or cement mortar. In cases where the “underside” of the tile has a relief, a tool with a straight working part is used.
Laying tiles
For any type of installation, it is recommended to move from the corner to the center. Each fragment is pressed against the surface with force and, if necessary, its position is adjusted until the tiled brick is fixed. Excess glue or cement mortar must be removed immediately with a rubber spatula. To ensure uniform seams, it is recommended to use rubber spacers. The options for laying decorative tiles are the same as for ordinary bricks. Among the most aesthetically beautiful are:
- Spoon masonry offset by 1/2 and 1/4. This is a traditional option that is found in standard houses.
- Chain masonry. It is characterized by the alternation in each row of long bricks with square fragments that are equal to half of them.
- Cross masonry. In the first row of slabs, whole fragments are laid, and in the second - their halves. The main thing is that the small pieces are located directly above the center of the large ones. This way you will get brick “crosses”.
- Bonded masonry. All rows consist of halves that are offset, as in the spoon version.
Silesian, Gothic, Flemish and chaotic masonry are also in demand. In the latter case, each brick is positioned as the designer wishes. The result can be a very original composition. After the tiles are fixed, it is necessary to grout the joints so that they acquire a neat appearance. For these purposes, special compositions based on cement or epoxy resins are used. After the solution has dried, remove excess from the surface of the tile using a damp cloth.
