During the Soviet era, painting walls with various paints was widespread. Painted walls could be found in government offices, hospitals, kindergartens and schools, as well as in the apartments of city residents - mainly in kitchens and bathrooms. Their quality left much to be desired. Later, wallpaper and tiles replaced paint. Today, the fashion for painted walls is returning, but the requirements for appearance and, accordingly, the technology for preparing the surface for painting have changed.
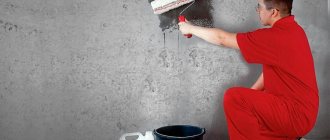
When finishing, before applying paint to the walls, it is necessary to carry out putty (putty) work. They will help smooth out all defects and level the surface to perfection. During subsequent painting, this is even more important than when wallpapering, since thick wallpaper can more or less hide minor flaws, but paint cannot. Paint adheres better to a smooth surface, and no defects of the pre-applied plaster appear even in bright, oblique lighting. In addition, a flat surface allows you to use paint more economically.
All about putty
Page navigation
Putty is a special building material for leveling walls for subsequent finishing - painting or wallpaper. All putties, regardless of type, contain glue with mineral fillers.
In fact, this is a more modern type of plaster, which has a fine fraction, which allows you to achieve a smooth surface. Also, the putty has a light color, not showing through even through thin layers of paint, which allows you to achieve the most aesthetic result.
Putty and putty are the same thing. Both of these names are correct and can be used when writing.
Rating of the best putty manufacturers
Today there is a large selection of finishing materials on the market, so before purchasing it is worth familiarizing yourself with those from the manufacturer that have proven themselves well.
- Knauf is a German company and a leader in the production of high-quality and affordable products. Putties are available in polymer, gypsum and cement compositions. The company also produces gypsum putties with X-ray protection.
- Tikkurila is a well-known Finnish manufacturer that offers a wide range of high-quality products and even putty without the need for sanding, that is, the surface itself becomes smooth.
- Volma is a domestic supplier that characterizes itself only on the good side. The company supplies various products, including polymer and gypsum putties with different particle fractions.
For reference! The ranking of the best manufacturers should also include Ceresit, Kreisel, Vetonit and Prospectors.
It is necessary to putty the base before painting, because only this way will the painted walls look beautiful and attractive. Therefore, it is important to know which putty is best suited for paintwork. Before purchasing, be sure to study the composition of the material, its shelf life, and it would not be amiss to ask the seller for a certificate of conformity.
Post Views: View statistics 1,906
Leveling walls for putty
Leveling the walls for putty is done if the surface deviates from the vertical by more than 4 cm, but experienced craftsmen advise not to apply the mixture in a layer thicker than one, since due to the fine fraction, the following points are observed when applied thickly:
- the composition may leak;
- it is difficult to level the soft mass on a vertical surface;
- The work is expensive.
Therefore, before applying putty, the walls are usually leveled with plaster or drywall, and the mixture is used at the last moment before the finishing coat.
Important: when leveling walls with plasterboard, the seams between the sheets and the heads of the screws are covered with plaster to prevent cracks.
What you need to know about working with mixtures
So that no one is deceived, we will say right away that puttying is a rather long and labor-intensive process that requires strict adherence to the sequence of actions, patience, diligence and attentiveness.
It also requires not only the moral and physical preparation of the master, but also very specific actions with the surfaces being treated, which we will definitely talk about today. So, first of all, we need to look at the walls we will be working with. In most cases, these will be plastered surfaces, as well as those made of plasterboard and similar materials. If in front of you is just a brick wall without plaster, then you won’t be able to putty it, since the applied layer is measured in millimeters, and for normal leveling it may require much more.
Puttying the wall
It’s a different matter if you have to work with monolithic slab surfaces, in panel houses - here it’s quite possible to do without leveling, if they are installed well, vertically. Since, in fact, both surfaces will be concrete, and in the case of plaster, gypsum is also possible, the work will be carried out in the same way.
The easiest way to work is with plasterboard surfaces. Here the procedure will be slightly different, so we will describe it separately.
Puttying the walls and ceiling of the attic
The next point we pay attention to is the purpose of the room itself. This parameter will affect the selection of the type of putty. Let's look at the most common and popular ones.
Which putty to choose: types for each stage
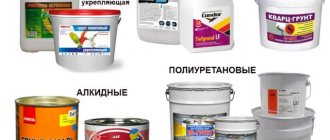
Currently, there are quite a lot of putties, differing in composition and scope of application:
- Oil-based drying oil contains chalk and catalysts that stimulate drying for leveling floors, doors, window sills, window frames, and other surfaces exposed to water before painting. It is distinguished by significant moisture resistance, but takes a long time to dry.
- Adhesive on drying oil has higher strength.
- Oil-adhesive with acrylates and plasticizers is elastic.
- Polyester mainly for metal processing.
- Latex is an analogue of oil-adhesive, only for interior work.
- Gypsum is white in color and is used for finishing in dry rooms.
- Putty can be used to fill cracks, baseboards, and with a more liquid dilution, whitewash. Some sites indicate that tiles can be glued to putty, but this should not be done.
- Epoxy is most often used for wood processing, but there are varieties for other surfaces.
- Acrylic can be universal and façade. Universal is the most popular mixture for interior finishing (with the exception of metal processing). The facade is resistant to atmospheric influences and moisture, and therefore is excellent for outdoor work when finishing any surfaces except metal.
- PVA-based putty has antiseptic properties and prevents the spread of fungus. It is used for interior work to level drywall or concrete surfaces, as well as seal cracks and joints.
Each of these varieties can be used on its own, but some masters use several types to achieve the ideal result.
What's the best way to start?
For initial leveling of walls, it is cheaper to use ordinary plaster, but if desired, you can also use acrylic. When leveling the plaster, a starting layer is not needed: the finish is applied immediately after the joints and screws are putty.
Important: before starting leveling, it is necessary to remove old paintwork, lime, falling pieces of plaster or concrete, and also clean the surface of dust, and then apply at least 2 layers of primer. Otherwise, the putty will fall off after drying.
The best finishing putty
It is difficult to say which finishing putty is the best, since all types of mixtures are intended for different types of surfaces, depending on the intensity of use and humidity level. The best option for finishing putty inside dry rooms is a gypsum or acrylic universal mixture. By the way, when using this variety, a topcoat is not required: it is applied immediately as a base and finish at the same time.
Putty for grouting joints
It is possible to use putty instead of a special compound for grouting joints between tiles, but it is highly undesirable, since in this case it will quickly fall off.
The same applies to the treatment of joints between sheets of gypsum or fiberboard, which is best done with plaster. If you still decide to use putty, then you should choose a mixture with the highest elasticity coefficient, for example, based on PVA. For bathrooms, it is also important to take into account high humidity and the risk of fungus formation, therefore the composition must contain special antiseptics and waterproofing components, which is always indicated on the packaging.
How to choose the right product
Everyone's selection criteria are different. Some prefer alkyd-based products, others are accustomed to working with polyester or nitrocellulose products, and still others prefer PVA-based compositions. Much depends on the tasks assigned to the substance. It is worth paying attention to the following product characteristics:
- Ecological cleanliness. A major factor that should not be overlooked. If a substance is to be used for interior work, it must be completely safe for the health of humans and pets living in the house.
- Adhesion. The putty should adhere tightly to the surface to be treated. Otherwise, it may fall off or cracks may appear.
- Convergence. The quality that is necessary to form a perfectly flat surface without the use of additional mechanical forces.
- Wear resistance. Resistance to mechanical stress, significant temperature changes, and high humidity. The indicator is especially important when leveling walls outside the building.
- Possibility of grinding.
When purchasing a product, you need to listen to the opinions of qualified craftsmen. There is a list of tips to consider:
- When purchasing a ready-made mixture, ask the seller to slightly open the lid of the container. If solid fractions are visible on top, discard the product. This indicates low quality raw materials.
- Before making the final choice of a product, determine the scope of its application and the material with which it will interact. If the final step is wallpapering, then it is advisable to purchase a dry mixture. If you have to open the walls with varnish or paint, then you should give preference to ready-made pastes.
- Do not lose sight of the temperature of the room in which the manipulations will take place.
- On store shelves you can find a huge assortment of products that differ not only in base, but also in weight. You need to choose a container with a small margin. You should not buy too much volume. If the seal of the package is broken, the service life of the substance is significantly reduced.
The question of where to buy the product you like is not difficult. Any construction market will provide a huge assortment for customers to see. There you can get acquainted with new products, find out what they cost, and get advice from a professional sales manager. You can order the composition online in the online store. The main thing is to first check the seller for integrity.
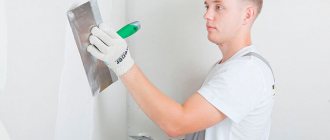
How to properly putty with your own hands: step-by-step instructions
Any puttying begins with preparing the working surface:
- Remove old coating mechanically.
- Remove paint that cannot be removed manually using a special remover or a drill with an attachment. If a water-based emulsion was applied, it is first soaked and then washed off with a soap solution. In this case, it is necessary to wipe the walls of the soap itself, as it has strong repulsive properties.
- Remove as much as possible all falling off pieces, break off those that may fall off in the near future.
- Remove dust with a wet cloth.
- Apply 2 or more coats of primer.
- Level the walls with plaster, gypsum or boards (depending on the situation), if there is a large deviation from the vertical (according to the instructions, more than 4 centimeters, according to the experience of the craftsmen - one).
- Use primer again before applying actual putty.
Starting layer
You can distinguish the starting putty from the finishing putty by its coarse fraction. The work is also simplified if you use a universal mixture that is suitable for both start and finish.
Initial puttying is carried out to eliminate visual defects of the walls, such as cracks, gouges or other irregularities. This may require laying several layers, each of which is applied after the previous one has dried.
Important: the putty must be applied in thin layers up to 5 mm, since its fraction is too fine. Another plus in favor of using plaster for leveling is a significant saving of time and money, because 1 layer of putty dries for at least a day, and before applying the next one, you must prime the surface (by the way, the primer also does not dry immediately).
To ensure that at the end of the work the mixture does not shrink after drying, and therefore does not crack, it is advisable to use a painting mesh that is attached to the wall.
If the deviation of the surface is large, then it is leveled and puttied along the beacons. However, almost no one does this, since it is difficult to imagine how much time and money it will take to apply a few centimeter layer of putty.
After drying, it is necessary to smooth out small irregularities with sandpaper and prime them for further work.
Finishing putty
The finishing putty is applied in a thin layer (up to 2 mm) to the leveled surface to achieve ideal smoothness due to its finest fraction. After drying, the wall is brought to perfection by mechanical sanding with fine-grained sandpaper, and then primed again for painting or wallpaper.
Reinforcement of seams or the entire surface with web
Reinforcement with cobwebs or painting mesh is required. It is carried out in order to avoid peeling of the putty or plaster from the wall, and also to prevent cracks from occurring or the composition falling out of the seams due to shrinkage of the mixture after drying.
The mesh sticks to the surface with a small adhesive layer, and then is simply covered on top. In some cases, it can be further strengthened with a construction stapler.
If it is necessary to putty with plaster, then the web is laid only on the seams between the sheets, but in cases where a starting layer is required, it is applied to the entire surface of the wall.
Grinding: the right technology
Sanding after puttying is done to remove unwanted grain and perfectly align the joints of the mixture.
It is best to carry out sanding by hand using regular fine sandpaper or a special block on which it is attached. In this case, the result will be more ideal, and the risk of accidentally rubbing the hole is minimal.
Grinding should be carried out in good lighting, constantly assessing the result from four sides. What kind of rubbing movements: circular or longitudinal is not so important, but the pressure should be controlled so that pits do not form, otherwise the finishing layer will have to be applied again.
In addition to the sandpaper, a special mesh is sold for grouting putty, which leaves less dust and does not clog longer, which increases its service life.
Final putty “clean” for painting or gluing
Finishing putty “clean” for wallpaper or painting is carried out with a very thin layer of any finishing or universal mixture, depending on the room, followed by sanding. No matter how thin the applied layer is, before and after its application it is necessary to prime the surface well
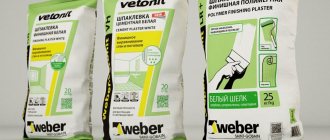
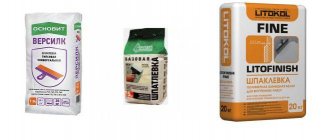
Rating of high-quality universal putties
Weber Vetonit JS
This composition allows you to quickly and effectively process walls and ceilings. Can serve as a basis for subsequent painting. It is based on the use of polymers that retain the material’s working properties over a long period of time. An excellent solution for dry rooms. After drying, the base is white and smooth. No cracks or shrinkage are observed. Despite the high cost, the material is in high demand among domestic builders.
Average price – 824 rubles.
putty Weber Vetonit JS
Advantages:
- There is no shrinkage during the drying process;
- resistance to cracking;
- popular model, time-tested;
- universal composition;
- adhesion.
Flaws:
- During the sanding process, a large amount of dust is generated;
- lack of moisture resistance.
VGT acrylic universal
The advantage of this acrylic-based composition is the ease of application of the substance. An excellent solution not only for residential premises, but also for toilets and bathrooms where there is a high level of humidity. The maximum permissible layer thickness will be 7 mm. Material consumption deserves special attention. For 1 m2 of area you will need 1.4 kg of mixture. Due to the increased adhesion coefficient, the substance can be applied to plasterboard sheets, wood, brick and concrete. Over time, significant shrinkage occurs. The coating is not afraid of regular precipitation.
Average price – 790 rub.
VGT acrylic universal putty
Advantages:
- ease of use;
- resistance to significant temperature changes;
- adhesion;
- moisture resistance;
- practicality;
- functionality;
- reliability.
Flaws:
- It will take at least a day to dry completely;
- The sanding process is accompanied by the formation of a huge amount of caustic dust.
KNAUF-Fugen
This composition has proven itself well in arranging well-heated rooms. A universal putty based on the use of polymer additives. Due to them, the substance is elastic, which facilitates the subsequent application process. High adhesion allows you to work with concrete bases. In addition to the affordable price, there is economical consumption of material. When creating a layer of 1 mm, you will need about 0.8 kg/m2. The grit factor is 0.15 mm. Due to the increased hygroscopicity of gypsum, the composition is not recommended for use in rooms with high humidity levels. No shrinkage or cracking is observed during the drying process.
Price – 424 rub.
putty KNAUF-Fugen
Advantages:
- elasticity;
- adhesion;
- affordable price;
- versatility;
- minimum consumption.
Flaws:
- not identified.
UNIS BLIK
This gypsum-based composition will eliminate significant unevenness on the surface of the concrete ceiling. The maximum permissible layer will be 0.8 mm. An excellent indicator compared to competitors. Also used to eliminate unevenness on plasterboard structures. It will take at least 7 hours to dry completely. The consumption of material is significant, since the composition contains large inclusions.
Average price – 364 rubles.
putty UNIS BLIK
Advantages:
- cracks do not appear during the drying process;
- arbitrary range of layer thickness;
- elasticity;
- price;
- a universal type of putty.
Flaws:
- significant expense;
- Pebbles may be found as inclusions.
Founds Ekonsilk
White gypsum putty can be used to create a layer no more than 50 mm thick. It will take 5.5 hours to dry completely. An excellent solution for arranging surfaces of any type. There is an increased coefficient of adhesion and plasticity. During the drying process, cracks appear, which is the only drawback of the mixture. The substance can be used to level brick, plasterboard and concrete surfaces. An excellent solution for creating a thin layer of plaster on the ceiling or walls. It is used to perform internal repair work in rooms with an optimal level of humidity. Can serve as a basis for paint and varnish layers, wallpaper and decorative plaster.
Average price – 333 rubles.
putty Osnovit Ekonsilk
Advantages:
- for leveling walls and ceilings;
- affordable price;
- used as a grout for cracks;
- versatility;
- An excellent solution for sealing seams.
Flaws:
- not identified.
Wall sanding tools to help with large areas
Special grinding machines have been developed for grinding large areas. In this case, for walls, surface grinders are used, which have a large working surface, and for ceilings, machines with special attachments are used that create a vacuum and thereby stick, which greatly facilitates physical labor.
Based on the principle of operation, they are distinguished:
- tape;
- vibration;
- eccentric;
- orbital.
When choosing a model, you need to pay attention to the fact that orbital ones cannot be processed in corners, and tape ones are better suited for removing thick layers.
It is not recommended for non-professionals to use grinders, since when finishing leveling the main thing is not to remove excess.
Functional characteristics of finishing putty materials
The purpose of the finishing putty is to eliminate small cracks, defects and scratches, as well as to bring the surface to a perfectly smooth state.
The finishing putty mixture has a smooth, uniform structure and small particle size. This putty is very plastic and pliable, thanks to the plasticizers and modifiers included in its composition. This quality is of great importance for creating a smooth surface and finishing preparation for painting. The mixture, as a rule, has a white tint, which allows you to apply the lightest and most pastel paints to the walls.
The finishing putty should, as a rule, have a white tint, an even, uniform structure without lumps, and be easy to apply and sand.
Before you find out which putty is best suited for painting walls, you need to understand what requirements its composition must meet:
- adhere securely to the walls, do not peel off and extend the life of the decorative finish;
- easy to apply and does not clump;
- do not spread over the surface after application;
- correct any shortcomings that remain after the initial puttying;
- the dried material should not crack;
- after drying, the surface should have an even white tint.
Important points in work
When applying putty yourself, it is very important to follow the following rules:
- It is necessary to putty only in good lighting, otherwise it will be impossible to achieve a perfect result.
- Before and after applying each layer, the surface must be thoroughly primed. It is important to wait until both the putty itself and the primer are completely dry.
- It is advisable to putty the entire surface at the same time and dilute the amount of mixture required for work at once, but remember that it hardens quite quickly (depending on the type).
- If the mixture is finished, but work needs to be continued, then the already applied layer must be moistened with water at the joint for greater adhesion. When it dries, it is better to use a primer.
- When joining, it is worth applying the mixture overlapping.
- It is necessary to reinforce with cobwebs, otherwise cracks will appear. The exception is finishing puttying of drywall.
- For a large area, you can check whether the layer is even or not using a regular thread, which is pulled diagonally.
- After drying, diluting and using the mixture again will not work.
You should also note that dry putty is cheaper, but sets much faster, which is important when planning the scope of work.
When puttying, it is necessary to take into account the characteristics of the selected mixture depending on the purpose, and carefully follow the manufacturer's recommendations. It is also worth using putty only for the final coating of walls before painting or wallpaper, and they must be leveled with plaster. This will significantly save time and money
Types of compositions
Conventionally, putty for walls for painting can be divided according to several criteria:
- form – dry (diluted immediately before application), paste-like (most often in a plastic container);
- layer – starting (covers the main cracks and irregularities), finishing (finally levels the surface and prepares for painting), universal;
- composition – cement, gypsum, polymers and their mixtures.
The cheapest is pure cement dry putty, the most expensive is ready-made universal acrylic-latex or polymer-cement. However, when buying, you need to be guided not only by price.
Puttying the ceiling on plaster
The need to putty the ceiling over the plaster during planned painting is obvious - you need to completely level the plaster coating and reduce the porosity of its surface.
If the starting situation is new plaster, the following tools will be needed to putty it for painting:
- An electric drill with a mixer attachment and a container for mixing putty;
- Paint roller and brush - for priming, a cheap foam coat will do;
- Set of steel spatulas of various widths;
- A bubble level and a rule-strip 2 m long - to control the horizontalness of the ceiling surface;
- Personal protective equipment – respirator, safety glasses, set of overalls.
Materials for ceiling putty:
- Primer;
- Putty mixture – base and finishing;
- Sandpaper or sanding mesh with holders - for sanding dried putty.
Determining the volume of putty
Ceiling plaster is not always horizontal and so smooth that to paint it you only need to fill its pores with putty. Therefore, before filling, it is necessary to determine the degree of evenness of the plaster coating in order, if necessary, to eliminate its deviations from the horizontal using putty.
Find the lowest vertical corner of the room - similar to plastering, measure the distance from the floor to the ceiling at the corners. If the floor has not been leveled, a horizontal line is drawn along the walls at any height, and the distance to the ceiling is measured from it - the minimum value will show the lowest angle.
Using a hydraulic level, the upper mark of this angle is transferred to the remaining angles, and the difference is measured. If it is from 0.3 to 1 cm, first perform basic filling of the ceiling with starting putty, after which differences of up to 3 mm are eliminated with the finishing mixture. If the corner heights differ by up to 3 mm, you can only use finishing putty.
Putty technology
Puttying begins after the primed plaster has dried. Work begins with the preparation of the starting putty - water is poured into the mixing container, and then the dry mixture is poured in portions, with intermediate mixing with a mixer, until the required consistency is obtained. Mixing is the opposite - adding water to the dry mixture will lead to incomplete mixing of the putty, part of which will remain unmixed at the bottom of the container. The volume of the batch is selected so that it is worked out before the composition begins to set.
Puttying is carried out with two spatulas - with the narrow one, the mixture is taken from the container and placed on the wide one, with which the putty is applied to the ceiling. Work begins from the corner, preferably in the direction of lighting. The permissible thickness of the layer to be laid is indicated on the packaging of the mixture, but you should not strive to make the thickest layer possible - the mixture behaves differently on the ceiling than on the walls. In addition, the surface of thick layers tends to be wavy. Spatula skills are developed during the finishing process.
Having applied the starting putty over the entire surface of the ceiling and the joints with the walls, wait for it to harden, after which, using a sharp spatula, remove convex defects - cut them off, placing the blade at an acute angle to the base.
If necessary, lay a second layer of the base mixture, applying it perpendicular to the first, but only after it has completely dried - the coating has reached a uniformly white or light gray color.
Typically, the starting coating is not treated with abrasives, so for finishing puttying it is not necessary to prime it; it is enough to brush away the crumbs from the ceiling from trimming defects.
The finishing putty is prepared and applied to the ceiling in the same way as the starting putty, but in a thin layer (the size is in the mixture instructions). Puttying is carried out in at least two layers, each subsequent one is placed only on the dried previous one. If intermediate layer-by-layer rough grinding is performed, the under-worked layer is primed before applying the next coating.
The last finishing putty is followed by sanding and priming.
Finishing with finishing putty
The next stage is final finishing. You will need the same wide tool. The step-by-step instructions are no different from applying the starting coating. Only the layer will be no more than 3 mm (very thin). To do this, hold the spatula straight, 90 degrees to the wall. During operation, there is a lot of pressure on the tool. Then you will get a thin and as even layer as possible. We wait until it dries. After this, the surface will be ready to apply paint.
First layer
To start working with putty, you need to separate the work area. Spread the oilcloth, place all the tools and begin preparation and operation.
- First you need to pour the dry mixture into a container, pour in water (see instructions for the material);
- Using a construction drill with a mixing attachment, you need to stir the composition until the lumps disappear and thicken;
- Leave the composition in this form for 10-15 minutes for shrinkage;
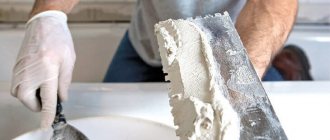
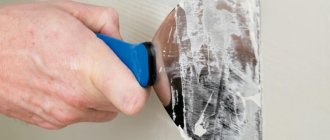
- Next, you need to pick up some material on a narrow spatula, transfer it to a wide one and start puttingty.
This way you can apply several layers. After complete drying, it is necessary to treat the walls with a mesh for better adhesion to the finishing coating.
Applying starting putty
The first stage is applying the initial layer. It will be quite thick, because... designed to remove all serious irregularities. At the joints of plasterboard sheets, in deep places from under self-tapping screws and nails, fiberglass is additionally laid on top of the putty. Now you can leave it to dry.
The mixture must be diluted in small portions. This will allow you to get used to work. The lifespan of putty is short. You need to use it all before it dries out.
The puttying procedure is very simple:
- First apply a thick layer. The work is done using a large spatula.
- In just a couple of minutes you need to run the tool over the treated surface again. This will remove excess.
It is better to collect the mixture from the bucket with a small tool and transfer it to a working spatula. The inclination to the surface should be about 45 degrees. Every time a new batch of putty is required, it is recommended to wash all tools and containers. This way the work will be much more accurate.