OSB sheets are manufactured with a straight or profiled edge (edged end of the product). Straight edge slabs are designed for rough finishing of walls, ceilings, floors and other large surfaces. A finishing decorative layer is placed on top of this coating, protecting the wood from moisture, sun, abrasion and temperature.
The profiled edge of the OSB sheet is an end cut that connects the slabs without cracks or visible gaps. This surface is considered ready for use. The end side of the slab is selected for a tongue-and-groove or quarter-lock type, which ensures quality and smooth joint of sheets in compliance with the requirements for maximum permissible noise, heat and moisture insulation.
The fold is used if there is no movement on the OSB surface. Most often these are walls and ceilings. The fold does not protect the edge of the sheet - for this, putty for OSB joints or sealants is used.
Why do you leave gaps when installing OSB?
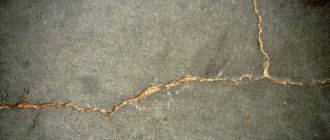
All wood materials react strongly to increases in humidity and temperature. And oriented strand board is no exception in this regard. During the heating process, the sheets expand greatly and without the provided compensation gaps, two adjacent panels are capable of deforming each other.
Therefore, compensating gaps of 3 mm and 15 mm along the perimeter of the coating are created between the sheathing elements. They continue to work throughout their service life and should be preserved without affecting the appearance of the designer finish.
The fulfillment of two mutually exclusive conditions is possible if the joints are covered with elastic materials that well hide the joints and preserve their purpose.
Varieties of mixtures for walls and ceilings
Putty for OSB must meet certain requirements and be made on an oil, adhesive or synthetic basis. It is necessary to select compounds that are suitable for working with wood. These are polymer and oil-adhesive putties.
Polymer
Polymer putty for OSB (acrylic) is made on the basis of latex and acrylic. Thanks to modifying additives, it is suitable for rooms with high humidity and facade work. Easy to apply, dries quickly, sands well.
- ultra-thin coating (up to 1 mm);
- high adhesion;
- snow-white color;
- soundproofing;
- vapor permeability;
- moisture resistance;
- antiseptic;
- heat resistance;
- plastic;
- strength;
- no smell.
Dispensed dry and ready-made. Neutralizes phenol vapors and is compatible with water-soluble paints. Consumption - up to 1.3 kg/m2 with a layer thickness of 1 mm.
Oil-adhesive
The binder in oil-adhesive putty is drying oil. Fillers - glue, lime, water, adhesive plasticizers. Add more driers to increase the speed of drying of oils. Can only be used for interior work. Layer thickness - up to 2 mm.
- low price;
- high adhesion;
- quick drying;
- environmental friendliness;
- plastic;
- easy to apply;
- easy to sand.
- unstable to mechanical stress;
- does not tolerate moisture well;
- cannot withstand temperature changes;
- incompatible with most finishing materials.
Oil-adhesive putty is not suitable for facade work or rooms with high humidity. It is used for rough finishing of well-heated rooms for painting or wallpapering. Incompatible with plaster. Poorly seals deep defects. Consumption is up to 1.5 kg/m2 with a layer thickness of 1 mm. Dispensed dry or ready-made.
There are 2 stages - priming the surface and sealing the cracks. This is necessary to increase adhesion, stability and sealing of joints.
Technology for performing work on seams.
When filling seams with any of the above traditional materials, the composition of the work and the actions performed are very similar. Carrying them out correctly provides significant time savings:
- If subsequent decoration is planned, then OSB boards are cleaned of paraffin by grinding;
- Mandatory coating with a primer with antifungal properties;
- After the primer has dried, the edges of the seams are taped with masking tape to protect the front surface of the sheets from the seal;
- The parquet varnish and primer are carefully rubbed into the gap with a spatula, and the sealant is filled into the joint using a gun;
- Use a small spatula to remove excess material that protrudes above the surface;
- After polymerization, the masking tape is removed;
- The filled seam can be sanded away from protrusions and irregularities.
You can learn about how to choose a primer and how to apply it correctly in a separate article: primer for OSB - types, application.
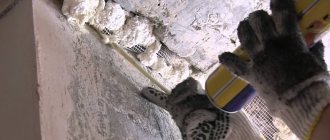
If the gaps exceed 5 mm, then they must be additionally reinforced with sickle tape. And, in this case, only putty is used (usually, this phenomenon is observed along the walls). If you fill the space without reinforcement, then after polymerization the composition forms cracks and spills out over time.
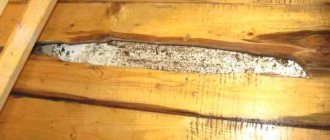
Sectional view of seam sealing. When finished, the mesh is not visible.
The varnish composition is mixed with sawdust to completely hide and make the cracks invisible. After drying and sanding, it is sometimes impossible to determine the location of the seam.
How to seal OSB joints | Finishing experts
- After laying each layer, the chips are impregnated with moisture-resistant glue, the workpiece is compressed in flat steel molds with presses, heated and kept until completely dry.
- The size of the molds determines the exact geometric shapes of the slabs; length, width and thickness, and the enormous compression force of the hydraulic mechanisms provides the necessary density. QSB is formed by a continuous rolling method with further cutting to length.
Insulation is usually carried out outside the building. For example, to plaster OSB boards, sheet foam 40 mm thick is used as insulation.
Which is better: heated floors or radiators?
Warm floorBatteries
- Sheets of insulation are glued onto the prepared OSB surface. After the glue has dried, the sheets are fixed with mushroom dowels, recessing the caps into the foam. The joints between the sheets of foam plastic are foamed, the foam protruding above the surface is cut off.
- Apply the adhesive composition in a layer of 3 mm, apply the mesh, straighten it, smooth it with a wide spatula, immersing the mesh fabric in the solution. The solution that protrudes over the mesh is leveled.
- After the adhesive solution has dried, the prepared plaster mixture is applied.
The method resembles the Wet Facade technique. Therefore, the nuances of implementation can be found in the corresponding article.
Is it possible to glue wallpaper on OSB, or how to glue it correctly - instructions
Despite the beautiful appearance of this element, some owners of apartments and private houses want to stick wallpaper on OSB. Is it worth doing this, how can you stick wallpaper on an OSB board, is it possible to glue wallpaper on an OSB board without putty?
Expert opinion
Strebizh Viktor Fedorovich, leading construction foreman
Liquid wallpaper is a special type of finishing coating that combines the properties of rolled paper wallpaper, decorative plaster and varnish coatings. If you want to clarify something, please contact me!
Other options for sealing cracks and gaps with OSB
Along with traditional ones, there are methods that are less widespread, but in some cases their use is preferable. So, when the temperature drops to +5 degrees and below, sealant and putty cannot be used. They will simply be half-frozen and unable to create high-quality protection. In this case, various means that have long been used in other areas come to the rescue. They can be used with one caveat - only for outdoor work.
Machine protection
Automotive plasticine traditionally protects car bodies from moisture and can be useful in this matter. The main thing is to be a little smart and melt it before using it. The liquid mixture is perfectly poured into cracks that are located horizontally (building foundations, flat roofs). Of course, this is not the best solution, but leaving the panels unprotected is much worse.
Using autoplasticine:
By analogy with the method described above, you can use rubber mastic, as well as two-component polyester automotive putty.
Wooden inserts
When working internally in unheated areas of country houses, it is simply not advisable to use substances with a pungent odor or toxic emissions. In this case, you can hide the gaps before finishing using pliable balsa wood. Cork is completely invisible against the background of a textured wooden surface and allows for any type of subsequent finishing work, including varnishing.
The disadvantages of using cork are quite significant and, whenever possible, it is better to use traditional options:
- It does not create a moisture-proof layer;
- Specific experience is required to properly close seams;
- Finishing work is somewhat extended over time;
- Careful subsequent sanding of all cracks is required.
In view of these disadvantages, it is much better to use liquid cork, which is used when laying laminate, but this is only possible at the appropriate temperature.
The work process can be significantly simplified and speeded up if you take standard (in size) wooden slats. The only condition is that for them you need to cut joints of equal width using a router.
Of course, this method also does not provide adequate protection from moisture. In addition, if you use hardwood to fill gaps in the OSB board, then its edge may be slightly damaged, which will affect the overall appearance of the front surfaces. However, when OSB forms the basis of the load-bearing frame and is used for rough foundations, then this effect is not terrible. The walls will receive additional strengthening and the panels will be protected from potential displacements in the gap area. In this case, filling this space with wood is very useful.
When it is necessary?
Putting OSB is necessary for all types of decorative finishing that require a smooth and uniform base: painting, plastering, wallpapering. Puttying can be neglected only if it is planned to cover it with clapboard, laminate or panels. In other cases, this is to achieve the following goals:
- protection of wood-fiber material from direct sunlight and fumes;
- prevention of mechanical and chemical damage during the operation of the material, the influence of moisture;
- eliminating the risk of formation of resinous stains and pigmentation of the decorative finish;
- masking of installation and construction defects, cracks, chips, crevices, seams;
- creating a mono-textured and monochromatic base, hiding the texture of wood chips;
- increasing adhesion and resistance to paints, finishing and decorative materials.
If there is no plan to hide the material, for example, when varnishing, then it is not necessary to putty the OSB. However, when preparing the surface for painting or wallpaper, this is necessary. It is recommended to putty the boards for exterior work when using OSB-3, 4, in rooms with high humidity.
Leaving cracks without filling
And finally, if OSB sheets are used as a rough surface, then the gaps between the sheets do not need to be sealed at all. Of course, it is better to insulate them, but if there are difficulties in carrying out this work, it is permissible to leave the slabs in their natural form. In this case, it is necessary that an important condition be met - water should not get on the sheets of oriented strand board. That is, they are necessarily hidden under other surfaces (vapor barrier film, insulation, kronospan, etc.).
Examples of such applications of OSB with open seams are:
- Roof plane for soft tiles;
- Rough ceilings;
- Subfloors;
- Load-bearing walls;
- OSB in sandwich panels.
You should not forget to treat the open slab with an antiseptic and primer.
Features of OSB puttying indoors
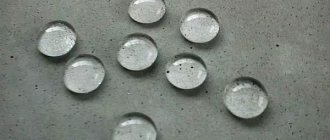
Oriented strand board or OSB is a multi-layer compressed material made from thin wood chips, bonded with resins and impregnated with synthetic wax and boric acid. Since the slabs are almost 90% made of natural wood , they adopt its basic properties and characteristics. The first is the ability to absorb moisture.
Therefore, doubts arise about the advisability of puttying or painting OSB with water-dispersion paints. After all, upon contact with water, the material can swell or deform. Craftsmen note that it is possible to putty OSB, but with polymer or oil-adhesive compositions that are not water-based.
Putty for OSB must have good adhesion, uniform consistency and high strength, and also not shrink. To prevent cracks from occurring, it is recommended to lay a reinforcing material, such as painter's interlining or fiberglass .
Alternative ways to protect OSB seams and gaps
There are fans who believe that the strand board itself looks beautiful and is not worth covering. However, the finishing coating performs another important function besides the decorative one - it protects the sheets from the destructive effects of the external environment. When panels are left open, harmful effects on them must be minimized.
Firstly, you cannot remove the factory paraffin layer - it at least slightly protects the wood from moisture and the resin from the destructive effects of ultraviolet radiation.
Secondly, it is better to use a variety of oil impregnations to increase the service life of the casing.
Thirdly, the most vulnerable places on OSB sheets are the joints. From the ends, these wooden products remain uncovered and, from there, the process of decay and rotting most often begins. Therefore, it is advisable to close the gaps, even if the panels remain bare.
To make the sealed cracks look beautiful, they are decorated and highlighted as much as possible. For these purposes, they are covered with wooden slats, filled with sealant and painted over. You can also fill prepared joints with plastic or translucent polycarbonate profiles.
This contrasting combination looks very attractive, and when the entire surface is covered with stain, the slabs can serve without deteriorating for a very long time.
Installation of plaster mesh and corner
It is recommended to putty OSB over fiberglass. It will prevent cracking of the putty solution. The material should be attached to the ceiling using 1 layer of mixture or mounting adhesive. You should not fix the mesh on the stapler, as it may sag.
- apply 1 layer of putty with a wide spatula, moving from the edge of the wall;
- do not apply putty, but smooth it in the direction of the lighting;
- instead of putty mortar, you can apply assembly adhesive, but you will have to work faster;
- you can cut the mesh into small fragments;
- fix the material at the edge of the ceiling, stretch it, smooth out the bubbles with a spatula;
- Cover the entire ceiling in the same way, covering the OSB seams with a continuous sheet.
Perforated corner slats with a flag are installed in the outer corners. The elements are attached with mounting adhesive or embedded in putty. The solution squeezed out through the profiles is removed with a spatula. After the corner and fiberglass have dried, you can begin to putty.
For corners, it is better to choose a material made of PVC or more durable aluminum. Galvanized steel can rust over time.
Puttying the ceiling from OSB panels
Putting OSB is done for decorative plastering, painting or wallpapering. Below we discuss the features of technology for painting and wallpaper. The differences are mainly expressed in the compositions, as well as in the surface grinding.
Under the wallpaper
The process of puttying OSB is no different from the usual one. However, it is required to apply the mixture in at least 3 layers with a break for drying. Puttying under wallpaper can be done without smoothing out minor defects and imparting a white tone. An oil-adhesive composition is suitable.
- mix the solution according to the instructions until the lumps and paste-like consistency are eliminated;
- transfer the composition to a wide spatula using a paint scraper or plastic tool;
- from the outer corner of the ceiling, using a semicircular movement of the spatula, transfer the composition onto the fiberglass;
- after applying the putty, immediately cut it off with a spatula in the vertical and horizontal directions;
- Having processed the plane from one corner, move on to the next, moving towards the middle of the ceiling;
- wait for 1 layer to dry for 6–8 hours, then apply at least 2 more;
- after final drying, install the P180 attachment on the grinder or grater;
- Using circular movements of the tool, grind the surface, eliminating minor defects and irregularities;
- Dust the base with a vacuum cleaner, do not use a damp cloth.
You can work with oil-adhesive putty only at positive temperatures. Close windows and doors tightly to prevent drafts. Before wallpapering, apply 1 layer of penetrating primer.
For painting
The technology for puttingtying OSB for painting does not differ significantly from the standard one. The surface should be perfectly flat and monotonous. Choose white acrylic putty.
It is important to thoroughly sand the final layer, eliminating any defects or unevenness. Polymer compositions can be tinted, so at the finish it is possible to add color to match the decorative finish. For dry mixtures, use dry pigment; for ready-made mixtures, use liquid pigment.
Advice from the experts
A few tips from experts to make working with OSB putty easier:
- to completely cover the fiberglass, you can apply 4 layers of putty, the maximum thickness of the coating should not exceed 10 mm;
- lay the reinforcing mesh overlapping, do not allow the material to join at the OSB seams - they must be covered with a continuous sheet;
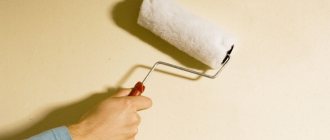
- You can prime the slabs on the walls with a roller, but for the ceiling it is better to use a paint brush to avoid gaps;
- You can prevent cracking of the mortar at the mounted corners by laying sickle or fiberglass on them;
- do not choose facade putties for interior work - they can emit toxic fumes;
- choose primer and primer from the same manufacturer to minimize the likelihood of material incompatibility;
- Hold the spatula at a slight, shallow angle, otherwise the mixture will not spread evenly.
The difference between puttying OSB is the need to apply several layers of putty, sanding and applying fiberglass. The primer and primer must be suitable for working with wood material and not water-based. In general, the process is no different from conventional puttying and is accessible even to a beginner.
Source
Care with joints
No matter how good and high-quality the sealant is, it also has its own service life. On average, protection lasts up to 15 years, but it can last less - it all depends on the operating conditions.
Open and accessible seams should be periodically inspected and the condition of the sealant checked. Even sip panels should be opened once every 10 years of the vapor barrier layer and their condition checked. At the same time, the cracks will be examined and the protective membrane will be renewed.
When conducting an audit, you should perform a number of simple steps:
With proper care of the joints, OSB boards will serve for a long time and reliably. Knowing their most vulnerable places, you can take targeted actions to protect them and significantly improve operating conditions and extend the service life of these wonderful materials.
OSB surfaces with sealed joints are a good basis for finishing. You can learn about various methods of finishing OSB and their features in separate articles:
OSB finishing indoors: walls, ceiling.
Sealant hypersil
It is applied at temperatures from 5 to 40 degrees, since the material is sold in the form of sausages in cellophane; it is most convenient to apply it with a special gun for grouting.
Well, if you don’t have such a tool, you can squeeze the sealant out of the bag with your hands. True, it will not be very neat and the consumption will increase significantly.
To level the sealant itself, you can use a small spatula. As you can see, sealing seams between OSB boards is not very difficult, the main thing is to have the right tool available.
How to make your own putty
Ready-made store-bought putty mixtures are not very expensive. But if it is necessary to treat a large area of ceilings, floors and walls, the total costs can amount to a considerable amount. Therefore, craftsmen often prefer to prepare their own wood putty.
To make the putty you need the following ingredients:
- pumice (perlite) - 30 g;
- turpentine oil - 60 g;
- gelatin - 20 g;
- linseed oil - 0.28 kg;
- casein - 20 g;
- water - 0.3 kg;
- borax - 12 g;
- ammonia (solution 18%) - 17 g.
First you need to grind the pumice until dust forms. Pour the resulting powder into a container, add linseed oil and stir until smooth. Now pour in the turpentine oil and mix thoroughly again.
The prepared mass should be allowed to brew for 5-10 minutes, then add the remaining ingredients according to the list. Cook the mixture in a water bath, then stir and leave for a while. When the mixture has settled for the last time, it is ready to use.
Video description
Polymer and silicone sealants
Sealants of this type are suitable for sealing cracks at the joints of oriented strand boards inside and outside of various types of structures. At the same time, it is better to choose polyurethane materials for facades, silicone for rooms with high humidity, and acrylic mixtures for other rooms. But if finishing is provided on top, then it will not be a big mistake to use any composition in any place.
Sealants are pressed into the cracks using a mounting gun, and then the seam is corrected with a metal or rubber spatula. As a rule, after sealing joints with such compounds, sickle tape or paper tape is not used, although this is a personal matter for everyone.
PVA glue
Nowadays, it is probably impossible to meet a person who does not know what PVA glue is or has never heard of such a substance. This is a universal composition that exhibits adhesion properties to mineral, polymer and, of course, wooden surfaces, therefore, in our case, this glue is no worse than any putty or sealant. It is packaged in buckets, bottles and small bottles, but in large containers for some reason it is called construction material, although, in essence, it is no different.
heated floors electric energy consumption
To seal cracks on an oriented strand board surface, you will need sawdust (not shavings) in a two to three ratio to the glue, but if the glue is thick, then one to one. To do this, pour three cups of sawdust into a container, fill it with two cups of glue and mix thoroughly. That's it, the putty is ready to use on the seams.
Note: since the humidity and fraction of sawdust may differ, and the consistency of the glue is also not always the same, the proportion of 2/3 is only approximate. Therefore, you will have to determine the more accurate composition at the place where the putty is made.
When you don't need to seal seams
This may seem strange to some, but there are situations when sealing seams with OSB on the floor does not make sense - this applies to floating structures. If particle boards are mounted on a concrete screed or plank floor, as a rough base for laying laminate flooring, then sealing the joints does not make sense. A laminated assembly of this type belongs to the category of floating floors, that is, there is a compensating gap of 20-30 mm around the perimeter for the swelling of the panels. The same principle applies to panels, although they, unlike cladding, are screwed to the screed or plank flooring.
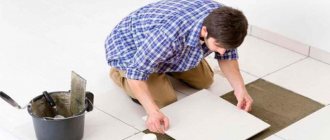
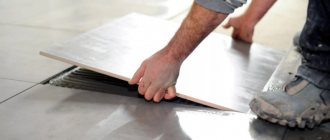
Another option for installing particle boards, where there is no need to seal the seams, is when using OSB to level the rough surface of the floor, ceiling or wall for subsequent tiling with ceramic tiles. The glue itself fills all the gaps between the joints during installation, so there is simply no point in doing it separately. Also, sealing will be unnecessary when finishing the ceiling with foam plastic or polyurethane tiles, since the rough leveling from OSB will be hidden.
In addition, there is no need to leave gaps at all when joining oriented strand boards if it is a dry room and the finishing is rough. For example, the final cladding on OSB can be wallpaper or paintwork. But the second option does not provide for finishing with colorless varnish, since regardless of whether there is a gap or not, the joints will appear under the hardened film, and this is simply wrong from an aesthetic point of view.
Recommendation: end-to-end installation of OSB without gaps is best done using OSB-2, OSB-3 and OSB-4. The moisture resistance of these brands is higher, therefore, if the slabs are well fixed, then they are not afraid of deformation from moisture.
Wish
Decorative painting of OSB boards is simple and inexpensive. It is enough to properly prepare the coating, sand sharp corners, prime the walls and apply a suitable paint and varnish material in several layers.
By the way! It will be interesting to know: Japanese fiber cement panels: impeccable facade finishing
All that remains is to choose a color scheme for painting a wooden house that fully meets your personal preferences. Your home is your rules.
The basis of the facade asbestos-cement slab
- flat pressed moisture-resistant sheet. It is used for ventilated exterior finishing of buildings, new and renovated.
painting
.
Design. . Properties and characteristics of a curtain wall façade
made of fiber cement
boards
. Fiber cement slabs and their decorative coating are hardened during the production process to increase strength.
Basically, paint it
A house made of timber can be painted with paints from world manufacturers, which can replace the protective treatment of the external timber surface of the house.
. Options for painting OSB slabs on the facade
.
Selecting the type of paint for a wooden house. When choosing what paint to paint the outside of a wooden house, you can focus on three types. Options for painting
OSB boards on the facade
.
Painting if necessary
, for
facades
costs increase.
. It has excellent noise insulation. Minimum 480. Painting
fiber cement
boards
.
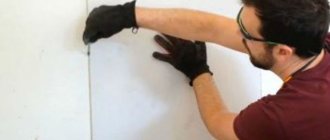
Is it necessary to rub joints when laying stone cladding?
Grout is a multi-component composition for waterproofing joints between artificial or natural decorative stone. Grouting of seams is necessary both inside and outside.
Typically, the compositions are available in dry form or in a thick solution, multi-colored or in the form of a basic white and gray mixture.
Grouting functions:
- waterproofing stone ends;
- protection of cladding from sudden influences, temperature changes and humidity;
- decorativeness;
- impregnation and protection against fungus and mold.
It is necessary to grout the joints, as it increases the strength of the facing surface, provides high adhesion to the base, and increases resistance to fading.
What connections to make
The most important parameters for determining which seam is required are:
- By color - the grout should be in harmony with the overall composition and color scheme.
- In width - the calculation is made when laying the decorative stone, then the gap itself is filled. This is necessary to calculate the amount of material consumed.
It will be possible to smooth out seams aesthetically and reliably only where construction and finishing standards were initially observed:
- evenness of the masonry with the same distance between the stones;
- The tiles do not stick out above those lying next to them.
In this case, filling the seams is easy. Construction standards indicate the size of the seam - up to 1 cm, but no more. This will help determine the amount of consumables, for example:
- for a depth and width of 10 mm, you will need from 6 to 8 kg of grout mixture per 1 square meter. m;
- for a standard brick stone measuring 240 by 71 mm, 2.5-3 kg will be needed to process the seams.
Attention: Most mixtures are sold in standard 25 kg bags - this is enough to mash 8-9 square meters. m.
Retainer
Seam fixer is a special solution for working with natural and artificial stone.
When facing, it ensures the preservation of gaps of the required size between masonry elements. Each manufacturer has recommendations for maintaining the gap size and fixing solution. For example:
- for clinker - 10–12 mm;
- for large stones - 15 mm;
- for an irregularly shaped stone - 15–20 mm.
Based on these gap dimensions, manufacturers calculate the consumption rates of stone, grout and fixative.
Retainers are made primarily from extruded polystyrene foam, a flexible, hard material. This is a very useful property when laying artificial stone that has smooth edges.
Necessary materials
For frame
The lathing option is chosen according to your taste and capabilities. Although metal is more expensive, it will not deform due to changes in temperature and humidity. A wooden frame can “walk” during temperature fluctuations, although it is cheaper.
Fasteners (hardware)
Necessary tools
- for installing metal sheathing, metal scissors or a grinder;
- for marking - pencil, felt-tip pen or marker;
- measuring instruments (tape tape, laser level, plumb line);
- hacksaw;
- set of screwdrivers and screwdriver;
- when working with nails you will need a hammer;
- when attaching the frame to concrete or brick, a hammer drill with drills is required;
- You may need a drill (with chucks for metal or wood drills);
- jigsaw
This list of tools is optimal and allows you to perform the entire installation cycle with your own hands from the very beginning to the end.
It is best to collect and prepare the tools in advance in order to reduce the time of work and optimize it as much as possible.