Bearing structures
How can I seal the seams on a plywood floor under linoleum?
And so I will give you one interesting way when the seams will not appear on the linoleum and the plywood itself will not deteriorate for a long time. When the entire floor has been treated with a primer, let it dry thoroughly; to do this, you can put a fan in the room so that the air circulates throughout the day quite sufficiently. Then mix the epoxy resin with wood dust in a metal container, then the resin must be heated to 40 degrees so that it becomes liquid and flowable, and only then we begin to fill the cracks and other flaws on the plywood. Then we let it harden for a day and you can start sanding. All linoleum will fit perfectly and in the future there is a full guarantee that the seams will not come apart or crack.
Before you begin laying linoleum on plywood, you must carefully prepare the surface of the plywood. To do this, it is necessary to seal all existing seams at the joints and small cracks with putty for wooden products, and dents in the plywood, if, of course, there are any, can be filled with silicone sealant.
In addition, the plywood must be treated with a special antiseptic, which is included in the primer.
And only after the plywood has dried after all processing procedures can you begin the direct installation of linoleum.
But before doing this, do not forget to make sure that the entire surface of the plywood is smooth and clean.
Most modern flooring is installed on a level base. But old floors do not always meet the stated requirements, and they have to be leveled. Flooring can be done in different ways, but the most popular is the use of plywood.
Its prevalence is explained by several parameters:
- high wear resistance;
- ease of installation;
- affordable price.
Also, do not forget that plywood is a natural material.
, which is also important.
Sealing the seams of plywood sheets on the floor
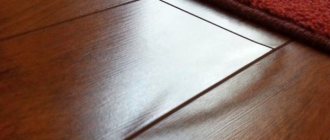
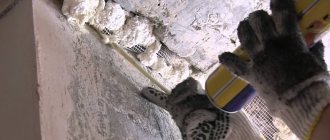
During installation, whole sheets are sawed into rectangles, between which it is necessary to leave technological gaps of 3–8 mm. Therefore, after installation, the question arises: how to seal the plywood joints on the floor? There are many options, but their effectiveness varies.
Regardless of the chosen method, the main thing is to follow the technological process:
- The joints of the sheets must be tightly secured. Plywood is a fairly elastic material, so the edges will “play” a little in any case. But the greater the amplitude, the faster the putty will fly out
. To avoid this during installation, the self-tapping screws are placed as close as possible to the seams (it is desirable that the indentation be about 2 cm) in increments of no more than 20 cm. When attaching plywood with glue, special attention must be paid to the edges and corners, avoiding un-glued areas. - The plywood at the joints must be processed using a sander or sandpaper. This item plays a special role with soft finishing surfaces: linoleum, carpet.
- After completing all installation work, the seams need to be cleaned of dirt; it is most convenient to do this with a vacuum cleaner. Then degrease and prime. The best results are shown by a moisture-resistant primer, and if the room is damp, .
Types of grout
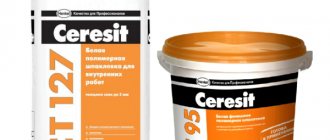
Naturally, plywood when laying a floor will give a good result only with the correct putty. It should be elastic, but not soft. Also, it should not shrink, otherwise over time the joints may appear on the surface of the finishing coating.
Impregnation with drying oil or PVA
When the plywood is impregnated with PVA and dried, it is the turn of the antiseptic, treatment with which helps prevent the development of fungus and mold.
Next, the material is coated with acrylic varnish. Another option for strengthening plywood before puttying and further laying linoleum is to soak the veneer with heated drying oil. Using a water bath, the drying oil is heated to 50-60 degrees Celsius (the temperature should never be exceeded). Heated drying oil is applied to the surface of the material with a roller or brush.
We suggest you familiarize yourself with How to properly level a wooden floor with plywood
Note! When impregnating, special attention should be paid to the end sections of the sheets, since these are the places that are most vulnerable to external influences
Padding
When the plywood is laid out on the floor, it needs to be primed. Unlike the impregnations discussed above, which are aimed at protecting against rotting, primer is considered as a way to improve the quality of putty. The fact is that priming allows you to increase the adhesive qualities of the surface (adhesion is the ability to adhere to dissimilar materials). In addition, the primer forms a protective barrier against too deep penetration of paints and varnishes into the wood structure.
As in the case of putties, specialized primers designed specifically for wood processing are used for priming. A feature of such compositions is the presence of special components in them, including antiseptics.
So, before you putty the plywood, it needs to be primed. The material is first cleaned of dust, dirt, oil stains and any other contaminants. Primer can only be applied to clean natural veneer.
Next, a primer is applied to the plywood, for which you can use a brush or roller. After this, you need to let the surface dry. Drying time depends on the humidity and air temperature in the room. On average, drying will take from 3 to 6 hours.
How to make a plywood floor in an apartment
An ordinary one may simply not withstand the load.
Of the entire range on the market, acrylic putty showed one of the best results
. It is applied to the widest and deepest cracks in several stages, each time waiting until the previous layer has completely dried.
Some people recommend using silicone
, but it is not very suitable, as it is too soft and will press through at the seams.
Elastic sealant is also not a panacea
– it usually shrinks greatly, causing clearly visible depressions to form on the seams. This can be avoided by applying it in several layers, waiting for the previous layer to completely dry and shrink, but this is a rather lengthy process. Of all the variety of sealants, acrylic is best suited for these purposes.
A more expensive option is hot melt adhesive.
. Apply it a little with a reserve (so that the seam sticks out). After hardening, the excess is cut off with a wallpaper knife. The connection turns out to be quite elastic, but not soft; it also hardens very quickly and practically does not shrink.
The disadvantage of this material is the price and the need to buy a fairly powerful (at least 500 Watt) hot melt glue gun.
Hot glue gun for sealing seams
If you are interested in folk methods of how to seal the seams between plywood on the floor, then there is no consensus here either. Some recommend rubbing the seams with a PVA solution mixed with sawdust
.
Others for these purposes suggest using a mixture of epoxy resin and wood dust heated to 40 degrees
.
Still others are a mixture of drying oil and construction chalk
.
Whatever you decide to use to seal the gaps between the plywood on the floor,
The main thing is to follow the technological process. In this case, the result will be reliable and durable.
More information in this video.
General concepts Practical comparison Varieties Negative sides of plywood Preparation for installation Base moisture Laying plywood on a concrete base Laying on a screed Laying plywood on joists
Plywood is a universal material; it is perfect for making a plywood floor in an apartment with your own hands. The main condition is compliance with the basic rules and nuances, attentiveness and a scrupulous approach.
Due to the various uses of this material, you can find many varieties on the market.
Plywood has a number of advantages:
- high strength;
- low cost;
- environmental friendliness;
- ease of installation.
All these factors make the material an excellent solution for use in various fields.
What putty should I use to seal plywood joints on the floor?
Most modern flooring is installed on a level base. But old floors do not always meet the stated requirements, and they have to be leveled. There are many ways to correct uneven flooring, but the most popular is the use of plywood.
Its prevalence is explained by several parameters:
Sealing the seams of plywood sheets on the floor
During installation, whole sheets are sawed into rectangles, between which it is necessary to leave technological gaps of 3–8 mm. Therefore, after installation, the question arises: how to seal the plywood joints on the floor? There are many options, but their effectiveness varies.
Regardless of the chosen method, the main thing is to follow the technological process:
Professional ways to eliminate cracks
You can eliminate cracks in boards using special means that are highly reliable. Let's list the alternative options.
Regular wood putty
This material option is considered the most alternative only in cases where minor gaps have appeared
Here it is important to decide on the type, since they can be finishing, sealing, universal, or filling. It is better to give preference to the last option
The dilution principle for each individual type of material is written on the packaging.
Puttying cracks in a wooden floor before painting Source waysi.ru
Trademarks offer various options depending on the presence of special components in the product:
- pigmented. Putty that has some tint. This type is chosen so that the defect on the floor is almost invisible under a layer of paint;
- acrylic. It is considered environmentally friendly and fireproof; it will reliably fill gaps even large in depth;
- parquet. This building material is specially designed for wooden floors, made on the basis of a specialized solvent;
- polymer. It is considered absolutely harmless and is made on a water basis, has a fast setting property, and does not crack after some time of service;
- elastic. It is considered an ideal option for filling floating gaps; it hides cracks directly in parquet boards well. It is not visible under the paint.
The rules for diluting and using professional putties are written on each package.
Purposes of puttying
Plywood structures are often used to level different types of surfaces during repair work. Installation of plywood sheets is carried out on the floor, walls and ceiling. However, without additional procedures, the seams between end-to-end sheets do not look very attractive, and the surface of the material itself is not even enough to lay linoleum on top or glue wallpaper. It is puttying that allows you to create a perfectly flat surface and hide interpanel defects.
It would seem that puttying is an obvious solution. However, many craftsmen wonder: is it possible to putty plywood, since we are talking about wood? The fact is that such doubts are justified, since humidity provokes rotting of wood, the development of mold and mildew on it, which gradually leads to the destruction of the material.
There is a way out if for processing you use not the first putty you come across, but a special one - made taking into account the characteristics of the wood. With the help of such compositions, you can eliminate all the problems inherent in plywood sheets without damaging the material. The putty contains moisture-protective agents, which allows the production of mixtures even on a water basis.
In addition, thanks to the addition of an antiseptic, the putty is also able to resist the development of fungus and mold.
Video description
Securely level old floorboards
Construction foam
This material is most often used to seal joints between the wall and wooden boards on the floor. This option is also suitable for sealing large cracks and damage in the floor. Before using such a product, the surfaces of the gaps are moistened with water so that the liquid foam adheres better to the wood.
It is recommended to apply polyurethane foam in small quantities, as it tends to expand and subsequently the boards may begin to deform, which will negatively affect the plane of the floor.
Acrylic sealant
Sold in special tubes equipped with a syringe. Ideal for filling gaps between laminate and parquet joints, and eliminating spaces between dry boards.
After applying the composition, the boards will stop moving, the creaking will disappear, and it will be comfortable to move on the floor. The acrylic sealant on top can be painted with enamel or special paint for wooden floors.
Acrylic sealant for sealing cracks in wooden floors Source materik-m.ru
High-quality sealing of cracks in wooden floors
Regardless of the size of the gap between the boards in the floor or in the parquet, before eliminating it, it is necessary to do dry and wet cleaning, remove dust and clean the gap area, and let it dry.
Sealing options:
- If the gap in a wooden floor is up to 1 cm in size, then it can be sealed with a rope, grout or filled with sealant.
- If from 1 cm to 3 cm, then a special putty is suitable.
- If the gaps are very large, then mounting foam, wedges or slats will work well.
After the operations have been completed, it is better to cover the floor with sheets of plywood, the joints of which are also processed and leveled with putty. Small cracks or joints can be covered with self-prepared putty made from glue and sawdust.
The sawdust is selected in small fractions, poured with boiling water and mixed until smooth.
After the solution with sawdust has cooled, add PVA glue and apply it with a spatula to the location of the crack that has been cleared of dirt and dust. After the surface of the sealed crack has been leveled to the floor level, it must be left for a couple of days for the mixture to set and dry. After everything has dried, the uneven areas must be treated with abrasive and fire protection applied, and only then the selected paints and varnishes.
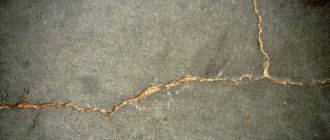
Factors influencing the appearance of cracks
And finally, to prevent cracks from appearing, you need to know the reasons for their formation. Such knowledge will also help eliminate their consequences. So, the appearance of cracks can occur due to:
- low-quality raw materials (for example, if the boards are damp and laid on the floor, over time they will begin to dry out, forming spaces);
- increased dryness in the room and the prevalence of high temperatures. Optimal indicators: humidity 45-65%, and temperature - no higher than 25 degrees;
- unsuitable material that was used for laying the floor. Ideal raw materials are species of coniferous and tropical trees, as well as oak boards;
- rodent settlements. Only in this case the cracks will be equal and uneven. The best way to eliminate such problems is to completely replace them with a new board.
There are many other reasons why cracks may appear in boards. In any case, it is better to eliminate them while they are small in size.
Features of finishing wood fiber boards
Plywood and other wood-based boards (oriented strand, wood-shaving, wood-fiber) are widely used in covering surfaces, laying subfloors, and in the manufacture of furniture and other items. These materials are characterized by certain features, and they must be taken into account when preparing for finishing:
- Uneven thickness.
Plywood is glued together from veneer sheets cut from solid wood, and boards are pressed from individual fibers or particles of wood. In any case, it is not possible to achieve perfectly smooth surfaces, so pre-treatment will be required before finishing. - Fibrous structure.
Even after sanding, the surface retains its texture, which can appear under a thin layer of paint.
- Inhomogeneous coloring
(typical of plywood and OSB boards). The layers of wood can be quite contrasting, so they are almost guaranteed to show through under a light pigment.
- Mounting features.
In the vast majority of cases, sheets of material are attached to the frame with self-tapping screws. When in contact with moisture, the fastener caps may rust, and as a result, characteristic stains will appear on the wallpaper, decorative plaster or interior paint.
- Changing linear dimensions.
With changes in temperature and humidity in the room, the dimensions of sheets and slabs can change, and quite significantly. If you neglect the putty, the finishing layer will most likely suffer (either cracks or folds will appear).
It is for these reasons that puttying plywood for painting, wallpapering, and even laying thin linoleum is highly desirable. I’ll tell you below what to use for this and how to apply the putty!
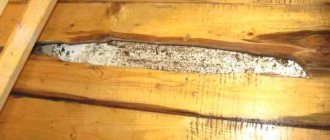
Need to know: how to seal a mouse hole
There are mice in both rural and urban areas. If there are any cracks in the houses, then mice can easily enter the living space; they will not only harm human health, as they are carriers of leptosperosis, toxocariasis, streptobacillosis and many others, which can lead to death, but also harm the room, its decoration, can penetrate into food products.
The most proven options for sealing holes in the wall from mice are:
- Glass wool sealing;
- Repairing the defect with cement;
- Polyurethane foam also helps a lot, mice don’t chew it, and it seals the hole tightly.
Expert advice boils down to broken glass being placed in mouse holes.
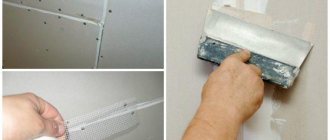
Surface preparatory process
Before you begin to seal the seams themselves, you must first carefully prepare the surface for work. A more significant action at this step is sanding the seams to be sealed.
The softer and thinner the finishing is, the better all imperfections will be visible on it.
The easiest way to bring plywood sheets and the joints between them to the desired condition is to use a sanding machine. This tool will make it possible to quickly remove all unnecessary irregularities and joints from the surface.
If there is no grinding machine, then the same steps can be performed manually, but this will take much more time.
Varieties
In order to lay a plywood floor in an apartment, you can use one of the following types of material marked as follows:
- FC – plywood with an adhesive in the form of urea resin. It is distinguished by high moisture-repellent characteristics, high strength, environmental friendliness, and can be used to create a finished floor covering.
- NSh is an unsanded type of plywood in which the layers are glued together using casein glue. This plywood is the cheapest, but may require additional sanding after installation.
- Ш1 – plywood with one-sided sanding. It also contains casein glue. It is best to use such plywood for a subfloor, since only one side is sanded.
- Ш2 – plywood with double-sided sanding. The layers are glued together with the same casein glue. Provided that such plywood is used in rooms with a normal climate, it can replace FK plywood.
Substrate moisture
After the material has acclimatized, you need to check the level of dampness in the area where the floor will be laid.
If the humidity is high, you will need to lay an additional layer in the form of waterproofing. In order to measure the humidity level, you will need to take one square meter of polyethylene and lay it on the floor, securing it in the corners with something heavy. Leave with the raised central part for a while.
Based on how long it took for the drops to appear, you can judge the humidity in the room:
- 24 hours – a room with such humidity cannot currently be used for laying plywood;
- 3 days – a layer of waterproofing should be laid;
If the floor is concrete, then we lay the film, and on top - a reinforcing mesh and fill the screed. If the floor is made of wood, then all rotten boards must be removed from it. Plywood is laid using FC grade.
5 days – installation of plywood can be carried out without restrictions.
Preparing for finishing
Selection of formulations
The range of tools that we can use to solve the problem is quite extensive. It all depends on where exactly we will process the wood boards.
The easiest way is to decide how to putty plywood under linoleum. Here we don’t need to create a perfectly flat plane – it’s enough to mask the fastener heads and protect the base from moisture. We proceed like this:
- treat plywood sheets with drying oil or primer (it is better to do this on both sides);
- Carefully coat the screw heads and joints between the sheets with epoxy putty.
But it’s more difficult to level walls under wallpaper or paint. Compositions that can then be leveled by grinding are suitable here:
- Gypsum materials
are sold dry and diluted with water to the optimal consistency before use. Easy to apply and work well. The disadvantage of gypsum compositions is that it is advisable to use them only in fairly dry rooms. Gypsum absorbs moisture, which can lead to swelling and peeling of the leveling compound.
- Acrylic compositions.
Ideal for processing wooden surfaces: they are not afraid of moisture and vibration, are easy to apply and level, and have good adhesion. Most often they are sold ready-made, so they can be used without prior dilution. The downside is the higher price.
- Adhesive putties.
Such products can be prepared with your own hands from sawdust and PVA glue (less commonly, water-soluble wood varnish). They are used mainly for sealing defects, masking fasteners and sealing seams between sheets. They are also suitable for processing large areas, but are inferior to acrylic ones.
It’s difficult to say which option is definitely better: they all have pros and cons. But in general, gypsum putty can be used as a base putty, and where there is a risk of gypsum peeling off, acrylic putty can be used. I would recommend using homemade adhesive compounds exclusively for local repairs.
Putty technology
If you have at least minimal skills in finishing work, then you should not have any questions about how to putty plywood sheathing. Still, there are a number of features that are worth mentioning:
- Firstly, wood boards need to be leveled, dusted and primed. Only if these conditions are met will the putty mixture “lie” evenly and adhere well.
- Secondly, under any decorative material you need to lay a starting layer with good adhesion. Thus, applying bark beetle sand putty to USB plywood without prior leveling and reinforcement will lead to rapid cracking of the face layer. The reason is a change in the linear dimensions of plywood with changes in temperature and humidity.
Instructions for performing the work are presented in the table:
| Illustration | Stage of work |
| Sanding wood. Before you putty the plywood for painting, it is advisable to sand it. This will remove loose wood fibers and eliminate any unevenness. | |
| Base primer. Immediately before puttying, we treat the plywood with a wood primer. The primer will not only bind the smallest wood dust, but will also reduce the wood's susceptibility to moisture. So, the sheathing itself will not swell, and the plywood putty will dry more evenly, without the risk of cracking. After priming, possible fixation on the surface of the plaster mesh - to protect against cracking. | |
| Applying putty. After the primer has polymerized, we begin puttying. First, we apply the material to the joints and fastening points. After this, use a wide spatula to lay the mixture on a plane and try to smooth the surface as much as possible. We control the quality of processing using a level. | |
| Leveling with abrasive. When the putty has dried, carefully sand it with sandpaper, gradually reducing the size of the abrasive grain. The required quality of sanding depends on how exactly you plan to finish the walls. |
After dusting the sanded surfaces, they can be safely painted, covered with wallpaper, treated with decorative plaster, etc.
Characteristics of a quality mixture
Despite the fact that different types of putty mixtures differ in components, they all must meet a number of quality requirements:
- a sufficient degree of elasticity, due to which the mass lies evenly on the surface and fully fills all voids and cracks;
- good fixation of the mixture on the wood surface, which allows the floor to remain level for a long time, without swelling or peeling;
- homogeneous composition without large particles does not cause scratches or damage to the floor surface during application.
If you need putty for a wooden floor in an open area - in a gazebo or on a terrace, several mandatory characteristics are added to the material:
- frost resistance so that the surface does not crack during frost or sudden temperature changes;
- water-repellent properties that protect the wood of the floor from moisture and rotting;
- drying speed, which determines the duration of finishing work performed on the floor.
Wood putty for indoor floors must also have specific qualities related to human safety:
- an environmentally friendly composition that ensures the safety of people in the room when applying and drying the composition;
- antiseptic components that rid the floor of the occurrence and spread of mold, bacteria and fungi that harm wood;
- fire resistance, which will keep the putty layer intact when exposed to high temperatures or open fire.
To eliminate uneven walls before painting and wallpapering, various types of putty are usually used, but is it possible to putty plywood? Of course, it is possible and even necessary, since the material itself is far from smooth and contains many natural irregularities, chips and cracks.
Features of puttying plywood sheets
Since plywood itself is very susceptible to external influences, its treatment with a primer, protective impregnations and putty is necessary.
Important! Since all types of putty have a liquid base that can disrupt the physical properties of plywood, the wood must first be primed to protect the product from moisture and create better adhesion when the putty adheres to the surface
Primer of plywood is strictly necessary.
Specialty construction stores sell many types of primers specifically for wood on various bases.
Be sure to read the instructions on the package.
Containers with primer contain instructions from the manufacturer, which indicate the characteristics of the substance and scope of application. Many people recommend priming the sheets before installing them on the walls and only after they have completely dried, proceed with installation.
Types of putties for plywood
Before choosing what to putty plywood under wallpaper, you need to know exactly the features of the room and the type of finishing. Preparing the surface for wallpapering is slightly different from preparing it for painting and different types of putties are used for this.
It is also necessary to take into account the humidity of the room and possible temperature changes, which also affect the choice of putty.
To level out uneven walls and prepare them, two types of putty are used:
dry in powder form (photo);
ready-made in the form of a thick solution (photo).
Dry putty for plywood is most widely used, since such mixtures are easy to work with and the consistency can be adjusted independently depending on the circumstances. It is produced in bags of different weights.
There are ready-made finishing mixtures, which usually contain various dispersions, silicone or latex. The advantages of this material lie in the use of modern synthetic products as a filler.
There is no need to mix the solution yourself and use it completely. Such putties can be stored for a long time, but their cost is much higher than that of dry mixtures.
Based on its chemical composition, plywood putty is divided into four main types:
- gypsum;
- polymer;
- cement;
- homemade.
- Gypsum-based mixtures are easy to use and do not shrink. However, if the plywood sheets are not securely fastened to the frame and there is a possibility of vibration, then such a mixture may crack in the area of the joining seams, since it does not have the necessary elasticity after drying.
Dry gypsum putty.
- Polymer-based putty mixtures have shown their best performance when working with wood, but their price is significantly higher than their analogues. Polymer mixtures are water resistant, which justifies their use when processing plywood in rooms with high humidity.
Such mixtures do not shrink and have good elasticity after drying. If you don’t know how to putty plywood on a floor where there is an increased level of vibration and mechanical impact, then polymer putty will be the best option.
- Cement mixtures also have good water resistance, but you need to remember that after drying they shrink slightly and have no elasticity.
- Another type of common mixture is putty, prepared independently based on ordinary PVC glue and fine wood dust. How to properly sand putty on walls for painting? The advantage of such mixtures is their high water resistance, the ability to create the desired consistency and good elasticity. It is for this reason that such mixtures are used very often in order to save money.
Practical comparison
Chipboard is cheaper, but has harmful inclusions in the form of volatile carcinogens.
It is worth conducting several tests to assess the practicality of materials:
- The first test will be for flexibility and maintaining the same shape. Let's put a centimeter sheet of plywood on two beams and stand on it. The material will bend for a while, and after we get off it, it will take its previous shape. In such a situation, the chipboard will simply crack.
- The next test will be for moisture resistance. Let's place the two materials in water and wait for the changes. The chipboard will very quickly begin to thicken and become limp, losing its shape and becoming completely unusable.
- The last test will be for fragility.
Using a hammer, apply several blows to the materials. The chipboard will crumble, and the plywood will absorb the impact, causing minor dents.
All these positive distinctive features of plywood are acquired by the material thanks to a special manufacturing technology. Plywood is a wood board whose layers are glued together. Chipboard is pressed from chips.
All tests performed show that plywood is in any case better than particle board.
Puttying
Applying putty to plywood is carried out according to the same principle as to concrete or brick. The tools you will need are a spatula, a rule and a small spoon. Particular attention should be paid to joints (Fugenfüller is used for this). The normal thickness of the putty layer is 2-3 millimeters.
If small grains remain on the coating after finishing the putty, they should be removed with sandpaper as soon as the surface is dry. However, this development of events can be prevented if you sift the solution through a fine sieve or nylon in advance. Once the surface has completely dried, you can begin further finishing work.
Puttying work with plywood is not much different from processing other materials. However, it must be remembered that any wood is vulnerable to moisture, and therefore needs protective measures, which we discussed in our article.
To seal the gaps in the floor between the boards, there are many options, you need to study them and choose the most suitable one. A wooden house is the most environmentally friendly and modern building for housing. It is pleasant and cozy to be in, however, there are a number of problems that the owners of this building face, for example, cracks in the wooden flooring.
How to install natural linoleum flooring
Natural linoleum is a great flooring option because it is made from renewable sources and has antibacterial properties, making it ideal for areas where there are a lot of children. It's also comfortable underfoot and comes in a variety of colors. Here's how to add it up:
natural linoleum template material (plain tar paper works well) duct tape 7/8-inch staples with ¼-inch crown hole ¼-inch birch plywood backing floor adhesive Portland cement finishing scribing tool hook-blade knife or utility knife pneumatic stapler notched trowel mud roller knife orbital sander
1.Remove existing flooring material in this area. Linoleum does not adhere well to the rough waffle subfloor typically found under existing carpeting, so installing a ¼-inch thick birch plywood underlay may be necessary before applying natural linoleum. If so, nail the backing in place with a pneumatic stapler, making sure the seams between the pieces are tight.
2. Apply a thin layer of Portland cement between the backing seams using a trowel. Sand the cement using an orbital sander to obtain a smooth surface.
3. Lay the material to be used as a template on the floor, draw the outline of the wall and use a hooked knife to cut along the marking line. Have duct tape on hand in case you need to overlap the template sheets to cover the entire floor.
4. Lay the linoleum on a flat surface. Carefully roll the template and unfold it onto the linoleum.
5. Cut the linoleum to the size of the template using a hook-blade knife. A large ruler will help you cut straight lines.
6. Roll up the linoleum and move it to the room where you are installing it. Apply the adhesive to the base using a notched trowel and then gradually lay the linoleum. Be sure to apply the material right away as the glue dries quickly. A heavy roller will push out any air pockets and help seal the linoleum to the glue.
7. Wait 72 hours for the adhesive to cure before allowing normal traffic in the room or placing heavy furniture in the room. For a shinier finish, apply at least two coats of a topcoat, which also seals the surface.
Leveling the surface with plywood
Floor leveling is most often done by laying plywood. Leveling the floor in this way turns out to be of the highest quality. To carry out the work, it is recommended to use FK grade material, class 4/4, its minimum thickness should be 12 mm. If the rough base is fairly level, it is permissible to lay plywood with a thickness of 8-10 mm.
Spreading linoleum.
Before leveling the floor under linoleum using plywood, you should install beacons, which will be self-tapping screws; they must be positioned level on the surface. As a rule, beacons are mounted at the corners of squares, the side of which can be equal to the limit of 25-30 cm. A screwdriver will allow you to install beacons. Only then can you begin laying the logs, which can be made of plywood; they need to be given the appearance of strips with a width of 30-40 mm.
The joists can be fixed to the base of the floor with glue designed for working with wood. This could be PVA Moment or PVA Stolyar; self-tapping screws will serve as an alternative fastening solution. In the space between the joists and boards, in the gaps between the beacons, plywood bars should be laid, having previously coated them with glue.
Then you can begin preparing the plywood for laying on the floor. The sheets can be given the appearance of squares, each of which has a side of 60 cm. This method eliminates the formation of waste, since such squares can be obtained by cutting the sheet into 4 parts, the standard size of each will be 125x125 cm.
Scheme for leveling the subfloor with plywood.
It is impossible to level the floor surface under linoleum using defective sheets. Errors may become noticeable after the sawing process - delamination may occur at the ends of the squares, which, as a rule, cannot be noticed in whole sheets. Such elements will have to be replaced. Afterwards, you can level the floor surface by installing plywood on joists. During installation, it is necessary to ensure that the joints of the squares fall on the logs.
Before leveling the floor under linoleum using plywood, you should know that the sheets need to be laid with some offset so that they are laid like bricks in masonry. This indicates that it is not acceptable to cross 4 seams at one point. If necessary, the plywood can be cut to size.
You can cut a plywood sheet and save material if you place the sheet on the floor before installing the joists. Then you should mark with chalk where the plywood sheets will join. This way it will be possible to attach the logs in those places where necessary.
Level the surface using plywood by attaching the latter to the joists with self-tapping screws.
After laying the plywood, thin sheets of fiberboard should be nailed to it, then you can apply glue to the floor surface and glue the linoleum
It is important to ensure that the joints of the substrate and the finishing coating do not coincide. Otherwise, cracks may form
It should be noted that any preliminary leveling of the floor will slightly raise its level; for small rooms such a change will be very noticeable.
It will be possible to lay linoleum in a high-quality manner only with proper preparation of the base, because a soft coating can reveal all the shortcomings of the base surface, and later they will become a place where the linoleum can become depleted and torn, which will require replacing the coating with a new one. Thus, good foundation preparation can help save money in the future.
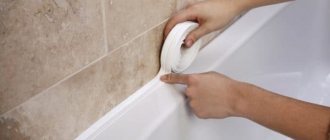
How to seal the seams on the ceiling between the slabs
In this case, you need to ask the installers to bring you a plug of the required length, or you can buy it yourself from a specialized company. For correct and accurate installation, you need a mounting spatula, which is a regular stainless steel trowel for laying mortar or building mixture. Sold in construction stores. Sharp corners on a spatula can be smoothed with a file.
Self-installation of the plug with a spatula
2. Installation of decorative ceiling plinth. This option is suitable for mounting on flat walls and will be cheaper, and the choice of products is quite diverse. It is recommended to glue to the wall using liquid nails or special glue for ceiling tiles. It can also be glued to a suspended ceiling, but if the ceiling is dismantled, it will most likely be problematic to remove such a plinth without damaging the ceiling fabric. It is also necessary to cut the corner joints correctly.
Ceiling plinth on a white matte stretch ceiling
Foam ceiling plinth on a white varnish stretch ceiling
Foam ceiling plinth on a white matte stretch ceiling
Decorative fabric braid on a stretch ceiling
Decorative fabric braid on a stretch ceiling
Through experience, I was able to come up with a fastening method, which is shown in detail in the video tutorials
Please note that the braid must have a sewn edging, which is necessary for successful installation
Braid with edging
4. You can also try gluing a special wallpaper border with wallpaper glue that extends slightly onto the suspended ceiling.
Some clients also insert the top edge of the wallpaper into the gap between the wall and the suspended ceiling - cheap and cheerful!
How to make a plywood floor in an apartment
An ordinary one may simply not withstand the load.
Of the entire range on the market, acrylic putty showed one of the best results
. It is applied to the widest and deepest cracks in several stages, each time waiting until the previous layer has completely dried.
Some people recommend using silicone
, but it is not very suitable, as it is too soft and will press through at the seams.
Elastic sealant is also not a panacea
– it usually shrinks greatly, causing clearly visible depressions to form on the seams. This can be avoided by applying it in several layers, waiting for the previous layer to completely dry and shrink, but this is a rather lengthy process. Of all the variety of sealants, acrylic is best suited for these purposes.
A more expensive option is hot melt adhesive.
. Apply it a little with a reserve (so that the seam sticks out). After hardening, the excess is cut off with a wallpaper knife. The connection turns out to be quite elastic, but not soft; it also hardens very quickly and practically does not shrink.
The disadvantage of this material is the price and the need to buy a fairly powerful (at least 500 Watt) hot melt glue gun.
Hot glue gun for sealing seams
If you are interested in folk methods of how to seal the seams between plywood on the floor, then there is no consensus here either. Some recommend rubbing the seams with a PVA solution mixed with sawdust
.
Others for these purposes suggest using a mixture of epoxy resin and wood dust heated to 40 degrees
.
Still others are a mixture of drying oil and construction chalk
.
Whatever you decide to use to seal the gaps between the plywood on the floor,
The main thing is to follow the technological process. In this case, the result will be reliable and durable.
More information in this video.
General concepts Practical comparison Varieties Negative sides of plywood Preparation for installation Base moisture Laying plywood on a concrete base Laying on a screed Laying plywood on joists
Plywood is a universal material; it is perfect for making a plywood floor in an apartment with your own hands. The main condition is compliance with the basic rules and nuances, attentiveness and a scrupulous approach.
Due to the various uses of this material, you can find many varieties on the market.
Plywood has a number of advantages:
- high strength;
- low cost;
- environmental friendliness;
- ease of installation.
All these factors make the material an excellent solution for use in various fields.
Laying on screed
Let us explain the order of installation of plywood in an apartment specifically on a concrete screed:
- First you need to carry out a thorough cleaning, there should be no debris left behind.
- The surface should be opened with bitumen varnish with the addition of kerosene. If there is no such mixture, you can take parquet mastic and add a solvent there.
An absolutely necessary precaution would be to turn off the power in the panel for the period of complete ventilation of the room. This prevents the occurrence of an accidental spark that could ignite flammable vapors.
- Plywood sheets should be cut into strips or squares of 1250x1250 mm.
- Laying is carried out with a 50 percent shift according to the principle of brick masonry.
- We arrange the sheets on the floor, adjust their size, number them, and remember the gap between the plywood on the floor.
- If linoleum serves as the finishing coating, then before sealing the seams between the plywood on the floor, it can be glued directly to the concrete floor using bustylate. The main thing is to understand how to glue linoleum to plywood correctly. The result will be a cork floor without mounting gaps. If you have a question about how to seal the seams in plywood on the floor, then use acrylic non-shrink putty for wood floors.
- If oak flooring is to be laid, then plywood should be laid with the addition of mounting slots:
First you need to attach the sheet to the concrete and drill 4 holes in the corners and one in the very center, lightly touching the concrete. It is better to take a drill made of hard steel alloy, since a simple drill will quickly become dull due to contact with concrete. Next, we remove the sheets and make full-size holes for the dowels. We open the bottom part of the sheet with glue and put it in place, clamping it with screws.
If you don’t know how to seal the plywood joints on the floor in this case, then the answer is simple - you can leave them as is.
Types of putties for floorboards
Today there is a fairly wide selection of wood putties. Before choosing putty, you need to decide on the price, scope, type and brand.
Putties are divided into types:
Polymer putty, which is water-based, therefore does not emit chemicals into the atmosphere. It dries quickly enough, holds well and does not crack. Oil putty based on water, chalk and oils
It is one of the most reliable, however, after treating the crack, it takes a lot of time for it to dry completely. Acrylic putty is environmentally friendly and non-flammable, which is very important for wood. Solvent-based putty is ideal for hardwood flooring, but is not the most environmentally friendly option. The putty is elastic, which is ideal for “floating” cracks and joints. It holds its shape perfectly and has good adhesion to the surface. Wood putty is pigmented, that is, in various colors (white-birch, teak-mahogany, wenge-dark oak, beech-oak)
It is necessary to take into account that often the color does not match what is stated on the packaging; you should request a demonstration of the product or a stand with these putties. Putty for wooden floors, which is used to smooth out unevenness, various defects and crevices.
The main brands of putty manufacturers are Dulux, Parade, Semin, Varathane, Axton, Neomid, Forwood, Rainbow, Tytan, Master's Choice. We must not forget that putties differ in the main types: finishing, leveling, filling, universal, sealing. The putty is applied with a spatula of the selected size by pressing it deep into the crack. After the putty has dried, it is necessary to level the surface using abrasive products for wood.
Technology of floor leveling with special compounds
Technology and installation of a wooden floor in a private house with your own hands
Scheme of floor construction with linoleum on the ground.
Leveling the surface using special mixtures before laying linoleum involves the initial installation of logs. If they are installed on the surface of a wooden floor, then all boards that are poorly reinforced must be fixed to the joists with self-tapping screws, the heads of which should be driven below the floor level.
The wooden floor must be prepared; for this, the cracks and grooves between the boards will need to be eliminated, which can be done using acrylic putty, which can be replaced by a leveling mixture; the latter must be diluted during the preparation process to the thickness of the putty composition.
As soon as the base has dried, it must be coated with a moisture-proof primer, which will ensure high-quality adhesion of the self-leveling composition and wood. The walls will need to be covered with waterproofing.
In order for the self-leveling floor to gain additional strength, reinforced mesh should be used. It will need to be secured to the wooden surface with a construction stapler. The mesh should be laid with an overlap of 5 cm.
Afterwards, you can begin preparing the leveling mixture solution. You can stir it using a construction mixer; an electric drill equipped with a special attachment will also work. Such mixtures must be used immediately after preparation. The mixture must be poured into the space between the logs, leveling the surface with a spatula and a rubber mop; the logs will act as beacons. Air bubbles can be removed using a needle roller. Now the mixture can be left to dry completely.
How to prepare various substrates for laying tiles Training Center
Ceramic and porcelain tiles are among the toughest flooring materials. They need a subfloor that can accommodate this without any wobble or movement. If ceramic or porcelain tiles are installed on an uneven surface, you risk allowing the tiles to crack or become loose. Here are some instructions on how to prepare your subfloor for tiling.
Laying tiles on concrete
Repair all cracks and uneven areas in the concrete subfloor before installation - especially important if the tiles are bonded directly to the concrete. For a subfloor with large cracks, consider removing a large section of the concrete slab and replacing it with a new one instead of sealing all the cracks
If there are severe cracks in the concrete slab, smooth it with concrete filler or a similar compound. If the concrete floor is new, it must be allowed to cure for 28 days before laying the tiles. Cleanliness is paramount. In addition to any surface materials, be sure to remove any grease stains or other substances that have stained the slab as best you can. A cement backerboard can provide a strong, flat surface for tiling if you have a wood subfloor.
Laying tiles on plywood
- A plywood subfloor must be structurally sound and able to withstand installation. Tile floors are heavy, and tile is a hard material. It will break or move if the surface bends under load.
- Remember that you will need a very flat surface to work with. If necessary, sand the plywood to level the subfloor.
- The plywood must be installed over a matching subfloor and must be at least 1 1/8 inches thick when combined with the subfloor. Interior plywood and chipboard are not considered strong enough for tile installation.
Can tiles be laid over linoleum or vinyl?
- Yes, non-cushioned vinyl and linoleum, which have a strong structure and are free from excessive movement, can act as a suitable base for tiles.
- No, soft vinyl is not a suitable subfloor. You will need to remove the vinyl flooring and any remaining adhesive used to install the vinyl.
- In some cases, the vinyl itself can be removed, but not the adhesive. Use the type of thin set recommended by the board backer manufacturer.
- If it seems difficult, you can lay the base board with a thin layer.
Is it possible to lay tiles on tiles?
- Yes, you can either leave the existing tile floor in place and apply a thin layer directly over it, or you can remove the tiles with a hammer, depending on how high you want the floor to be in relation to doors and other interior features.
- If the existing tile floor is installed over a layer of mortar, it may be difficult to remove the tiles without removing a large amount of the mortar layer.
- If you are laying tile directly over an old tile floor, sand the existing tile using sandpaper. Clean with degreaser and test the bond in a small area overnight.
- Also check the floor height with the height of doors and cabinets. Any good solvent can be used to install a new floor.
Unsuitable subfloors for tiles
Subfloors to avoid when installing tile are those that are prone to bending, expanding, contracting or warping. Any excessive movement will weaken the tile and cause grout. Unsuitable subfloors must be replaced or covered with a suitable underlay. Here is a list of prohibited subfloors:
Adviсe
To properly putty the floor indoors, you should know how to choose a good finishing mixture and correctly apply it to the surface.
To achieve the desired result, you must follow the useful recommendations of experienced professionals:
puttying is not carried out at low temperatures: the process is more effective in the summer; Before sealing the main part of the surface, potholes and other floor defects must be treated
The holes that will be sealed should not be more than one centimeter; Putty is applied to a wooden floor only after preliminary drying of the surface material; When purchasing a ready-made mixture, it is important to check the contents of the product by opening the lid of the package. The low quality of the product is indicated by the presence of solid particles in the composition;
- Before using any mixture, study the instructions for working with this product;
- the composition is diluted in small parts, since with a large amount of ready-made unused mixture and rapid drying, the product loses its quality;
- It is recommended to apply PVA glue diluted in water before starting puttying;
- to apply the mixture to a concrete floor, it is necessary to bring the putty to a more liquid consistency than for finishing walls and ceilings;
- if there are a large number of cracks, finely dispersed compounds are used, and the depth of the crack is filled with a coarser material, which must first be treated with glue;
- After applying the putty to all problem areas of the floor, you need to carefully clean the base using sandpaper.
If the budget for purchasing dry or ready-made putty is limited, there are several ways to make the composition yourself:
- By mixing PVA glue with sifted chalk. As a result, a fairly thick mixture of viscous consistency should form. In the process of finishing large irregularities and cracks, sawdust is added to the composition. Drying time is about two days;
- By mixing acrylic varnish with chalk. The same mixing method is used here as for the first recipe for preparing putty. Only the result should be a paste-like mass.
- For rooms with high humidity, it is recommended to prepare an oil solution for leveling. You will need about one kilogram of drying oil, two kilograms of chalk and one hundred grams of any substance that accelerates the drying process;
To putty a wooden floor, a composition of varnish based on oil and wood dust is used; The leveling compound can also be made from small pieces of old linoleum. The main thing is that the material does not delaminate. It is filled with acetone solution
It is important to leave the workpiece for a short amount of time to dissolve the linoleum. The finished product protects the floor surface from moisture in the same way as professional products; It’s easy to make putty at home, which is an analogue of an acrylic mixture
For this you will need about 200 grams of rosin, 400 grams of ozokerite and yellow ocher. The substances are mixed in a metal container, which is placed over a fire to dissolve the materials. The peculiarity of applying such a product is that the putty is applied hot.
The most economical options for preparing a leveling mixture for a concrete floor with your own hands are obtained from a mixture of gypsum and chalk in a certain proportion: there should be twice as much chalk. You also need to add PVA glue to the composition. Another option is a combination of varnish and cement; it gives a good result, since the finished product is characterized by increased stability.
When mixing all products, safety precautions must be observed, as the use of chemicals can be harmful to health. It is recommended to use personal protective equipment during work. It is also better to prepare the solution in open spaces or on the street.
Following the puttying instructions will simply guide you through each step of the process. The result will be a smooth floor, ready for the final coat.
To learn how to putty a floor under a laminate, see the following video.
Putty plywood floor
Plywood, like most building materials, is designed to finish rooms for various purposes. Its strength exceeds the type of wood from which it was made. Typically, plywood is mounted on level guides. After fixing the plywood, you can putty it. It must be treated with a primer on the outside and inside.
When the plywood is primed, you need to wait about an hour until it dries. Each manufacturer of a primer or antiseptic indicates the area of use of the antiseptic or primer, indicates the drying time and other characteristics of use. These are such as humidity and air temperature and other materials for which this product is made. Once the primer is applied and dry, apply putty.
You can use ordinary putty, which is sold dry, and then mixed, adding water, until it becomes sour cream.
But the application layer of such putty is from 2 mm. Therefore, when choosing what to putty the floor with, choose latex or oil putty. If you choose an oil-based one, then after drying there will be almost no need to go through sandpaper, rubbing out any irregularities.
Since when puttingtying plywood, or any other surface, oil putty stretches well, you can choose it. It absorbs less paint compared to dry paint.
When puttying plywood, latex putty forms a layer of 1 mm.
This putty can stretch well and cover all unevenness. It is usually puttyed once. If necessary, you can apply a second layer. It's difficult to sand with sandpaper. Because the grout mesh or sandpaper quickly exhausts its resource.
Therefore, when thinking about how to putty the cracks in the floor, we answer, do it carefully so that you practically don’t have to use sandpaper. And when the putty already applied to the plywood has dried, start painting.
For flooring, polyester putty is most often used. Its features are strength, good adhesion, and elasticity. This putty does not shrink, but when working with it you do not need to take a large layer. The number of thin layers should be no more than two.
Polyurethane putty is also popular. It's easy to use. It is resistant to gasoline and acids.
Plywood is very often used as a base for other types of flooring and as a finishing material. Since this is a natural material that requires technological gaps during installation, the question necessarily arises: how to seal the seams between the plywood on the floor?
The answer depends on several factors:
- thickness of the gap between the sheets;
- specific finishing;
- the room itself (humidity, heating, etc.).
Preliminary preparation
Before proceeding directly to sealing the seams, they must be prepared.
You should start by sanding the joints, because this is the most important. If plywood is a finishing material or something thin and soft, such as linoleum, will be placed on top, all surface defects will be clearly visible
It is most convenient to minimize the difference at the joints with the help of a sander; it can also be used to go over other flaws in the material (knots, irregularities). This work can be done manually, but it will take much more time.
Another important factor is the fastening of the edges. It must be very rigid, the joints must not “walk”, otherwise not a single putty will hold in them.
Read important material on the topic
: what putty to choose for plywood and why?
If plywood is laid on a concrete base, then it is fastened with glue (the main thing here is not to skimp on it); when installing it on a wooden surface, the sheets are screwed with self-tapping screws. They are screwed in every 15-20 cm. The outer rows should be positioned as close as possible to the future seams, but so that the sheet does not crack.
Sealing process
Immediately before caulking, the seams must be cleaned of dust and dirt; this is most conveniently done using a vacuum cleaner. Then the joints are degreased and coated with a primer. The soil must be moisture-resistant, and if the room is damp, then it is advisable to add antifungal additives. The putty itself is applied only after the primer layer has completely dried.
Leveling with self-leveling mixture
Leveling a wooden floor with a self-leveling mixture: the base should not have large gaps or cracks
Pouring concrete screed has always been a success among builders as a simple and affordable way to level the floor. But in houses with wooden floors this was unacceptable due to the large mass of concrete that had to be used. Thanks to modern technology, this problem has been solved. Self-leveling mixtures allow you to level a wooden floor under linoleum, laminate or tile. The cement-adhesive composition, after drying, will create a smooth, durable and fairly elastic coating with low mass due to a layer of up to 20 mm. To do this you need to do the following:
— the floor surface is completely cleaned of old floor covering;
— we recess the protruding nail heads, remove any metal objects;
— using a sander or sanding machine, partially remove the top layer;
— all creaking and springy boards are secured to the joists using self-tapping screws;
— thoroughly vacuum and remove dust and dirt from the floor;
- putty all the cracks and cracks, let them dry completely;
— we impregnate the wooden floor with a deep penetration primer with moisture-proof properties; if this seems insufficient, you can lay a waterproofing membrane;
— we glue the joints of the walls and the floor with an overlap on the floor and walls, using double-sided tape, and glue a waterproofing membrane in the form of a strip onto it;
— on the walls we mark the level to which the self-leveling mixture will be poured;
Scheme of filling with self-leveling mixture: insulating layers
— near the door we fix a wooden plank, the thickness of which corresponds to the level of filling;
— we lay a reinforcing mesh on the floor surface and secure it to the floor using self-tapping screws or staples;
Now that the wooden floor is prepared, you can start pouring the mixture:
— add the mixture to a container with water and knead using a drill and a mixing attachment;
We get rid of bubbles in the self-leveling mixture with a rubber roller
— pour the resulting mixture onto the prepared surface and use a special rubber roller with spikes to get rid of small bubbles;
- level the surface using a large spatula or rubber mop;
— now all that remains is to wait for the mixture to dry completely and prepare it for laying the floor covering.