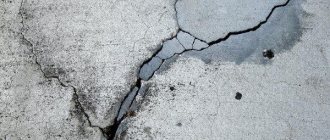
Gaps in the wooden floor
Reasons for the problem
Wood is always about aesthetics, comfort, and ecology. The advantages of wood firmly hold it on the pedestal of leaders among materials for repair and construction work, as well as laying floors. But even such a strong and durable coating develops problems over time: cracks, squeaks, etc. The first thing any homeowner does in this case is determine the reason for their appearance.
Correct identification of the cause of the defect will help to select effective measures to eliminate it. Otherwise, the repair process can last endlessly and over time lead to tragic consequences, including complete destruction of the flooring
The “culprits” may be different:
- The laying technology has not been maintained . Incorrect installation of boards, violation of the horizontal position of the joists, poor-quality fasteners can lead to “walking” of the flooring, its subsidence, loosening and, as a result, the appearance of gaps.
- Low room humidity . Dry indoor air causes wood to actively release its moisture and, as a result, a significant reduction in its own dimensions. Optimal conditions for wooden floors are humidity 40-65%, temperature 18-25°C.
- Quality of material . Wood that is not dried well in a vacuum chamber goes through a process of natural drying. If you lay raw lumber, a decrease in its volume is inevitable. Moreover, depending on the type of wood and humidity levels, ordinary boards can lose from 5 to 10% or more. Good, evenly dried boards have a relative humidity of 8-12%.
- Unsuitable wood varieties for a specific purpose . Each type of wood has its own structure, characteristic features, properties, but not everyone can become a floorboard. When choosing floorboards made of pear, beech, maple, ash, or cherry, be prepared not only for a beautiful appearance, but also for upcoming repairs. But tropical or coniferous trees, oak, are a reliable covering.
- Rodent pests . If there are mice or rats in the house, they will not sit quietly in one place. Small rodents will constantly multiply, expand their area of residence, move forward in search of food, and wooden floors will not become an obstacle for them. Therefore, before you start repairing the floors, you need to get rid of uninvited “guests”.
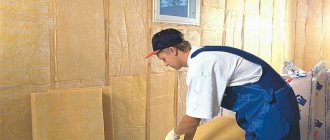
- Incorrect ventilation . Properly organized ventilation is one of the guarantees of long service life of the floor. Violation of proper air exchange in the underground space creates all the conditions for the appearance of fungus and rot. From above, the appearance of the boards can be very attractive, despite the complete destruction of the lower and middle parts.
- Active use of the coating and high loads on it . In this case, most likely, a creak will appear first, the localization of which must be established. After all, baseboards, joists, and boards can make unpleasant sounds. Later, cracks and cracks appear.
Before starting repair work, it is necessary to clarify some points:
- The source of the defect and the area of its spread.
- For what reason did the gap appear?
- Scope of proposed work.
- Labor costs.
- The time it takes to fix the problem.
- The amount that will be invested in repairs.
Types of wood floor repairs
There are three ways to troubleshoot problems:
- Cosmetic . The work is carried out on the floor surface - we remove defects in various ways.
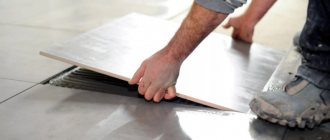
- Partial. It is done in separate areas in the presence of wide cracks. Several floorboards are removed and new ones are installed in their place with a precise fit. Usually this method is combined with the previous one.
- Full (global replacement ). This method involves removing all floor boards on the assumption that some of the joists are damaged. To remove the boards you will need a nail puller, a hammer, and a crowbar. Completely unusable boards are removed to be replaced with new ones; undamaged boards undergo additional processing to become operational again. After preparation, a new dense laying of the floorboards on the joists is carried out. It may be more expedient to “go through the floors” than to repair them.
Putty
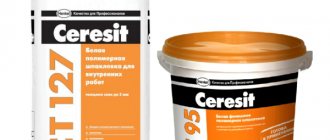
A simple and quick way to seal defects is putty. Ready-made solutions are sold in every hardware store. For floor repairs, a universal or moisture-resistant wood putty is suitable. For most solutions, the manufacturer separately specifies the possibility of using filler to seal cracks.
Using a spatula, the solution is placed into the cracks and lightly pressed down. After drying, the surface is leveled.
For small defects and small cracks, this option for eliminating defects is considered one of the best, but putty does not cope so well with deep and too wide cracks. Over time, cracks form and repairs have to be done again.
Methods for eliminating gaps
Wood coatings have been known for a long time, as well as their disadvantages and problems that may arise during their operation. There are many methods for eliminating cracks in a wooden floor. First of all, let's consider the most accessible, simple, well-known folk methods.
Reinforced tape
The best option for very quickly getting rid of small cracks and crevices in the floor.
To apply a 50 mm wide tape, you must thoroughly clean the floor covering from grease and dirt, wash it well and dry it. The gap is closed with tape, the edges of the latter are fixed with a stapler. Everything is quite simple, except for one nuance - stripes of adhesive tape. It is better to cover them with a rug, path, carpet, etc.
Linseed oil and wax
A very simple way to counter shallow, small-sized defects in boards. Both components heat well, mix into a homogeneous substance and pour the latter hot into the cracks. After cooling, level the surface.
Gelatin, shavings, gypsum
Pour table gelatin with warm water and leave until it swells, then obtain a homogeneous mass. Add gypsum and fine wood shavings to the gelatinous substance, mix well, and place the resulting mixture in the cracks. After the solution has dried, the residues are cleaned, removed, the surface is sanded and decorated with paint or enamel.
Paper, copper sulfate and paste
One of the most accessible methods.
The algorithm of actions is quite simple:
- Paper (not glossy) is shredded into pieces (torn, cut), filled with water and left to soak.
- A paste is prepared from water and starch (flour).
- Copper sulfate is added to the resulting “jelly” at the rate of 1 part of the substance per 10 parts of paste. In the future, the additive will protect the putty from small insects.
- The paper is squeezed out well, added to the paste and the whole mass is brought to a homogeneous state.
- The resulting mixture is spread onto well-cleaned cracks, compacted to the required depth, and the surface is leveled.
- Over time, the well-dried composition is treated with abrasive materials and painted.
Wedge slats
Not to say that this method is completely simple, but it is practical, popular, and gives excellent results when repairing even large defects.
The process goes as follows:
- Similarly to all the mentioned methods, all dirt, dust, etc. are removed from the surface of the floor, cracks, and the edges of the cracks are made smooth.
- Prepare the slats: it is best if it is pine wood, the inserts become narrower towards the bottom, and the width is 0.5 mm less than the width of the gap.
- Prepare the gap: use the tip of a screwdriver to guide it along the entire length, applying force. The procedure is repeated several times.
- Glue (PVA) is added to the defect and leveled well so that it fills all the voids. The sides of the wedges are also lubricated.
- The lath is inserted into the gap with a hewn edge and beaten with a mallet or hammer so that it goes deeper into the gap.
If you use a block of wood as a spacer between the hammer and the strip, then you don’t have to worry that the latter will leave dents after impacts. The joints, if desired, can be covered with masking tape.
- There are voids left - they can be easily filled with a homemade mixture of sawdust and glue.
- When the glue is completely dry, the edges of the wedge that protrude above the floor are removed using a hacksaw, plane or knife. The repair is completed by sanding with sandpaper (fine-grained) and treating with varnish, paint, stain, and oil.
Tow, rope, cord
A time-tested method.
Moreover, it is used to eliminate gaps not only in the floor, but also in wooden walls. The primary task is the correct choice of cord (rope, twine) of the required length and diameter. The thickness of the material must be greater than the width of the gap. In addition, you will need: glue (carpenter's glue, PVA), putty and sawdust. The step-by-step action plan is as follows:
- It is good to soak the rope with glue; you can even immerse it in the adhesive composition and hold it in it for a while.
- Without wasting time, mix glue, putty and fine sawdust.
- The cord is placed in the crevice and deepened 3-4 mm using a hammer, core or spatula.
- With the mass prepared in advance, it is necessary to fill the remaining space to the top with a reserve. It is taken into account that the mixture shrinks during drying. As a result, the former gaps are well cleaned and painted to match the floor.
An analogue of hemp rope can be plumbing flax tow. It is also compacted into the cracks after impregnation with glue.
You can purchase synthetic sealing cord at hardware stores. The material of manufacture is foamed polyethylene, the cord itself does not require glue, it is compacted into the gap by 4-5 mm, covered with putty on top, the optimal coating is an oil-based composition for wooden products.
The proposed method is effective in combating squeaking in floorboards
Sawdust and glue
You can successfully seal cracks using just two components. To get a working mixture, take PVA glue and sawdust, preferably of a fine fraction. Pour boiling water over the latter, mix thoroughly, and leave for 1-2 hours to swell. The next step is to add glue to the resulting mass (PVA can be replaced with carpentry glue, and to speed up hardening, choose epoxy) to obtain a viscous, viscous substance. It will become a homemade putty for eliminating cracks in the floor. The mixture is applied with a spatula, leveled well, and after 2-3 days required for the glue to dry, sanded.
Sawdust and cement
One of the varieties of the previous mixture. To create the composition, first mix glue and warm water in a ratio of 2:15. Then we supplement the mass with cement and sawdust, 5 parts each. Mix all components thoroughly, let it brew for 5-7 minutes and seal the cracks. For the best effect, use the mixture warm (heated). The advantage of the method is good insulation, the disadvantage is a long drying time.
Sawdust and paint (varnish)
Another composition with sawdust. Take 1 part each of wood varnish and paint, add 4 parts of sawdust (fine shavings). We seal the cracks with a homogeneous composition: 1 time - small ones, several times - large ones.
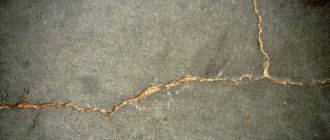
Cement and broken glass
The cement-glass mixture is relevant if there are rodents in the underground. Not every poison will do. It is better to choose poisons with mummifying properties, otherwise the smell of decaying mouse corpses will be impossible to eliminate. In addition, rodents can cope with many solutions without problems, but broken glass is too much for them. The cracks are filled with a mixture of fragments of bottles and concrete, and a layer of putty is placed on top.
Those who don’t want to tinker with glass can safely use pieces of wire as filler (even cut metal items for cleaning dishes). But stores offer professional building mixtures based on concrete with the addition of aluminum chips.
Epoxy cement mortar
A simple and reliable tool. Cement and epoxy glue are mixed 1:1 and, until the composition has hardened, quickly pour it into the gaps. The cracks are filled with a small margin, and after drying, the excess is cut off and the floor is decorated.
Plywood and chipboard
When we are not talking about minor damage, but about a significant distance between the floor boards, it is hardly possible to save the situation with mixtures or solutions. You need to act differently and use chipboards, plywood, and only then organize the coating with finishing materials. There are several ways to fasten sheets: using liquid nails, dowels with self-tapping screws, ordinary nails. As a rule, the caps are sunk into the base, and then everything is leveled with putty. The advantages of this method are a flat floor for any covering, insulation, not a single crack. Negative aspects are labor intensity; for large affected areas, significant investment in materials.
Screed
Deformation occurs mainly due to drying out of the wood and the formation of large cracks. To tighten the floor, it is necessary to dismantle the boards. The latter will be installed anew, but with displacement, compaction and the addition of 2-3 floorboards. The work is carried out using a jack, wooden wedges, clamps, and a special lever. The boards can be laid thoroughly, reliably and efficiently, and the floor will serve the owners for a long time.
Now let's move on to more professional means.
Putty
Have the first small cracks appeared?
Factory putty of various types will come to the rescue: finishing, filling, leveling, sealing, universal. It also makes sense to get recommendations from specialists, since there are different types of compositions:
- It is recommended for wooden floors as it smoothes out various defects, unevenness and small cracks.
- Pigmented (for wood) is available in different colors (beech-oak, teak-mahogany, etc.), it is necessary to check the match between the specified and the actual color.
- For parquets it is made on a solvent basis.
- Elastic – the best option for joints and “floating” gaps.
- Oil-based – reliable, practical, despite the long drying time. The base is chalk, water, oils.
- Acrylic – environmentally friendly, fire resistant.
- Polymer is harmless (water base), holds tightly, dries quickly and does not crack. The mixture (in reasonable quantities) is applied to the floor and pressed into the cracks using a spatula. After the material has dried (the exact time for a specific type of putty is indicated on the packaging), the surface is cleaned and leveled with sandpaper.
Polyurethane (construction) foam
Blowing out cracks with foam is a very simple repair method.
In addition, the composition will not only help get rid of defects, but also enhance the heat and sound insulation of the floor. Since foam is used quite often, it is necessary to clarify some of the nuances of working with it:
- In order for the mass to adhere well to the surface of the gap, its surface must be slightly moistened. To do this, you can take the simplest spray bottle (mechanical) or a plastic bottle with holes in the lid.
- The optimal temperature for working with the can is 5-25 degrees Celsius.
- Be sure to take into account that polyurethane foam tends to expand. Moreover, the composition intended for use in special “guns” (replaceable cylinders) lays down more accurately and swells less than the foam in disposable cylinders. Therefore, it must be applied little by little, very carefully.
- We should not forget that foam is a caustic material in use, although, after stabilization and drying, it is harmless to humans and does not emit toxic substances.
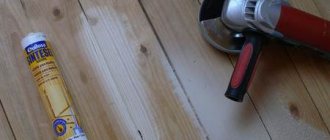
Sealant (acrylic, silicone)
If there is a need to find a composition to eliminate narrow or wide cracks, the sealant will be a real godsend. The nozzle cap, shaped like a syringe, makes it possible to easily introduce and distribute the composition inside the recesses. With proper preparation of problem areas of the floor and installation of sealant, the latter will serve faithfully for many years.
To “reanimate” wood, two types of sealant are used:
Acrylic
The composition is easily washed off your hands (water base), odorless, transparent. It adequately withstands high humidity, and after drying it can be easily processed - sanded, painted or varnished. When choosing this material, you should pay attention to some points:
- Characteristic shrinkage.
- Instability to temperature changes (the optimal use case is a heated room).
Silicone
The material is elastic, and this is one of its main advantages. When the floors “play”, “walk” and cannot be securely fixed in any way, silicone sealant will come to the rescue. The composition has excellent adhesive (penetrating) properties and is resistant to compression and stress. The disadvantages of the material include the almost impossibility of coloring it, although specialized stores offer a considerable selection of products in various colors.
The sealing procedure is as follows:
- We clean damaged areas of the floor, edges of cracks, and joints from dirt.
- We insert the tip of the balloon into the gap and carefully fill the space with an even strip.
- Using a narrow spatula, level the composition, removing excess.
- After drying, the surface is sanded and painted.
The question often arises about eliminating cracks in cork parquet. It is important to clarify here that the material, in principle, as a type of laminate, has a characteristic structure of several layers. The thin top plate made of balsa bark makes it impossible to apply technology to ordinary wood
It is worth mentioning separately the deflection of the boards , which can also lead to the appearance of cracks and significant deformations. Causes of the problem:
- Incorrect lag installation step.
- The finishing material is too thin.
To correct the situation, it is necessary to connect adjacent boards with dowels.
- We make a corner hole in the adjacent boards.
- We insert wooden rods soaked in glue into the finished hole and tighten the boards.
- When the glue dries well, remove excess parts and sand the surface.
Expert advice
In order for the process of sealing cracks to be as successful as possible, you must:
- Assess the scale of the damage - if possible, it is better to replace the board or part of it with a new piece of wood, since major damage will sooner or later lead to active rot and collapse of the entire floor.
- Choose the most suitable sealing method - if the gap is narrow and shallow, then wood putty is sufficient. There is no point in using foam or cord that is suitable for filling deep and wide crevices.
- Be sure to prepare the gap before sealing, without ignoring the disinfection step . It helps suppress the activity of pathogenic bacteria that destroy wood and lead to the formation of large cracks.
- Paint over the sealed areas - regardless of the chosen product, the surface must be opened with varnish or paint. This is necessary to protect the surface from possible premature cracking.
- Do not rush to complete the work in one day - haste is the main enemy. A gap that is poorly dried after treatment does not provide the necessary adhesion between two surfaces, which guarantees the futility of the work performed.
Have you ever had to seal cracks in the floor?
It happened, it didn't happen
How to prevent cracks from appearing
It’s not for nothing that they say: “Forewarned is forearmed.” So in this matter: it is better to follow all the rules for laying the floor, regularly carry out inspections and take the necessary measures.
- Laying is carried out taking into account the correct ratio of the thickness of the boards with the gap between the logs.
- There is a gap between the wall and the floor covering along the entire perimeter of the room.
- The joints of wooden surfaces are covered with damping gaskets as a means of shock absorption and preventing squeaks.
- Wood products must be coated with antifungal and water-repellent solutions.
- In order to prevent moisture from appearing under the floor, it is possible to organize natural ventilation.
Cord
Putty is widely used for filling holes in both walls and floors. The product is selected according to the width of the hole.
This technology helps get rid of the annoying squeaking of floorboards. For the procedure you will need a cord of any material or string, as well as wood glue, putty and sawdust.
- The cord should be completely lubricated with glue
- then mix the solution with sawdust, glue and putty
- deepen the cord inside the crack so that 2-4 mm remains to the floor surface (this is important)
- pour the prepared mixture over the cord, leaving a small margin on top
The putty will definitely settle, so there is no need to skimp on the prepared composition.
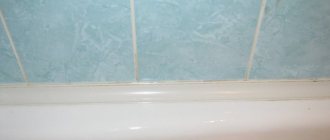
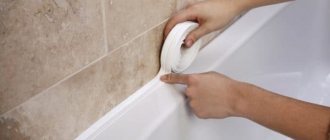
Gaps between floor and wall
This problem occurs quite often. Moreover, it can be either a house with a wooden floor or an apartment in a panel house. In any case, the problem must be solved: the sooner the better.
As for flooring made of boards, according to the technology of building construction, a small gap between it and the wall is necessary. This is a mandatory condition, since wood is a “living” material and can expand with high humidity or decrease in volume with dry air. In addition, this is also such important ventilation for wood. The initial width of the gap is in the range of 0.5-1 cm, the permissible increase is up to 2 cm. In the future, you will have to remove the plinth and eliminate the damage. By the way, skirting boards are effective for gaps of 1-2 cm, and their poor installation allows debris to accumulate between the floor covering and the wall, eventually destroying and deforming the joint.
To seal the gap, we dismantle the baseboard, thoroughly clean the gap from dirt and try to reduce its size. The choice of material to eliminate the defect depends on the depth and severity of the latter. Typically used:
- Felt (for caulking), jute, tow.
- Polyurethane foam.
- Plaster, putty.
- Acrylic or silicone sealant.
If the gap:
- Small (less than 3 cm). It is easy to seal it with plaster, polyurethane foam, cement mixture, putty .
- Medium (from 3 to 5-8 cm). Here it is necessary to use additional (preferably natural) materials - tow, moss, jute felt rolled into a “sausage” . They will add strength to the filling, and if processed, for example, in formaldehyde, they will prevent the appearance of insects in the future.
- Large (more than 5-7 cm). To fill the voids, the following are suitable: polystyrene foam, pieces of brick or wood . The main thing is that the filler is not very fine, covers a larger area, but does not make the gap wider.
When the gap is filled with auxiliary material, you can fill it with construction foam, cement mortar, etc.
If, when eliminating the gap, there will be plaster on top, then pieces of wood cannot be placed in the recess. They will absorb moisture from the solution, which can cause rotting, swelling, and mold.
After complete drying, excess material is removed, surfaces are cleaned, finishing work is carried out, and if desired, the baseboard is installed.
Wax solution
For small defects in the floor, you can use a hot solution of wax and linseed oil. It will not only eliminate cracks, but also protect the wood from moisture.
At the preparatory stage, the boards are cleaned of dust. Wax and linseed oil are mixed in equal proportions, heated in a water bath and poured hot into chips, cracks and crevices. As the solution dries, it hardens, forming a durable “patch.” Excess wax is cleaned off with a spatula or fine sandpaper.
For those who are not used to fiddling with solutions, manufacturers of paints and varnishes offer ready-made wax crayons and protective varnishes. They are suitable for both flooring and furniture restoration. By creating a waterproof protective layer, it prevents further cracks from spreading.
Local replacement of the damaged area
What to do if mice have gnawed through the floor, and the gap in the wall-floor area exceeds 5-10 cm in width. Neither putties, nor sealants, nor even sealing ropes will help in this case. You can cover the top with a piece of plywood or chipboard, but such a blotch will simply get in the way and stand out too much. The best option is to replace a board or a small section of the floor.
To prevent the repaired floor from becoming a victim of rodents again, some craftsmen recommend starting with creating a “barrier” for mice. In particular, cement mortar mixed with broken glass or iron filings can be poured under the coating into the area of the mouse passage.
The next step is to remove all the baseboards and cut out the damaged area or strip using an appropriate power tool. New parts are glued or nailed to the base with hardware.
DIY car door soundproofing
The last stage is sanding, or better yet, complete sanding of the floor, followed by varnishing or painting. If the shades of the floorboards differ by more than 2 tones, you can try to tint the planks with stain or protective and decorative glazes.
In case of severe damage to the entire floor area, some experts suggest sewing sheet materials over the wood - plywood, chipboard, OSB and others. This is a good option, but only if you intend to lay a new topcoat on top that is resistant to abrasion, dirt, and shock.
Advice! If you need floor repair specialists, there is a very convenient service for selecting specialists from PROFI.RU. Just fill out the order details, the experts will respond and you can choose who to collaborate with. Each specialist in the system has a rating, reviews and examples of work, which will help with the choice. Looks like a mini tender. Placing an application is FREE and does not oblige you to anything. Works in almost all cities of Russia. Without your desire, no one will see your phone number and will not be able to call you until you yourself reveal your number to a specific specialist.
If you are a master, follow this link, register in the system and be able to accept orders.
Source