assets/from_origin/upload/resize_cache/iblock/5f1/600_450_2/5f1882db35a8cccda7013447c538031b.jpg From this article you will learn:
- What are the advantages of renovating a country house compared to working in an apartment?
- Where to start renovating a country house
- What to look for when inspecting and analyzing a home
- What should a home renovation plan include?
- What are the stages of renovating a country house?
The fact that a country house requires attention is known to any of its owners. Over time, various problems and shortcomings become obvious, and an elementary desire arises to make changes to the interior. But where to start renovating a country house? The professional advice presented in our article will help you find the correct answer.
Advantages of renovating a country house compared to an apartment
When starting to renovate a country house in Moscow, the owner is free from a number of restrictions inherent in the housing issue, in particular:
- transformations can affect not only individual rooms inside the building, but also the exterior decoration;
- the duration and schedule of work are determined by the capabilities and wishes of the owner - the absence of neighbors allows you to start repairs at any time and carry them out without stops required by law;
- building materials can be purchased in advance and stored in the yard, which is very convenient given price fluctuations.
Installation stage of heating systems
After all plastering work is completed, water supply and sewerage equipment is installed, you can proceed to the installation of the heating system. In most cases, this stage consists of replacing old heating radiators with newer and more advanced models. Also, sometimes shut-off valves can be installed near the battery, which will make it possible to regulate the flow of the body, saving money, resources, and creating a comfortable microclimate.
It is worth noting that when wallpaper is hung and other finishing work is carried out, the batteries may have to be temporarily removed.
As for, for example, installing a heated floor in a bathroom, it is advisable to carry it out at the stage of screeding the floor.
Where to start renovating a country house: we conduct an inspection and analysis
Every country house has its own specifics. Inspecting the building from the inside and outside will help you determine the required scope of work in a specific situation. Pay special attention to the condition of electrical wiring and utilities. Record all identified damage. This way you can decide how significant the renovation of a country house will be and where to start.
Take the test
Find answers to the following questions:
- How much do you plan to spend;
- What is the type of fault and extent of damage;
- Do you have experience in repair work?
When planning a renovation of a country house, take into account the seasonality of the work. So, in the summer it is advisable to start repairing the roof and troubleshooting the heating system, and interior decoration, if the premises are heated, can be moved to the end of autumn or winter.
After assessing the condition of the house and analyzing your own capabilities, you will understand the nature of the repair, which determines the need for building materials, the cost of money and time. Based on complexity, repairs can be divided into the following types:
- Capital . The scope of work includes the replacement of window and door units, roofing, utilities, dismantling old floors, laying new flooring, restoring the foundation, finishing and insulating the facade.
- Cosmetic . Involves eliminating minor damage and decorative finishing of indoor surfaces.
- European-quality renovation . A radical transformation of space, starting with the development of a design project. All work and selection of materials are carried out in accordance with modern European requirements and standards.
If financial possibilities are limited, it is worth starting a combined type of repair. It includes urgent capital work, as well as interior finishing and facade renovation, which will transform a country house without requiring significant investments.
Take the desired result as a basis when planning repairs. It's even better if your ideas are transferred to paper. Visualization will make it easier for you to stick to your goal. Knowing what the outcome should be, you can begin to draw up a plan.
Please note that construction equipment must be provided with free passage to the site. This detail often escapes the attention of developers and is hardly known to the owner of a country house. It is undesirable to expose building materials to damage and contamination, so consider in advance the possibility of delivering them directly to the repair site.
Communications
Providing the house with amenities shura80 began with a trench for the water supply - while it was a warm March evening, he marked it out and began digging. However, the March morning was “pleased” with snow, and the day with cold drizzle and slush, so the work was continued indoors. Since the mortgages for laying the sewer pipes were laid during the pouring of the foundation, there were no problems with preparing for laying the main line in the house. Buying pipes and laying pipes was also not a problem.
Street digging of trenches for water pipes is complicated by the presence of a large number of foreign inclusions in the ground - during the heyday of the Soviet Union, public buildings were located on the site, and the garbage, after the demolition of the buildings at sunset, was simply rolled out with a bulldozer. However, with the help of a crowbar, an axe, a powerful sledgehammer and enviable perseverance, the trenches were mastered, despite the large-scale “gifts”.
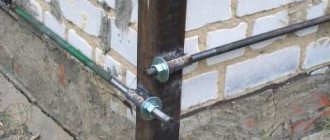
In order for water from the distribution well to flow to each house independently, shura80 assembled a distribution unit by installing plastic taps on a bronze tee.
In connection with this, a recommendation appeared.
shura80
By the way, maybe this will be useful for someone to note: yesterday, when I was installing a tee in a well, I was repeatedly glad that when I was drawing water into the future main house, I did not spare money and was not lazy, but laid a casing from a 110 sewer pipe and already ran a HDPE pipe into it . Now it moves back and forth there, it’s easy to work with, you can shorten it if necessary, or even replace it if necessary. So, if the route is short, it is better to make a pipe in a pipe, this will avoid many problems in the future.
Combining a walk with the children with work on the site, I poured sand into the trench, laid the pipe, connected it, tested it - there was water in the house, everything worked. The trench was quickly buried with irreplaceable helpers - father and father-in-law.
Plan and stages of country house renovation
By drawing up a detailed work plan indicating the sequence of actions, calculations, materials required at each stage, and other important information, the home owner makes further work easier.
Typically the procedure is as follows:
- Preparation;
- Measurements;
- Drawing up estimates;
- Purchase of materials;
- Repair of individual rooms in the house.
The main goals that are pursued at the stage of preparation for the renovation of a country house are the choice of stylistic solutions, the creation of a design project, the selection of suitable materials, and the search for a reliable construction company. Working with a professional team of specialists will help to significantly speed up repairs and improve their quality.
Self-employment can save money if time permits and you have the right job skills. Most often, we can only talk about actions that do not require qualifications. But it is definitely necessary when performing major repairs or European-quality renovations. In most cases, working alone significantly increases deadlines and the risk of errors.
Recommended articles on this topic:
- Renovating a living room in a country house
- Installation of automatic gates
- Heating in a turnkey house
At the next stage, the necessary measurements are taken and an estimate is drawn up. It is important to carry out measurements as accurately as possible, because in accordance with the data obtained, the required amount of building materials will be calculated. Measurements are also needed when moving or expanding doorways and carrying out redevelopment, if we are talking about major repairs.
You should take budgeting seriously; you need to take into account all the necessary materials and their cost.
For convenience, information can be combined into blocks, for example:
- Rough materials – primer, putty, construction mixtures, bulk mixtures and others.
- Finishing materials - flooring, paint, wallpaper, and so on.
- Consumables.
Self-repair of a country house is impossible without special tools, so you should plan for the costs of purchasing them. In cases where the repair of a country house is carried out by a team of workers, these expenses can be avoided.
Purchasing everything you need to carry out the repair is the next step. You will be able to find the most profitable options by checking out the offers on the websites of various construction stores.
Installation stage of water supply and sewerage systems
All work on the installation of the water supply system is carried out simultaneously with the electrical installation work. These works require a clear understanding and idea of where each piece of plumbing should be located. Naturally, this stage of repair work also assumes the presence of all plumbing products that must be installed. Also at this stage, water supply and sewerage pipes are laid.
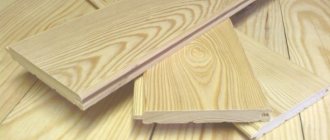
Materials for country house renovation
When the type of repair is determined, we begin to select materials, calculate their required quantity and compile a list of tools and necessary accessories.
Acrylic or latex coating is an opportunity to economically update the facades of a wooden house. The material will cost you from 3,000 rubles to 13,000 rubles per 10 liters, but at the same time you will not only protect the surface from the negative effects of climate, but will also be able to preserve the texture of the wood.
A house made of rounded logs or beams is treated with impregnations after preliminary preparation. The repair of such a structure should begin by filling the seams and gaps between the crowns. Jute fiber, linen batting or polymer-based sealant will do the job well.
External walls of a cottage made of blocks or bricks can be treated using acrylic or silicone paint for exterior work. The additional use of a primer allows you to reliably protect the facade, improve its adhesion and reduce the cost of the finishing coating.
The table provides information regarding various options for finishing external walls, as well as their average price:
Insulating the roof and walls using materials such as mineral wool, expanded polystyrene, and sprayed polyurethane foam will help protect a country house from heat loss.
Drywall stage
Work on creating structures from plasterboard is usually carried out after the screed has dried well and settled. An excellent option for use in many spaces, especially bathrooms, is moisture-resistant drywall. Next we will dwell on specific types of drywall and their characteristics.
Types of drywall and its properties
The following main types of drywall are distinguished:
- wall: its thickness is 12.5 mm, it is used very often for wall cladding, as it makes it possible to create a smooth surface without plaster. It is also used for arranging partitions, and sometimes for cladding the ceiling;
- ceiling: used in ceiling cladding, especially when it is planned to use suspended ceilings. Its thickness is 9.5 mm to facilitate the ceiling structure;
- arched: the thickness of this drywall is even smaller - 6.5 mm. It is used to create arched structures of different sizes.
Drywall is also divided depending on the place of use according to a number of characteristics. Thus, there is moisture-resistant plasterboard, which is practically unable to absorb moisture, and is often used in bathrooms and kitchens, fire-resistant, which is recommended for use, for example, in the area near the fireplace.
All types of plasterboard have such positive properties as thermal insulation, good sound insulation, environmental friendliness, and the ability to carry out clean, “dry” construction work using it. Partitions made from plasterboard can be subjected to any finishing work; plasterboard bonds well with almost any material.
Disadvantages of drywall
Despite all the advantages listed above, it is important to note that drywall also has some disadvantages. Thus, the main disadvantage of plasterboard structures is their low durability and inability to withstand heavy loads and impacts, which manifests itself in the inability to attach a medium-heavy cabinet, etc., to such a wall. This makes drywall impossible to use in some areas. Over time, cracks may form on drywall due to exposure to vibrations and displacement of sheets relative to the joints.
Drywall also causes some difficulties in installation and the need for a special approach, especially for ceiling structures.
The use of drywall is also associated with a decrease in usable area: metal frames take up space and reduce the height of rooms. By the way, rodents can grow in the space between two sheets of drywall and mold can also develop. It is worth noting the low breathability of plasterboard, which affects the microclimate of the room and calls into question its use by people with respiratory diseases. Drywall is hygroscopic, and therefore can become deformed over time when exposed to humidity.
All these qualities of drywall make it not the material that is used in elite-class repairs, since very often its behavior in certain conditions cannot be predicted. Although, the popularity of such designs remains at the same high level.
Where to start renovations inside a country house
The sequence of internal work affects the quality and timing of the result. The following order should be followed:
- remove all furniture from the room;
- securely cover those interior items that remain in the room being renovated;
- dismantle old coatings and elements;
- replace or repair windows;
- replace communications and wiring;
- prepare surfaces for further work.
- start repairing the ceiling;
- install switches and sockets;
- install flooring;
- install doors;
- carry out the necessary work on the walls;
- install skirting boards and platbands.
Let's consider all the listed points in more detail. Furniture and personal belongings must be removed from the premises where the work is planned before starting repairs. Those items that cannot be taken out must be covered.
Dismantling operations performed first may include replacing windows and doors, removing partitions, old coatings, cleaning surfaces, and more. In some cases, it is advisable to preserve old windows and window sills by repairing them. In any case, they also need protection from damage, like other interior items remaining in the room.
Wiring and communication systems should be replaced before surface treatment begins. Having completed all the necessary rough work, you can begin leveling the ceiling, walls and floor, installing and constructing niches, installing several levels of the ceiling, if this is provided for in your project.
The next step is decorative finishing and design of the ceiling. At this stage, ceiling plinths are installed. Having completed the above work, they begin to install sockets and switches, and after that - to lay the flooring.
Recommendations: pay special attention to the condition of the floor. After carefully inspecting it, determine which joists have rotted and need to be replaced, and find damaged or deformed areas of the floor covering. Working with laminate and parquet boards is simplified by the special design of the materials themselves, which makes it easy to remove individual elements. For natural wood floors, similar work will require careful loosening of the fasteners using a nail puller. The gaps between the boards are filled with putty or synthetic cord soaked in PVA glue.
Wall finishing is a set of works that should begin closer to the completion of the renovation. The specific list of actions will depend on the type of material chosen by the owner of the country house. All actions must be carried out according to a specific plan.
The most popular finishing options are:
- Decorative painting;
- Making mosaic panels;
- Flexible stone finishing;
- Decorative plaster;
- Installation of natural stone.
The listed types of building materials require knowledge and work skills when using them. That is why high-quality repairs and an attractive appearance of a country house are the work of professionals. Simpler finishing options today are wallpapering and installing plastic and MDF panels.
Installation of platbands and floor skirting boards completes the repair work. But we should not forget: the redevelopment of a country house should begin with preliminary coordination of actions with the relevant authorities. To do this, you will need to prepare a package of documents.
The house can be updated without major renovation work, however, we are only talking about the interior furnishings. By choosing bright and compatible textile decorative elements, curtains and furniture covers, pillows, blankets and the like, you can transform rooms beyond recognition. By rearranging and carefully selecting accessories, you will complete the creation of the interior, and correctly placed light sources will effectively highlight the changes you have made.
Types of ceiling finishes
Types of interior decoration of a country house on the ceiling:
- tension or suspension systems;
- drywall;
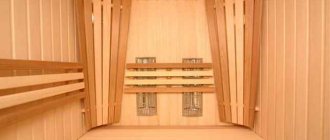
- natural wood (“lining”, block house, pine or birch slats);
- painting;
- whitewash.
Before finishing the ceiling in the country house, it is important to eliminate all heat loss. And to do this, first check whether the roof is cold. To prevent condensation from accumulating at the border between the entry of warm steam from below from the interior and the supply of cold air from above, a rolled vapor barrier is laid on the roof side, and then thermal insulation (mineral or eco-wool). If necessary, the ceiling is additionally insulated with lightweight tile material (for example, foam plastic, polystyrene foam, cork).
The living room on the attic floor is decorated with wood and a painted white ceiling Source yellowhome.ru
For tensile structures, it is important to consider the location of the internal electrical wiring. First, electric lines are laid and securely fixed with established points for future lamps. After this, carefully install the profiles on which the decorative tension material (PVC or fabric) will be held. The big advantage of tension systems is their decorative nature and wide possibilities for creating interesting designs. But if the room is small, then you need to be careful with voluminous (2 or 3-level) ceilings - they hide quite a lot of space.
An interesting combination of slatted walls and ceilings with a suspended ceiling Source parquet.ru
How to renovate the outside of a country house
Whatever type of repair you decide to begin, the volume of planned work and its specific list will be determined in accordance with the type and nature of damage to a particular element.
Foundation
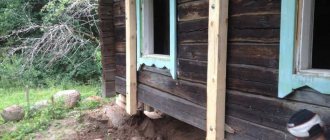
Small defects in the foundation can be corrected by additional masonry in the area where the damage is found. Visible damage around the perimeter requires more serious actions and adherence to a certain sequence.
The work order is as follows:
- Cleaning the surface from dirt;
- Equipment of a trench along the base;
- Strengthening the structure with anchors and metal mesh;
- Construction of formwork;
- Pouring with concrete mortar.
Work with the foundation should be completed by applying a special silicate-based coating to it or by covering it with materials after it has gained strength.
Roof
Broken areas, as well as rotting areas of the rafter system, are repaired using a suitable piece of board or timber. To make the wood and fastening elements last longer, special protective agents are applied to their surface.
Further work varies depending on the type of roof, which can be:
- metal. Small scratches and defects can be filled with silicone putty, but if the surface has undergone significant deformation, the damaged sheet must be replaced with mandatory fixation with self-tapping screws.
- cement-sand or ceramic. The damaged plate is dismantled, the surface is cleaned of the remnants of the old putty. A whole element is laid in the vacant space, the resulting joints are filled with a fresh solution of sand, lime and tow.
- in the form of flexible tiles. Leaks resulting from displacement of sheets are eliminated by updating and laying new elements, which are carefully secured with adhesive or nails.
If deeper damage is detected, not only the roof, but also other deformed structural elements must be replaced.
Communications
Operations with utility networks are technically complex and require professional skills. Working with metal pipes is especially difficult.
Metal-plastic or polymer pipes are much easier to replace; individual segments can be connected using both special equipment and shaped elements.
Installation of partitions in the apartment
When all dismantling work is completed, you can proceed to the installation of new partitions in accordance with the prepared project. Partitions can be made of various materials: brick, foam blocks, drywall, etc. All these materials have their pros and cons, but in most cases, each partition requires leaving a small gap between it and the ceiling, which is necessary in case the building shrinks.
Types of interior partitions for an apartment
Naturally, a screen or a sliding door can serve as an interior partition, but many still prefer stationary partitions, which can be of different types. It is them that will be discussed further.
Review of stationary interior partitions made of various materials
Brick interior partitions
Such partitions are very often erected in modern apartments, including in bathrooms. The reason for this popularity is the advantages of brick, which consist in its moisture resistance and high sound insulation ability. However, brick is not without its drawbacks: for example, the construction of brick partitions requires a lot of time compared to interior partitions made of plasterboard and foam blocks, and also have significant weight.
Partitions made of tongue-and-groove slabs
Such partitions are suitable for use in any room and under any conditions. Their advantages include fire resistance, moisture resistance, breathability, and environmental friendliness. Partitions of this type are relatively easy to install, and inside such partitions you can hide, for example, an electrical cable if the partition is single, and even a sewer or water pipe if it is double.
Foam block partitions
Such partitions are a type of concrete partitions, and therefore have such properties as fire resistance, high thermal and sound insulation ability, and excellent load-bearing capacity. The negative side of this type of partition is its low air permeability, but this does not make the foam block less popular in use, since it is now considered the best solution for organizing interior partitions. Such partitions are strong and strong enough even to hang a kitchen, TV, loaded shelves, etc. on them.
Glass block partition
This type of partition is useful for unusual design ideas. The glass for such partitions is quite strong and has a width of up to 10 mm, and can also be decorated with any pattern, which makes this material invaluable for creating an interesting design. In addition to design, the advantages of such materials include their heat and sound insulation, fire resistance, strength and reliability, as well as the ability to transmit light, which other types of partitions cannot do. Naturally, you cannot nail shelves to such a partition and lay electrical wiring in it.
Plasterboard partitions
Such partitions are often used to create frame structures. Due to the fact that drywall itself does not have sufficient strength, it is attached to a finished metal frame. With a small mass of such a partition, it has good soundproofing properties, it is vapor-tight and fire-resistant. Drywall, however, has some disadvantages: for example, it is not very durable, breaks easily, and can become saturated with moisture and become deformed. If you need to attach something to such a partition, you need to remember that it cannot withstand a lot of weight, and it is better to attach some structures to a metal frame.
Wooden partitions
Such partitions may differ in design, but they are all natural and have properties such as strength, good sound insulation and thermal insulation. But, in addition to these positive characteristics, wooden partitions have several disadvantages: they are able to absorb moisture and do not withstand fire well.
What you need to know when starting a major renovation of a country house
So, you've decided to renovate. There is no way to delay time and reschedule the work for another date - the structural elements are dilapidated, any delay will only worsen the situation. You have a lot of work to do, but many questions arise: where to start renovating a country house, what is the sequence of actions, who to entrust the work to, and is it possible to save money by doing it yourself?
Where to start a major renovation of a country house?
Objectively assess the situation - how much work is planned, whether you have the necessary knowledge and skills, and whether there are enough funds. It is best to entrust the repair of a country house to a team of workers with relevant experience, led by a good foreman. Specialists will assess the existing damage, propose a project for major home repairs and will be responsible for the result if problems arise. The advantage is that you don’t have to spend money on purchasing tools, which are often expensive.
Often circumstances require economical spending of the budget, and this forces the owner of a country house to take on many construction operations. If this is your situation, start the repair by drawing up a detailed plan: determine what exactly needs to be replaced - the roof, communications, windows, doors, or whether work is required on the facade. Perhaps you will reconsider the list of elements that are subject to fundamental changes. Calculate the projected investments very carefully and in detail, draw up an estimate, make calculations for each object:
- Measure the area of all surfaces separately: ceiling, walls, floor;
- Measure the length of pipes and communication wires;
- Based on the data obtained, count the number of materials needed: bricks, tiles, wallpaper, flooring, and so on.
What are the stages of a major renovation of a country house?
Major repairs include work on the facade, replacement of utilities and interior decoration.
It is better to entrust the replacement of communications to professionals. Independent actions with water supply networks, sewerage, electrical wiring, heating, ventilation and gas supply can lead not only to various problems during subsequent operation, but also additional costs for their elimination, and in some cases, create situations dangerous to the health of the residents of the house.
Installation of doors and window structures is not such a difficult task at first glance. However, you should not make hasty decisions. Installing plastic windows without the necessary professional knowledge is a risky endeavor. Errors in measurements and non-compliance with installation technology can cause a violation of the geometry of the structure, which will negatively affect heat and sound insulation. On the contrary, you can install the doors yourself, following the outlined plan:
- the old door along with the frame must be dismantled;
- We install a new door frame in the opening;
- all gaps between the frame and the opening are filled with mounting foam, after drying, plaster is applied to the wall;
- A new door is placed on the pre-lubricated hinges.
We have already discussed the foundation above. We emphasize once again that the detected cracks must be repaired, otherwise over time the country house will settle and will need to be strengthened.
Repairing the roof is often included in the list of works when a major renovation of a country house is planned. You may be faced with the need to dismantle the covering and replace it, providing thermal and sound insulation of the attic. It is necessary to assess the condition of the rafter system: if more than 50% of the total area is affected by rot, major repairs cannot be avoided. When choosing roofing materials, preference should be given to metal tiles or ondulin.
It is also worth starting external work after a thorough inspection of the walls - if they are damaged, they must be disassembled and re-installed. If the surfaces are in good condition, then the facade can be finished by first removing the old coating and repairing the cracks. You may need wall insulation, but it is important to decide both on the method of thermal insulation (internal or external) and the insulation technology: “wet method” or suspended ventilated facades.
The finishing work itself is the next step. In any price segment you can find a suitable material - from brickwork to plastic panels or decorative stones - which is applied to a primed surface: this way the result will be of higher quality and more durable.
How to renovate an old house with your own hands: interior work
The fast pace of life forces people to often spend time on the road or constantly work, but even the busiest person spends a third of his life at home, not to mention children, housewives and retirees. Therefore, it is very important to create a favorable atmosphere, and this applies not only to decoration, but also to lighting, heat, ventilation and other important aspects. The psychological and physical health of the household will depend on them.
Daylight
It is important that there is natural light in the house, and the more of it, the better. Windows should occupy no more than 10% of the total area of the house. Just imagine how much discomfort a person who regularly stays in a shaded room will feel - it will ruin his eyesight, it is impossible to fully clean, ventilate and grow indoor plants in this room. In addition, the lack or absence of windows will lead to high energy costs, and now even wealthy homeowners are trying to save on electricity.
Attention! Previously, small doorways and small windows were made in wooden houses in order to minimize heat loss. In those days, they used simple glass, which did not protect against the cold very well.
However, no one will allow you to just cut a beach window in the wall. There are certain regulations for expanding, moving or replacing windows. Please note that separate standards are provided for all regions of the country, since the coefficient of natural illumination is different.
The loss of illumination is affected not only by the size of the window, but also by the type of glass you use. It's no secret that double-glazed windows or ordinary glass do not transmit UV radiation, which means it will not be possible to create a luxurious greenhouse or solarium. Quartz glasses are used for this, but they are expensive, so they are purchased for specific needs.
How to arrange windows in the house:
- The windows in the bedroom and kitchen should face the southeast side, so that in the evening the sunset does not blind the household, and in the morning there is natural light.
- The windows of the living room are usually located to the west, so that you can turn on the lights during the evening rest for as long as possible and admire the sunset.
- The windows of the utility rooms must be oriented to the north, since they usually contain equipment, tools, materials and products that do not need bright natural light.
- If the room has several windows on different sides, then the small ones should be oriented to the north, and the large ones to the south.
- Windows facing south and west should be shaded naturally through structural elements of the building (protruding roof or balconies), cornices or shutters, or trees growing nearby.
Insulation of the house
A comfortable microclimate in a house largely depends on humidity and air temperature. In turn, these factors are ensured by proper steam and heat insulation and ventilation of the space.
The temperature in the house consists of two components - the temperature of surfaces (ceiling, walls and floor) and air. The optimal surface temperature is +17°C, air temperature is +20°C. In this case, it is necessary to take into account the individual characteristics of the residents. For example, for older people, housing should be made warmer, so it is better to install a heating regulator in each room so that everyone can set the desired temperature.
As a rule, in old-type houses there is insufficient thermal insulation of the walls, or it is simply missing. For this reason, a difference arises between the temperature inside and outside the building, as a result of which condensation forms, humidity increases and households feel unwell due to constant stuffiness. If the wall cannot be disassembled, we recommend making high-quality thermal insulation of the walls from the inside or outside.
Ventilation in the house
Due to disruption of natural air exchange, the structures of the floor, walls and ceiling deteriorate over time, which can also cause respiratory tract diseases. Previously, rarely did anyone think about creating ventilation in the roof and walls, and the reason for this was often not just the carelessness of the builders, but also the lack of well-thought-out projects.
At that time, the methods of ventilating foundations, facades and roofs that are used in construction today were not yet known.
Ventilation of rooms with excessive air humidity - bathrooms, kitchens, basements - deserves special attention. If in multi-storey buildings exhaust ventilation is used, which works due to pressure differences between cold and warm air, then this method is unacceptable for private houses.
In a house with two or three floors, the air pressure is very weak, so air exchange is carried out through the walls. To ensure this, it is worth laying a vapor barrier and insulating it with “breathable” materials. These include mineral wool boards, expanded polystyrene (extruded and regular), penoflex, etc.
Additional ventilation should pass through windows and vents, but in winter this method causes inconvenience. As a result, in cottage construction an exhaust ventilation system is always provided, which operates on fans - they take in warm air and remove it outside, supplying fresh air from the street. The photo below shows the principle of operation of exhaust ventilation.
To improve the microclimate, it is recommended to use natural building materials - wood, clay, bricks, gypsum and well-known plasters. They absorb unpleasant odors and moisture.
Electricity in the house
Unfortunately, the power supply in old houses almost always leaves much to be desired. If the previous residents did not take care of improving the system, then such work will fall on your shoulders. The main problem in these cases is not rotten wiring and old sockets, but insufficient power.
Previously, people did not consume much electricity because there was not an abundance of electrical appliances. As for entertainment, there was only radio, TV, but now there are game consoles, computers, stereo systems, etc.
If you have planned to install a “warm floor” system, do not want to turn off the computer to turn on the washing machine, or simply risk the performance of expensive equipment, you will have to contact the regional energy supply organization and ask to increase the quota for your home.
Unfortunately, for most old houses this cannot be done, so the only correct solution is to install your own substation. This event is quite expensive, but can pay for itself in the first few years and, as a result, will save money and control energy supply.
In the event that everything is fine with the power, and you only need to replace the wiring, you need to draw up a diagram of the finished system. It is necessary not only for quick and coordinated replacement, but also for subsequent repairs in the house. So, if you are planning to demolish a wall or doorway, then there is a high probability of cutting off power to absolutely the entire house.
Mostly open wiring in old houses (the wires are on the outside of the wall, running in the corners near the floor or under the ceiling), so it will be easy to draw up a diagram. If you use closed-type wiring, we recommend calling a specialist.
Attention! When drawing up an electrical wiring diagram, we recommend indicating not just the location of the outlets, but also the power of the devices that you are going to connect to them. It would be a good idea to make a small supply of sockets if you plan to install additional equipment in the future.
High-quality heating in the house
The most common problem with old houses is the high energy consumption for heating the premises. This is primarily due to poor thermal insulation of the floor, walls and ceiling and an outdated heating system. To reduce costs, in addition to thermal insulation, it is worth replacing old radiators (usually cast iron). The thermal insulation of the roof deserves special attention, since most of the heat escapes through it.
Attention! If you paint the batteries black, and lay foil material between the wall and them (the reflective side should be outward), then the house will be much warmer. The black color helps the battery heat up faster, and the foil will reflect heat into the room, whereas previously it escaped through the wall.
It is especially important to decide on the right choice of heating equipment. Thus, modern boilers operating on solid fuel are able to maintain the optimal temperature at the outlet of the boiler in automatic mode; a capacitive heat accumulator can be connected to them, which will accumulate excess heat during the day and release it at night. This is convenient if there are no residents during the day and there is simply no one to warm up.
Recently, gas generator boilers have become extremely popular. Their efficiency reaches 90%, since it burns not just wood, but also wood gas. They produce a small amount of zone, significantly save fuel and do not produce soot.
As for pyrolysis boilers, they are perfect for houses with a centralized gas supply, while electric boilers are recommended to be used as a backup option if your boiler suddenly fails.
They are not profitable financially and consume a lot of electricity. However, even a high-quality boiler cannot avoid heat loss, especially if it is installed in an old house. There are several ways to help minimize heat loss:
- seal or replace windows and doors;
- install thresholds and sealing gaskets between the floor and doors;
- if there is only one glass installed in the windows, provide it with a second frame or install a second one;
- hang thick, heavy curtains in the living room, bedroom and nursery, but so that they do not cover the radiators;
- You can ensure floor insulation in a room located above the basement using cork or felt backing, linoleum, thick carpet, heat-insulating boards; to enhance the effect, insulate the basement ceiling;
- We recommend covering the outer surface of the heating boiler with non-combustible insulation; by the excessively warm air you can determine that the heating equipment is losing a lot of useful energy;
- In summer, special solar collectors that heat water will help you save on electricity;
- In those places where the heat pipe passes through an unheated room, insulate it with foam or mineral wool.
Interior decoration
When the replacement of electrical wiring, plumbing, vapor barrier and insulation of surfaces is completed, you can begin the interesting part of renovating an old house with your own hands - interior decoration. The specifics and scope of work directly depend on the selected wall material.
For example, plasterboard partitions can be covered with wallpaper, while brick walls require priming and leveling, unless, of course, you plan to finish with PVC panels.
Interior wall decoration is necessary not only for external attractiveness. Its main task is to protect the heat and vapor barrier layer and the material itself from premature damage and deterioration. Therefore, you should choose finishing materials only taking into account the specifics of the room. Washable paints or putties are suitable for the kitchen and nursery; for the bedroom it is better to give preference to something more comfortable, for example, vinyl wallpaper; for the study, wooden panels are perfect.
Before finishing wooden walls, it is worth treating them with fire-retardant compounds, which protect the wood from fire. In this regard, paint is the best option, as it performs both decorative and protective functions.
However, it should be chosen carefully. Like other finishing materials, paints can be used for interior and exterior use. The main difference between “internal” paints is that they are not so resistant to negative external influences, temperature changes and UV radiation, but have greater coverage and aesthetics.
The environmental friendliness of the material also plays a huge role. In old houses you can still find surfaces that are covered with heavy paints (they contain lead). It is also better to avoid inexpensive oil-based alkyd paints, as they release harmful chemicals.
As for water-dispersion paints, they are perfect for finishing rooms. They are safe for health and do not interfere with natural ventilation, that is, they allow the walls to “breathe”.
Floor in the house
As a rule, the floors in old houses are covered with either planks, creaky parquet, or worn linoleum. Let's consider each of the options in more detail.
The nature of the repair work directly depends on the floor covering of the house:
- Wooden covering.
The most common type of flooring is a plank floor, since the floorboard provides aesthetics and comfort to the room and is inexpensive. It is durable and environmentally friendly, for this reason, if you get such a floor, do not rush to tear out the boards - if it is properly repaired, then no modern coating can compare with it in quality and beauty.
Over time, the boards dry out, begin to spring, creak and wobble, and in some places holes appear from wood-boring beetles. In this case, severely damaged boards should be replaced. If you decide to replace part of the board, then the patch must rest on two joists, otherwise it will be unstable. To ensure that the floor does not creak and is level, the floorboards are held together.
To do this, the floor is dismantled, marking the location of the boards so as not to disturb their order later. Then you need to check the condition, replace or lay the substrate if it has deteriorated due to humidity or time.
If the floorboards are sagging, this may mean that there are not enough joists underneath and not enough quality support. Therefore, you just need to remove the boards and add joists in the places of deflection. If you suddenly find holes, chips and cracks in the floorboards, they can be repaired using wood putty.
- Parquet flooring.
Parquet flooring is especially common in homes that were built in the 60s and 70s. last century. One of the most common parquet problems of those times was the creaking and swelling of floorboards. Such elements will have to be replaced with new ones, unless, of course, the parquet is swollen along the entire perimeter, since then it will need to be completely replaced.
Often the cause of squeaking is dry boards or an uneven base. Previously, parquet was laid directly on bitumen mastic, and there was no talk of any cork or plywood underlays. To find the cause of the squeak, you need to remove the floorboard and carefully inspect the base. It is best to re-lay creaking parquet on a substrate.
Old parquet floors have cracks in which debris regularly gets clogged. They definitely need to be sealed. To do this, you need to clean the gap and fill it with a special putty. If it is large, then to eliminate it, use a wooden patch, which is mounted on epoxy glue.
If you are faced with worn, scratched and darkened parquet, there is only one way out - sanding. The sanding machine removes the top layer of parquet and removes the varnish coating, after which you can begin to seal the cracks and recoat the floor with fresh varnish.
- Linoleum.
If there is old linoleum on the floor, it is easier to replace it than to repair it. This is one of the budget coating options, so you do not lose out financially. In addition, modern linoleums are produced with dense noise- and heat-insulating substrates, so they will be better than the previous coating.
If the linoleum is in good condition, but there are small holes or dents where the furniture used to be, apply patches. Place a new piece of linoleum on the damaged area with a small allowance, cut out the patch, grabbing the old linoleum from below.
So, you will have both a patch and a suitable notch for it. Carefully coat the edges of the holes in the old linoleum and the bottom of the patch with glue, and for better fixation, place a weight on top until the glue dries. Moreover, with the help of such patches you can create an original floor covering if you have pieces of linoleum with different patterns.
Tips for major renovation of a country house from professionals
Major renovation of a country house requires preparation. Advice from professionals with relevant experience will help you decide where to start and how to carry it out quickly without unnecessary expenses.
You can find useful information:
- in construction magazines;
- on thematic sites;
- on forums dedicated to repairs;
- by watching video tutorials from professionals on the Internet.
Monitoring the progress of the repair on your part will not be superfluous, even if you involve specialists in the work. You can take notes, marking the information you need, for example: addresses and phone numbers of stores where you plan to make purchases, contact details of specialists, cost of materials, cost accounting. Write your comments or questions you want to ask. The value of the information collected is also that the next time you need to repair any damage, you will not have any questions about where to start repairing a country house, who to contact and where to purchase the necessary building materials.
Note: often a major renovation of a country house takes a long time. By dividing this process into stages and defining deadlines for completing each of them, you will be able to control the progress of work.
How much can you do on your own if you plan to start renovations? It is difficult to answer this question unambiguously. Of course, performing a number of actions yourself will help save some money if the required operations are quite simple or you have the necessary skills. Otherwise, any mistake made will be costly. Delaying the deadline for independent overhauls for years is another likely scenario. Therefore, when making a decision, think carefully about everything - and good luck to you!
Finishing work for floors
For a summer residence, protection from moisture and subzero temperatures is important. Therefore, the base coating here should still be a rigid concrete screed poured onto a porous base (expanded clay, and a reinforcement grid on top of it). Linoleum, laminate, and board fit perfectly on such a base.
A dacha made of timber - the floors are made of concrete screed for further finishing Source pol-exp.com
Finishing the floor with laminate is an excellent solution if the material is chosen with moisture-resistant properties. But if they live at the dacha permanently, which means they regularly maintain a normal level of humidity, then it is permissible to lay cheap laminate flooring. The material is presented on the market in a wide range (like linoleum or tile).
Finishing the bedroom floor in a country cottage with a light wood laminate Source: vash-artdom.ru
On a note! If the dacha is not heated during the cold season, then it is better not to lay carpet. Otherwise it will become damp and rot.
Laying the floor with parquet boards is expensive, but reliable. In addition, parquet is easier to restore than plank flooring. But you need to understand that parquet requires more careful care than other popular types of flooring. In addition, after laying the dies, the surface must be sanded many times and then polished. That's why such floors are not cheap.
Finishing the floor with parquet for a country living room Source rdstroy.by
Laying tiles may be a good solution. This is especially suitable for dachas with private use, where guests often come or a large family lives. Such a floor is easier to wash, and more than one hundred times. A warm floor is often built under the tiles.
Scandinavian-style shower floors are finished with small gray tiles Source coolhouses.ru
Tips: how to correctly prepare an estimate for the renovation of a country house
Drawing up an estimate for home renovation is an important point from which it is wise to begin the restoration of any building, including a country house. This document allows you to determine the final cost of the entire project, which is important for both the customer and the contractor, if any. Information that, in addition to prices, should be reflected in the estimate is a list of works, deadlines for their completion, and the required amount of building materials for each stage.
Any building or structure sooner or later becomes unsafe for living, but if you begin major repairs of a country house in a timely manner, you can extend its service life. The owner can not only strengthen the structure, replace damaged elements, but also create the most comfortable space for living by performing work in accordance with the design project, change the layout of the premises, and update the interior decoration. No matter what you plan, making an estimate is necessary to carry out the renovation.
What features are important to consider when drawing up an estimate for the renovation of a country house?
When drawing up estimate documentation, various factors are taken into account that influence the final cost of the entire repair. The determining criteria in pricing are such criteria as the amount of building materials, the need to use additional equipment and the complexity of the work that a certain repair team must perform.
The type of object determines the structure of the documentation and estimates compiled. For example, a major renovation of an apartment building involves drawing up estimates for various types of work for each element separately: restoration of the roof, elevator shafts, water supply and drainage systems, basements, and so on. But the estimate for restoration work when renovating a country house is not unified and reflects the specifics of a particular structure, soil characteristics, climate, etc.
Thus, the documentation may include calculations for work to dismantle structures, build a fireplace, or raise a wooden house by adding crowns. Therefore, thoughtless copying of someone else's estimate without taking into account the wishes of the owner and the design features of the building does not make sense. A correctly drawn up document will help you control the repair process itself and not exceed the budget planned for spending.
If you are working with a contractor, make sure that the estimate is drawn up on a separate sheet before signing the main contract and is included in it as an integral attachment. If a team of workers offers you to reflect in the contract only the total amount of expenses, and put all additional costs in the “Other” column, do not agree, since the contractor will receive a legally enforceable right to suspend repairs on a daily basis until the acquisition of any materials and tools, without which completion is supposedly impossible repair.
An important point, the content of which should be seriously considered in advance, is the distribution of responsibility in case of unforeseen expenses. Most often, the causes of such problems can be factory defects in materials and tools, accidental damage to finished surfaces, and the like.
What must be included in the estimate for home renovation?
- Accurate calculation of consumables for each stage in the appropriate units of measurement.
- Brand, name and manufacturer of building materials used. Including such information in the estimate will ensure the safety and quality of the result. The home owner’s task is to carefully check the information on the labels of purchased materials with the information agreed upon by the parties.
- In some cases, it is advisable to provide for the possibility of replacing the material with a similar one of a different brand.
- Step-by-step and detailed calculation of work on each surface, taking into account maximum deviations.
- Planned types of work and their cost.
- The time frame allocated for completing the scope of work for each stage.
Following these recommendations will make it easier to control the actions of the repair team, and therefore help save money. The compiled estimate makes all calculations transparent to the customer and improves verification. If you don’t have enough time to carry out independent calculations and prepare an estimate, entrust this work to a professional and independent estimator, who will promptly carry out the necessary calculations taking into account the client’s wishes.
To draw up an estimate, you will need a number of documents:
- Complete renovation project;
- General technical specifications for repair work;
- Defective statement.
What are the common mistakes made when drawing up estimates?
Inaccuracies, the appearance of which in the estimate may lead to unforeseen expenses, are as follows:
- approximate calculation, without preliminary inspection of the object;
- lack of reserve funds for unforeseen expenses that may arise in force majeure circumstances.
- accounting for an incomplete list of works and materials.
The main expenditure document for repairs or construction requires a serious approach and accurate calculations. Otherwise, you may get incorrect results and waste extra money.
Apartment interior design project
Any renovation should begin with the preparation of a design project for the future interior. Such a project contains data on the finishing materials of the walls, floor, ceiling, lighting scheme, furniture arrangement diagram, etc. Such a project can be created within three months, but this time and costs are necessary, because otherwise all the expensive repair work carried out may give a completely different result than we would like. The development of a design project can be extended for a couple of months if redevelopment is planned in the apartment, a change in the location of plumbing or gas equipment, etc. Such changes require approval from the relevant authorities.
Composition of the design project
The process of creating a design project consists of several mandatory stages, which are as follows.
- The first stage is to study the client’s wishes for the future interior, its style, discuss the main details and the main concept.
- Then a preliminary design : all the client’s wishes are taken into account when creating a three-dimensional sketch, which shows the design solution and the location of the main elements in the room or apartment.
- After the preliminary design has been drawn up, they move on to the selection of building materials and furniture , and here the specific model of a particular piece of furniture is already indicated.
- Then they move on to 3D visualization of the space and creation of working drawings . The working drawing is created on the basis of a preliminary design, but contains specific details for the builders who will carry out all stages of the work. The author of the completed design project retains control over how his ideas and developments are implemented.
Programs for creating an apartment design project
To draw up a design project, at the visualization stage, designers often use special software with which they can virtually imagine the future design of a room or apartment. In such programs it is easy to change the color of walls, the width of passages, the size of windows, move furniture, change the layout of rooms, etc. Some such programs can ultimately produce a detailed drawing with all the necessary quantities and values for future implementation by specialists.
Let's look at a few examples of such software. It is worth noting that both free and paid programs have been released and are available. Let's look at what their main advantages are further.
Free programs
- Remplanner.ru is a unique tool with a free online version that allows you to independently create real working drawings, which builders, electricians and plumbers can then work with. This is precisely the fundamental difference between the program and the mass of its analogues. Interacting with the tool is very simple; it allows any user to prepare a full-fledged design project without resorting to the services of designers, and this is a significant saving of money and time. The planner is easy to learn, and the output allows you to get 16 planning sheets, including a lighting plan, placement of plumbing, furniture, dismantling and erection of walls, etc. Also in the Planner there is:
- 3D visualization of the project;
- Calculation of work volumes and estimates for teams;
- Approximate calculation of the amount of rough materials for repair work;
- Ability to save drawings in pdf format and then print;
- Option to work simultaneously with several project/layout options.
- Aston Design is a program that allows you to easily model your future room. You just need to set the parameters of the room, as well as the size and location of windows and doors. The program has a huge range of furniture that can be used in it, which can be used when designing bedrooms, living rooms, children's rooms, hallways, etc. When all the parameters have been entered and the furniture has been selected, all that remains is to move it around the room and change the colors of the walls and floor, and then you can clearly see everything that we are trying to see by moving the furniture from corner to corner and from room to room. You can submit a request for the Aston Design program here.
- Google Sketchup is a program that has two versions: paid and free. Interestingly, the free version has a fairly wide range of tools that can be used when creating a project. This program is easy to learn and will be useful for novice designers, but, nevertheless, it gives the opportunity to get excellent results. Some elements can additionally be downloaded on the Internet, where you can find already created interior projects, which can be used by some as a basis. .
- Sweet Home 3D is a fairly easy-to-learn and use program that contains a lot of textures for floors, walls, doors, windows, furniture and accessories that can be used in a project. Any minimally trained person can quickly master such a program. The result of your design can be easily printed and sent by mail. You can download the Sweet Home 3D program (available in several languages, including Russian), and also get acquainted with its capabilities on the official website of the developer.
Paid programs
- PRO100 is a program that has wide functionality for moving pieces of furniture around a virtual room. Each item in this program has its own pop-up menu, which allows you to select some characteristics of the item: color, material, texture, etc. A designer working with this program has the opportunity to view the created virtual interior in seven projections. When a change occurs in one of the project elements, this change is taken into account by other elements. More detailed information about the program can be obtained on the official website.
- Arcon Eleco is a program that is designed mainly for professional architects, but, unlike other paid programs, it is not very difficult to learn, since it does not have an overloaded, intricate menu. The process of creating a project in the program is quite typical for programs of this kind: the dimensions of the room are selected, all the furniture and accessories are placed, the finishing is selected, and then the designer receives three-dimensional models of the room of very high quality, which is why this program is very popular in Europe, where more than 20 people use it 000 specialists.
- ArchiCAD is a program that is widely used among architects and designers. With its help, the most complex objects are designed, although it can be used to create projects of any complexity. The program has very high capabilities, which makes it perhaps the most expensive among similar programs. It is worth noting that in addition to the design of the premises, the program makes it possible to maintain all kinds of construction documentation. The video shows a residential building project developed in the ArchiCAD program.
Factors influencing the cost of repairs
Repair is a global event. It requires certain costs. But what factors make up its cost? Their list is as follows:
- Professional level of employees. The higher it is, the higher the dynamics and speed of repairs.
- The responsibilities that experts can assume and the guarantees they provide.
- Hiring a team or agreement with a company. In the second case, the payment is always higher, but there are more guarantees for high quality repairs, and all activities are reflected in the documentation.
- The amount of work carried out by a team or company.
- Number of decorative components. For example, due to the use of 3D panels and ceiling lights, the cost of work also increases. These nuances must be provided for in advance. The simpler the repair is, the easier it is to agree on an estimate.
- Dynamics of work implementation. Here workers can work in two shifts. Accordingly, the payment will be higher.
- Hiring a foreman. It is needed if for some reason you cannot control the execution of the work yourself. And if you can, and even purchase the materials yourself, then you get savings. But the time investment is enormous.
Have questions ? Call!
Tile laying stage
Work on laying tiles must be carried out as carefully and carefully as possible, since it is the quality of its installation that largely determines the overall impression of the renovation.
Naturally, the finished tile covering directly depends on the quality of the tile itself, which is almost impossible to predict - its quality becomes known only when the time comes to lay it, and it finally arrives at the work site. It is worth noting that the most difficult thing to lay is tiles that have a complex pattern and various decorative elements: the more such elements, the lower the quality of installation and the higher the complexity. It is also more difficult to lay tiles that are elongated in length.
Laying flooring indoors
It is best to start laying flooring when all other finishing work has been completed, i.e.
It is better to use the floor covering to complete all stages of finishing. The same applies to doors, as well as stairs, which are provided for installation by the project. Each type of flooring has a number of requirements for their implementation. For example, laminate is laid on polyethylene foam, and parquet requires laying on a concrete screed covered with plywood, after which all the necessary painting work is carried out, upon completion of which the coating itself is laid, fastening it to the plywood with nails. To avoid getting dirty, it is usually covered with paper or cardboard on top.
Installation of plumbing in an apartment
Usually, the installation of plumbing begins after the stage of facing work has been completed: the walls have been painted, the floor and ceiling coverings have been completed.
At this stage, all the necessary plumbing products required by the project are installed: bath, shower, washbasin, toilet, bidet, heated towel rail. Sometimes, when the intended design requires it, some of the facing work is carried out after installing the plumbing. So, sometimes it is necessary to lay tiles exactly along the edge of a shower stall or bathtub. When installing faucets, which is also included in the list of plumbing installation works, it is important not to scratch the chrome parts, so you need to use special tools. You should also not forget about the need to seal the joints of sanitary ceramics with cladding.
Do-it-yourself repair of old walls
Useful tips and tricks to help you repair old walls yourself. Stages of work, finishing materials, application technologies and tools
Repairing walls is one of the main ways to put your house or apartment in order, because it is this element of the room that our eyes most often direct.
For this reason, increased demands are placed on methods and materials for wall finishing.
It’s not difficult to disguise minor flaws in the condition of the ceiling or floor, but this trick won’t work with walls.
Experts recommend: before starting work, clearly define the repair technology, carefully study it and select materials that are ideal for your conditions.
Thinking through the design
Oddly enough, even before starting the rough work, it is necessary to decide on the interior design, since, based on this, it will depend on where and what communications to lay and what finishing solutions to use.
Before proceeding with rough finishing, if necessary, windows, heating radiators, plumbing communications and electrical wiring are replaced.
Replacement of all of the above can be carried out either completely or selectively; it is important that all this work is completed before performing rough finishing, Bortnikov points out.