assets/from_origin/upload/resize_cache/iblock/475/600_450_2/4756e0b357660642ed7c49dec4489faa.jpg From this article you will learn:
- Where to start wall repairs
- How to remove old wallpaper
- How to wash off old whitewash from walls
- Where to start repairing walls when plastering surfaces
- Where to start repairing walls when puttingty
- Where to start repairing walls when using drywall
- How to start wall renovation without removing old plaster
- Where to start repairing external walls
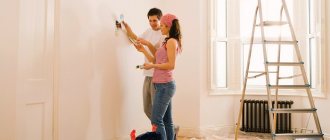
In a new building, finishing work begins immediately when the installation of electrical wiring and utilities is completed. The situation is different if the apartment is no longer new. In this case, you must first remove the old wallpaper, and possibly the plaster. In this article we will tell you where to start repairing walls in various cases.
Where to start renovating an apartment
In a situation where renovations in an apartment are inevitable, anyone who is not a professional in this field experiences some confusion. And the first question: where to start the repair? The beginning of repair work is considered one of the most difficult and critical stages. If the process is properly organized, further operations will proceed according to the planned schedule.
Before starting renovations in an apartment in Moscow, it is necessary to clear the premises of furniture and other heavy objects. Since the work takes place alternately in each individual room, it is possible to move furniture to adjacent rooms. If this is not possible, you will have to start by placing all the large objects in the center of the room. They must be covered with thick film.
Now you need to protect the flooring and baseboards in the room where the walls will be repaired. You will need cardboard, film, wide tape and masking tape. You should start by laying cardboard over the entire surface of the floor. Then it is covered with film, which is fixed with tape. Masking tape is used to protect the baseboard along the entire perimeter of the walls.
Using the same tape, you need to close all electrical outlets and switches. To begin repairs, you will need to turn off the power supply to the room where the work is planned.
It is better to start the renovation of multi-room housing from the most remote room, and finish with the kitchen and bathrooms.
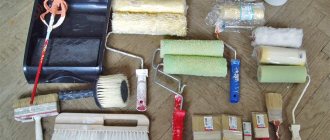
In order not to interrupt the work, you need to prepare everything necessary for repairs. The list of materials should include: a roller and tape for painting, sandpaper, tape, polyethylene film (to protect things and flooring), construction tools with which you can make repairs yourself.
You need to start repairing walls in an apartment that has already been in use for some time by removing old paint, wallpaper and various irregularities on their surface. This can be done with a spatula. After that, use a sponge and warm water to wash off the remnants of old wallpaper and whitewash. Finishing is done with sandpaper. It is necessary to carefully level the planes of the walls and ceiling, and also remove paint from the wooden elements of the interior.
After leveling the walls and ceiling surfaces, they are treated with a primer that enhances adhesion to finishing materials.
This completes the preparatory work and you can begin work on finishing the walls in the apartment.
Psychological approach to apartment renovation
To implement this TOP 7 stages of preparation for repairs (which are listed above), you need to prepare psychologically and have:
- Determination. Stop being afraid and take the first step! Then the second and third. And then everything will go like clockwork.
- Interest. Even if you don't have enough money, there are things you can save on. For example, cleaning the apartment before renovation on your own. Or create some decorative elements yourself. Sometimes, if you have a little experience, you can do the rough work yourself. Although this requires specialized knowledge and skills.
- Logic. You'll have to evaluate what needs replacing now and what parts could last just fine for another year or two.
- Tendency to delegate and abstract. This will be very useful. There will be many advisers among relatives, friends and acquaintances. You will have to learn to “move away” from their opinions and trust yourself. That's the minimum. Or leave everything in the hands of professionals. In this case, you save several vital resources: money, time, nerves.
How to Remove Old Wallpaper to Start Renovating Your Walls
In some older apartments, removing wallpaper from the walls is not particularly difficult. To do this, just pull the edge of the canvas, and it will come away from the wall without much resistance. If this situation occurs in your apartment, then after removing the easily torn sheets, you will only have to clean the walls in those places where the wallpaper is held especially tightly.
Where the wallpaper is difficult to peel off, you can start using the wet method of dismantling. Technologically, this technique involves wetting the old coating with warm water. After a short period of drying, the wallpaper should be removed with a spatula. To make this operation easier, experts recommend adding a little dishwashing liquid to warm water. This solution will slow down the drying process of old wallpaper.
You can wet the wallpaper on the walls using a paint roller. The procedure should begin by soaking the roller in a container with the prepared solution. When it is well soaked, squeeze it out lightly and run it along the surface of the wall. Leave the wet wallpaper for about 20 minutes. If you forget to prepare a paint roller, you can use a sponge or spray bottle to wet the walls. You should not treat all walls with the solution at once. While you are removing wallpaper in one corner, it may already be dry in another, and you will have to do everything all over again.
Recommended articles on this topic:
- Arrangement of a small apartment
- Stages of renovation in an apartment
- Turnkey cosmetic repairs
Well-soaked wallpaper can be easily removed from the wall with a spatula. It is better to start this process from the top of the wall and work your way down. The easiest place to pry off wallpaper is at the joints of the panels. If they lag behind with difficulty, you need to carry out the soaking procedure again. To ensure that the solution saturates the wallpaper well, make cuts or punctures on its surface (for perforation it is convenient to use a roller with metal spikes attached to the surface). The cuts can be made with a spatula or a construction knife.
When making cuts, as well as when removing wallpaper from walls with a spatula, you need to be careful. Otherwise, you can damage the plaster, which will entail work on puttying the walls.
Under the Soviet Union, only paper wallpaper was used for wall cladding. The modern market of finishing materials offers consumers vinyl, non-woven and other types, including liquid wallpaper. Dismantling of each type of material is carried out using a special technology.
- Non-woven wallpaper.
Non-woven wallpaper has a two-layer design - a paper backing and a non-woven outer layer. It is he who is removed without much difficulty. First, the edge of the non-woven covering is separated from the wall, which must be pulled without excessive effort. You need to start dismantling from the bottom of the wall (from the baseboard) or from the ceiling surface. After removing the decorative layer, a paper backing remains on the wall.
If the wallpaper has been glued well and there is no damage to the surface of the paper backing, then it can be used as a base for a new wallpaper covering. The advantage of non-woven finishing materials for repairs is that they help strengthen the walls and prevent the formation of cracks on their surface.
If the paper base was damaged when removing the decorative layer, you will have to start by completely removing the backing, since for new wallpaper it is necessary to ensure a flat wall surface.
- Vinyl wallpapers.
The peculiarity of wallpaper for vinyl walls is that they do not allow moisture to pass through. Therefore, their dismantling must begin with perforating the surface. This will allow water to penetrate under the decorative vinyl layer. You need to make as many cuts as possible to make it easier to remove the old wallpaper from the wall. The process will be significantly accelerated if you use a special tool - a wallpaper “tiger” (perforation equipment). This device will help you make many cuts without damaging the plaster.
If the coating is poorly soaked, you can prepare a solution with the addition of a small amount of wallpaper glue so that the water does not flow off the wall so quickly. After an hour, maximum two, after treatment with this mixture, the vinyl wallpaper will easily peel off the wall surface.
- Washable wallpaper.
The multilayer composition is also typical for washable wallpaper. Their dismantling should begin from the top layer. If it comes off easily, then the base can be removed using the method described above using warm water and a spatula. If the top layer does not come off well, you need to make perforations on its surface using a wallpaper “tiger”. After this, you need to moisten the wallpaper and begin dismantling after 30 minutes.
Please note that if there is not enough water for wetting, it will dry quickly without having time to soak the wallpaper. If there is too much water, it will flow onto the floor and ruin the plaster.
- How to properly remove wallpaper from drywall.
After the appearance of such a material as drywall on the building materials market, some specialists applied wallpaper directly to its surface. This decision was explained by saving money and time on wall repairs. The disadvantage of this method is that the paper covering of the drywall is tightly adhered to the base of the wallpaper, which also consists of paper. As a result, during the next renovation, removing such a finish will cause enormous difficulties.
There are several practical recommendations on how to solve this problem. If non-woven wallpaper is pasted onto drywall, then you need to start by removing the decorative layer and try to preserve the paper base. New wallpaper can be glued to the remaining backing. To remove wallpaper from drywall, you need to use a special liquid, the composition of which interacts with the glue, but does not affect the strength of the structures under the finish. If this liquid does not bring the desired result, a steamer will help you. You can replace such a device with a household iron. You need to start the process of removing the old coating from drywall by wetting the wallpaper. After some time, they should be ironed with a heated iron through the fabric.
Instructions for cosmetic repairs - step by step
The main stages of work to carry out cosmetic renovation of rooms were named above. But in each individual case there are nuances associated with the characteristics of a particular room. Some of them will be described in the instructions presented in the table below.
| Illustration | Brief description of the work stages |
| The first thing you need to do when starting renovation work is to draw up a general plan, including everything that needs to be done. If at this stage the design direction has not yet been finally determined, it is advisable to make several sketches of the design of each room. This will help you personally evaluate the appearance of the room after completion of the work. It is best to think through even two or three such “mini-projects” and carry them out in different colors and with possible furniture arrangement options. | |
| Next, measurements are taken of the areas to be renovated. The linear dimensions of each of the walls, ceiling and floor are determined. The area of door and window openings is calculated separately so that, if necessary, it can be subtracted from the total area of the wall. In addition, it is necessary to count the number of electrical outlets, lighting fixtures, switches, faucets, door handles, locks and other elements that require replacement. | |
| Based on the data obtained, as well as after studying the average prices for materials in local stores, an approximate estimate for future repairs is drawn up. The resulting amount should be increased by another 15–20%, since usually, even with marginal savings, costs exceed expectations. The estimate includes the name and quantity of materials, as well as their approximate cost. It is best to do it in the form of a table, this will make the calculations easier. If some or even most of the operations are planned to be carried out with the involvement of craftsmen, you will have to take into account the payment for the work, which is usually no less than the cost of materials. So it is more profitable to initially focus on your own capabilities. | |
| The next step is to clear the room of everything that will interfere with the renovation or could be damaged by building materials. Items that cannot be removed from the room should be covered with plastic wrap. If you do not plan to replace the floor covering, it is recommended to cover the floors with cardboard and then with film, which can be secured around the perimeter with masking tape. | |
| After the space has been cleared and prepared, the old ones are dismantled and new window frames are installed, if this is included in the redecoration plan. choose the best plastic windows . Typically, such work is carried out by teams from the window manufacturing company. But the owners need to prepare for a fairly large amount of garbage, which will also have to be immediately removed from the premises. | |
| When the windows are installed, the external and internal slopes are finished. The technological gaps between the window frame and the wall are filled with polyurethane foam, which is sensitive to ultraviolet radiation. Therefore, finishing the external slopes is no less important than tidying up the internal walls around the window. It should be noted that finishing slopes, especially external ones, is not an easy task, therefore, if there is no experience in carrying out this process, then it is better to entrust it to professionals. The external slopes of the windows of high-rise buildings are finished with plaster mortar for external work. Internal walls can be decorated in different ways - this is leveling with plaster and then putty, plastic panels or, for example, gluing with cork sheets. | |
| If you plan to improve the slopes using plaster mortar, with further painting, it is recommended to purchase fiberglass “gossamer” for reinforcing the surfaces, and for the outer corners of the openings - a metal or plastic perforated corner, possibly with “wings” made of sickle mesh attached to it. First, metal corners are secured to the outer corners of the opening using finishing putty. Both the corners themselves and the perforated or mesh “wings” must be hidden under the plaster mortar. | |
| After the final leveling of the slopes and drying of the putty, fiberglass is attached to the slopes with special glue. After impregnating it with glue, it will not only hide minor imperfections in the putty layer and strengthen the surface, but also give it a pleasant roughness. When the glue has dried, the slopes can be painted with water-based paint. But painting is usually postponed until later - when the walls of the room are brought to their final form. | |
| Drywall is also an excellent choice for finishing slopes, as it performs two functions at once - surface leveling and additional thermal insulation. The sheets are easy to cut and fixed to the wall using gypsum-based glue. You can subsequently stick wallpaper or cork onto the primed drywall, or paint the slopes with water-based paint. | |
| Another option that has become increasingly popular lately is lining slopes with plastic panels. The convenience of this material is that its installation is quick, since there is no need to wait for the solution or glue to dry. But, in addition to the panels, for their accurate installation it will be necessary to purchase special profiles - a starting one, attached to the window frame and a corner that decorates the outer corner of the opening. Since the panels are fixed to the sheathing, and free space is formed between the wall and the panels, it becomes possible to insulate the slopes. But before choosing this cladding method, you must check whether the window will fully open after installing the panels. The improvement of window slopes in much more detail in a special article on our portal. | |
| Next, the interior doors are dismantled - this process can be done independently. The first step is to remove the door leaf from the hinges. For convenience, you can use a claw pry bar as a lever. This tool will also be required when removing the door frame, which is dismantled after removing the panel from it. If you do not plan to reuse the door frame, the easiest way to remove it is by sawing the vertical posts in the middle part in two. | |
| You can also do the installation of a new door yourself if this service is not provided by the product manufacturer. The door frame, together with the door, is placed in the wall opening 3÷5 mm higher than the threshold height and aligned to the building level. To secure the structure in the required position, pads - pieces of timber or boards, depending on the width of the resulting space - are installed in the gaps between the wall and the frame, in two places on each side. These additional details must be prepared in advance. The wooden inserts must be wide enough to allow a fastening screw to pass through each of them when fixing the box to the wall in a given position. After the box is securely fixed in the opening, the gaps around it are filled with mounting foam, the excess of which will need to be cut off flush with the surface of the wall after it expands and dries. The gaps around the door frame are masked with decorative overlays - platbands. For safety, it is best to immediately cover a hung door with plastic film for the duration of the rest of the repair. If you plan to install an interior door yourself , then the instruction article to which the link leads will be of help. | |
| Now you can move on to working on preparing the ceiling surface. If the decision is made to install a plasterboard structure or a “stretch ceiling” system, and the surface is not damaged by mold or mildew, and there are no unstable fragments of finishing or ceiling visible on it, then it is not necessary to clean off the old coating. But when wallpaper, paint or ceiling tiles are chosen as finishing, the old covering will have to be removed. Whitewash can be scraped off with a spatula in dry or wet form, depending on the thickness of its layer and the strength of its adhesion to the surface. The wallpaper will also need to be removed, since to finish with all the coatings mentioned above, the ceiling must be absolutely clean. | |
| In order to quickly finish with the most dirty work, after cleaning the ceiling, it makes sense to immediately move on to freeing the walls from the old finish. There are several ways to carry out this process, from which the one that is most suitable for a particular case is selected. Sometimes it is enough to pick up the wallpaper with a spatula, and it is completely separated from the wall. In other cases, you have to soak them in warm water, applying it several times, after which the wallpaper is also cleaned off with a spatula. Another frequently used way to separate canvases from the wall is to treat them with damp hot steam. For this purpose, a special steamer or an iron with a steam function is used. The process of removing old wallpaper is quite tedious, but not even a small piece of material should remain on the walls, otherwise it may show through the new finish. | |
| What's more difficult to get rid of is the old paint that still covers the walls in some kitchens and bathrooms. It’s especially difficult if it’s oily. But there are also several ways for this purpose. The simplest, but at the same time dirty and labor-intensive cleaning method is abrasive, that is, using metal brushes, manual or in the form of attachments on a power tool. You can use a chemical remover - applying a special composition to the wall that softens the paint, after which it can be easily removed with a spatula. | |
| Another method is to heat the coating using a hair dryer. Under the influence of high temperatures, the paint also softens and separates from the surface, so it can then be easily removed with a regular spatula or the nozzle included with the hair dryer. | |
| Now that the entire room is free of the old finish, all that remains is to remove the flooring, if, of course, you plan to replace it too. The first step is to dismantle the skirting boards that hold the material around the perimeter. A mount is also suitable for this purpose. If linoleum is laid on the floors, it will be easier to remove than any other covering, even if it is secured with special glue. The flooring must be separated from the floor on one of the narrow sides of the room, and then, peeling it off from the surface, immediately roll it up. | |
| Dismantling the parquet will take more time, but removing it is also easy - just catch on one of the slats. A mount is also suitable for this job. If the parquet is in good condition, then it should be removed more carefully, as it can be reused for flooring. | |
| A more difficult task is removing ceramic tiles from floors or walls, especially if they were laid with high-quality glue. This work can be done manually, using a hammer and a special chisel, or using a hammer drill, on which a similar attachment is also installed. After the decorative covering is dismantled, the floor surface must be thoroughly cleaned of glue and debris, as the surface must be clean. | |
| Once the surfaces are cleaned, they should be inspected for any cracks that need to be repaired, otherwise they will definitely show through the new finish. The cracks widen and, if possible, deepen. Then they should be cleaned and treated with a primer - it is better to do this with a spray bottle, so the primer will penetrate the entire depth of the damage on the wall. After waiting for the soil to dry, narrow cracks are filled with concrete or putty mortar, and wide cracks, more than 15 mm, can be filled with polyurethane foam with an average expansion coefficient. When the foam expands and dries, the excess must be cut off to the level of the wall. The process of preparing walls for finishing is very dirty and tedious, but it should not be ignored or simplified. More details about this can be found in the article to which the recommended link leads. | |
| Before moving on to the next stage of work, it is necessary to de-energize the room and remove sockets and switches. It is best to seal the empty socket boxes that remain from them with masking tape. Now that the room is ready for preparatory treatment for decorative coating, a deep penetration primer is applied to the ceiling, walls and floors. It is capable of binding the surface of the base material and penetrating to a depth of up to 10 mm. If you apply two or three layers of primer, the quality of the treatment will only improve. Each subsequent layer is applied after the previous one has completely dried. | |
| If the ceiling is flat and needs to be prepared for painting, wallpapering or foam tiles, then it is covered with a thin layer of putty, which will hide minor flaws. The work is carried out with a wide spatula. Next, the surface prepared for wallpaper is sanded using a construction float with an abrasive attachment (mesh or sandpaper) having a medium grain, approximately P160. We will not describe the details of puttying the ceiling | |
| If you plan to paint the ceiling, then it is recommended to stick fiberglass “cobweb” onto it. This will greatly simplify the process and improve the quality of finishing. | |
| Then, after painting, the ceiling will have a pleasant texture, uniform matte surface, which is quite difficult to achieve by applying putty, especially if you have no experience in this work. We advise you to pay close attention to this interesting material - painting fiberglass web . He will help out more than once! Read more about it in a separate publication. | |
| The next step is to putty the walls. The number of layers applied and the quality of processing depend on the chosen decorative coating. Before painting, the surface of the walls must be perfectly smooth, but if something goes wrong, then the same “cobweb” can save you, which will mask small errors. The wall should be smooth before wallpapering, but ideal smoothness may not be achieved. | |
| To ensure that imperfections are clearly visible during putty work, experienced painters use backlighting. Properly set light will reveal even the smallest unevenness, as it will cast a shadow. | |
| After the putty layer has dried, it is sanded using a construction float. The process is carried out in a circular motion, counterclockwise, without strong pressure on the surface. Belt, vibrating or eccentric sanders are also used. But since they produce a huge amount of dust, such an operation should be carried out only if it is possible to connect the equipment to a construction vacuum cleaner. It sounds simple, but in reality, finely leveling walls with putty is a very difficult task. To deal with it, read the recommended instruction article. | |
| It is recommended to prime the finished puttyed and sanded surfaces again. This layer will help increase the adhesive properties of the materials, so the paint on the coating will lie more evenly, and the wallpaper will easily stick to the wall. | |
| Next, if provided for in the plan, a suspended ceiling is installed. The process is complex and unsafe, and it requires special equipment, so it is better to entrust this stage of work to specialists. | |
| If you plan to paint the ceiling or cover it with wallpaper or tiles, then a ceiling plinth is marked and glued along its perimeter. To fix it, one of the polymer adhesives is used, and many craftsmen even use a diluted solution of finishing putty. The framing will limit the areas to which decorative cladding will be applied. To prevent paint or wallpaper glue from accidentally getting on the baseboard, it must be covered with masking tape before installing decorative materials. | |
| The ceiling surface is painted using a roller with a fur attachment. The ceiling is painted in two layers - the first of them is applied from the window to the door, parallel to the longer walls of the room, the second is perpendicular to the first, that is, parallel to the wall with the window opening. | |
| If you plan to use wallpaper with a certain relief or color pattern to cover the ceiling, then you need to take into account that combining it on the ceiling is much more difficult. The canvases can be pasted both along and across the room - this choice depends on the homeowners’ preference for the location of the wallpaper decor. But it is still recommended that the joining seams be located from the window to the entrance - this way they will become less noticeable. | |
| When cutting wallpaper, they need to be made longer by 50÷100 mm, and they are glued with a small allowance onto the baseboards, matching the pattern if necessary. After gluing the canvas, it is easy to straighten it - press it with a spatula exactly along the line of the plinth, like a ruler, and then cut off the excess with a knife. | |
| Everyone installs polystyrene foam tiles differently. Some people believe that it is better to stick the baseboard on top of the tiles. This is wrong, since sometimes the glue is not able to withstand such a load, and both the baseboard and the tiles can move away from the ceiling at once. Therefore, the plinth should only be glued to the ceiling, and the tile covering should be adjusted to it. To ensure that the tiles are evenly distributed on the ceiling, the surface must be marked before installing them. Typically, two perpendicular lines are drawn on the ceiling, which intersect at the point where the chandelier is planned to be placed. Based on them, the tiles are glued - with glue or with finishing putty. If necessary, the side plates glued along the plinth line are trimmed. | |
| Next, you should finally finish with the dirty work, which includes leveling the floor for a new coating. The floor surface must be primed and dried again. A damper tape is glued along the perimeter of the entire room along the baseboard area, which is designed to compensate for the expansion of the screed or self-leveling floor when temperatures change. | |
| To quickly level the surface of a floor that has minor errors, special self-leveling self-leveling solutions are used - they are available for sale in a wide range. The prepared composition is poured into puddles on the floor and spread over the surface first using a wide spatula or squeegee. After this, the master puts on studded paint shoes, takes a needle roller on a long rod and finally evenly distributes the solution over the floor. The composition tends to occupy all free spaces, that is, cracks and dents, and its surface independently occupies a perfectly horizontal position, as a liquid should. Now all that remains is to wait until the renewed floor hardens - and you can move on to the next stage of work. How to choose and how to pour a self-leveling floor yourself is in a separate publication on our portal. | |
| Walls are painted using a roller with a fur or foam attachment, depending on the desired effect. The paint is applied to the surface starting from the ceiling plinth with up and down movements, gradually covering unpainted areas. To get an evenly painted wall, at least two layers of paint must be applied to its surface. | |
| Wallpaper is applied starting from the corner of the room. At the beginning of the wall, stepping back from an angle of 20÷30 mm, a perfectly straight vertical line is struck, along which the first sheet of wallpaper will be aligned and glued. The upper side of the canvas should be 20÷25 mm on the baseboards, so that it is possible to align the drawings or patterns, and not leave an unsealed strip on top. | |
| To ensure that the top edge of the wallpaper is even, it should be pressed against the baseboard with a spatula and carefully cut off the excess part with a sharp stationery knife. For work, it is best to use a spatula 250÷400 mm wide with a smooth blade edge. The process of hanging wallpaper yourself is not as simple as it might seem. The nuances of this stage of finishing are in a separate article. | |
| When the wallpaper is dry, sockets, switches, and wall lighting fixtures are installed in place. | |
| The last stage of work is the installation of the floor covering. It is started when the manufacturer’s recommended hardening time for the self-leveling floor has been fully met. If a laminate is chosen for finishing, then it is mounted on a special substrate, which will reduce the noise from steps on the coating and provide the required level of shock absorption. A special instruction article posted on the pages of our portal will help you carry out high-quality installation of laminate flooring yourself | |
| Unlike laminate, linoleum must lie down and straighten out before fixing it to the floor; about a day is allotted for this. The covering is spread in the room for which it is intended and left for the above-mentioned time. After that, the evenness of the installation is additionally checked, then the linoleum is pressed against the junction of the horizontal and vertical planes and the excess strips are carefully cut off from it. There should be a gap of 5÷7 mm between the wall and the coating, which is necessary to compensate for the thermal expansion of the material. Previously, linoleum was certainly glued to the base, but today this installation technology is rarely used. Most often, high-quality material is laid as described above. About the technology of laying linoleum with your own hands with all the details - a special publication at the link. | |
| Another material option that is becoming increasingly popular is cork tiles or roll coverings. The tiles are laid according to the laminate principle, and the rolled material is fixed with a special glue applied to the prepared base. | |
| The covering will not look properly if it is not framed with a plinth. Similar finishing parts can have different designs and different types of fastenings. It is important that the skirting boards fit well into the overall interior design in terms of color and are in harmony with the floor covering. At the same stage, a threshold is fixed in the doorway, which also presses the edges of the floor coverings of adjacent rooms. |
The result of the cosmetic renovation should be a neat, fresh room, ready for arranging furniture and further use.
Agree that most operations, except for some specific ones (which, by the way, may not be included in the general plan of work), can be performed independently.
* * * * * * *
In the article reviewed, only a brief description of the stages of replenishment of cosmetic repairs was presented. But on the pages of our portal, in the “Apartment Renovation” a lot of attention is paid to each of the mentioned processes. In this array of information, the reader will find not only detailed instructions for carrying out repair and finishing work, but also recommendations for choosing the necessary materials, with a comprehensive consideration of their characteristics, advantages and disadvantages.
And finally, as an example, watch a video about redecorating an apartment.
How to wash whitewash from walls
If, in the process of repairing ceilings in an apartment, modern technologies for arranging suspended or tensioned structures are used, then the whitewash may not be removed. But there are other finishing options that require preparation of the surface of the ceiling and walls, then you will have to wash off the lime layer.
Whitewash will have to be removed in the following situations:
- if you plan to paint surfaces or wallpaper them (the fact is that the lime contained in whitewash reduces the adhesion of finishing materials);
- if you need to start work on applying a new whitewash, the composition of which is different from the previous one (adhesion with the old coating may be unreliable);
- if it is necessary to carry out work on arranging insulation or sound insulation;
- before you start sealing joints (with putties or plaster mixtures) or cracks;
- if stains of rust, soot, fungus or mold appear under the whitewash.
It is worth getting rid of fungus and mold, even if the repair plan involves installing suspended or suspended ceiling systems. The fact is that such formations can quickly move to walls and other surfaces. After the old whitewash is removed, the area affected by mold or fungus must be treated with special compounds.
In other situations, you only need to remove the whitewash that has already peeled off. This can be done using a grinding machine. After completing the work, remove any remaining dust with a brush.
Whitewash removal is usually carried out in two ways: wet and dry. Moreover, each of these methods contains several more methods of performing work.
The dry whitewash removal method involves using a sharp spatula. The disadvantage of this technology is that it is very dusty and accompanied by a lot of dirt. After removing the whitewash with a spatula, further work can begin only after general cleaning.
A more practical way to remove whitewash involves wet washing. In this case, there will be no dust, and the amount of dirt in the room will be much less. Next we will look at several methods for carrying out work using the wet method.
You need to start washing off the whitewash layer with preparatory measures. Furniture and large objects should be removed from the room (if this is not possible, cover everything with film).
You can quickly remove whitewash without excess dirt using a washing vacuum cleaner. A special solution must be poured into the vacuum cleaner tank, which is used to perform regular washing (the procedure must be repeated until the walls are completely cleaned).
It should be noted that after washing off the whitewash, the vacuum cleaner can no longer be used for its intended purpose, so for such an operation they allocate an old device that has already served its useful life. The use of a vacuum cleaner is justified if there are several layers of whitewash on the walls of the apartment (otherwise there is simply no point in such mechanization; it’s faster and easier to do everything manually).
You can also remove old whitewash from the walls during apartment renovation using a paint roller or sponge soaked in water. You need to thoroughly wet the layer and wait up to 10 minutes until it gets wet. It should be taken into account that if about an hour passes after wetting the whitewash, it will have time to dry completely, and everything will have to be done again. Considering this circumstance, craftsmen recommend carrying out work on removing whitewash gradually, treating small areas.
Companies and stores selling building materials have a range of special cleaning agents. Such compositions can be prepared independently from traditional products that are found in every home.
Washing solutions, even if made at home, allow you to quickly and efficiently remove whitewash using the wet method. Here are some recipes for such compositions:
- Soap-alkaline composition. Take a bucket into which you need to pour 5 liters of warm water. Dissolve a tablespoon of grated laundry soap and 3 tablespoons of soda ash in this water. Use this product to moisten the whitewash on the walls, and when it swells, remove it with a sharp spatula.
- The vinegar solution is prepared in 10 liters of water with the addition of 2 tablespoons of vinegar and 5 caps of bath foam.
- Paste-based solution. To prepare it, you need to take 6 tablespoons of starch or flour and fill them with cold water (250 ml). This mass must be mixed well and diluted with 1 liter of boiled water. When the resulting mixture has cooled, it is applied to the surface of the whitewashed wall. The peculiarity of working with this product is that you need to wait for it to dry. After this, the whitewash is easily removed with a spatula along with the paste.
For those who do not want to prepare home remedies, there is the option of purchasing a ready-made substance, which is easy to find in construction materials stores.
Most of the factory compositions are made on an adhesive basis. Such products are applied to the wall with a brush and left until completely dry. The principle of performing the work is the same as when using paste.
The use of washing compositions has the advantages of their simple preparation and high efficiency. The main disadvantage of such products is that purchased removers are expensive and may contain toxic components.
After removing the whitewash, before starting further work on repairing the walls in the apartment, you need to rinse the working surfaces thoroughly with warm water (a good sponge is suitable for this). After the walls have dried, check the quality of cleaning their surface. If you run your hand over the treated area, there should be no traces left on your palm.
The methods and means for removing whitewash from walls described in this section have demonstrated their effectiveness. Home-made removers will save money, and purchased formulations should be used when you need to quickly remove whitewash over large areas, since all these products are highly concentrated and one package is enough.
Features of finishing
First of all, you need to decide what the finishing of an apartment is. This concept does not have a clear, fixed designation, so there are several interpretations. In general, finishing work implies processes that do not require large-scale and labor-intensive manipulations, the result of which is a room that is absolutely ready for habitation.
On a note! Confusion arises because there are several options for dividing repair work into stages. So, in the first case, the list includes only two processes: finishing and rough finishing. But often there is an intermediate stage - pre-finishing. This is why the line between the works that should be included in each category is a little blurry.
There is no clear line of delineation between the concepts of rough and fine finishing; they are defined only in general directions.
It must be borne in mind that currently it is possible to buy housing at various stages of the work. Many people prefer fully finished houses or apartments, which has a number of undeniable advantages:
- You can move in immediately. All communications are functional, and surfaces have decorative cladding.
- There is no need for additional expenses, which saves the family budget a little.
- There is a possibility that the finishing work was carried out by professionals and is of good quality.
Buying an apartment with full finishing has many advantages only if you have confidence in the integrity of the craftsmen and the quality of the materials
. Of course, this solution also has disadvantages:
- If a new home is purchased with finishing work completed, then their cost is probably included in the final price of the house or apartment.
- Finishing is carried out in a standard manner, without taking into account individual preferences.
- There is no way to check whether rules and regulations were followed. It often happens that decorative cladding of walls, floors and ceilings is carried out when the surfaces are not yet sufficiently dry after pouring the screed and plastering. This leads not only to damage to the coating, but also to the appearance of mold and mildew, which are very difficult to get rid of.
Thus, there are several options: purchasing turnkey housing, performing all or part of the activities yourself, as well as hiring craftsmen whose work can be controlled.
The golden mean is considered to be the purchase of housing for final finishing.
Where to start finishing walls with plaster
As experts note, the most popular wall finishing technologies for apartment renovations remain options that include wet methods. This category includes putty and wall plaster. Such finishing methods can be used if the walls in the apartment are not insulated from the inside. When repairing walls in a new apartment, you need to start the process with plastering work.
The disadvantage of wet technologies for decorating walls in an apartment is that it takes a lot of time due to the fact that all applied layers of material must be thoroughly dried. At the same time, you will need slightly less money than for finishing using plasterboard structures (only if the work is done with your own hands).
You need to start the wet finishing by installing the guides. To do this you need to buy metal beacons. Profiles left after drywall work can also be used as beacons. They are attached this way:
- You need to start by installing the first beacon on the wall near the corner. It must be oriented strictly vertically (a level is used for checking). The lighthouse is fixed with a gypsum compound.
- The second beacon is mounted on the wall in the opposite corner.
- Between the exposed beacons you need to stretch three pieces of strong thread (top, bottom and middle).
- Subsequent beacons must be installed at intervals of 100 to 150 cm. In this case, you need to ensure that the beacon touches all tensioned threads.
After installing the beacons, you need to wait for the gypsum composition to dry (from 12 hours to a day).
After the preparatory stage is completed, you can begin plastering work in the apartment. To complete them you need to prepare:
- container for mixture,
- Master OK,
- a ladle or spatula for throwing plaster on the walls,
- grater,
- rule (any flat plank approximately 150 cm long).
If the walls are plastered with a cement composition, then you will need a ladle to throw it onto a wet surface. If the work is carried out with ready-made plastic plasters for walls, you can work with a spatula.
When using cement plasters, it is better to start pouring the mixture from the bottom up, especially if you are performing this operation for the first time.
When working with a cement-based mixture, small unevenness and roughness may remain on the wall surface. This is a normal process. After the first layer of plaster has hardened a little, you will need to apply another thin layer, which will be perfectly leveled after smoothing with a trowel.
Tools and materials required for work
Wall primer diagram.
In addition, it is very important to properly equip your workplace. Make sure you have everything you need at your disposal. We are talking about the most basic tools and required materials for wall decoration.
Carrying out self-repair of a wall surface requires the following materials and tools:
- gypsum plaster (preferably good quality);
- primer composition (with antifungal additives);
- putty;
- a hammer or perforator with specially designed attachments (for beating off old coating);
- spatulas;
- brush (roller for applying primer);
- medium capacity container (for plaster).
The right approach to working with your own hands will significantly reduce the cost of your time and effort. This will also ensure high-quality and, therefore, durable work results.
Coating with putty is the next stage of wall repair
You can start puttingtying the walls in the apartment after completing the plastering work. The walls should be completely dry by this time. A layer of putty allows you to efficiently remove the smallest irregularities. The higher the quality of leveling the plaster, the thinner the layer of putty can be applied. In this case, the main goal of the work at this stage will be to camouflage the rough structure of the plaster. After final sanding, you can begin the final stage of wall repair - finishing.
What you need to prepare to start puttingty the walls in your apartment:
- a clean container for preparing putty (a dirty bucket will ruin the material);
- a mixer or a special attachment for an electric drill;
- a set of spatulas (large and small);
- sanding meshes;
- holder for sanding mesh.
If everything is available, you can begin work on putty, which is carried out in the following sequence:
- Apply a primer to the surface of the plastered wall and let it dry.
- To prepare the putty, you need to fill a wide container with the required amount of water. Gradually pour the putty mixture into this water, constantly stirring with a mixer. The consistency of the finished composition should resemble sour cream with high fat content.
- Using a small spatula, scoop up the putty and apply it to the bottom edge of the large spatula.
- Moving a large spatula at a slight angle to the wall surface, you need to distribute the putty. To apply the first layer, it is better to use vertical movements (accordingly, apply the second layer horizontally).
- After finishing treating the wall with one layer, you need to let it dry completely and only then apply the second layer.
Failure to comply with the technological requirements for applying putty can lead to the formation of cracks on the walls.
The final layer of putty should be made as thin as possible. This can be achieved by holding the spatula almost perpendicular to the wall surface.
Now the wall should dry well.
As a result of the work done, the surface should be completely flat and smooth. There may still be shallow traces of the spatula left on it, which can be removed by sanding. The final grouting of the walls is carried out with fine-grained mesh No. 150 or No. 180.
After sanding, you can begin decorative finishing of wall surfaces by painting or wallpapering.
Sequence of major renovation of an apartment
When working with housing, professionals most often have to deal with major repairs. Often owners have no time for cosmetic repairs - this is the result.
Therefore, you need to know the sequence of work during a major renovation of an apartment.
:
- Planning. Preparatory work (removing garbage, equipment, removing chandeliers, mirrors and everything “extra”). As a result, there should be “bare” walls and floor.
- Dismantling of unnecessary structures and communications. If the renovation is cosmetic, then you need to remove the wallpaper and linoleum. If it’s major, there’s more work. This could be dismantling partitions, heating systems, plumbing, replacing a toilet, bathtub, shower, etc.
- Repair and installation of communication systems. At this stage, radiators are replaced, hoods are installed and air conditioners are installed. Updated electrical wiring is also an important type of service at this stage.
- Surface finishing. Usually the rule is this: it must be carried out from top to bottom, from the ceiling to the floor. But more often, pasting and painting the walls is done at the final stage. As for surface treatment, first they are leveled (see above), then plastered, then puttyed and opened, as necessary, with a primer. And then (optional) - paint, wallpaper. At the end, the baseboards are installed.
Important! When making repairs in a multi-room space, you should start from the remote rooms, completing the repairs closer to the front door. In this case, excess garbage is not spread around the apartment as much.
Where to start repairing walls using drywall
Leveling walls with plasterboard sheets is becoming an increasingly popular solution for apartment renovations. Its appeal lies in the absence of wet operations. The master does not need to waste time waiting for the next layer of materials to dry. At the same time, much less dirt is formed in the premises. In addition, there are situations with wall repairs when drywall work is indispensable:
- if necessary, insulate walls from the inside;
- if the wall is too uneven;
- in order to close pipes and other utilities;
- if the apartment renovation design project includes the arrangement of complex structures: arches, columns, etc.;
- with limited time to carry out wall repairs in the apartment.
Repairs using plasterboard structures should begin by identifying points for attaching heavy pieces of hanging furniture and decorative elements. In such places it is necessary to provide additional reinforcement of drywall. After this, they begin to install the frame for attaching the plasterboard sheets. It is equipped with special profiles. It is quite possible to perform such an operation on your own.
For guides, a profile with a width of 2.7 cm is usually used. For the remaining elements of a plasterboard structure, a profile with a width of 6 cm can be used.
If you want to repeat the renovation seen in an interior magazine, you need to understand that the arrangement of figured elements made of plasterboard requires high skill and special skills.
To prepare places for attaching heavy hanging furniture and massive decorative elements, you need to make and strengthen horizontal bridges between the profiles. A profile with a width of 6 cm and a length of 60 cm is suitable for them. Using self-tapping screws, it must be installed at the required height. To strengthen the profile, a wooden beam is inserted into it. To make the structure even more reliable, in addition to the horizontal jumper, you can also strengthen the vertical profiles to which it is attached.
The same jumpers should be installed at horizontal joints of plasterboard sheets.
If the renovation design project involves finishing plasterboard walls with tiles or other heavy materials, then the profiles should be installed at intervals of 40 cm. This will make the structure more durable. In this case, the joints of the sheets will precisely fall on the profile.
Please note that the spacing between profiles is measured not along their edges, but along their central axes.
Apartment renovation: stages and order of work
When the time comes for work in the apartment, defining the stages and order of the procedure is an important basis for achieving your goals. You should prepare for both the cosmetic and capital varieties.
TOP 7 stages of preparation for apartment renovation
Follow this simple plan and you will succeed:
- Consider what you'll do once you've determined which type suits you best.
- Determine who will do the repairs (yourself/a team/several craftsmen).
- Calculate your expenses. This can be done either independently or using special programs. For example, on the website of the Repair Master there is a calculator, when you enter basic data on the apartment, area, type of building and expected results, you will be given future costs that are as close as possible to real ones. Having received the total amount of finances, you can estimate whether you can handle such expenses. Although, it is often better to take out a loan from a bank, but carry out the work on time, without expecting deeper damage to surfaces, cracks, etc.
- Study the websites and offers of companies and repair teams. Choose the best one according to your taste or reviews from friends or based on reviews on Internet resources. Contact them, hold a meeting and let them calculate the costs, issue the amount and calculate the time for the work. If everything is suitable, sign an agreement, which must indicate not only all the services that will be provided, but also include general estimates and stipulate in writing the conditions for what will happen if a failure or force majeure occurs.
- Clear the premises. Remove old items and furniture that needs to be replaced. Put away the equipment. Remove everything from the walls, from pictures to sconces, clocks and mirrors. Remove the fasteners and bolts yourself (so as not to pay repair crews).
- Create a schedule for repairs. If you are a responsible apartment owner. Plan to observe the stages and level of cosmetic, major or VIP repairs.
- Accept work from the crew. Your apartment should simply shine after the renovation. If this is not the case, do not be afraid to voice your complaints. It's your money and right. Discuss the points you don’t like, as they will remain in your home.
Where to start repairing walls without removing old plaster
The wall repair options presented above are quite labor-intensive and require a certain amount of time. What to do if you don’t have much time, but you need to get your apartment in order? In such a situation, you can restore the old plaster and then put new wallpaper on it. Of course, very lumpy walls cannot be made perfectly even in this way, but you can give a neat look to the interior of the room.
Where to start repairing walls in an apartment in such a situation? First of all, you should dismantle the old finish.
After this, you need to expand the largest cracks.
This process consists of deepening the cracks in the form of a funnel. Then the wall is treated with a primer. After the primer has dried, the surface of the wall must be moistened and covered with a nylon mesh. At this stage, the embroidered cracks are sealed with a plaster compound.
To make the plaster more durable, tile adhesive is added to it.
After the plaster has completely dried, you can begin to putty the walls. The first layer is applied with the starting composition, and all subsequent layers are performed using finishing putty. There should be three layers in total. For a flat wall, 2 layers may be enough.
Now you need to prime the wall and move on to wallpapering.
Additional information about materials
In most cases, gypsum plasters are used to decorate interior walls.
Each wall must be plastered level. Experts recommend plastering some rooms “in the corners.” As a rule, this applies to rooms such as the bathroom and kitchen. In addition, it is desirable that the rooms in which tiles will be laid on the floor “in the corners” will be plastered, making every divergence of the walls noticeable. You can determine how long it may take for the plaster composition to completely dry based on the thickness of the applied layer, taking into account weather conditions.
https://moyagostinaya.ru/youtu.be/gaNcLQEGL0Y
Repairing walls with your own hands without special expenses is within the capabilities of almost every real owner. As you understand, by doing without the help of specialists, you will save a significant amount of money, which provides an excellent opportunity to purchase better quality material.
Where to start wall repairs during exterior work
Facade painting
The simplest and most inexpensive option for facade repair involves the use of plaster compounds. The technology for their application does not differ from that used for interior work. After plastering, the walls can be puttied and painted. For such repairs, special putty and paint for facade work are used.
The disadvantage of the repair described above is the fragility of the coating. This facade will have to be repainted in a few years.
Stage of dismantling work in the apartment
It is with dismantling work that the entire process of repairing the premises begins. So, all the old finishing, and this is wallpaper, parquet or laminate, tiles, various partitions, is removed, preparing the surface for a new coating. At this stage, it is necessary to achieve the maximum amount of dismantling of the old finish, otherwise all further work may not bring the desired result.
Dismantling partitions and walls
Partitions in the apartment can be safely removed, since they, unlike load-bearing walls, do not bear any load, but serve only to divide the space. There is usually a small gap between the partition and the ceiling, which ensures its integrity when the entire building shrinks. This gap is filled with tow, which needs to be removed. After this, the partition itself is dismantled: this must be done from top to bottom. So, for a brick wall, dismantling consists of gradually dismantling it brick by brick. It is worth paying attention to protecting the floor from falling particles of the destroyed partition.
Removing floors in an apartment
For this rather dirty procedure, you need to make sure you have gloves, headgear and special clothing to avoid injuries and negative effects on health. It is better to put construction waste on a cart or something similar, since garbage bags often break under the weight of the old floor covering. To dismantle a tiled floor you will need a hammer drill, a sledgehammer and a chisel, but for a wooden floor you will not need to use as much force. If the floor covering does not need to be replaced, it must be carefully sealed to prevent damage.
Dismantling window and door units in an apartment
To dismantle the door block, you must first start with the door, which is not so difficult to remove. It will be more difficult to remove the door jamb from the wall, especially since it can be installed in a load-bearing wall. After the door block is removed, the doorway can be changed in size depending on the parameters of the new jamb. If replacement of windows and doors is not expected, then you need to carefully remove the cracked paint, preparing the surface for applying a new coating.
Dismantling wall and ceiling coverings
Plaster is removed from the walls layer by layer, starting from the top of the wall. The wallpaper is torn off in pieces, and those that are firmly attached to the wall are soaked and removed using a spatula. Paints and enamels that are used to cover the ceiling can be removed with a spatula, starting from the places where cracks have formed, and the whitewash can simply be washed off until a layer of putty appears.
Floor screed
Floor screeding is carried out after all plastering work has been completed and communications have been installed. The screed is necessary to create smooth surfaces, which are needed at the stage of finishing the room. There are a lot of requirements for performing such work, which include the nuances of performing the work, the materials used, drying time, etc. There are several types and methods for laying floor screeds. We will consider them further.
Types and methods of applying screed
Wet method of concrete screed
This is by far the most common method. This screed is carried out using a very liquid sand-cement mixture, which can also be reinforced with a metal mesh for additional strength. The thickness of the screed layer made in this way is usually about 3 cm. This is a cheap and reliable method, which, unfortunately, is not without some disadvantages :
- drying time (for certain finishing materials – up to 30 days),
- possibility of deformation and cracking,
- obtaining an uneven surface,
- possibility of water passage.
This method can be used to reduce the cost of work, but now it is gradually being abandoned.
Dry floor screed
This method is increasingly used by modern specialists, and most often in private homes. This screed eliminates the use of any wet processes, which is its main advantage. When arranging it, expanded clay, gypsum plasterboard sheets and glue are used. However, this method also has disadvantages, the main ones being the cost of the work, as well as the need to wait for the so-called maturation of the floor.
Semi-dry floor screed
This method is the most affordable in terms of price and quality of work performed. The main advantage is the ability to begin laying finishing materials on the floor 10-14 hours after the screed work has been carried out. This screed is performed using a semi-dry solution with polypropylene fiber. The result is a smooth surface that is resistant to cracks, deformation and other damage.
Mechanical floor screeding
The peculiarity of such a screed is that the solution for it is prepared in a special apparatus, which, after its preparation, is passed through a hose to the place where the screed needs to be poured. Such a screed quickly becomes strong: so, already on the fourth day you can carry out finishing work. The screed makes it possible to obtain a flat surface, and the mechanical screed is well suited for large rooms of simple geometry - in them the screed can be completed very quickly.
Electric installation work
Immediately after the plastering work, almost at the same time as the installation of plumbing, electrical installation work is carried out. Here you need to clearly know where and how many sockets and switches to install; you also need to know the number and location of the main consumers of electricity. After this, all this is done regarding the load on the electrical network and the wiring is installed according to a certain scheme.
The procedure for performing electrical installation work
It is very important to carry out the installation of electrical wiring after plastering the walls. Indeed, in this case, the accuracy of the location of switches and sockets increases, future finishing is not damaged, and the chance of damaging electrical wiring is also reduced. In addition, it is thanks to the execution of electrical installation work after plastering that there is a chance to correct some miscalculations without resorting to destruction of the already completed plaster.
It is worth emphasizing the importance of an accurate representation of the future interior of the room or apartment, so that you can know exactly where the sockets will be needed, because when they are installed thoughtlessly, this often leads to not entirely pleasant results. Therefore, you need to draw up a plan in advance for the location of all sockets and switches, and then discuss it with a specialist in order to agree on some details or eliminate possible miscalculations. After the layout design has been agreed upon, it is necessary to make a working electrical design, according to which the rough electrical installation work is carried out. They consist of laying wiring, installing socket boxes and an electrical panel. But all other elements, sockets, switches, lighting fixtures, are installed after all finishing work has been completed.