It is too early for buyers of apartments in new buildings to relax after receiving the keys, because if the housing was purchased without renovation from the developer, then the new owner gets literally bare walls.
We decided to remind new residents about the basic technologies and stages of rough finishing, the quality of which determines the quality of the future decor.
Technological memo
Currently, there are two main design schemes for apartment buildings.
Firstly, these are houses whose frame and external walls are built from reinforced concrete panels. And secondly, these are houses whose frame is made of monolithic reinforced concrete, and the openings are filled, as a rule, with blocks of cellular concrete.
There may be other design schemes, but they make up a small percentage of newly built apartment buildings, explains Alexander Bortnikov, head of the training center of Knauf Gips LLC.
“It should be noted that newly constructed buildings using reinforced concrete as the main material are subject to shrinkage. Shrinkage is a feature of all cement-based materials, since cement stone decreases in volume as it hardens.
Therefore, it is recommended to begin finishing work when all shrinkage phenomena have passed, and this is about a year after construction, or to take this phenomenon into account when choosing certain materials and systems for finishing,” the expert recommends.
Thinking through the design
Oddly enough, even before starting the rough work, it is necessary to decide on the interior design, since, based on this, it will depend on where and what communications to lay and what finishing solutions to use.
Before proceeding with rough finishing, if necessary, windows, heating radiators, plumbing communications and electrical wiring are replaced.
Replacement of all of the above can be carried out either completely or selectively; it is important that all this work is completed before performing rough finishing, Bortnikov points out.
Leveling the floors
The first step is to level the floor.
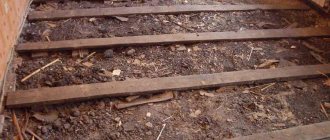
If your apartment is completely “bare”, then you have a monolithic slab on the floor, which must not only be leveled, but also insulated, because it transmits all vibrations and sounds.
To do this, it is advisable to first fill in a layer of expanded clay, which has excellent sound and heat insulation properties (layer thickness is approximately 5 cm).
Before starting work, you need to make sure that there are no cracks in your concrete floor, otherwise water from the screed may leak down to the neighbors.
Typically, holes may remain in the area of risers and ventilation shafts. They need to be sealed with foam or adhesive mixture. Next, we fill in the expanded clay, starting from the place that has the greatest depth.
We pour the expanded clay with a solution of liquid concrete, the consistency of which resembles milk. This solution dries in about a day or two. You can also immediately make an expanded clay-cement-sand mixture and lay it on the base.
For bathrooms, it is advisable to make floor waterproofing before laying expanded clay, extending up to 10 cm onto the walls. If it has already been done before handing over the house, then its quality must be checked, since defects often occur.
Next, we begin directly leveling the floor.
This can be done using a cement-sand screed or self-leveling floor. The main advantage of cement-sand screed is its price, from 90 rubles (on average 150 rubles) per 40 kilograms, depending on the manufacturer, region and composition. The consumption of the screed depends on the applied layer.
However, the screed does not allow you to obtain a perfectly flat and smooth surface, and its drying time is 28 days, which significantly delays the progress of repair work. Self-leveling floors are a more technologically advanced option.
Due to its fairly liquid consistency, the mixture spreads over the floor surface and takes on the level of the horizon, that is, it self-levels.
The master needs to select the optimal amount of water and slightly help the mixture to spread over the surface.
It must be said that before installing a self-leveling floor, the base must be primed. You can prime with a regular or acrylic primer, rollers or brushes.
Concrete contact is usually used when the apartment is from an old foundation and the foundation is very poor - there is no point in using it in a new building, especially considering the difference in price (3-4 times more expensive than primer, namely 1500-2000 rubles per 10 liters).
Priming should be done either in two layers, or immediately with a generous layer - before applying the second layer of primer, the previous one must dry.
Also, the installation of a self-leveling floor should be carried out over a dried primer, but the time gap between priming and the completion of floor laying work should not be large - no more than a day, and preferably an hour or two, in order to avoid dust settling on the surface.
The only drawback of self-leveling floors is the price - from 240 rubles per 25 kilograms (average 400 rubles), so usually self-leveling floors are used for height differences of no more than 4 cm.
Also, the self-leveling floor can be laid on a cement-sand screed (after it has dried), this will allow you to get a more even surface at a lower cost. You can walk on self-leveling floors after 5 hours, lay linoleum or tiles after two days, and wooden floors after 7 days.
Under some finishing coatings, it is advisable in any case to use a self-leveling floor, for example, under a laminate - it is not attached to the floor, but simply lies on the substrate, which is why it can move and rub against the surface during use.
If you just have a sand-cement screed on the floor, dust will form, but self-leveling floors completely eliminate this.
Another way to level the floor and prepare the base for laying the finishing coating is to use dry prefabricated floors, says the Knauf Gips expert. “When using this solution, floor elements or, for example,
“Knauf-superfloor” are laid either directly on the base, or on an insulating layer (expanded polystyrene or mineral wool boards), or on a layer of dry expanded clay sand backfill.
The latter option of dry prefabricated flooring is the most popular because it allows you to quickly level the floor surface.
The use of this method of preparing the base makes it possible to install the finishing coating within a day after laying it, and at the same time, the issues of reducing the load on the floors are resolved, and the sound insulation of the floor is improved,” says
Bortnikov. Gypsum fiber boards (GVL board) can be up to 20 millimeters thick. Their cost ranges from 315 to 566 rubles.
Tools needed for work
In the process of working with walls you will need:
Wallpapering will require scissors, a carpenter's knife, and a roller for applying glue.
Important! Smooth the wallpaper on the wall with a clothes brush. If the joints of the panels cannot be glued with wallpaper paste, use PVA glue or instant glue from small tubes. Working with the latter requires care.
Walls are painted with brushes, a roller, or a spray gun, depending on the amount of work and the skills of the performer.
In a new building, when performing the first renovation, it is advisable to refrain from painting large areas. This is due to the fact that new construction shrinks over several years, which causes fine cracks to appear on painted surfaces. Wallpaper in this sense is preferable because it is elastic.
Plastering the walls
As for the walls, indoors you can encounter various surfaces made of reinforced concrete, cellular concrete, very often gas silicate and ceramic bricks, with the help of which internal partitions can be made, notes Bortnikov.
It should be noted that currently some manufacturers produce reinforced concrete panels with a high surface quality, which can only be puttied, but in most cases, leveling the walls with plaster is required. “Indoors, it is more advisable to use gypsum-based plasters, with the exception of rooms with high humidity (bathrooms, showers).
Before applying plaster, the surface of the walls must be primed. For weakly absorbent surfaces, such as concrete, a primer like Knauf Betokontakt is used to improve the adhesion (adhesion) of the plaster to the surface,” explains the expert.
For priming highly absorbent surfaces, such as ceramic bricks and aerated concrete, primers are used that reduce the absorbency of the substrate and prevent uneven setting of the plaster mortar.
The maximum thickness of the plaster of one layer should not exceed 50 millimeters. The interface between various surfaces, for example, cellular concrete and reinforced concrete, must be reinforced with fiberglass mesh with a mesh size of 3x3 or 5x5 mm.
If it is necessary to perform leveling with a thickness of more than 50 millimeters, it is recommended to use cladding on a metal frame covered with plasterboard or gypsum fiber.
In rooms with high humidity, you should use cement-based plasters or wall cladding on a metal frame using slabs (aquaplates). The cost range for plaster is from 250 to 550 rubles per 25 kilograms.
Removing old coatings
The scope of repair work will be much wider in a situation where the wall surface is severely damaged or when we want to carry out repairs in a different way.
Removing plaster and tiles
Old plaster is most easily removed by hand using a wide chisel or using a hammer drill with a wide chisel. If the plaster or tiles are coming off the surface or the wall is extremely uneven, the entire wall will need to be treated. To reduce dust in the room, the wall should be regularly moistened. After this work, the resulting cavities are filled with leveling solution.
Removing paint
The method for removing peeling or cracked paint depends on the type of paint and the required quality of the substrate. Mineral, limestone and adhesive paints are easy to remove. The wall must be moistened with water with the addition of, for example, dishwashing liquid or a special preparation, left for 5-10 minutes and after the coating has softened, remove it using a spatula inclined at a slight angle to the wall surface.
Emulsion or oil-based paint is more difficult to remove. In this case, it is best to use a specialized product designed for removing paint and varnish coatings. It is applied to the wall with a soft brush and left for a time corresponding to the type of finish (from several minutes to an hour). Then it is removed along with the old paint with a spatula or a hard brush. If necessary, the procedure must be repeated 2-3 times.
Removing old wallpaper
Wallpaper pasted with water-based glue can be easily removed after soaking. To remove the non-woven coating, which consists of two layers - the top and the backing, you just need to tear them off one by one. However, the backing can be left for pasting a new coating.
We put up barriers
In houses built from monolithic reinforced concrete, apartments are sold with an open plan: that is, there are no interior partitions and the owner creates the interior space at his own discretion.
The best option for installing partitions in this case is the use of dry construction systems, that is, structures consisting of a metal frame and sheathed with plasterboard sheets or high-strength sheets.
The advantage of this solution is that such structures have less weight compared to other options, allow the creation of curved partition configurations, and have good soundproofing properties. In addition, their installation is completed in a short period of time.
But it is important to remember some features when constructing such structures, Bortnikov emphasizes.
“Installation of plasterboard and gypsum fiber partitions should be carried out when all wet processes in the room have been completed, or rather, plastering of existing walls should be completed and the plaster layer should dry,” he says.
To construct the frame, the expert recommends using a profile with a metal thickness of 0.6 millimeters.
It is better to use plasterboard 12.5 millimeters thick as cladding for the frame. Its cost ranges on average from 200 rubles per sheet to 360 rubles.
When installing sockets on both sides of the partition, they should not be placed opposite each other, as this worsens the soundproofing characteristics of the structure, notes the agency’s interlocutor.
Attention to the ceiling
Another surface in apartments that may also need leveling is the ceiling. It can be plastered (layer no more than 20 millimeters). Before plastering, the ceiling surface must be primed to avoid peeling of the plaster layer.
“To level the ceilings, suspended structures can be created on a metal frame and covered with gypsum-based sheet materials.
Suspended ceilings have two main frame designs: one-level and two-level. If finishing is carried out in buildings where shrinkage phenomena have not occurred, it is recommended to make a choice in favor of a two-level ceiling.
In this case, the frame is secured to the ceiling using hangers and is not attached to the walls and, accordingly, is less susceptible to deformation, explains Bortnikov from Knauf Gips.
Finishing rough finish
“We have leveled the walls and ceiling, now we can begin finishing, but depending on what material will be used for this, final puttying of the surface of the plaster or sheets may be required,” says the expert.
“If tiles are glued to the surface or decorative plaster with a fraction of more than 1 millimeter is applied, then there is no need to perform finishing putty.
But when using matte paints and structural plasters with a fraction of less than 1 millimeter as a finishing layer, it is necessary to putty the surface,” he instructs.
In this case, puttying is performed in a thin layer using the “scraping” method. “The technique of puttying “to strip” is that a putty mixture is applied to the surface, then a wide (at least 600 millimeters wide), rigid spatula is pressed against the surface at an angle of approximately 70 - 80° and passed along the surface.
With this method, excess putty is “ripped off” from the surface, and small irregularities below the level of the spatula are filled with putty mixture,” Bortnikov explains the intricacies of the technology.
When using, for example, vinyl wallpaper, glaze or medium gloss paint, the putty is applied to the surface in a layer of up to 1 millimeter and smoothed with a thin, elastic spatula (at least 600 mm wide, but it is better to use a wider spatula).
Puttying is performed using a bright lamp (spotlight), the light from which is directed at an acute angle onto the surface in order to see irregularities. After the putty has dried, grind it to remove small burrs that remain from the edges of the spatula. If necessary, the puttying operation is repeated, the expert explains.
For finishing puttying of the surface, putties based on gypsum or polymer binder can be used. Polymer putties can be ready for use, that is, just open the container with putty, mix the contents and you can use it.
“Gypsum-based putties require experience and skill because you need to apply and work the mixture fairly quickly, otherwise it will set. Polymer putties allow you to work more measuredly.
In addition, polymer putties prepared from a dry mixture retain their properties and can be used for 72 hours, provided that the container with the product is closed.
Ready-made polymer putties retain their properties and can be used for several months, but it is also necessary to hermetically seal the container with the product,” the agency’s interlocutor points out.
The cost of putties ranges from 200 to 1.3 thousand rubles per 25 kilogram, depending on the quality and purpose.
On average, materials for rough finishing will cost 6 thousand rubles per square meter.
We continue to repair the walls with our own hands
Repairs are, of course, expensive. After all, you need to decide on a palette of walls, then choose a floor for them, I would like to hang beautiful ceilings and lamps for them.
And plumbing and electrics are generally on guard... How to inexpensively make repairs in an apartment? Calmly! Don't panic! Builders have come up with several “tricks” that will help update and modernize your nest at a very reasonable price.
1. Instead of wallpaper - decorative plaster.
It is especially suitable for those who have small children or animals in the house. You can draw on this coating, smear plasticine, and scratch it.
You can really wash and peel off everything from it without damaging the appearance.
“But mainly, plaster is durable,” says builder Oleg Zyabnev.
– Mineral, for example, can last up to 30 years, silicone up to 60 years, and polymer in general up to half a century. The same cannot be said about wallpaper. The most reliable ones will last a maximum of 20 years.
There are a lot of plasters and, in general, this pleasure is not cheap. But among this material you can also find inexpensive “candy”. For example, textured plaster.
– It comes in several subspecies: “Lamb” (has stone grains of different sizes), “Fur Fur” (the surface is rough, in the form of a slight “hairiness”) and “Bark beetle” (resembles the surface of corroded wood).
The cost per square meter starts from 250 rubles. Agree, a worthy competitor to wallpaper.
2. Ceilings – suspended.
The question of choosing a stretch ceiling or painting arises quite often. The main thing is that it is beautiful, practical, and even cheap.
“Stretch ceilings can be installed in just a few hours,” continues our expert. – Preparatory work is minimal, and after installation there is virtually no dirt or dust. Before painting, the ceiling must be cleaned, primed and plastered.
In addition, a suspended ceiling made of PVC can prevent leaks and save from flooding, as it can withstand a large weight of water.
It does not require special care and is durable to use.
As for the price, a square meter of stretch ceiling with installation will cost from 250 rubles.
Paint will cost about the same, but it will be a lot more hassle. So stretch ceilings are becoming increasingly popular. Well, it’s very convenient and practical.
3. The optimal floor is laminate.
It is quite difficult to answer the question “which gender is better.”
It all depends on your budget and personal preferences. First, let's look at all the options.
– Solid boards are universal and suit almost any interior. Durable - up to 50 years, but reacts sharply to the indoor microclimate: temperature and humidity.
Its cost reaches 9 thousand rubles. per square.
– Block parquet – you can create different designs from blocks.
It lasts up to 50 years and requires a high-quality subfloor. The cost per square meter is about 5 thousand rubles.
– Parquet board – the material is already sanded and varnished. The service life is short - up to 20 years maximum. Price – from 2 thousand.
rub. sq. m.
– Cork flooring is warm, resilient, pleasant to the touch and useful for walking. The main disadvantage is that it is easy to damage. Serves up to 15 years, costs from 2 thousand.
rub. sq. m.
– Laminate – wear resistance, extreme ease of installation.
There is a “but”: he is afraid of water. Service life – up to 20 years. Costs from 300 rubles per square meter.
– Natural linoleum is an environmentally friendly, warm and easy-to-install and maintain material. Lasts up to 30 years, but is very unstable to alkalis.
Price – from 700 rub. per sq. m.
– PVC linoleum – unlimited choice of colors and patterns. Very economical coating. There is a big disadvantage: the coating is artificial, so it can cause an allergic reaction.
Service life up to 7 years, cost – from 500 rubles. sq. m.
– Carpet is a cozy soft material.
Does not require subfloor preparation. However, do not forget that this is a large dust collector. Therefore, such coating should be cleaned carefully and often.
It lasts a short time - up to 5 years, costs from 500 rubles. sq. m.
In general, laminate won in our rating. It is optimal in price and has no obvious disadvantages. You should wipe it with a slightly damp cloth, and it will be grateful to you for this for many years.
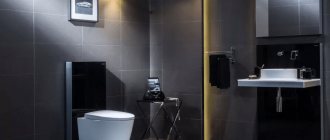
4. Hide the side of the toilet in the wall.
A wall-hung toilet looks more beautiful than a floor-standing one.
All valves, pipes, etc. are hidden in the wall into which the installation is built. And in that place you can hang shelves, a closet or a heated towel rail. Which already gives the bathroom an aesthetic appearance.
“In a wall-hung toilet, the flushing system works much better due to the design features,” notes Oleg Zyabnev. – In addition, all such systems have a double flush button, which allows you to waste less water.
In addition, a wall-hung toilet takes up less space, even though the installation is attached to it.
It is usually more than 20 centimeters wide, while a regular toilet stands further from the wall, and its tank is wider.
By the way, many are sure that if, for example, a pipe breaks, they will have to break the wall where the barrel is walled up. Nothing like this! The hole where the button for the wall-hung toilet is located provides access to the flush mechanism.
5. Throw out the closet and make a dressing room.
Most of the people in our country live in small apartments, where every centimeter counts. Therefore, issues of size often play a decisive role. The cabinets have outlived their time.
They are bulky and uncomfortable. You can’t go in and change clothes in front of a mirror. Therefore, it has become fashionable to have dressing rooms in apartments.
– The smallest dressing room can have an area of 1.2 - 1.5 square meters.
meters,” says the expert. – This room is also often made into a corner room.
This option is even more spacious than a rectangular one of similar size: with an equal area, the length of the sides on which shelves and storage systems can be placed will be greater.
Construction and furniture stores sell inexpensive wardrobe systems. You can meet 20 thousand. On one side, hang men's things, for example.
On the other hand, women's. And in the middle there is a mirror. What a beauty!
Throwing out the closet and making a dressing room Photo: Mikhail FROLOV
6. Instead of chandeliers - spotlights.
This advice is only useful for those who want to save money.
Large chandeliers will certainly remain classics forever. No matter where you hang them, the room will instantly bloom. However, their prices are rather high.
You won't find anything for less than a thousand rubles. Therefore, if you don’t have the opportunity to fill your entire house with high-quality lamps, you can purchase spotlights. But again, you need to understand that they can only be installed on suspended and suspended ceilings.
– The ideal lamp for a suspended ceiling would be an LED lamp (40 W), which practically does not heat up and will not damage the canvas.
LED lamps are able to provide an uninterrupted flow of light of various colors, which does not tire the eyes or impair vision.
You should choose them based on personal wishes and purposes of use. Their cost varies from 100 rubles.
To ensure the safety of the ceiling, the following rules should be followed:
– The power of the light bulb should not be more than 50 W;
– The presence of a mirror part to reflect light;
– No sharp ends that could damage the ceiling during installation.
7. Batteries – bimetallic.
Bimetallic batteries offer good heat dissipation, low weight, and elegant design. And if you correctly calculate the number of radiator sections and its power, they will serve faithfully for many years.
The main advantage of such batteries is that they can be regulated independently. Is it hot at home?
No problem! I turned up the valve and it became cooler. Or, on the contrary, it was frosty outside. Once - and made it hotter.
– The main advantage is a long service life. They can last up to 50 years.
In addition, radiators of this type have significant heat transfer rates. The aluminum outer casing promotes rapid heat distribution in the room.
In the most standard models with a distance between the axes of 500 mm, the heat transfer is up to 190 W, which is much more than in single-element radiators.
These batteries are distinguished by their high durability. This property is achieved due to the steel core, which not only resists high pressure, but is also not afraid of strong hydraulic shocks, which are characteristic of central heating systems.
It is better to take radiators of at least 10 sections for an apartment or house (for a room from 10 to 30 square meters). Otherwise, the heat can be reduced.
But you certainly won’t freeze. They cost more than conventional batteries - from 7 thousand rubles. But you shouldn’t save money on this matter.
Stages of wall repair in an apartment
Wall repairs are carried out after basic repairs to the floor and installation of the false ceiling frame, but before installation of the ceiling sheathing. This will allow you to cover the uneven ends of the wallpaper with the ceiling plinth. An exception is covering the ceiling with solid laminate or MDF boards followed by wall cladding: in this case, wall cladding will provide additional support for the ceiling and increase the overall strength of the room cladding.
The stages of repairing walls in an apartment are as follows:
Cleaning
When cleaning walls, you need to take measures to protect against dust: a respirator, goggles, a hood with a cape, closed clothing, gloves.
If surface stripping under wallpaper is carried out, the following must be observed:
Complete cleaning for replastering is carried out after generously spraying the walls with water and keeping it indoors for 24 hours.
Remove with metal shea
with a wide spatula, in layers. The remains are cleaned with a drill and a cord brush. The walls must be cleaned down to the brickwork or concrete monolith.
Drying and disinfection
Dry with a construction hairdryer, then impregnate with a deep penetration primer with biocidal additives. Rusts (seams between slabs) are foamed in layers using a polyurethane foam gun with a long spout.
Plaster
First, beacons - plaster markers - are mounted on the wall. Install them vertically. The pitch is slightly less than the width of a metal spatula, but there should be a beacon in each corner.
The next stage is starting (primary) plaster. It is produced using a cement-based starting plaster mixture. Knead in portions according to the instructions and plaster the spaces between the beacons alternately from bottom to top; level with a spatula along the beacons.
The corners are passed either with the angle of a spatula, if it is at 90 degrees, or with a special corner spatula in the form of a triangle with a right angle at the apex and sides slightly larger than the installation pitch of the beacons. The latter method allows you to get perfectly even corners without having to be a qualified plasterer.
After the starting plaster has dried, the finishing plaster is applied - white, gypsum-based. The normal thickness of the finishing plaster layer is 1 mm; the thicker one will then peel off, so thicker coatings are applied in layers, each subsequent layer after the previous one has completely dried. But multi-layer finishing plaster is not so durable, so the evenness of the walls and corners must be achieved at the starting stage.
Lathing
Wall sheathing can be made from either U- and C-profiles or wood.
Metal wall sheathing is more of a tribute to fashion, since the wall sheathing is loaded several times less than the ceiling.
Excellent sound and heat insulation will be provided by foam plastic slabs laid in the cells of the sheathing. Fiber insulating mats are not suitable for walls: in a vertical position they will soon shrink and cease to perform their functions.
In the sheathing you need to immediately lay cords for sconces and signal cables: television, telephone, Internet. Possibly – split system refrigerant pipelines; even with wooden sheathing, the usual height of its beams, 40-80 mm, completely allows them to be installed. But laying power wiring in the sheathing is unacceptable!
The sconce cords should extend outward and end with plugs; It is permissible to combine several lamps into one group and provide them with separate switches.
Sheathing and cladding
The walls can be sheathed with laminate, MDF, plastic lining, wooden panels or slats, plywood painted with stain. In addition, no one has canceled the leveling of walls with gypsum board for subsequent painting or finishing.
An economical and aesthetic option for cladding - half-height or full-height, and whitewash or wallpaper to the top. This provides the following benefits:
Completes the wall covering, and with it the repair of the walls in the room, installing door and window frames on glue with self-tapping screws or small nails. At the same time, if provided, decorative overhead ribs are also installed.
When tiling (tiles, porcelain stoneware), you need to remember that the underlying surface must be no less durable than the facing material.
If, for example, you line a wall with artificial stone on gypsum plaster according to all the rules, it will soon begin to fall off along with the layers of plaster.
Therefore, the starting plaster for stone cladding is reinforced, and in any case, the lining is made using the starting plaster, and the finishing plaster is applied after.
Wallpapering
The thinner the wallpaper we choose, the smoother the walls should be so that bumps from plaster particles do not appear on the surface. However, you can choose decorative or decorative wallpaper. The first group includes paper, smooth and embossed, vinyl and textile products. Fiberglass wallpaper, etc. Raufazer (for example, with wood chips between layers of paper) is painted with acrylic or latex paint. Paper wallpaper requires applying glue only to the underside and allowing time for the material to absorb the glue and soften. In turn, fiberglass and non-woven wallpapers are laid on walls coated with glue.
If you use patterned wallpaper, you need to pay attention to the report, i.e. the distance between the repeating element - it cannot be shifted in subsequent cut sections. To make the pattern look good, you need to purchase wallpaper with a reserve.
Attention! After applying wallpaper to the wall, you need to level the surface and remove air bubbles using a brush or wallpaper spatula.
Do-it-yourself repair of old walls
Useful tips and tricks to help you repair old walls yourself. Stages of work, finishing materials, application technologies and tools
Repairing walls is one of the main ways to put your house or apartment in order, because it is this element of the room that our eyes most often direct.
For this reason, increased demands are placed on methods and materials for wall finishing.
It’s not difficult to disguise minor flaws in the condition of the ceiling or floor, but this trick won’t work with walls.
Experts recommend: before starting work, clearly define the repair technology, carefully study it and select materials that are ideal for your conditions.
What are the walls?
Internal walls are partitions that divide the room into separate zones - rooms. There are two types - load-bearing and self-supporting. The former take on the load of the house structure, therefore any redevelopment with them requires separate permission from the relevant authorities. As for partitions, they are much easier to work with - move, remove, partially eliminate, create an opening, etc.
To find out which walls are load-bearing and which can be worked with, you should use one of the following methods:
- get acquainted on the Internet with the database of load-bearing walls of standard series of houses - panel and block houses were previously built according to a standard scheme;
- thickness measurement in a panel house: partitions – 80–100 mm, load-bearing – 140–240 mm;
- if the house is brick, then the size will be a multiple of the size of the brick: 120 mm × 2 + thickness of the vertical seam (on average 10 mm) + thickness of the finishing layer - thus, the thickness of the load-bearing surface starts from 380 mm and above;
- invite specialists who will independently take measurements.
Important! The thickness of the wall in the house is affected by the finishing - a layer of plaster, plasterboard covering, etc. Therefore, if the apartment has previously undergone renovations, then before measuring the thickness of the “treatment” is determined.
The types of walls are taken into account without fail, since this directly affects the type of intervention permissible in relation to a specific surface.
Do-it-yourself major wall repairs: when necessary
In most cases, we start working on walls only after major renovations. Cosmetic interventions every few years do not count. If you follow the advice of experienced builders and finishers, the first signs of a major overhaul are:
Strange sounds when tapping plaster. If, when knocking, the wall begins to sound like an empty drum in at least half of its area, do not tighten it.
The plaster can fall off at any time, and re-pasted wallpaper will not only not hold it in place, but will also become an aggravating circumstance. Wet external walls. Have you noticed such a problem?
The reason is the leakage of the walls and their constant contact with the street environment.
A simple replacement of drywall or wallpaper is not enough; you need to work closely with the plaster. Worn-out electrical wiring. To replace communications you will have to make a lot of effort.
If the problem is local, then you can get by with local repairs, but in the case of laying new electrical wiring throughout the entire apartment or room, it is better not to save money and do two things at once.
What paint to paint the walls
Latex paints are more wash-resistant and more difficult to stain than emulsion and acrylic products. This is the most commonly used method for finishing walls. Many homeowners paint the walls themselves, which usually doesn't cause any major problems. When choosing paint, there are several factors to consider:
— conditions of use of the premises;
— resistance of the coating to dirt;
- resistance to fading.
Paints are divided into three main groups:
- emulsion - the cheapest product, characterized by low resistance to washing, intended mainly for auxiliary premises;
- acrylic - they are a little more expensive, but also more durable, can be used under standard conditions;
- latex - they are resistant to moisture, they are more difficult to get dirty, therefore they are recommended for kitchens and bathrooms.
Painting methods
The surface to be painted must be smooth and clean. In order to evenly absorb and facilitate the application of paint, it is necessary to prime the wall. Painting work is carried out at a temperature of 15-20 ° C, humidity 60-80% - in such conditions the paint does not dry out too quickly, which will allow you to apply and carry out any corrections evenly. Most products require mixing after opening the package. It is most convenient to apply the paint with a roller or use a narrow brush to apply it in corners and hard-to-reach places. Large surfaces can be painted using a gun or painting unit.
Painting begins from the ceiling, applying paint with a brush along the joint with the wall. The ceiling is painted with stripes perpendicular to the window. For walls, paint must first be applied to the edges and in hard-to-reach places - near sockets and connectors. Most often, two layers are applied, the second can be applied after the time specified by the manufacturer. Most paints reach full wash resistance after 2-4 weeks.
Repair of old walls in a private house: stages of work
After determining the scope of work and purchasing the necessary finishing materials for the walls, you can begin repairs. The process includes several stages:
Dismantling old wall coverings. The technology for removing old coating depends on the characteristics of the material that was previously used. Preparing the wall for finishing and leveling the surface.
At this stage of work there is no need to save or rush, because the final result depends on it.
Using a plumb line and level, check the condition of the wall horizontally and vertically. Before finishing, it is necessary to apply a layer of primer: it guarantees uniform absorption of the new material and ensures perfect adhesion to the surface.
For priming, use a roller or a construction brush.
Only after the wall is completely dry can you begin finishing. Applying finishing material. The technology of work largely depends on which repair method you choose.
In practice, most often the walls are painted, covered with wallpaper, and also covered with ceramic tiles, decorative plaster or natural stone.
Procedure
It is always easier to work with new surfaces than to restore them. When repairs cannot be avoided, the work must be performed according to a certain algorithm. Each action will not only renew the surface, but also create real support.
Surface condition assessment
Secondary market housing is famous for its sad condition. Many people decide to buy an inexpensive apartment and invest in renovations themselves. In most cases, this is a justified decision, even if there are very uneven walls.
Assessment of surfaces includes analysis of differences (in old houses they can reach 10–15 cm), the presence of cracks and chips. It is also important to assess the reliability of the foundation. If this is the first floor, then there is a risk that the partitions will be in terrible condition, since over a long period of operation, the load of the upper floors has negatively affected the structure of the walls . And this is already fraught with destruction in the literal sense of the word. Therefore, it is recommended to remove all old coatings for inspection. If deep cracks are found on the surface, then you cannot do without the help of specialists. The fact is that here you need to install special brackets that will prevent destruction.
When the texture of the wall allows you to avoid contacting professionals, you can begin cleaning the surfaces.
Removing old coating
Of course, in this case you won’t have to break anything, but you won’t be able to do it without some skill. Depending on what exactly the work area is covered with, certain tools may be needed.
The options may be the following:
- Wallpaper. To clean, you will need a bucket of water and a spatula. The paper is well moistened using a spray bottle, roller or regular washcloth. The water is allowed to soak in for 10–15 minutes, after which a corner of the roll is pryed up with a spatula and removal begins.
- Whitewash. If the layer is thick, it will not be possible to wash it off. Therefore, it is removed in the same way as wallpaper.
- Old paint or plaster. In Soviet apartments, paint was often used as a coating for walls. It was applied in a thick layer, so it can only be removed with a chisel and hammer. Similar tools are used for plaster if it is not removed by soaking.
Elimination of defects
As soon as the inner wall is cleared of the old coating, it is necessary to check how many defects there are on it - drops, cracks, crevices, etc. For elimination, you will need the following tools and consumables - leveling mixture, spatula, reinforced tape.
The whole job looks like this:
- the damaged area is completely cleaned and degreased;
- if the difference is up to 2–3 cm, then leveling is carried out using putty (it is recommended to carry out the work using beacons);
- when a crack is repaired, it is first well moistened with water, and then reinforcing tape is placed inside and 0.2–0.3 cm of putty is applied;
- It will take 2-3 hours for the wall of the house to completely dry, and then this area is cleaned using a grinding machine or a block.
Important! The mixture is applied not only to the defect, but also to the nearby surface.
Alignment of walls
To level the walls of a house, you need to use a level to calculate how large the differences are. If they are more than 3 cm, then it is better to use drywall. Sheets of material allow you to work with large areas and create a perfectly flat surface. True, such preparation of the walls “eats up” the usable area, since it requires the installation of a frame made of metal profiles.
Curved walls are leveled in several stages:
- A primer is applied to the cleaned surface, which increases the level of adhesion, making the wall texture more susceptible to subsequent treatments. The primer also strengthens the base and protects the surface from the formation of fungus and mold.
- Next, 1 cm of putty is applied. This procedure is performed three times, with each layer allowed to dry for 10–12 hours.
- After this, the internal walls are plastered. This final treatment creates a perfect surface that is ready for painting or wallpapering.
To check the evenness of the surface, apply the rule (2 meters). If the wall cladding was carried out in accordance with all the rules, then there will be no gaps left between the surface and the tool, or they will be no more than 2 mm.
Useful tips from experienced finishers
To paint walls, you can only use special paints based on acrylic or water-based solutions.
Try to give preference to products from well-known manufacturers: this will provide the coating with visual appeal and long-term operation.
The paint is applied with a roller, evenly and only in one selected direction.
Use decorative plaster as a finishing material only if you know the technology well and have some experience. Otherwise, it is better to entrust the work to professionals.
A layer of primer is first applied to the wall, and after it has dried, you can begin working with a trowel or spatula.
Using tiles or stone as a finishing material provides additional moisture resistance, hygiene and an attractive appearance.
The wall is pre-cleaned and primed, and then the tiles are laid on an adhesive or cement mortar in a given proportion.
Preparatory stage
Think about design and redevelopment
At the very beginning, decide what you want to see in your apartment: what its design will be, the arrangement of furniture. Where will there be blind and where will there be light zoning partitions? To ensure you don't forget anything, get your ideas down on paper or in a spreadsheet. Consider your long-standing desires: when else can you make them come true if not now? This could be replacing old windows, installing heated floors, or remodeling.
Decide what you are not willing to give up. Often, it is precisely these fundamental desires that people start from when they think about the arrangement of furniture and other details. For example, the decision to turn a wide window sill into a relaxation area may entail remodeling the kitchen unit. Adjust the written points by comparing them with real possibilities.
Write out the work plan
List everything that needs to be done. In the next column or a separate table, make notes: a shopping list, the approximate cost of materials and services of craftsmen.
Create a budget for the entire project
At the same stage, draw up a schedule for the delivery of materials. Downtime will increase costs, and disruption to the sequence of work will negatively affect the result. If you are out of the previously planned amount, decide what you can save on and what you definitely can’t. For example, inexpensive wallpaper is easier to replace after a couple of years than cheap linoleum that has become unusable.
For an approximate budget, it is also wisest to seek help from designers, architects or builders. They will help you estimate the amount of work and funds that will have to be invested. They will determine the state of utilities, the degree of wear of the screed and, based on the data obtained, will develop an estimate that will be useful even if the repairs are planned to be carried out on their own. Such services are not free, and there is a temptation to refuse to assess the condition of the apartment, hoping for chance. This decision can hardly be called reasonable - you will have to be prepared for unpleasant surprises and, as a result, unforeseen expenses.
How can you reduce costs?
We offer you 10 tricks that will help reduce the cost of the project with almost no damage to the future interior.
Walls almost always have to be leveled—builders rarely achieve strict verticals and right angles. Quite a lot of plaster and putty may be required. You should not choose cheap mixtures - there is a very high risk that low-quality materials will soon begin to crack and crumble. If the walls are too far from the ideal geometry, it makes sense to abandon plastering them altogether and level the surfaces with drywall. Most likely it will be more profitable.
Once you have a final budget and list of changes, you can begin to take action.
Buy materials with a small (about 10%) reserve. Additional trips to the store or to the market are fraught with time and financial losses. Unused surplus can then be returned to the store using a receipt.
Find workers
Some processes are too labor-intensive and will take a long time to complete on your own. For example, dismantling partitions. No special qualifications are required for this, so people will be found quickly. But sometimes it’s better to entrust the installation of plumbing, wiring, and heated floors to specialists.
Finding them is not an easy task, and it is difficult to give any recommendations. Those for whom savings are important choose private teams, usually relying on word of mouth. That is, recommendations from those who have already collaborated with these masters and are satisfied with the result. Most likely, you will have to cooperate with such masters only by verbal agreement. If something goes wrong, it will be impossible to obtain compensation from them.
isosoft insulation what is it
Official construction organizations are more expensive, but the relationship between them and the customer is built on the basis of a contract, which clearly states the rights and obligations of the parties. In addition, according to the consumer rights law, they provide a warranty for a period of one year.
Give builders information in advance about all plumbing fixtures and their features. At this stage, a detailed design project from an architect-designer will be very useful.
Source
Direct repair: leveling and plastering of walls
Leveling and plastering walls is the most important element of preparation for repairs
For leveling, you can use both plastering the walls and covering them with various building materials, for example, sheets of plasterboard or gypsum fiber, various types of panels, etc.
If your choice is plastering the walls, then you need to take into account several important points. Leveling plastering is carried out using special beacons. Layers of plaster should be applied sequentially, only after the previous layer has completely dried.
In order for the plaster to adhere better to the primary surface of the wall, you need to artificially make irregularities on it - for example, you can make notches on a concrete or brick wall with an ax.
If the condition of the primary wall surface does not allow applying the required layer of plaster, then fixing a reinforcing mesh to the wall using self-tapping screws can solve this problem. How and what is the best way to plaster walls made of shell rock, brick, concrete and wood, read the link.
The first layer of classic plaster is done using the spray method. The resulting surface is not leveled.
The second layer is soil. If the wall is very uneven, then there will be several layers of soil. The first of them is done using the spraying technique, and the next ones can be done using the spreading technique.
If the wall curvature is very large, special metal profiles are used for leveling. The final layer is the covering. This layer should be about 2-3 mm.
Plastering walls with gypsum mixture - photo
If plastering is done with a gypsum mixture, then it is spread with a wide spatula, from bottom to top, successively applying and leveling the plaster solution over an area of about 1 sq.m.
Smoothing of this plaster can be done with the same solution, in a thinner layer. Gypsum plaster does not allow for leveling along the beacons, but in the final finish it can be made glossy.
After the plaster has completely dried, its surface is sanded with sandpaper.
After this, the walls are puttied - with rough and finishing putty. After finishing putty, they are sanded again. In this form, the walls are suitable for further decoration - paint, wallpaper or decorative coatings.
Assessment of the condition of internal walls
The scope of repair work depends, first of all, on the condition of the plaster that usually covers the walls. The most common defects are uneven surfaces and small cracks. Repairing them will not be too troublesome. However, there are also more serious structural defects. For example, when too little cement or lime binder was used to make the plaster and its surface is not hard enough, or when the plaster layer is peeling off from the base of the wall and it may be necessary to completely remove it and apply a new layer.
To assess the condition of the plaster, you do not need to hire a specialist - all surface defects will be visible to the naked eye, and unevenness can be identified by applying a long 2-meter rule to the wall in several places and at different angles. Gaps and bulges under the lath should not exceed 2 mm - then the plaster can be considered fairly smooth.
They also check the hardness of the plaster layer by scratching the surface - the absence of deep scratches and chips on the surface means that the coating is durable. You can check the adhesion of the plaster by knocking on the wall - a dull sound or bulges that bend under hand pressure indicate that the plaster is moving away from the wall.