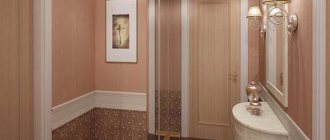
Ideal smooth walls look beautiful and expensive in themselves. Nowadays, there are a great many options for finishing a room, but leveling with putty is assumed in most of them.
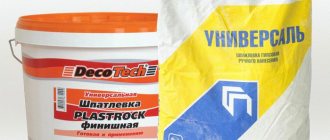
There are a variety of mixtures on the market, powder and in paste form; to correctly select the right option, you need to take into account some aspects, which we will discuss below.
Which mixture to choose
Based on the binders in the mixture, manufacturers distinguish 4 types of products:
Cement putty. This composition can withstand an abundance of moisture, therefore it is suitable not only for dry rooms, but also for bathrooms and kitchen aprons. The dried mixture has a fairly dark gray tint, therefore, if you plan to paint the wall, several layers of paint will be required.
Gypsum is designed for work in rooms with a relatively stable climate. It does not like changes in temperature and moisture, it can crack and absorb liquids, therefore it is intended only for the interior.
This type is used most often due to its affordable cost and stability during shrinkage. Available for two stages: starting and finishing (fine). It differs in the structure of the final coating. Mainly used for puttying walls under wallpaper.
Acrylic compositions, like cement ones, are suitable for external and internal work. They have the best properties, but their price is high.
Latex putties are mainly for interior work, but they withstand moisture well and are suitable for bathrooms and sometimes outdoor areas. The shrinkage is small and requires some skill.
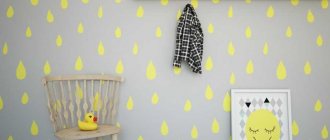
Making a textured wall from putty, paint and decor
Today we’ll look at how to make a beautiful wall using putty and paint. In this case, the wall turns out to be textured, the surface is somewhat reminiscent of slices of cheese, ripples on the water, or the lunar surface with small craters, whichever is more convenient to compare with. For practical reasons, I recommend using this method of decoration to first decorate one wall, for example the kitchen wall, in the dining area.
The method and material are especially suitable for those who have a gas stove at home and the wallpaper quickly gets dirty due to soot, but want coziness and comfort in the kitchen. It would also be good for a dacha, where the stove is heated with coal or wood. For a country house, when the room has a fireplace. Where the whitewashing and painting of walls has to be done regularly. And for a number of reasons, other materials are not suitable.
This method of decoration has its pros and cons.
pros:
- Perfect replacement for wallpaper. For the next few years, you definitely won’t have to update them every year, which is undoubtedly convenient for those who have tension over time, have a limited budget for repairs, or, for example, find it difficult to glue wallpaper alone.
- In order to update a wall, it is enough to refresh it as needed with a layer of water-emulsion paint, painting it in the same color or any other color.
- Giving a new look is as easy as shelling pears - just remove the old decor from the wall and add new elements.
- Scratches, damage from animal claws, small cracks and cracks can be easily decorated or disguised in just five minutes. It is enough to apply a spot-on new layer of plaster and then paint.
- Putty-paint fits well on lightly washed whitewash, and works great on previously painted walls. You can paint it with enamel, if desired, and then wash the wall with a brush. In the latter case, as an alternative to tiles, if it is not possible to lay them in this place.
- A variety of designs and textures, literally from improvised means, give complete freedom of creativity.
- The method is simple to implement, it is relatively easy to do everything alone, or create together with children.
And minus:
Having covered the entire wall with putty, and even more so all the walls in the room, if you suddenly don’t like the result and decide to return to wallpaper, you can only hang new wallpaper after removing the putty and paint. Partial or complete, depending on the thickness of the layer. Therefore, as I said earlier, I recommend starting with one wall, for example a small area above the table.
*This is not decorative plaster for interior work, which is sold in finishing materials stores, but putty-paint. Although, there are some similarities... That is, it will not shine beautifully with pearlescent gloss, and it is not covered with wax, and it is easier to apply. In my example, the wall will have a matte white and blue surface. A budget option for decorative plaster, but it’s up to you.
Materials and tools:
- white putty-paint (a lot, depending on the thickness of the layer and the size of the wall);
- wide construction spatula with a smooth edge or a tool for applying plaster;
- narrow spatula or tablespoon;
- plastic film, scissors, masking tape;
- gloves;
- color scheme;
- water-emulsion paint;
- paint tray, or container for diluting and coloring paint;
- brushes or roller for faster painting.
Optional:
- roller to create a spectacular texture;
- artificial flowers and grass for decoration. You can replace them with natural ones, such as fern leaves (maple leaves, gypsophila with small flowers, spikelets), to create texture on the wall. Gild with paint, glitter;
- PVA glue, for gluing decor to the wall.
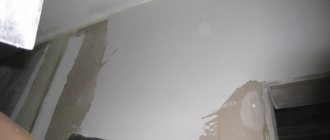
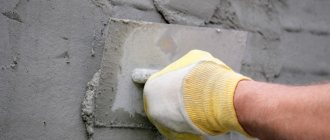
1. Preparing the wall . We completely remove the old wallpaper. If the wall was previously painted with a water-based emulsion, or the old whitewash remains on it, walk with a wet rag over the entire surface of the putty. Leave it for a while and let it get wet so that the putty will adhere better. We glue masking tape to the baseboard. To protect the floor from paint splashes, we also lay out plastic film along the wall.
2. Making an invoice
Using a spoon or narrow spatula, spread putty-paint onto a wide spatula. Apply with light short movements, literally barely touching the wall, a thick layer of putty, about 1-1.5 cm, and spread it very slightly over the wall, lightly pressing on the spatula with your hand. We hold the tool almost parallel to the wall, and move it that way, as if removing the top layer.
This movement, without short strokes, leaves a beautiful pimply mark after the first pass.
The thicker the layer of putty, the more beautiful the effect, but the greater the consumption, of course. If you run a spatula over the same place two or more times, or smear the putty on the wall, the entire effect of large bursting bubbles will disappear... The most beautiful results are obtained on a thick layer, with light movements of the hand.
Texture on magnification
It didn’t work out beautifully the first time, no problem. We take a small piece of plastic film, about the size of a bread bag, and place it on a layer of putty-paint. Smooth it along the wall with your hands. And very quickly we tear it off the wall. Experiment with tack speed, pressure, and smearing movements of the spatula to get the best effect.
There will be nicks and characteristic ripples on the surface of the putty layer, which is what we need. We repeat the action until the result suits us.
By making circular movements with your hand and patting your palms on the wall, you get the effect of a mud wall. Or you can leave children's handprints as a souvenir. I used a variety of techniques. Basically, with crumpled plastic film (No. 2, 3 in the photo below).
Photo for example. A drawing that is obtained by using various objects.
dry thoroughly . Especially if you need a texture with pointed edges and teeth, in a small hole, like cheese.
For the cheese effect, I decorated this wall with oil-based putty. I applied it with a small spatula, and then, after it had completely dried, I painted it with white enamel (it glares in the photo, the surface is glossy). Such a wall can be washed with a brush and chemicals. Even three years later, the wall is still like new, after repairs, nothing has cracked or fallen off.
During subsequent painting of the putty-paint with water-emulsion, part of the pattern will become wet and smeared, and the holes will be painted over. Therefore, the more prominent the design is initially, and the drier the wall is before the first painting, the better.
Wide spatula and crumpled film, plaster roller
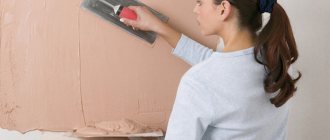
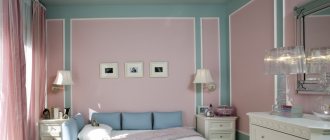
4. We color and paint
Add the selected color to the water-emulsion white paint. Can be painted with ready-made colored paint. I have a soft blue wall color in my kitchen, I used a violet color. Proportions by eye, approximately 1:10 or less. We paint the wall with a slightly wrung-out fur roller, and difficult areas with a brush. Then let the paint dry, this will take about a day. Carefully remove the tape and film from the floor. At this stage you can stop, everything is ready.
Or continue with the decor, in accordance with your idea.
In the photo behind me: the wall after painting. My husband and I celebrate finishing work with an orange. 
The same wall two years later, after another painting.
5. Decorating
You can use ready-made wall decor from the “everything for creativity and floristry” store. Or make the decoration yourself. We place precise markings on the wall where the decorative elements will be located. Apply a little PVA glue and glue the decor to the wall. Ready!
Photo for example. Butterfly decor
Fern leaves - covered with gold spray paint. It is better to do painting outside, for example, on a balcony, in a place where there is a flow of fresh air and good ventilation. Place the sheet on paper and paint one side, then the other. Next. Allow to dry thoroughly. Cover one side of the sheet with varnish with glitter from a can, or small areas with glitter. Let dry.
Large decorative elements look good when there are only a few of them on the wall, 1 piece each. per m2 of wall area.
You can also, as an option, hand press leaves (painted gold leaves, and leave them on the wall) into the wet plaster if the wall is white without being painted in color. Lightly tint the protruding veins with a dry sponge and gold paint. With bright curtains, such as coral curtains, this pattern looks very impressive and cozy.
I personally haven’t experimented with colored decor and flowers, but who knows... Perhaps with an artificial soft blue or white and pink hydrangea it will turn out even better than a wall with no decor at all, or a wall with a golden fern. Try it!
I wish you a pleasant renovation and cozy home warmth in your rooms. After all, it is so important when there is a place in the house where you want to return after work, enjoy receiving guests, and spend time with loved ones.
Features of the material
One of the most important factors for a good result is not only the cost of wall putty, but also the speed. The prepared mixture does not tolerate being left the next day and changes its properties quite quickly, so you should always use all the prepared material at once, trying to avoid the formation of joints in visible places.
If you have to postpone work in the middle, the edge of the treated surface is moistened with water to improve adhesion to the fresh layer.
The easiest option for puttingtying walls with your own hands is plasterboard. It does not require lengthy preparation, being smooth and homogeneous in itself. All that is required is a layer of primer before finishing, as well as alignment of the joints between the sheets.
Possible examples
Using the Internet, on special construction sites you can find a large number of photos of decorative putty made by yourself.
Having chosen the combination that interests you, you can familiarize yourself with the stages of its implementation, with the list and quantity of materials used and their cost. All you have to do is reproduce the masterpiece you saw in your room and add individual uniqueness to it.
Secondary surface preparation
If the room has already been renovated, you have to take the time to remove old paint, lining or wallpaper.
The worst option is old oil paint. Here it will need to be completely removed, which often causes the layer underneath to deteriorate.
Also a problem is poor old plaster, which makes it necessary to remove it all the way to the wall. These procedures create a lot of dust and debris, so before starting work you need to thoroughly clean and prime everything.
Varieties
There are types of these compositions:
- Mineral putty;
- Silicate;
- Silicone;
- Acrylic.
To find out which decorative putty is better, it is important to focus on the characteristics of these mixtures and their intended purpose.
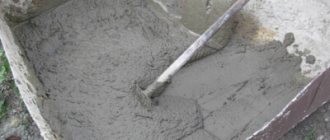
Preparation of the solution
If you choose a mixture in powder form, it is important to mix it correctly first. A rubberized or plastic bucket and a construction mixer will do. Mixing the composition with a mixer is carried out at low speeds to avoid splashing and the formation of bubbles.
The container is filled with water about a third, and then the powder is poured in at a ratio of 1/1. After whipping, the mixture is allowed to stand for a couple of minutes and the process is repeated.
Insulators ShF-20G- Production of plastic for finishing
How and how to caulk a timber house with your own hands: materials and step-by-step instructions
The quantity is calculated from the forecast of costs by the master within no more than half an hour. Then the mixture loses its properties and a new one needs to be prepared. Therefore, the price of wall putty will ultimately greatly depend on how economically the solution was used.
Undeniable advantages
- Can be applied to surfaces made of any materials.
- Removes uneven surfaces on the wall.
- If you use decorative putty according to the instructions, it will be resistant to mechanical influences.
- Waterproof.
- High resistance to temperature changes.
- Possibility of producing exclusive designs.
- Breathes due to the porosity of the texture.
- Inexpensive price category.
The final stage
The drying of the surface is determined by the absence of dark spots of moisture on the putty. After making sure that everything is dry, you can prime the wall again and mix the finishing composition. For this, beacons are no longer needed, the solution is simply applied with a thickness of no more than 2 mm, this is enough.
An experienced craftsman can complete the final finish faster, but beginners have to add another step of sanding the surface after drying for a smooth finish. This is usually done with a diamond mesh; the work is dusty, but the result is worth it.
How does putty differ from plaster?
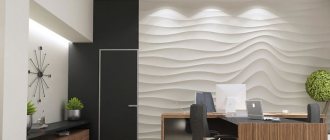
There are a large number of mixtures with which today you can repair steep surfaces. A beautiful finish is obtained by using decorative plaster. It contains organic components: mineral chips, granite flour, cotton or wood fibers. When they are mixed with a binder, a plastic mass is obtained that easily lays on any base in a thick layer and forms a relief texture. The use of special tools allows you to create more complex patterns. All this significantly expands design possibilities, which has a positive effect on the final result.
Putty is needed to prepare surfaces for subsequent decoration (painting or wallpapering). This is her main task. Plaster helps to form a protective layer; it can be used to correct minor defects and hide unevenness. The composition is applied in a thin layer, no more than one centimeter. It dries quickly, after drying a base appears, which is considered the final stage of repair. Next, the decorating process begins.
Putty helps create a perfectly smooth base for subsequent decoration Source rabota.multi-viza.com.ua
You can work with putty and create a beautiful texture. To do this, you just need to properly prepare the base, prepare the composition of the required consistency, and buy the appropriate tools. The concept of “decorative putty for walls” does not exist. There is only the usual leveling composition and a special technique for applying it.
Application of structural putty
When applying this type of material, a certain sequence should be followed:
The wall surface is cleaned of dust and old finishes. The walls are treated with a primer to ensure good adhesion of the material to the wall surface.
The composition is applied to the walls, a pattern and structure are created. The choice of configuration depends entirely on the chosen tool, as well as your imagination.
When applying the composition with a roller, you will get an original velor imitation. In this case, the lining should be completed in half an hour to prevent the mass from hardening.
For certain wall surfaces, the application of two layers of the composition is required to eliminate serious defects, or the decorative design of the wall surface requires complex textures of several tones.
The material applied to the surface may be subject to original coloring. Once the coated surface has dried, you can adjust the existing relief.
Nuances when performing putty work
To ensure high-quality surfaces for wallpaper, the following recommendations must be followed:
For those who are doing work on leveling walls under wallpaper for the first time, it is recommended that you first take a small spatula . It is much easier for them to stretch the mixture layer evenly than for larger ones.
Working with putty is not particularly difficult, however, it requires certain knowledge and skills. Therefore, you first need to watch the video lesson, and then practice applying and distributing the material on any one area of the surface with your own hands.