- Selecting material and tools
- Tools
- Aligning the outer corner
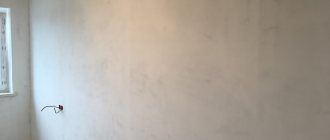
- Leveling concrete walls
Wallpaper is one of the most common types of wall decoration. Thanks to their wide variety, they can decorate any interior. However, wallpaper will look expensive and high quality only if you take care of preliminary surface preparation before gluing.
In this article we will answer the main questions that arise among people who are deciding how to line their walls with wallpaper themselves.
How to putty the walls before wallpapering
We would like to dedicate this article to those new to renovation work.
It often happens that when repairing the walls of their home for the first time, many do not understand why, and most importantly, how to carry out this repair. Plasters, putties, primers - what needs to be done and what will happen if you don’t? Actually the answer is quite simple.
A primer is a material designed to create an invisible film that has good adhesion properties, the so-called adhesion. Thanks to it, plaster and putty will firmly adhere to your walls.
Plaster is a material designed for leveling walls to give them a strictly vertical level. This will help in the future to install tall cabinets along the walls and avoid uneven gaps.
Putty is a finishing material that has a fine grain, due to which the walls are smooth and, after cleaning, you can glue wallpaper or apply paint on them.
Whether all this work is worth doing or not is up to you to decide; we will only tell you about putty work.
Is it necessary to putty the walls before wallpapering? Maybe it makes sense to save money? This question is often asked by those who are faced with repairs for the first time.
Putty work solves several problems:
- level the walls;
- create a uniform tone;
- improve adhesion.
You can do without putty work when putty work was carried out earlier. In this case, you just remove the old wallpaper, prime the surface and start gluing new wallpaper. Of course, in the case when the putty layer was damaged when removing old wallpaper, it is necessary to restore it. All dimples, bumps and cracks should be filled with putty.
- Why do you need to prime walls for wallpaper?
- Which putty is best for walls under wallpaper?
- How to putty walls under wallpaper
- conclusions
Preparing the surfaces
Concrete or brick wall
Before gluing wallpaper on such a surface, you must use putty. In this situation, two stages are implied - applying the starting layer and then the finishing layer. In this case, it is necessary to clean the surface of debris, remove flaking old plaster and remove dust using soil.
Leveling the walls yourself
The starting putty can be applied in a layer as thick as 60 mm in one go. It has a coarse-grained structure and therefore allows you to quickly prepare the surface for finishing. Usually they use a beacon system, which makes it possible to properly level the surface.
After this, the wall is given time to dry completely. If you do not wait, then in these places the wallpaper will begin to wrinkle and bubble, as the material will begin to deform as it dries.
Advice: you can check visually whether the surface has dried or not - there are dark spots on it, which means it is not yet time for further work.
Using construction beacons to level walls
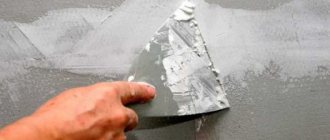
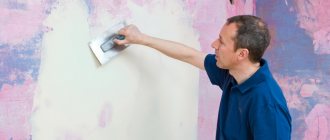
Applying a finishing layer of putty makes it possible to make the wall, if not smooth, at least suitable for gluing wallpaper. To do this, you do not need to achieve an ideal surface and sand it; it is enough to simply remove the material deposits with a spatula.
After that, wipe it from dust with a brush, and then apply a layer of primer. You can paste the wallpaper after the soil has dried.
Tip: if the concrete wall is smooth, there is no need to putty under the wallpaper. It is enough to fill small holes and wash away.
OSB boards
The traditional approach cannot be applied in this case, since the surface of the material has high absorbency. You cannot simply paste wallpaper onto an OSB board, since the glue contains water, which is why the material will begin to increase in volume and they will fall off.
Below are instructions that will help you avoid unpleasant moments when gluing wallpaper onto an OSB board:
- Before you putty the walls before wallpapering, apply a layer of deep penetration resin-based primer to the surface.
- Wait until it is completely dry, the time indicated on its packaging.
- Apply a layer of any dispersion putty based on synthetic resin on it. Wait for it to dry, usually at least 12 hours.
- Glue elastic reinforcement material onto it.
Only if you follow these rules will you be able to cover the walls of your rooms with wallpaper. Thanks to this, they will be able to stay on the OSB surface.
Gypsum boards
They are the ideal base for wallpaper. However, even in this situation they need preparation, the basis of which is puttying the seams between the gypsum boards. The further result of the finishing will depend on how you can do this as efficiently as possible (find out also how to finish the slopes on the windows).
Two words about the difference in materials
The functions of the plaster and the finishing layer are completely different, therefore their composition is slightly different. In the first case, coarse clean river sand is present, which makes it possible to obtain a significant thickness of the plaster without significant shrinkage of the applied layer. The composition of proprietary mixtures necessarily includes several plasticizers and substances that improve the wettability of concrete or cement surfaces. Thanks to the presence of coarse filler, the plaster under the wallpaper is soft, well-permeable to air and water vapor.
The finishing mass, unlike ordinary plaster, must be very plastic, so it always contains lime and the finest sand. Therefore, it must be applied with your own hands with a certain amount of effort. The thinner the layer, the stronger the wallpaper will stick.
Advantages of wall putty
A renovation professional will insist on puttying the walls before wallpapering. Carrying out repairs with your own hands presupposes the quality of its execution, which can only be guaranteed by careful adherence to technology, completion of the necessary stages, and their order.
The use of technology in the “as for yourself” version provides that the wall must not only be puttied to remove noticeable unevenness in the relief and to even out the color, but also a finishing leveling layer must be applied.
After applying the putty, the adhesion of the wall will improve and the wallpaper will lie more firmly
This will provide the following prerogatives:
- the walls will absorb less moisture;
- will gain greater strength;
- will increase the adhesiveness and better hold the wallpaper;
- visual defects that spoil the final appearance will disappear;
- the amount of glue required will be reduced;
- the joints will become invisible and the glue will not protrude into them;
- The wallpaper will not be damaged in places where defects have been sealed.
Some modern wall decoration materials for wallpaper simply will not retain the decorative layer unless a protective coating is applied to them.
This is due to the raw materials used in them, which both provide excellent qualities and make them vulnerable to the application of wet glue. Puttying walls under wallpaper is a fairly simple process, but necessary when performing truly high-quality repairs or finishing.
In any case, high-quality finishing or repair work requires that the wall must be leveled and a finishing layer applied. Otherwise, expensive materials with a decorative function will not last the period that is guaranteed to them.
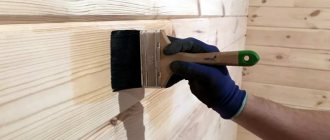
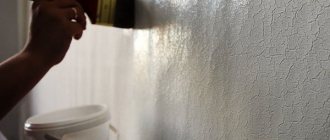
Base primer
Those new to wallpaper installation may find this step optional. But professional finishers are unlikely to advise neglecting priming of the base.
And there are many reasons for this:
- Due to the use of soil, the adhesive qualities of the surface are significantly increased, a thin film is formed on it, which improves the adhesion of other materials to the wall;
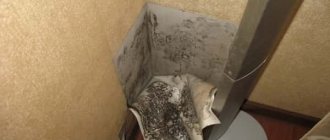
- Soil in combination with an antiseptic will help protect walls from fungus and mold, which not only spoil the appearance, but can also harm health;
- During the priming process, dust particles and various small contaminants are additionally removed, which prevent other materials from making good contact with the base.
If the wall has minor damage in the form of cracks, and the primer cannot completely penetrate them, you need to use a chisel and hammer to slightly widen them. This may seem strange, but this is how the primer will reliably penetrate inside and completely saturate them. And it will be easy to get rid of cracks at the next stage.
Why do you need putty under wallpaper?
Remember what wallpaper used to be like? Paper, with edges that had to be cut off on one side and overlapped. This made it possible not to worry too much about the smoothness of the base; most often, the walls were covered with old newspapers before the final finishing.
Today, old newspapers have already been abandoned, but the unevenness of the walls still requires some tinkering to get the wallpaper to fit as it should. That is why many people prefer to immediately entrust these chores to third-party craftsmen who will do it faster, without unnecessary nerves and with high quality.
Modern wallpaper is glued end to end. And the slightest hole or protrusion at the junction of adjacent canvases leads to a poor-quality seam. Ideally, it should be completely invisible, which is why the base needs to be carefully leveled. But the role of putty is not only this.
Functions of putty
In addition to the final leveling of walls or ceilings, finishing putty allows you to solve other problems, which include:
- Elimination of defects such as cracks, chips, large scratches, etc.;
- Giving the base greater strength;
- Increasing the adhesive properties of the base - its ability to firmly adhere to the finishing coating;
Note. Primer compounds fully possess this property, and in some cases it is enough to use only them if other qualities of the putty are not relevant in your case.
- Reducing the ability of the wall material to absorb moisture. This is important for high-quality wallpaper stickers and allows you to save glue;
- Leveling the surface color. White putty will reliably protect the wallpaper (see Decorating walls with wallpaper in the correct form) from stains that can show through it from an untreated wall.
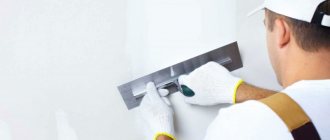
How to putty
This is a simple process that is performed in several stages. You can start puttingtying drywall immediately after the primer has dried sufficiently. After this, you need to stick serpyanka - a special fiberglass mesh - on all joints and corners.
Thanks to the self-adhesive surface, this procedure should not take much time. The only reason you need to make sure that the seam itself is approximately in the middle of the serpyanka.
Due to its physical properties, the putty dries very quickly. Under no circumstances should you add water to the drying mixture. This will lead to a deterioration in its qualities and make it completely unsuitable. Experts recommend the mixture in such quantities that it is enough for about half an hour of work.
Technology
Plaster on drywall is often used in combination with putty. Let us immediately distinguish between the areas of application of the two compositions used:
- Putty - will be used to cover small joints and create a finishing layer.
- Plaster – used for sealing large seams and corner joints. If it is noticeable that the design was made with deviations, i.e. The evenness of the frame creation was not achieved, then it is advisable to use a starting layer - up to 5 mm.
Plaster or putty
Before answering whether it is necessary to plaster the walls before wallpapering or not, let’s understand the concepts of “plaster” and “putty”. The fact is that beginners often confuse them, since both operations allow you to level the walls. But they have certain differences:
- Putty . Allows you to eliminate chips and cracks on the surface of the walls, as well as level them if the differences are no more than 7-10 mm.
Putty is applied in a thin layer
There is also such a thing as finishing putty, which allows you to make the surface smooth, but it is usually not used for wallpaper, since there is no need to obtain perfectly smooth walls;
- Plaster . It is applied in a thick layer (up to 70 mm), which allows you to eliminate more serious irregularities.
When it is necessary
It would seem that plasterboard slabs have a surface on which wallpaper can be easily pasted. This results in a fairly strong grip. But we should take a closer look - is it necessary to plaster drywall under wallpaper? So:
- GKL is a layer of gypsum-lime mixture, which is covered on both sides with cardboard.
- A layer of wallpaper is glued onto such a surface. It turns out that the two surfaces literally adhere to each other.
- And then the following happens - after a few years there is a desire to change the decorative layer.
- Accordingly, dismantling work begins. And when removing a layer of wallpaper, they also remove the cardboard that protects the gypsum board.
- The result is the following: drywall can no longer guarantee reliability. We have to resort to numerous tricks to correct the situation.
Plastering plasterboard walls
Drywall plaster is also needed for other reasons:
- If the plasterboard work was performed poorly, without following technology, there are large differences and unevenness.
- It is imperative to seal the seams that are formed at the junction of structural elements. If this is not done or done poorly, then they will immediately appear under the wallpaper.
- You can’t do without processing corners: external and internal.
Thus, the use of plaster for drywall is a prerequisite when gluing the surface is planned.
BUT! Here we need to clarify a little. The fact is that the use of this mixture alone may not give a high-quality result. So what should we do? Very simple. The plaster must interact with the putty. This interaction allows you to save on material (unlike if only putty was used) and get the most even and smooth surface possible. Each of these compounds will perform a specific task.
Sequence of work on leveling walls
In general, plaster for painting or wallpaper looks like this:
- wall primer;
- leveling the base with plaster mortar;
- applying a primer to a leveled surface;
- puttying;
- grinding;
- surface primer;
- painting or wallpapering
A detailed video about how and in what sequence to prepare a wall for painting. A small area shows the process from attaching the mesh to the final primer treatment. It is better to use the mesh in private houses made of blocks or bricks, where the house can shrink.
You probably noticed the abundance of primer layers. Their application is very important in terms of increasing the adhesion of leveling solutions to the base. Simply put, they are the ones who in most cases determine how well the plaster or putty will stick to the base. The peculiarity of the primer is that it allows you to bind the dust (no matter how you remove it mechanically, it will still remain) located on the wall, as well as strengthen the surface layer of the plane.
Primer options for strengthening the base
| Manufacturer | Name of product | Approximate cost* |
| Leningrad colors | Acrylate primer Tex Optimum penetrating | 225 rub. for 5 kg |
| Oscar | Universal latex primer | 230 rub. for 5 kg |
| Ecoroom | Universal acrylic primer | 210 rub. for 10 kg |
| Knauf | Betokontakt | 2500 rub. for 20 kg |
| Bergauf | Adhesive primer Beton Kontakt | 330 rub. for 7 kg |
| Tex | Strengthening acrylate moisture-resistant primer Profi (concentrate). Diluted 3 times | 910 rub. for 10 kg |
| Symphony | Acrylic primer Deep Contact | 980 rub. for 10 kg |
| Commander | Tasmania interior. Strengthening acrylic primer (concentrate). Diluted 3 times | 1340 rub. for 10 l |
| Dufa | Tiefgrund LF universal acrylic primer | 890 rub. for 10 l |
(*) – values are indicated to compare price levels for various products.
Rule #3. Each resulting coating must be primed. And do this only after the base layer is completely dry. All subsequent operations are carried out after the applied primer has dried. This will increase the adhesion of new layers of finishing to the base.
It is convenient to apply the primer using a roller, a regular brush or a brush. The composition is evenly distributed over the treated surface in one layer.
Tools and accessories
The “right” tools make physically demanding preparatory and plastering operations easier. Small mechanization used to prepare the solution and apply the mixture will also not be superfluous.
To prepare the solution you need:
- containers (measured, for solution);
- construction mixer;
- trowel or spatula.
For preparation and application:
- falcon (used more often by craftsmen);
- trowel (with a stainless steel spatula);
- spatulas of different sizes;
- rule;
- half-graters;
- brushes;
- plastering ladle (usually used by craftsmen for spraying);
- roller (for priming);
- level;
- cord;
- roulette;
- masking tape (to protect unplastered surfaces);
- clean rags.
In addition to dry plaster mixtures (SS), putties, and primers, corners, beacon profiles, and reinforced mesh are also prepared (as needed).
plastering tools
Preparation for painting
When preparing a concrete wall for painting, it must be cleaned of any coating that has been applied and anything that may prevent an even layer of putty from laying down. All chips and cracks are repaired, then the concrete for painting is sanded with sandpaper. To prime a concrete surface for painting, special deep penetration primer mixtures are needed to prevent swelling and peeling of the paint. You can get a high-quality surface painting only after applying several layers of primer. Painting of concrete should be done after complete removal of dust using a roller. Proper painting is carried out starting from the top of the wall.
Holes with a diameter of 80 mm in a plaster wall can be filled with a wet ball of newspaper dipped in the plaster and covered with plaster on top.
In the photo: filling holes in plaster. Tips from Dulux.
New and uneven.
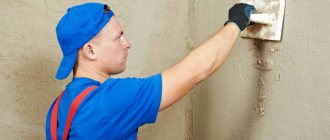
Plaster will be needed both for leveling the walls in an old apartment and for finishing them in a new building. Brick surfaces are usually covered with cement-sand plaster, concrete surfaces with a gypsum mixture. The first one costs much less than the second one, but is laid in a thick layer, often using reinforcing mesh.
As a rule, professionals plaster walls along beacons - guides that are installed on the wall using squares, plumb lines and a level. The result is a perfectly flat vertical surface, which makes wallpapering a pleasure to work with.
vote
Article rating