A garage is an important and necessary building for storing a car. This room can also be used as a workshop or storage room for household products and unnecessary items. Based on this, the flooring here must meet all standards and fully fulfill its purpose. An important factor is the surface coating, especially for concrete, because it is known that this material tends to “dust” and deteriorates over time. How to cover a concrete floor to strengthen the base and extend its service life?
Why do you need self-leveling floors: the pros and cons of the solution
To include a self-leveling floor in any interior, you need to masterfully create a texture of absolute smoothness and maintain ideal surface lines. The uniqueness of the system is that with proper preparation of the area, it will correct distortions in the structure. Another advantage is the variety of decorative solutions.
Laconic and bright interior with a terrace
Loft with podium window and self-leveling floor
White high-rise loft with dining area
Loft with wooden floors and self-leveling floor
Whatever the task: adding light, placing stylistic accents, changing the geometry of the room, the self-leveling floor will cope with it.
Loft with light arches and panoramic platform
Now let us more clearly outline the advantages of self-leveling floors. They are capable of:
- Create a harmonious and laconic space.
- Highlight the finish without drawing attention to yourself.
- Provide a safe and durable coating.
- Become a problem-free and easy-to-maintain floor covering.
White loft-style apartment with self-leveling floor
The self-leveling floor in the house is a seamless coating. Such surfaces are equally indifferent to moisture, fungus, dirt, and chemical detergents. Therefore, there will definitely be no problems with cleaning.
How to pour floor from a barrel
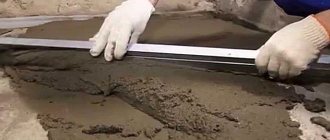
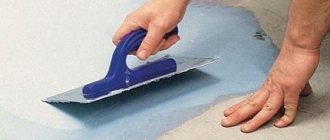
The strength of the material depends on the thickness of the floor being poured in the room. There are options that require special and complex application technologies. The second type of coating is self-leveling. In this case, all the “salt” lies in the master’s ability to pre-prepare the space. It is necessary to repair cracks, restore crumbling areas, and apply several layers of putty.
Thermal insulation methods
At the moment, there are only 2 methods for insulating concrete floors in any residential buildings; the choice of a suitable material largely depends on them:
Note. There is a practice of thermal insulation of rooms on the first floor from below, from the basement. This is convenient and cheap, but not very effective, since it must be combined with insulation of the foundation and basement of the building. When there is none, the cold will penetrate from the street through the edge zones of the concrete foundation.
The method of insulation on joists is quite accessible and, with the proper approach, can be easily done with your own hands. It involves the use of both roll and slab insulation for a concrete floor and is designed for subsequent laying of a finishing coating of linoleum or laminate over a flooring made of boards or OSB (chipboard). The list of insulation materials used is very wide:
For reference. There is also cork insulation on sale, but it is usually not chosen for insulating concrete floors; it is intended for heat and sound insulation of walls.
The essence of the second method of insulation is to monolith the heat-insulating layer under a cement-sand screed, and lay almost any floor covering on top of it. This means that floors insulated in this way are not only made for laminate or linoleum, but are also suitable for laying tiles. This is true in the kitchen or bathroom, where there is high humidity, where the screed will last much longer.
When installing electric or water heated floors, this insulation method is also the most effective. Of course, you can lay heating circuit pipes between the joists, but this will not achieve a large heat transfer area. And the screed monolith becomes like a solid heating device, heating the room with its entire surface. Therefore, warm floors are usually made of the same type (under screed) throughout the entire house, and not just in the bathroom or kitchen.
It is logical to assume that for the second method of insulating concrete floors it is impossible to use soft or rolled materials. Foamed polymers or basalt wool in slabs are suitable here, and the density of the latter should be at least 115 kg/m3 and thickness 100 mm. Expanded polystyrene can be taken thinner - 50 mm, polystyrene - 80 mm with a density of 35 kg/m3.
What is self-leveling floor?
Epoxy, polyester, thin-layer, polyurethane are the main types of self-leveling flooring. But this is not a complete list of options.
Library with self-leveling floor and bright chairs
Public space with self-leveling floor and twisted staircase
Loft space with a built-in residential module and self-leveling floors
Initially, due to its high wear resistance, self-leveling coating was used in industrial premises. Ease of installation and reasonable prices also played a role.
The coating is installed without seams, easily withstands temperature changes and mechanical stress, serves well in conditions of high humidity, and is not susceptible to chemically active substances. When house and apartment design firms discovered these indicators, matte and glossy self-leveling floors entered the top interior solutions. Today, 4 types of coating are often found in home and office designs.
White attic studio with coated insert and white center
Restaurant with self-leveling floor and wooden furniture
Polyurethane self-leveling floors
These are three-in-one floors. The coatings contain equal parts of modifiers, reactive oligomers and hardeners. Thanks to this chemical-physical composition, the floors are incredibly durable. They are not afraid of blows or falling heavy objects. This is a great option if you have children in the house who conduct experiments in the spirit of fun science and adults who regularly host crowded parties.
Important! Rooms in country houses and housing in rainy regions are excellent locations for polyurethane coating. The surfaces are not afraid of either dampness or dirt. And washing a seamless, flat floor is convenient and quick.
How to apply a self-leveling coating with an ornament
Thin-layer polymer floors
Polymer self-leveling floors for an apartment are more of a base for a coating. The material contains sand filler in large quantities. The thickness of this floor is on average 1 millimeter.
The purpose of the polymer coating is to become a buffer between the “rough finish” floor and external influences. Without self-leveling material, the concrete screed will crumble over time.
Thin-layer coating - good protection of the base from dust and chemically aggressive substances. And such a self-leveling floor, even taking into account its minimal thickness, creates a decorative effect.
The disadvantage of thin-layer polymer coatings is reduced impact resistance and reaction to chemicals. And the actual service life does not exceed 4 years.
Apartment with open plan and sliding doors
Self-leveling floors
Self-leveling floors are a godsend for DIY installation if you have no experience at all. If all instructions are followed, the coating can be applied efficiently and quickly.
A self-leveling floor will last up to 25 years. The thickness of the coating is approximately 5 millimeters. This is the average value by self-leveling floor standards.
In addition to the relative ease of installation, such floors are characterized by resistance to mechanical stress. Another important property is maintaining integrity under increased vibration. This is good for small productions or music studios.
Two-story attic with a complex staircase and a wooden module
Glossy black floor and piano
Highly filled floors
If in self-leveling floors the sand filler content is 50%, then in highly filled floors it is 85%. Coatings can easily withstand impacts and significant loads.
Also, floors do not suffer from abrasive wear. Due to their composition, their properties are similar to polymer concrete mixtures.
Most often, durable floors with a thickness of 8-10 mm are chartered for industrial areas, although they are suitable for other premises. Just like epoxy and polyester.
Bright furnishings and glossy beige flooring
Gray loft with a balcony floor and skyscraper views
What is the thickness of the coating
When pouring, it is important to correctly determine which floor screed is best to use and select the thickness of the coating. According to the standards, the minimum value is 2 cm. If reinforcement is not used, then the thickness is not less than 4 cm. A thin coating is installed provided there are no communications and the presence of a rough screed.
The maximum thickness depends on the load-bearing capacity of the base. It is not recommended to make a coating larger than 10 cm in an apartment. The greater the thickness, the higher the load on the load-bearing base.
Textured graphite self-leveling floor
The emphasis in the interior is a fine line between richness and lack of “air”. It is important to maintain a balance of high-quality content, functionality of things and furnishings, light and palette. To ensure that the room is not overloaded and remains harmonious, you need to find some play. This is a detail that will dilute the overall rhythm and tone. This part of the design can be a self-leveling floor. It will be a discreet but meaningful accent.
Graphite self-leveling floor and white walls
Dense, deep, textured - this “graphite” will help create a dark gray epoxy coating. It goes well with coated wallpaper and paint on the walls.
Surprisingly, several dark gray walls make the space feel cramped. And in combination with an accent surface, they create depth and emphasize other shades. To complete the picture, you can organize spectacular retro wiring in the room.
In Scandinavian interiors and lofts, in projects with bright furniture, co-working spaces, hostels and rented apartments, a plain self-leveling floor is the optimal solution. The graphite shade will make the atmosphere neutral and at the same time attractive.
White photo studio in loft style with self-leveling floor
Airy loft with concrete columns and light self-leveling floor
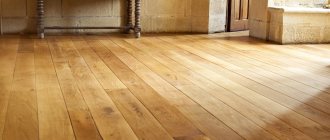
Laminate
Reliable and affordable material. Laminate is an excellent covering. A substrate should be laid on the concrete base (usually foamed polystyrene 3 mm thick is used). The rows of backing can be secured together with tape. The panels can be laid longitudinally, transversely or diagonally.
Important! The laminate should extend 1 cm from the wall (damper indentation).
The dies are attached to each other using locking connections. The ridge of the first row of panels should be cut off (on the side closest to the wall). Assembly is carried out in rows. If necessary, parts of the panels are sawed off with a hacksaw or jigsaw.
Laying laminate
Light inside the plane
If you need to create the feeling of a podium, lighting or a flying surface, consider the option of a self-leveling glossy floor in light shades. Milk, brie, champagne - these and other neutral tones create perspective.
It’s as if light is hidden inside such a covering. This is an optical effect that is convenient to use and play with in different ways. You can reinforce it with furnishings in light, soft natural tones and velvety textures. For example, textiles: carpets, rugs. As well as natural materials and unusual finishes: wooden doors, light-colored plaster moldings, light Wainscot.
If the room has panoramic glazing or streams of light enter the room through the roof or veranda, the idea can be implemented in a minimalist manner. For example, leave the brickwork, make a light-colored self-leveling floor, and include only the necessary interior items in the design. In the evening, you can maintain the effect with spot lighting. For example, garlands or track lights.
Turquoise and stucco together with self-leveling floor and brick wall
Why does dust and other defects appear?
Operating conditions in the garage contribute to the formation of dust and other defects, these include the following:
- the car itself, which moves in and out of the garage every day;
- due to the lack of heating, the humidity in the garage is increased, which negatively affects the condition of the concrete floor;
- negative temperatures;
- aggressive chemical compounds (motor oils, fuels and lubricants, etc.)
Dust and defects on the concrete floor.
Immersion in folklore and natural rhythm with self-leveling flooring
The ornament looks good not only on the walls, in stucco or wallpaper patterns, but also on the floor. This decor is suitable for self-leveling floors. The solution is popular in such styles as antique, empire, baroque and rococo, as well as in any variations based on them. Folklore ornaments also diversify eco-friendly interiors.
You can add a revolutionary arrangement of accents to your design in any of the classic “imperial” styles. Typically, in such projects, natural wood or materials that imitate it are in the lead. It is better to decorate the walls, moldings and ceiling with ornaments. A self-leveling floor will blur the line between classics and accents. It completely changes the usual geometry. This is why traditional projects look unusual and interesting.
Rope ornament in the self-leveling floor in the center and in the outline
Ornament with plant elements in self-leveling floor
Scandinavian loft with dining area, sofa and French windows
The need to use impregnations for concrete
Concrete is a porous material. Its strength depends largely on the hydration process of cement. As a result of this process, the pores of concrete may contain the gel substance of the cement mortar, moisture and air. All this negatively affects concrete during operation.
The presence of micropores causes two main disadvantages of this material:
- low hydrophobicity. Moisture seeps through the pores;
- insufficient concrete density, which reduces the strength of the finished floor.
Modern technologies make it possible to transform the porous structure of concrete and turn it into waterproof stone, which is especially important when creating concrete surfaces in contact with moisture.
The following problems are solved with the help of concrete impregnations:
- protection of concrete surfaces from chemicals and negative environmental factors;
- increasing the strength of concrete;
- increasing the wear resistance of concrete surfaces;
- dust removal of concrete structures;
- strengthening aged concrete structures;
- increasing the service life of concrete surfaces;
- improving the appearance of concrete floors.
Eco-friendly, technological and almost stone self-leveling floor
A self-leveling floor can easily fit into an environmentally friendly design. And the point here is not only in the richness of shades and textures. But also in the fact that our subconscious categorizes what it sees according to the initial data. For example, even the highest quality linoleum is often perceived as something artificial, synthetic. Such material will not fit into a number of projects. But self-leveling floors based on gypsum, concrete and sand filler consist mostly of natural materials. Therefore, it is successfully integrated into eco-friendly interiors.
Kinds
Depending on the technology and materials used, screed can be divided into several types.
According to the coupling method:
- connected;
- floating;
- separate;
By installation method:
- self-leveling;
- solid;
- national team;
- semi-dry;
According to the material used:
- plaster;
- cement-sand;
- semi-dry with fiber fiber;
- industrial;
- screed with plasticizers.
To create a level base, leveling and combined solutions are used. A small layer is laid, which creates a flat floor for further finishing. Combined technologies include leveling the base and installing thermal insulation.
Option number 6. Porcelain tiles
This is not an option for those whose budget is limited. Although the material is ideal for a garage, it is expensive, which is why it is used quite rarely. Porcelain stoneware is made by mixing clay, sand, feldspar, pegmatite and water. The mixture is subjected to high pressure and then high temperature. The result is a material that is not inferior in strength to natural stone.
Advantages:
- wear resistance and ability to withstand heavy loads;
- resistance to moisture and fire;
- resistance to temperature changes;
- durability up to 50 years;
- ease of care;
- great appearance.
The disadvantages , in addition to the price, include low thermal insulation qualities, as well as fragility, therefore it is necessary to transport porcelain stoneware with extreme caution. Lay the material on top of the concrete screed.
Why is waterproofing needed?
groundwater approaching the surface , which, seeping through the floor, protrudes outside, forming wet areas.
The second significant point is the need for high-quality removal of moisture falling onto the floor from above, for example, when washing a car or from melted snow.
To eliminate the effect of these factors, it is necessary to perform high-quality waterproofing of the floor in the garage.
Quality waterproofing starts with a solid foundation. And the base of the floor in the garage, in turn, begins with gravel. Gravel helps water flow down freely without stopping, under the influence of gravity.
For good water drainage, the bedding layer must be at least 100 mm thick . After cooling, the gravel is compacted well to create a reliable base.
On top of the gravel is a layer of sand . Sand is highly hygroscopic, allowing it to absorb excess moisture from the concrete base of the floor. The sand layer must also be at least 100 mm . Sand is well compacted after filling, as is gravel.
To isolate the concrete base from groundwater, dense polyethylene . The film is cut and laid over the sand, overlapping sheet on sheet, the overlap width is about 200 mm .
200 mm thick is placed on top of the resulting base . It is better to pour concrete along the leveled beacons; in this case, the screed poured later on top of the set concrete will require less material and effort for leveling.
The concrete pad must be poured into a reinforcement grid with a bar thickness of at least 10 mm .
The grid in this case is a mesh with cells 200 x 200 mm .
After pouring and leveling the concrete pad, it must be covered with polyethylene .
This is necessary to reduce the rate of moisture evaporation - this technique will make the concrete base as strong as possible.
The concrete pad covered with polyethylene should be left to dry for at least several weeks .
After drying, a cement screed is installed on the concrete pad, forming a subfloor . You can’t do without lighthouses here either. When installing beacons, it is necessary to take into account the future slope of the screed towards the gate within 1.5-2% , this is a height difference of 1.5-2 cm per 1 m of length.
The slope is necessary to drain excess water. The thickness of the screed can be 2-3 cm . The screed is reinforced in the same way as a concrete base, but the cell pitch here is already 100 x 100 mm .
After pouring and leveling the screed, it is also covered with polyethylene and left to dry until it acquires a light shade , indicating that it has completely dried.
Next, to give the floor additional water-repellent properties, it must be covered with a special coating .
- tile;
- rubber floors;
- polymer floor;
- painting;
- impregnation for concrete.
Advantages and disadvantages
- Tile: classic finishing option. The difficulty here is the need to avoid voids under the tiles. To do this, they must be laid on a thin layer of glue (under the comb), specially designed for the street. It is best to use frost-resistant, non-abrasion porcelain stoneware or GRE S.
- Rubber floors: Thick rubber tiles are very durable , not too expensive and a very good option. The coating is easy to install and unpretentious in use.
- Polymer floor: ideal, but very expensive . In our conditions, it is justified in large garages or car washes.
- wears off over time , you will have to repaint it, and this is inconvenient.
- Impregnation for concrete: impregnation is absorbed into concrete to a depth of 2-3 cm and does not wear off for many years, a very effective option.
What can you use to make a garage floor cheaply? Cheap floor coverings include tiles and painting .
And in conclusion: To organize the right floor in the garage, it is better to choose time-tested, high-quality solutions. In this matter, it is better not to chase fashion trends, because the price of a mistake here is extra expenses for reconstruction. A concrete floor , if installed correctly, will serve you for many years, delighting you and not causing any complaints.
Option #5. Paving slabs
An original solution for arranging flooring in a garage is to use paving slabs. Not only will the garage have an aesthetic appearance, but the material itself meets all the requirements for garage finishing.
Advantages:
- high strength - such a floor can easily withstand regular loads from a moving car;
- moisture resistance;
- fire resistance;
- excellent appearance, the ability to lay out a pattern;
- ease of care;
- relative ease of installation.
as a disadvantage , but if you search, you can find more or less affordable options, but you shouldn’t go to extremes - tiles that are too cheap are unlikely to be of high quality. Often such products are made in small factories with poor equipment and without adherence to technology, so the quality will be appropriate. As for installation, it is better to entrust it to professionals, but if you have some skills in the field of construction, you can try to do everything yourself.
Give preference to tiles with a rough surface - they will not slip. You should not take tiles that are too textured, as it will be more difficult to clean them from dirt.
The process of laying tiles in general is as follows. A layer of soil 20-30 cm thick is removed, a layer of gravel about 10 cm thick is poured in, thoroughly compacted, a layer of sand about 5 cm thick is poured on top of it, and also compacted. After this, a layer of sand is poured onto which the tiles will be laid. Each element is carefully deepened into the sand cushion, the cracks are filled with sand or a mixture of sand and cement.