Ceiling tiles are often used in room decoration. There are different options for such finishing, some of them do not have seams, which creates the effect of a continuous canvas decorated with stucco. With this design you can create a neat ceiling.
Ceiling tiles in the interior
What are ceiling tiles
Varieties of this building material include wooden panels and metal decorative sheets, but when it comes to ceiling tiles, they most often mean the polystyrene foam version of these products.
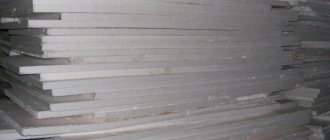
Stack of 7 ceiling tiles.
Ceiling surfaces have been finished with foam plastic for several decades. Initially, slabs of multilayer foam were used as insulation and noise insulation in industrial premises. Over time, they learned to make this material better, using new technologies in its production. As a result, it has become a suitable option for decoration in residential buildings and apartments.
There are several arguments for and against the use of foam products in ceiling decoration.
Negative sides:
- This is not the best choice, mainly due to the method of production of the material, which uses harmful components;
- The second disadvantage is the high sensitivity to temperature - even short contact with the heated lamp body leads to deformation and even destruction;
- It is believed that polystyrene foam ages quickly from ultraviolet sunlight, so it is best to use laminated types for finishing rooms facing south and having large windows;
- The porous spongy surface of the material absorbs dust and carbon deposits very well, which cannot be removed by conventional methods.
Positive points:
- The main advantage of ceiling tiles is their very low weight. One ceiling product, made of foam plastic, with dimensions of 50x50 cm, weighs only 100 g;
- Products made of polyurethane foam do not darken and are not subject to degradation under the influence of atmospheric oxygen;
- They do not contain substances and compounds that can be a favorable breeding ground for fungi and bacteria;
- All kinds of stains and dust are quite easy to remove if you regularly and carefully carry out wet cleaning;
- Noise and sounds in the room are partially suppressed, the home is perfectly insulated;
- The tile hides minor flaws and unevenness of the base and allows you to do without preliminary putty;
- Low cost of synthetic products;
- With traditional use, the height of the ceilings is maintained and the volume of the room is emphasized;
- Proper care and use of suitable adhesives during installation allows the surface to be preserved without changing the quality of the ceiling finish for at least 10 years;
- Updating it is quite simple; water-soluble acrylic paints are ideal for this. At the same time, such painting practically does not change the quality and depth of the pattern or the texture of the convexities.
The use of expanded polystyrene panels for finishing the ceiling is an ideal solution for quick repairs, when you need to quickly bring a separate room into a ready-made state for living in or renting out. If necessary, using ceiling tiles you can create a high-quality, high-quality finish.
High quality ceiling tiles.
Many users prefer this building material due to its availability, ease of installation (fixation with glue), quick preparation of the base and quick completion of all work. Light sheets of optimal size (50x50) are very convenient to handle, mark the ceiling, attach and cut them, and a wide selection of colors and textures will help satisfy the most sophisticated taste and choose the right option for any room (kitchen, living room, bedroom).
Varieties of seamless tile material
For the production of seamless tiles, polystyrene foam from the foam class is used; the thickness of the finished elements can be 3.5-15 mm. The tile can have different shapes, and on its surface there is a pattern from which all kinds of patterns can be easily formed. Using seamless polystyrene foam tiles, you can create an imitation of wood, stucco or artistic plaster. The edges of the seamless tile material are made in such a way that the seams at the joints are practically invisible and can only be seen at a very close distance.
There are several technologies for producing such material:
- Pressing
. Using a stamping press, the mass of expanded polystyrene foam takes the form of a slab with defined edges and a pattern on the surface. The thickness of the tile in this case is approximately 5 mm, and its area does not exceed 0.25 m2. The material made using this technology is quite low in cost. - Injection processing
. To answer the question of what injection ceiling tiles are, it should be said that in this case, expanded polystyrene is exposed to high temperatures, as a result of which the material is sintered in molds. Tiles made in this way have increased strength and greater thickness; it can range from 8 to 15 mm. In addition, the products are distinguished by a large selection of patterns and textures. - Extrusion
. Many consumers ask the question, what is extruded ceiling tile? The manufacturing process of such material involves adding foaming substances to the composition of the ceiling tiles under the influence of high temperature and pressure. Strips are formed from the finished mass, onto which a special protective coating is subsequently applied. Individual slabs are formed from such strips. With the help of a protective film, an imitation of metal, wood, plaster and stone is created, while the color and texture are almost natural. The thickness of extruded seamless tiles does not exceed 5 mm, but this material is characterized by increased strength. The cost of tiles made using this technology will be significantly higher than other types.
Depending on the shape, tile materials for finishing the ceiling surface are divided into two types:
- Tiles with straight edges
. Such products are made in the form of squares, on which drawings and patterns are applied. All elements, including the rectangular ceiling tiles, are exactly the same size and have precise edges. Thanks to this, the tiles fit tightly to each other, forming a minimal gap that is practically invisible from the outside. - Tiles with edges of complex shapes
. This category of materials helps to create aesthetically attractive patterns and designs on the ceiling, since when connecting individual elements with wavy edges, there is practically no gap. This gives the room personality.
In any case, it is important to know exactly which ceiling tiles are better
Material
Depending on the material used, this tile varies:
- Wooden , made of oak, mahogany, birch, aspen, linden, is distinguished by a smooth, structural and carved surface texture;
- Metal , having a concave, convex, matte, mirror surface (one of the most durable and fire-resistant categories that can withstand temperature changes);
- Plastic and polystyrene , characterized by a smooth or embossed surface, resistant to any temperature, practical, and against the general background reminiscent of gypsum stucco.
For example, wooden varieties do not have much weight, so they do not create a load on the rough base of the ceiling. To counteract moisture, they are coated with a layer of varnish. Metal is convenient due to its variety of designs and colors, is easy to apply, but can cause difficulties with cleaning, so you have to remove dirt by diluting a special concentrated product. The classic polystyrene category (PVC) is the most demanding of all when it comes to careful handling.
Dimensions
Standard sizes of ceiling tiles depend on the material used.
Each category has its own standards, for example:
- wooden can be 30 x 30, 50 x 50, 70 x 30, 60 x 20, 60 x 60 cm;
- metal has dimensions of 60 x 30, 50 x 50, 70 x 30, 30 x 40, 40 x 40 cm;
- polystyrene foam (solid and perforated) differs in parameters 50 x 50, 60 x 60, 40 x 40, 60 x 30, 70 x 30, 70 x 40 cm.
These are not all possible dimensions. It is worth considering that this material is often made to order. For example, strips of metal tiles can be up to 2 m long. The synthetic variety can be very small (less than 30 cm) or quite large (up to 1 m).
Colors
The times when only white tiles were on sale are a thing of the past. Today in construction stores you can buy colored materials in a wide range. Among the classic shades, noteworthy are white-blue, light pink, delicate milky, cream, sand, coffee, gray and orange tones. No less interesting are mint, lilac, purple, brownish-pink colors. Among the assortment you can find unusual varieties with a metallic sheen. This group includes golden, silver, copper, brownish, marsh shades.
Such tiles do not require painting, while porous white tiles can be painted over quite well with a dye with the addition of a regular color. Any shade can be obtained by mixing two or three pigments if necessary. This allows you to adjust the color of the ceiling to the design idea of the room’s interior, if you want to replace the white color with a colored one.
The category that can be colored is visually thicker than the colored variety.
Form
Initially, the classic shape of ceiling tiles was a square. This made it easier to start work, calculating the center of the ceiling, or doing it from the corner. Symmetry contributes to a harmonious aesthetic perception: the ceiling appears smooth and does not warp the walls. Today, in addition to square tiles, the parameters of which can be small, you can find materials of rectangular and non-standard shapes on sale. In this case, the side faces can be linear or figured (for example, wavy, concave, convex).
Armstrong ceiling covering
This is a special type of ceiling finish that requires special types of ceiling tiles. Most often, it is made from mineral wool fibers, so the material is characterized by increased fire resistance and is not susceptible to moisture. More recently, this type of tile was used only in the decoration of technical rooms and public places, but now that magnificent 3D tiles have begun to go on sale, which with their voluminous relief pattern can bring unique design accents to any interior, this type of finishing is increasingly found in residential premises, cafes and restaurants.
amstrong ceiling tiles
Advantages and disadvantages
Ceiling tiles have many advantages:
- it is produced on modern equipment using new technologies, due to which it has a different structure and good performance characteristics;
- tiles have several categories, differing in the composition of the raw materials used, which can be natural or artificial;
- the material can be of different shapes, which allows you to select various options for finishing the ceiling, taking into account the chosen style and non-standard types of ceiling area;
- it is easy to install: it allows for high-quality installation due to its optimally convenient size;
- Regardless of the type of material, ceiling tiles strengthen the base of the ceiling and insulate it, which is especially noticeable in the cold season;
- the tiles soundproof the room, relieving households of annoying extraneous sounds coming from neighboring apartments;
- has a wide variety of patterns, as well as texture, which allows it to be used in the same style with furnishings as support for the desired pattern;
- this finish has many color shades, and in some varieties allows for repeated painting of the surface using a regular color scheme;
- ceiling tiles are a universal material that can be bought at any hardware store, and have a wide range of cladding to suit every taste;
- some varieties of this material are suitable for wall decoration;
- There are varieties in the assortment for which it is not at all necessary to level the ceiling to perfection;
- The material is characterized by an acceptable cost, so buying a large quantity will not hit the family budget.
The texture of the ceiling tiles is also noteworthy: it can be smooth, rough, embossed or laminated. This material can imitate textiles, metal and wood. For such tiles it is easy to choose a plinth, corners and sockets in the same style. Based on the type of material used, the thickness of the varieties varies from 3 to 14 mm .
This finish fits perfectly into the interior of different rooms: it can be used to decorate the ceiling of a living room, children's room, office, kitchen, corridor, hallway or bedroom. At the same time, for each room you can choose varieties with a special pattern and texture. The wide range and demand are explained by the environmental friendliness and safety of many varieties of large class=”aligncenter” width=”718″ height=”538″[/img]
With many advantages, such cladding has several negative sides:
- the material is not always identical: it often needs calibration, which slows down the finishing work;
- Porous ceiling tiles can be deformed, so before purchasing it is important to consider the type of adhesive;
- not every type of glue can be removed from the front surface without damaging the material, so work should be carried out as carefully as possible;
- fragments made of synthetic material are quite fragile: when adjusting the angles, they can break, which increases the percentage of defects;
- Some materials do not have even corners due to dense packing, which tightens the corners and makes them obtuse, which leads to the formation of cracks and voids.
The disadvantage of porous categories is shrinkage when applying an adhesive composition to the surface and the appearance of glue on the front side of the cladding. Also, some varieties have a pattern in a certain direction, so fitting the joints is often difficult.
In addition, it is not advisable to glue ceiling tiles to the base of the ceiling immediately after purchase . It is prone to moisture accumulation.
To prevent this material from shrinking in the future, it is necessary to remove the plastic film from the packages and leave them for two to three days in a dry room.
How to choose
In order to choose the right tile for the ceiling, you need to decide on the overall interior of the room. In some cases, zoning is carried out, where a separate part of the room has different finishing materials for the walls and ceiling. For example, in a room where the living room is combined with a kitchen, you can decorate it using several materials. At the same time, wallpaper is glued in the living room, and the ceiling is painted, and in the kitchen the walls and ceiling are finished with tiles. All materials must be ideally combined with each other, as well as with the furniture.
In addition to the design of the tile, you need to pay attention to its quality, namely:
- Edge smoothness. If it is crooked, then it will be very difficult to lay the material end to end against the wall and with each other, and the work will look sloppy.
- The cut material must be dense. If pieces break off from it or it crumbles, then the quality of finishing with such tiles will not be at the highest level.
- The structure of the material must be uniform, with a clear pattern, if any. The presence of dents indicates that the tile is made from low-quality material.
When purchasing a tile, you can check its quality as follows: take it by one edge and shake it a little. If nothing happened to the material, then you can safely take it. If the edge begins to crumble, deform or even break off, it is better to discard such tiles.
Ceiling tiles for the ceiling are available from the following materials:
- Foam plastic.
- Plastic.
- Ceramics.
- Plaster.
If we talk about the most common one, foam plastic, then there are its main subtypes:
- Extruded.
- Stamped.
- Injection.
Extruded tiles are made from foam plastic and covered with a protective layer. Such material can be easily cleaned of dirt, which significantly prolongs its original appearance.
Less practical are stamped tiles, which do not have a protective layer.
It is difficult to install because it crumbles easily. She is also difficult to care for. It is better not to lay stamped tiles in the kitchen and in rooms with high humidity, as they will wear out quickly.
Injection tiles have the highest strength of all those considered. This material does not leave a visible seam after installation, which allows you to create a perfectly flat surface.
Criterias of choice
How to choose the right material for an adhesive ceiling? To do this, you need to consider the following points:
- High-quality tiles do not have deformed edges, otherwise it is impossible to glue the elements evenly.
- The density of the foam over the entire surface of the panel should be the same. In addition, the parts are inspected to exclude dents and chips of the material.
- Only tiles of the same size are suitable for repairs. Before purchasing, you should inspect the packs and compare the parameters of their parts.
- For finishing the bathroom and kitchen, do not use stamped tiles for painting. Extruded and injection models are suitable for these rooms. The ceiling of a hall or living room can be made of any type of foam panels.
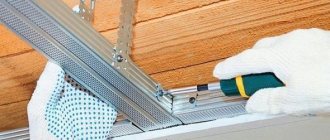
What glue to use to glue ceiling tiles
The construction market offers a variety of adhesive compositions that are used for various purposes. To correctly choose the most optimal options, you need to operate with several criteria:
- The glue should set quickly, then you won’t have to stand for a long time in a static position and hold the element being glued;
- Solvents are not allowed in its composition, otherwise the foam at the points of contact with it will sag;
- It is important that the color of the adhesive is white or transparent - partial translucency may be observed on thin stamped sheets;
- The adhesion of the adhesive is required to ensure adhesion to a dry concrete surface;
- Since the ceiling material can be different (wood, concrete, OSB, plasterboard), it is advisable to purchase a universal product that is suitable for all conditions.
The following video discusses some options for fixing mixtures:
Acetate compounds
Universal transparent adhesive mixtures with a pungent odor of acetone, which are sold in liquid form in transparent plastic bottles - this is acetate glue. In air, the acetone evaporates, and a thin layer of liquid resin hardens, firmly fixing the glued element.
Despite their external similarity, different products with acetate glue have noticeably different setting speeds and can greatly delay the gluing process and tire the working person. Products such as “Titan” and “Dragon” are the most effective.
Among the most noticeable advantages of this type of glue is good adhesion - it allows you to fix it directly on the whitewash.
There are a few more disadvantages:
- The mixture does not allow you to mask joints, as it is completely transparent;
- It has a pungent chemical odor, so work must be carried out with good ventilation;
- It is impossible to perform a good fixation if there are noticeable unevenness on the base or the presence of heavy glued elements (decorative skirting boards, injection or mirror tiles.
Wallpaper glue
All types of mixtures that are used for gluing wallpaper can be used as fixatives for plastic panels: Bustilate, PVA, non-woven and vinyl glue. The technology for using these compounds is very similar to the process of gluing wallpaper, when glue is generously applied both to the product and at the same time to the ceiling surface.
The disadvantages of wallpaper mixtures are significant:
- Very long drying time. You will need to simultaneously glue and hold several sheets at once to speed up the process at least a little;
- The technological features of the application are such that it is convenient to fix only thin stamped types of tiles;
- It is not possible to mask seams with this glue, as is the case with acetate.
Acrylic adhesive putty
Acrylic putty meets all the requirements for a means for gluing ceiling tiles. It is white, quite viscous, instantly fixes and holds any plastic sheets and baseboards. In addition, it can be used to mask small flaws and joints in injected ceiling coverings.
The method of using acrylic putty is somewhat unusual. It is applied with a thin layer of putty to the ceiling, filling all the unevenness and defects of the base, and then decorative elements are fixed to the sticky surface.
Among the disadvantages are the following:
- Increased consumption;
- High price;
- Incompatible with colored laminated panels.
Liquid Nails
The most successful option for use with plastic panels are colored fixing compounds, which are called liquid nails. They not only perfectly fix PVC tiles, but also allow you to mask joints on sheets of any color; just buy glue of the desired shade.
Due to the characteristics of this product, it is enclosed in special tubes for the gun. The required amount of adhesive to be applied depends on the weight of the tile and, usually, contour coating is quite sufficient. Due to the low consumption of this product relative to the total square footage of the ceiling, it is not much more expensive than acetate glue.
A set of necessary tools
Laying seamless ceiling tiles on a wall or ceiling is done using the following tools:
- Building level. This device helps determine the evenness of the rough ceiling and check the correct placement of individual tiles on the ceiling.
- A tape measure and square will be needed to take the necessary measurements.
- A utility knife and replacement blades are needed to cut tiles to the desired size. This applies to those moments when solid elements do not fit in one row.
- In some cases, a spatula may be needed for the job. Most adhesives are packaged in tubes, but sometimes they are packaged in small buckets. In this case, the adhesive is applied to the surface of the tile using a spatula, brush or roller.
- Marking the locations of tiles on the ceiling is done using a pencil or marker. In addition, sheets of paper may be useful on which you can first sketch a future drawing or pattern.
- Well, the most important device can be called a stepladder or a regular table. It is simply impossible to carry out installation work on the ceiling without them.
Marking
To determine the center, you need to pull the construction cord diagonally from two corners. The intersection of two diagonals will point to the center of the room. It is best to start installation from this point, moving along the central axis (it is also beaten off using a cord coated in colored dust). This scheme for gluing foam ceiling tiles is the simplest and most economical.
Preparing for work
For high-quality gluing of seamless tiles, it is important to carry out a number of preparatory measures on the ceiling. The main direction is to clean the surface from old coating, traces of dirt, grease and dust.
Depending on the material used to finish the ceiling, the cleaning method is selected:
- If the ceiling was covered with wallpaper, then first moisten the surface with water and wait until the material becomes damp. Further actions involve removing wallpaper from the ceiling, using a narrow spatula for this purpose. Then remove any remaining glue.
- You can also remove old ceiling tiles or plaster using a narrow spatula. If the plaster sits firmly on the surface and does not fall off when tapped, then you can glue the polystyrene foam tiles directly onto it.
- The whitened surface is washed several times with plain water or with the addition of detergent. Most often, old coating of this type is removed in two or three steps.
- The same method is used to remove water-based paint.
- Old oil paint is scraped off with a spatula.
- Coloring compounds that cannot be scraped off or washed off are removed using special solvents. After using them, it is recommended to thoroughly rinse the surface with water.
Further preparatory activities are carried out in the following order:
- All lighting devices are disconnected and removed, the ends of the wires are insulated. If possible, it is recommended to turn off the electricity in the room during the renovation period.
- Inspect the ceiling, identifying existing defects and errors in height. For differences of more than 5 mm, putty is used to level the surface.
- In a similar way, chips, gouges and cracks are eliminated. In this case, minor defects can be left; ceiling tiles are responsible for masking them.
- A deep penetration primer must be applied over the concrete ceiling and onto the putty. This material provides high adhesion to working surfaces. The surface is primed several times, with each subsequent application performed after the previous layer has completely dried.
Gluing seamless ceiling slabs
Before you start gluing seamless tiles to the ceiling, you need to know what types of ceiling tiles there are and draw up a plan for the arrangement of the elements. To do this, use a tape measure to measure the parameters of the room, but it is important to remember that the room may not be standard, so the length and width of the ceiling in different places may differ. A pattern is drawn on paper, and the number of tiles in length and width is calculated in accordance with the resulting pattern.
Next, the markings are transferred to the ceiling; here a ruler, square, marker or pencil will come to the rescue. The ceiling space is first divided into four parts diagonally or along the middles of opposite walls. You can make the marking process easier by using ordinary thread.
The next step will be the actual laying of the tile elements and their stickers. The installation process is as follows:
- Packages of finishing materials, including wood-effect ceiling tiles, should be opened and left for a while. In this case, the tile takes on the room temperature and does not deform during use.
- After a certain time, the adhesive composition is applied to the back side of the tile in dots. The glue must be in the center of the tile element and along its edges. It is allowed to distribute the adhesive over the tiles using a spatula.
- After application, the liquid adhesive composition must be dried by waiting for some time. Most often, the manufacturer indicates such information on the packaging.
- The prepared ceiling tiles are applied to the ceiling in the designated place and pressed with little force. It is important to remember that polystyrene foam tiles are highly brittle, so strong pressure can damage the element. The laying of the first tiles begins in the central part of the room, and one element should be glued on each marked area.
- Before gluing, the tiles must be laid evenly, pressed and left for some time so that the adhesive composition adheres to the surface of the main ceiling.
- Similar actions are performed with all solid seamless injection ceiling tiles. During the installation process, make sure that there are no gaps between the tiles. If excess glue comes out when pressed, you should remove it immediately. After drying, the adhesive composition is quite difficult to remove.
- Cut tiles are laid along the edges of the ceiling.
- It is recommended to seal the joints of the elements with acrylic sealant. You can use a silicone compound for this purpose, but during use it may acquire a yellowish tint.
With the help of beautiful polystyrene foam ceiling tiles, you can make high-quality and inexpensive ceiling repairs, and the correct choice of material helps to increase its service life.
Coloring
After the primer has dried and the seams have been sealed with putty, the surface of the tiles and friezes are painted. Suitable paint options are water-based or acrylic. Despite the general similarity of the characteristics of these materials, the first option is cheaper and less resistant to moisture. You can apply the paint with a roller, separately passing the relief areas with a brush. The second painting option is to use a spray bottle. In this case, a more uniform layer without sagging is obtained. It is advisable to apply the paint in two layers, with a pause for drying.