Previously, village fences were just continuous crooked wattles
and palisades.
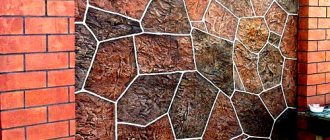
Nowadays, fences can be made from completely different materials: people actively use corrugated sheets, chain-link mesh, wooden and metal picket fences, polycarbonate sheets, forged fences, welded panel structures, vinyl fences, etc.
But a fence made of boards on metal posts is perhaps the most practical and beautiful solution.
Wood is still one of the most beautiful materials from which you can build a fence, despite all the new inventions.
This is a durable natural material that is in perfect harmony with nature. Especially if the house itself is also made of wood. Moreover, this option is not at all expensive and can be installed on your own.
What metal products are suitable
For any fence you need supports on which the fence itself will be attached. In addition, the fence is subject to wind and mechanical load.
Metal pipes are suitable as supports. These can be welded pipes of round or square cross-section.
The thickness of the metal must be at least 3 mm. The diameter of the pipe or profile can vary from 5 to 10 cm, rarely more is required.
The thickness of the support will depend on the overall massiveness of the future structure. Pipes are inexpensive, easy to work with, serve well as supports, and last a long time.
If the pipe is too long (6-7 m), it can be cut with a grinder into the required sections. Screw piles can also act as pillars - this is a more “advanced” option.
Installation of screw piles into the ground is quite easy. The piles themselves, thanks to their screws, hold well in the ground and brilliantly perform their supporting function.
Protection and finishing: what to cover and paint with?
All wooden structural elements must be coated with special products to ensure the durability of the material. First of all, you should impregnate wooden logs and pickets with an antiseptic. It protects against rot, mold, mildew and insects. The quality of processing depends on the depth of impregnation, so be sure to follow the instructions.
Wooden elements are also stained to give the desired shade. However, the best way to dye is to add pigment to an antiseptic or varnish. Wooden parts are impregnated with a primer in order to ensure uniform tinting of the finishing coat. Indeed, in less dense areas of wood, the substance is absorbed more, and light spots form.
Paints should be chosen special for exterior use. They are more resistant to temperature changes. Among the varnishes, yacht varnish is distinguished. It has an excellent appearance and is resistant to external influences.
Preliminary preparation
All elements of the fence, no matter what material they are made from, are subject to pre-treatment.
Metal poles (pipes) must be thoroughly painted before being buried, even if they are galvanized.
This will improve their anti-corrosion resistance. Only those pillars to which a gate or wicket will be attached can not be painted if additional welding work is planned to be carried out on them (welding hinges, etc.).
The wood (both the crossbars and the picket fence) must be treated with an antiseptic and a fire retardant compound. This will have to be done later, during operation.
After treatment with the solution, the wooden boards are coated with a primer. And then – painting: with any suitable varnish or paint.
Please watch the video on the topic:
You can simply coat it with an antiseptic, which over time will take on a natural brownish or grayish color (depending on the type of wood itself).
Advantages and disadvantages of metal poles
Choosing this material gives owners the following advantages:
- metal has a service life many times longer than wooden supports (subject to treatment with anti-corrosion agents);
- increased strength, resistance to mechanical stress;
- metal posts can withstand any weight of fence;
- ease of installation;
- possibility of using different types of fastenings;
- All types of work can be performed by 1–2 people without experience in construction.
Photo: round metal profile
The only drawback is the high price of the metal profile, which means an increase in the cost of the entire fence.
Installation of metal supports
It is best to install the supports at a distance of 2-3 meters from each other.
To do this, it is necessary to mark the area around the perimeter, divide it into equal sections and mark the points where the supports will be installed.
The depth of the pit should be at least 50 cm, but only for the lowest fences. For a fence 1.5-2 meters high, the depth of the support should be at least a meter.
If the pillars are 3.5 meters, then the depth should be 1.5 meters. Deeper holes are not needed, it is unnecessary, just like fences that are too high.
As for the width of the pit, the following rule works: the diameter of the hole for the post is approximately equal to three pipe diameters.
You can bury pillars in several different ways:
Simple driving into the ground - suitable in cases where the height of the fence is expected to be low, and the soil is quite soft, not clayey (but not too loose, it will not hold support).
A long post is more difficult to drive into the ground while keeping it completely vertical.
Backfilling with crushed stone or sand is also suitable for light fences and for areas with low wind load.
To do this, a hole of the required depth is dug in the ground, into which the post is immersed, the voids are then filled with sand or crushed stone and compacted tightly.
Concreting is the most reliable option; concrete supports can withstand the weight of high and strong fences.
Concrete solution is poured only when there is confidence that the support is strictly vertical.
Sometimes you can use combined methods - for example, you can dig a shallow hole and drive a pipe into it.
Then fill the remaining space with bulk material or fill it with mortar: it turns out that the pillar is half driven in, and the upper half is backfilled or concreted.
This is convenient to do, for example, with screw piles. You can concrete the lower part and fill the upper part with gravel.
The choice of method depends on the materials used and the future load on the fence.
When concreting, a so-called “heel”, a T-shaped plate, can be welded to the bottom of the pipe; this element can further strengthen the position of the support in concrete or crushed stone.
But, as practice shows, welding any additional reinforcement to a post complicates the installation of its position in the hole, so such things are rarely done.
Some particularly scrupulous builders make sleeves from roofing felt for the lower part of the column.
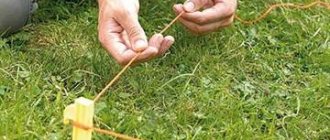
How to mark a site
Before you start installing the fence, you need to mark the area. The place where it is planned to install the fence is cleared of foreign objects, bushes, and trees. If necessary, level the soil around the perimeter. Once everything is prepared, you can start marking the area:
- install pegs at the corners of the future fence;
- you need to pull a string along them;
- marks are set at a distance of three meters along the perimeter - supports will be placed at these places;
- make sure that the marks are strictly on the line.
Preparations have been made, the area has been marked, and you can begin installing metal poles. There are several ways to attach supports in the ground, you need to know about them.
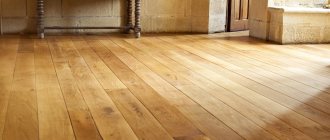
Any planed or edged boards
Staining and treatment with antiseptics was discussed above. There are other decorative options: for example, artificially aging wood.
To do this, you can treat the wood with a blowtorch - the soft fibers will burn out and you will get a relief. Then use a metal nozzle or any other suitable tool to clean off the charred wood.
You can also burn a special pattern onto the board. After these manipulations, treat the wood with an antiseptic.
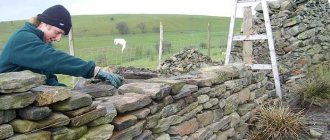
How to make a fence with brick pillars on a monolithic strip foundation: stages of work
Among builders, the most optimal option for implementing a support for a fence is considered to be a shallow foundation. In addition to learning how to knit reinforcement for the frame, you will need the following materials for construction:
- Crushed stone.
- Sand.
- Cement.
- Fittings.
- Brick.
Traditionally, a fence with brick pillars on a standard strip foundation is laid to a depth of 20-30 cm, if the soil is sufficiently dense and non-heaving. If the freezing depth exceeds 70-80 cm, the tape is placed to a depth of about 1 meter. The same situation applies to soils saturated with moisture. In other cases, deepening the base by 40-50 cm is quite sufficient.
On heaving soils, experts recommend using the technology of constructing MZLF with parallel organization of drainage. Otherwise, low temperatures may destroy the base.
To make the support look smooth and presentable, lumber is needed to assemble the formwork. They use edged boards with a thickness of 20-25 mm or moisture-resistant plywood from 8 mm. If there are large gaps in the formwork, it makes sense to use plastic film to prevent water from leaking out of the concrete mixture.
Main stages
According to the standard scheme, the future fencing is marked. Stakes are installed along its borders and a cord is pulled. The internal perimeter is marked in accordance with the width of the sections, usually 30-40 cm away from the external border. Further actions are carried out according to the following scheme:
- Using a level, determine the lowest point from which trench digging begins.
- Excavation work is carried out, the trench is dug to a depth of 30-60 cm. In some cases, the depth of the ditch increases, for example, if there is heaving soil on the site.
- Drilling holes for posts, the depth depends on the height of the fence with brick pillars on a monolithic strip foundation - if it is two meters high, then a three-meter pipe is lowered into the hole by one meter.
- Insert a roofing felt glass for the pipe into the well.
- Place a layer of sand 10-15 cm thick at the bottom of the ditch, pour water on it and compact it.
- Fill the post holes with a 15 cm layer of crushed stone, which will prevent the support from being pushed out at low temperatures.
- Assemble the formwork at such a height that its top level is slightly higher than the planned height of the base.
- Assemble a reinforcing frame from reinforcement bars and insert pipes into the recesses.
- Calculate the amount of cement for the foundation, prepare a concrete mixture and pour it into the formwork. To prevent the surface of the base from cracking, you need to periodically water it with water. If the weather is favorable, the formwork is removed after 5-7 days, the concrete gains strength within a month.
Forming brick pillars
When installing steel pipes, their position should be controlled using a level. Bricks are laid only after the concrete has completely hardened. For masonry, M400 grade cement and sand are used.
Mortgage elements for installing gates and wickets are welded to certain metal pipes. Masonry work requires technology and mandatory strapping for structural strength. The voids between the pipe and the bricks are filled with concrete mixture for strength.
The laying process must be accompanied by constant control of verticality using a plumb line. Fence posts stand for two to three weeks. If the supports were made of red facing brick, then during this time they are treated with impregnation to protect them from moisture and the appearance of efflorescence. Depending on the adopted design, a fence with brick pillars on a monolithic strip foundation can be lined with clinker tiles or artificial stone.
In general terms, the technology for constructing brick columns consists of several points:
- Prepare square rods to form the thickness of the mortar layer, and lay them along the perimeter of the installation.
- Place a layer of cement-sand mortar inside the perimeter, not exceeding the top level of the rods.
- Lay four bricks, taking into account the bandaging of the seams.
- Pull out the rods and clean them of any remaining mixture.
- Check the level for correct installation and level if necessary.
- Fill the cavity between the bricks and the pipe with mortar.
- Repeat the procedure with the top rows according to a similar scenario.
To prevent moisture accumulation, a cap made of metal or concrete is placed on top of the column. Also, waterproofing the base before laying should not be neglected. Solid brick should be used for the lower three or four rows; the upper rows can be laid out of hollow stone.
Fastening elements
You can attach wooden boards to the fence vertically or horizontally.
Vertical arrangement. Two (in rare cases 3) crossbars, wooden or metal, are welded onto the support, onto which the wooden fence boards will then be strung, respectively.
You can leave large or small gaps between them, or attach them end-to-end.
In the latter case, you need to leave small gaps of 2-3 mm so that the wood has the opportunity to expand when temperature or humidity changes, otherwise the fence will stand on end.
Horizontal arrangement. The following mounting options may be available:
Regular mount. The two crossbars are placed diagonally and intersect in the middle. Boards are nailed onto the crossed crossbars.
In this case, the boards will be fastened to both the posts and the crossbars. The gap between the boards is allowed arbitrary.
A “barcode” type model (different thicknesses with the same gaps), as an option: two 15 cm boards in a row with a 3 cm gap, and two 50 cm boards with the same gap, after which the order is repeated.
In this case, fence boards are attached directly to the posts. In the middle of the span, if it is too long, you can fasten the boards with a vertical strip (slat).
“Chess”: for example, a 100 mm board with a 60 mm gap is fastened in an even order on one half of the span, and in an odd order on the adjacent half.
You can choose other artistic options. You can make large gaps, or you can attach the boards with an overlap. The main thing to remember is that the closer the boards fit to each other, the higher the material consumption.
Fence decoration
The installed fence can be decorated with climbing plants if desired. This type of decoration is suitable for all types of fences.
If the owner of the property has a romantic nature, decorating the fence with fresh roses will suit him. Roses are planted close to the fence so that they receive sunlight. The distance between bushes should not be less than two meters.
Plants are supported using a metal mesh installed with your own hands. The flowerbed should consist of flowers that match the paintwork.
Decorating with flowers in plastic pots will give your fence a delightful look and design flair. Pots are attached along the entire perimeter of the wooden structure with fresh flowers already prepared in advance in them.
Decorating a fence with mosaic elements is not an easy task, requiring time and effort. The whole family can be involved in this activity. Broken mirrors, bricks or tiles will be useful for this work.
The pieces are applied to the surface, representing a single composition or pattern. After completion of the work, the fence will not look like a wooden structure “like everyone else’s”, but will become the pride of the family.
Wood carving
Wood carving has always been valued and used in the construction of houses and fences. Such decoration adds folk color and originality . The most common carved fence is with lace.
To create it, you will need a pre-prepared drawing on paper, which is then transferred to a wooden surface. It is best to use thin wood , from which the design will be cut.
A novice master should limit himself to a simple image, so as not to create additional difficulties when cutting.
After applying the design, they begin cutting out. For craftsmen who are fluent in using a jigsaw, such a task will not present any particular difficulty.
A wood saw needs fine teeth . It will provide a smooth surface around the edges of the product. If blots are still made in the work, they can be rubbed off with sandpaper.
When creating a pattern on the surface of a fence, craftsmen often use the technique of geometric carving. Circles, triangles, diamonds and other shapes are used as pattern elements
The work of creating geometric patterns is labor-intensive. However, they are quite doable even for novice builders. Cut out patterns using a sharpened wood knife. This type of fence decoration belongs to Russian folk art .
Cutting out contour edges will give the fence volume . With this type of carving you can give free rein to your imagination and creative thoughts. The design in such a composition does not matter; it can be anything.
The work is done entirely manually. The volume effect will be enhanced if you use one color at the edges and add a more saturated shade in the middle.
Attaching to posts
Attaching profile veins to metal supports can be done in two ways:
- conventional welding directly to the rack;
- using eyes welded to the posts, to which the logs are attached.
Weld the metal veins to the rack entirely and overlay. The second one is lightly attached as a continuation of the first one, and the next row of crossbars is mounted in the same way. Here it is important for greater strength of the fence not to allow the upper and lower joints to be placed on the same vertical line, but as scattered as possible.
It is not recommended to weld the connection of docked logs, because it is very difficult to maintain a straight line, and with a lot of labor, the connection will not be so strong. Unpainted veins are welded to the racks, because during the installation process the paint will be damaged and burned at the welding points.
Example of painted fence crossbars
Fence logs on support posts are placed at a distance of approximately 30 cm from the ground level or strip foundation and the same from the top of the fence. After installing the frame, the welding points must be processed and cleaned of scale. And before painting, they, like all metal surfaces, should be coated with an appropriate primer.
What you should know about this type of work
Before you begin installation, you need to familiarize yourself with several important nuances that will ensure the highest reliability:
| Properties of wood | Do not forget that this material can expand due to changes in temperature and humidity, so be sure to leave a gap in order to compensate for linear changes in size. This will avoid a lot of troubles in the future and eliminate unpleasant surprises in the form of cracks in the final finish. |
| Adequate structural protection | In order for the structures to last as long as possible, be sure to treat them before installation with a special compound that will protect the material from mold and pests, and also significantly reduce the likelihood of fire. It is better to use hard-to-wash options that penetrate deeply into the structure |
| Use of quality materials | It is not recommended to use wood with high humidity, since after installation the elements may move, which will disrupt the geometry of the structure. In addition, when dried in improper conditions, cracks may form on the surface, which reduces the reliability of structures. |
| Choosing the right mounting method | Different options for carrying out work may be suitable for different situations; there is no universal solution, so you should understand the pros and cons of one or another method. This will allow you to select the optimal fastener |
Important! Sometimes you have to proceed from the existing situation when the walls are erected, but even in such cases you can achieve an excellent result of the work.
You should not skimp on fasteners for wooden structures and choose the most reliable ones.
Nowadays, beams in a wooden house are secured using special high-strength supports.
End to end connection
Connection to MZP
Reliable end-to-end connection of timber is provided by nail plates; the product is a metal plate 1.0-1.5 mm thick with spikes 8.0 mm high. Spikes are formed as a result of cold stamping using a special stamp; 80-100 spikes are formed on one square decimeter of surface. The plate is installed on the side surfaces of the mating parts with the tenons down, the tenons are completely driven into the wood. The model range is coordinated with the standard sizes of lumber.
How to attach wooden sheathing to metal profile rafters?
A metal profile is a leaf material (sheet profile, corrugated sheet, corrugated sheet) which is the final roofing covering (material).
That is, rafters are not made from metal profiles; rafters are made either from timber (wood) of different sections depending on the load.
Or metal rafters are made from a profile pipe (square or rectangular cross-section). But first, steel corners are welded to the (metal) rafters, or the corners are bolted (bolted connection).
Next, a timber frame is attached to the corners, and a wooden sheathing is already attached to these mortgages; you can even attach it to nails or wood screws.
READ ALSO: Treatment of drug addiction in a rehabilitation center: how is the therapy carried out?
Metal can condense (moisture) due to temperature changes, so the wood must be separated from the metal, for example, by laying roofing material between the metal and the mortgage.
Sheathing bars and embedded bars must be impregnated with antiseptic impregnations and + fire retardant impregnation (such impregnations contain fire retardants).
In the corners we pre-drill holes for self-tapping screws (side holes).
If you want to attach the sheathing directly without corners, then you need metal screws; the wood and metal are pre-drilled.
But even in this case, the wood should not come into contact with the metal, that is, we lay pieces of roofing felt.