The advantages of a stone fence are difficult to dispute - aesthetics, durability, strength - these are not all positive qualities. The construction of a fence made of cobblestones can be maintained in any style, because... The fundamental building fits harmoniously into different landscape interiors.
A stone fence has only one minus sign – the high cost of materials and a complex operating algorithm that requires skills and experience. This article will be useful to you if you are not a professional builder, but want to build a stone fence with your own hands and save a little money. Let's figure out what features this material has and the work involved in constructing such a fence.
Pros and cons of stone fencing
An original and at the same time incredibly popular stone fence is always in fashion. Such a fence simultaneously serves as both a decorative element and a reliable fortress. The building can be raised to any reasonable height - for its strength you only need strict adherence to construction technology.
pros
- High strength. The structure has excellent stability indicators, withstands almost any adverse natural factors, and tolerates mechanical stress well.
- There are several types of stones for building fences. Many of them are affordable, but at the same time have excellent physical characteristics;
- The stone always looks expensive, so it can decorate any, even the most modest area.
- The high decorative properties of cobblestone allow it to be harmoniously combined with other building materials, thereby increasing the attractiveness and originality of the structure.
- A stone fence will not require complicated maintenance, systematic finishing, or renovations. It will retain its beautiful appearance for its entire service life.
- The design is fireproof.
- Environmentally friendly, natural materials always look advantageous.
Minuses
There are few disadvantages to stone fencing. Rather, these are characteristic features associated with labor costs. Constructing a fence from cobblestones yourself is a complex, labor-intensive process that requires special skills and financial investments in foundation and material.
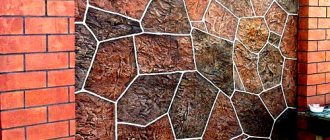
Photo gallery of finished fences
The photo shows various types of fencing using popular methods of laying stones. Both solid stone sections and successful combinations with other materials are depicted.
Despite the fact that creating a stone fence requires a lot of effort, time and money, the result obtained will justify the efforts. The reliable design will become a decoration and excellent protection for the site for many years.
Preparation for work and calculations
The beginning of construction work on the construction of any fence begins with marking its boundaries on the ground. First, draw a plan for the future fence, find out where the boundary lines are, then choose the type of stone. This sequence will allow you to move on to drawing up cost estimates and purchasing construction and consumables. At the same time, purchase and prepare the necessary tools.
marking
How to determine the boundaries of a territory
Before you make a stone fence, be sure to find out where the boundaries of your property are. Perhaps they are not where you thought, which is fraught with the demolition of a new building, or disagreements with neighbors.
Note! In the future, it will no longer be possible to change the trajectory of the fence without its complete destruction. Invited surveyors can help you in this matter. Border delineation is one of the services they provide.
Have you already clarified the boundaries of your site? Now you can start measuring the length of the sides, as well as sketching the future structure. Do not forget to mark on your sketch the height of the fence, the places where you will have entrances (wicket, swing or other gates). The height of the fence is selected individually. If you want a high fence, then the optimal length in height is from 2 m to 2,200 cm. Next, proceed to marking the required number of pillars for support. To maintain the strength of the structure, a certain length of spans per number of supports is required: approximately 1 pillar per 2.5-3 meters of length. The maximum length of 3.2 meters is no longer recommended.
Area of use of decorative stone
Thanks to its significant advantages, artificial stone is an ideal finishing material. It is used indoors and on facades, depending on the manufacturing method. In addition, certain types of material are used to manufacture specific products. Let's take a closer look at what can be made from artificial stone:
- countertops for kitchen furniture, which are highly resistant to damage;
- bar counters that are durable;
- sinks and sinks that have an attractive appearance and original design;
- window sills of various sizes and shapes;
- coffee and dining tables;
- stylish and custom mirror frames;
- shelves in a variety of colors.
Stone shelves in the interiorSource design-homes.ru
Decorative stone material is used to create wall panels, when cladding steps, railings, and arched structures. The use of artificial stone in the interior and when arranging a garden plot is an indicator of respectability and excellent taste.
Which stone to choose for building a fence
If you are finished with the calculations, you can proceed to the next, most enjoyable stage - choosing a stone. There are several types of natural stone widely available on the market with different decorative and physical qualities.
Most used
A fence made of wild stone can have any color and shades. This material is not specially manufactured. With the help of the sun and wind, nature itself processes it. Despite the angular and jagged edges that jut out over each other, wild stone makes an excellent decoration. You can use it to create a beautiful fence in Western European style. The material is mined from natural deposits in the form of large slabs and split into small pieces.
A fence made of French stone is called so not because the material was delivered from France. This is the name given to hollow concrete blocks, the production of which is based on the French pressing method. Like natural stone, French has a natural color and different surface structure. The structure is durable, and the surface of the material is treated with special compounds that protect it from moisture.
The beauty of a cobblestone fence is not inferior to other stones. This is a very strong stone that is extremely difficult to split. Mostly cobblestones are round in shape and are small parts of rocks such as granite or basalt. A basalt structure can last for centuries, and the low cost of the material is another plus.
Fences made of natural stone are some of the most beautiful. They resemble a work of art and can be constructed from many types of stones. These include pebbles, limestone, sandstone, cobblestone, marble, rubble and dolomite. In construction, each of these materials behaves differently, which is not a problem for professional masons. If you are a beginner and are going to build a natural stone fence yourself, then the best option is limestone with hewn edges or sandstone plates. This raw material has the correct lamellar shape and is easier to stack. It will not be difficult to build even rows of them. If your main priority is the aesthetic side, then the best fence stone is cobblestone or rubble of various types.
Advantages and disadvantages
By choosing this type of fence, owners receive a number of advantages:
- Its long service life is at least 50 years. And when using high-quality masonry mortar, this period can reach hundreds of years.
- Possibility of choosing shapes, colors, textures of raw materials.
- Environmental friendliness. Does not pose a threat to the environment.
- Natural stone is resistant to moisture, temperature changes, and does not burn.
- The ability to create unique hedges on different themes (mosaics, patterns).
- A wide price range of natural and artificial raw materials makes them accessible to owners with different financial capabilities.
- Stone goes well with other materials and fits into many styles.
Photo: a stylish option for fencing made of natural stone in the landscape design of the local area
. Of the minuses:
- The need to build a reliable foundation. Will incur additional costs.
- Laying a stone fence is quite difficult and time-consuming.
The services of masters will not be cheap. If you want to save money, you will have to lay out the fence around a private house yourself.
Preparing tools and consumables
If the stone has already been selected and purchased, begin preparing your work equipment:
- cement grade M300-400;
- crushed stone - fractions measuring 20-30 mm;
- sand - the optimal grain size is from 0.15 to 5 mm;
- fittings (rods) with a diameter of 8 to 12 mm;
- pipes made of thick steel: length - from 3.5 to 4 meters;
- semi-edged board for formwork construction;
- materials for decorative finishing of columns, bases.
To mix concrete, you will need a concrete mixer, which can be rented from special organizations. You can’t do without a welding machine, as well as other tools:
- wooden stakes;
- construction cord (at least 5 skeins);
- corded plumb line;
- building level - spirit level;
- hacksaw for metal and cutting wood;
- roulette;
- tamper for driving in soil (can be rented);
- “scoop” and “bayonet” type shovels;
- Master OK;
- guillemot;
- brush with metal bristles;
- 4-5 large volume buckets.
ADVANTAGES OF CLINKER TILES
- It is used both for interior decoration and for facade work;
- Has a high strength;
- Durability;
- Low water absorption;
- Frost resistance;
- Resistant to aggressive substances;
- Waterproof;
- Clinker tiles do not fade in the sun;
- Fireproof.
Installation of clinker tiles is slightly different from installation of artificial or natural stone. However, if you follow the necessary measures, the work can be completed quickly without compromising quality. As in any other case of external work, the surface must be carefully prepared, cleaned of dirt, dust, primed, reinforced, and only after the walls have been well prepared can the installation of clinker tiles begin.
When performing external work, the adhesive solution must be frost-resistant and intended for facade work.
Clinker tiles have few disadvantages. Since it is still ceramic, clinker tiles are fragile. And its biggest drawback is its high cost.
A fence finished with clinker tiles will add elegance to the entire area. With the help of clinker tiles you can improve even an old fence, giving it a noble, sophisticated look.
Making the foundation
Next, you should clear the construction area of plants, debris and other objects, and level the soil. Then drive wooden stakes into the outer corners of the future fence and connect them with a cord stretched close to the ground line. Mark the support locations with small sticks. For the construction of a stone fence, a strip foundation is optimal. Properly constructed, it will not allow the fence to tilt or sag, i.e. because its width should be at least 20 cm greater than the thickness of the fence.
Ground structures can be destroyed by water, so your fence will need a base 15 cm high above the ground surface. In the future, the height of the formwork should also be oriented according to the height of the plinth.
Sequence of work:
- We dig a trench 70 cm deep;
- Pour 5 cm of sand into the bottom of the hole and compact it;
- Next, we install the formwork assembled from edged boards;
- The next stage is laying the reinforcement cage on the sand bed. To strengthen a stone fence, you need to lay at least 2 nets of rods. Measure 50 mm from the surface of the sand layer and lay the first mesh. Lay the second layer half a meter below ground level. Both grids need to be securely strengthened, thereby making the foundation stronger. To do this, steel pipes are driven into the ground.
- Next, the formwork is filled with concrete and kept in this condition for 2 weeks.
Important! After removing the formwork, the process of concrete hardening will continue for at least 30 days. Only after this time can you install the fence.
The concrete solution is prepared as follows. It is necessary to place the required proportions of crushed stone, cement, water, sand and plasticizer into the concrete mixer, and then pour the mixture into the formwork. The finished mass that has spread over the surface must be made denser using a shovel or vibrator. Level the surface and place PET film on it. The coating will retain moisture in the concrete. In hot weather, you can additionally water the formwork with water.
Stone imitation
Artificial stone is also successfully used for making fence supports. Stone imitation gives an excellent decorative effect, does not require additional processing of the material and is cheaper than natural minerals.
Using artificial stone, you can easily cover a pillar with your own hands. Another advantage is the variety of choice of “fakes” for rocks: rock, wild stone, sandstone, granite, pebbles and others.
Lining fence posts with artificial stone
Artificial stone does not have as much weight as natural stone, so additional reinforcement of the fence and foundation structure is not required.
- Surface preparation. The base of the pillars for facing with artificial stone can be made of brick or concrete. The surface is cleaned and primed as necessary.
- Fastening the reinforcing mesh. For reinforcement, a metal mesh with cells of at least 5 x 5 cm is used.
- Plastering the surface. The plaster composition is designed to level the surface for laying artificial stone, which will protect the pillar from dampness and the penetration of various insects.
- Facing. Artificial stone tiles are glued using specialized glue. The cladding is done from the bottom up, the tiles of the material are easily adjusted and cut with a grinder. The process of lining stone pillars with artificial stone
- Grout. Typically, artificial stone slabs are laid with a gap of about 1-2 cm. The seams are filled with grout or residual adhesive.
- The final stage. The stones are cleaned of glue and grout stains and coated with compounds that will protect the surface from moisture. The top of the post is covered with a suitable protective cap.
French stone
Another type of artificial stone is French stone. “French” is a regular-shaped concrete block with voids inside.
This is what French stone fence posts look like
The block can have a smooth or rough surface. The standard dimensions of French stone are 120 x 200 x 400 mm. After laying, the fence posts are coated with paint, which will protect the surface from external atmospheric phenomena.
Making a beautiful, and most importantly, strong and durable fence with your own hands is easy and simple. All you need is desire and knowledge - and you can easily build the fence of your dreams.
Natural stone is considered the best material for building fences and fence posts; such types as dolomite, large pebbles, rubble, sandstone, and large pebbles are suitable. Stones for pillars should be smooth and with an average size of 10-20 cm.
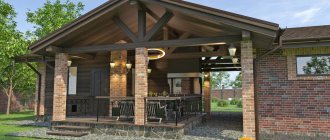
Fence made of wood and stone
We erect pillars
Stone pillars for a fence are laid out using the “Sliding Formwork” method. To strengthen the spans as best as possible, the pillars are laid with steel. The overheads, in turn, are cut from reinforcing bars and attached by welding to the metal frames of the risers. Place the parts of the rods parallel to the base, fixing the overhead ones one above the other with a distance of 30 to 50 cm.
The pillars also require the construction of plank formwork, which is a wooden box without a top or bottom, 30 cm high.
Sequence of work:
- The formwork is placed for the first layer of stones;
- Now you should lay out a temporary stone pillar, not secured with mortar. The masonry must be laid without gaps, tightly adjacent to the wooden boxes;
- Select and lay stones for the first row using mortar. Use prepared thick cement as a fastener. It is easiest to lay out even stones. In the case of uneven edges of the stones, pour additional cement mortar into the gaps. The remaining rows are laid out in the same way.
- Rows of formwork are filled one above the other, moved and filled further. This method is called sliding.
- Once you have built the first tier of stone and waited 24 hours, remove the bottom boxes but leave the formwork at the top of the structure. This step will allow you to place the following wooden levels.
After removing the formwork, you need to treat all the cracks between the cobblestones with cement to ensure a finished appearance and neat finishing of the supports, which you will also do yourself.
Remember that the masonry must gain strength, and for this it needs to be given time - at least a day.
Classic stone flowerbed
Now let's look at the stages of creating a stone structure, and look in detail at how to make a flowerbed out of stones and cement with your own hands.
In order to do everything correctly, regardless of the chosen design, a number of important nuances should be observed:
- Choose a place on the site where the flower bed will be planted. If this is an open place, you need to place oval, round and rectangular structures here, which will be viewed from different sides. If the flower beds will be located along paths and walls, you need to use semicircular and rectangular products.
- Select the shape and size of the composition to be created. You need to decide what the stone flowerbed will be like. It is best to prepare a drawing.
- Make markings to create a composition of the desired shape.
- Prepare a place for a flower bed, remove debris and grass.
- Lay out the flowerbed using stones of the required size.
- Plant plants.
Laying out spans
After the construction of the pillars and foundation, the next stage of work is the spans. To lay the sections you need to select stones ranging in size from 20 to 25 cm in diameter. Such elements weigh a little, so it is easier to work with them. If you don't find enough material, you can use a punch or hammer to break large rocks into fragments.
To prepare the solution, mix cement and sand in a ratio of 1 to 3. To obtain a beautiful color of the fastener, you can add paint to the solution.
Work like this:
- A cement-sand mortar is laid on the base.
- Stones are placed on both sides of the span. To ensure that the masonry is even, connect the edges of the section with a white thread and then use it as a guide.
- Fill the internal space of the edges of the span with stones, and tightly fill the resulting gaps with a cement mixture. Stones should be laid with the smooth side facing up.
- 24 hours must pass before the laid rad acquires the required degree of strength. Only after this can the construction of the next row begin. To build a stone fence with your own hands, proceed in this way until you reach the desired height.
Video: mistakes when laying stone
For laying next to each other, be sure to use any type of dressing that is convenient for you. To work with the top row, save stones of the same shape and diameter. Clean up any solution that accidentally falls on the front part of the span as quickly as possible.
Briefly about the main thing
A fence made of stones is a reliable and durable fence, a beautiful detail of any landscape design. It is built from inexpensive rocks of different origins: sandstone, cobblestone, shell rock, limestone, pebbles. The design of fences is pleasantly varied, from options with solid masonry to combinations with wood and metal.
For the strength and durability of a structure, the quality of the foundation is important; it is laid taking into account natural factors and is necessarily reinforced. When the solution in the trench becomes strong, stones are laid, selecting them according to size, taking care to bandage the seams. At the final stage, the space between the pillars is filled, decorative finishing is performed, and lighting is installed.
Ratings 0
Finishing a stone fence
Beautiful stone fences are complemented by the final touch - finishing. To increase the attractiveness of the appearance, the seams are unstitched. To do this, a colored or simple mortar is added between the stones, which makes the masonry more voluminous. Here you can use your own creative ideas, the main thing is to prepare the solution correctly.
You will need:
- guillemot;
- foam;
- brush with metal wire.
To finish the seams between the cobblestones, you should wait at least 3 and no more than 4 hours after finishing the laying of the spans. It is not recommended to wait longer as the cement mixture hardens.
Joining algorithm:
- Clean the seams between the stones with a wire brush.
- You need a scraper to create small depressions in the seams - no more than 20 mm.
- Next, you need to wash the finished fence with foam rubber using a 30% concentration of hydrochloric acid solution. Be sure to use protective gloves for your hands; if possible, try to cover your face and eyes with a transparent plastic mask, and your body with clothing.
Advice! For decorative finishing of the fence, you can use wood, as well as plaster with a beautiful finishing texture.
To remove moisture, special linings are installed on the pillars, which can also have a decorative value. Other types of decorations (lighting elements, forged figures) are installed by the owner of the site at his own discretion.
How to make a fence from gabions
A gabion fence is a durable and original design that will protect and decorate your garden plot
The advantage of such simplified gabion fences is their high aesthetic characteristics.
In addition, a gabion fence will fit perfectly into any interior and will give a great start to arranging your patio
Gabions
Typical sizes Mesh characteristics
Welded mesh gabions
Gabions
For gabions, a standard monolithic strip foundation is installed
The process of making a fence from gabions. Installation of gabions does not require special preparatory work. The walls of the boxes and the lids are connected to each other with special spirals or strapping wire. The boxes are then filled with natural material. It is allowed to place smaller stones in the central part, and large ones at the edges. When laying stones, it is necessary to reduce the formation of voids. The gabion is filled gradually, first by one third, after which the box is fixed from the inside, then the procedure is repeated
| Length x Width x Height, meter | Cell, cm | Weight of 1 mesh, kg |
| 1x0.5x0.5 (Zn 240g/sq.m.) | 6x10 | 6,8 |
| 1x0.5x1 (Zn 240g/sq.m.) | 6x10 | 13 |
| 2x0.5x0.5 (Zn 240g/sq.m.) | 6x10 | 12 |
| 2x0.5x1 (Zn 240g/sq.m.) | 6x10 | 18,5 |
Beautiful gabion fence
. Good luck!