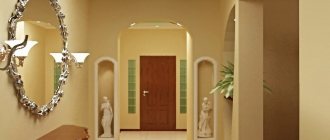
Various arched structures have continued to be the most trendy direction in interior design for decades. Thanks to these architectural elements, you can not only add a touch of sophistication and uniqueness to any interior, but also visually increase the area of the room, combine several rooms or, conversely, divide the common space into zones.
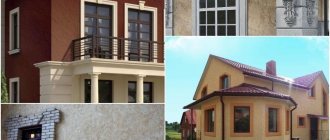
Arches are relevant in almost any interior design
There is an unlimited number of shapes, designs and finishing options for arched openings, and one of the most popular solutions is interior arches made of MDF, which are an excellent alternative to products made from natural wood, not inferior to them in their decorative and performance qualities.[contents]
Arched MDF structures: beautiful, fast, profitable
MDF arches have, indeed, rightfully received universal recognition, because... These designs have a lot of advantages compared to other types of opening openings. These include:
- aesthetic appeal;
- variety of configurations, colors and textures;
Just a few of the most common types of arches - affordable price;
- simplicity and speed of installation (do-it-yourself installation is quite possible);
- design versatility;
- the ability to select standard models and order non-standard options;
- environmental friendliness and high wear resistance.
Description
Arched interior structures made of MDF are popular. The fact is that this finishing of the gaps has certain advantages over other variations. The advantages of use include:
- visual appeal of the material;
- abundance of textures and colors;
- the ability to make an arch of any desired shape;
- applicable cost;
- relatively simple installation (the ability to assemble it yourself);
- environmental friendliness and safety;
- highest wear resistance.
Advice! Users have the opportunity to purchase ready-made conventional kits for the production of arches (they are suitable for standard clearances) or order their production according to their dimensions.
Decorative finishing
The popularity of arched structures made of MDF is justified, among other things, by the variety of their decorative design. Possible options:
- lamination with polymer film. This is the cheapest finishing method; the film can have a wide variety of pictures, including those imitating the surfaces of natural materials;
- The introduction of special paint coatings makes it possible to choose virtually all color options. Stunningly suitable for modern interiors;
- bases covered with natural veneer can be additionally varnished. This finishing option will perfectly fit into a traditional interior.
Options for decorative finishing of MDF arches
The ability to choose the optimally suitable arched structure is due not only to the variety of shapes and sizes offered, but also to the wide range of colors and textures of finishing materials. External protective and decorative coating on MDF structures can be applied using several basic technologies:
- painting with special durable paintwork materials (provides the most extensive selection of color variations; is an ideal solution for creating arched structures of non-standard shapes for interior decoration in modern styles, for example, high-tech);
- lamination with PVC film (large selection of textures, colors and patterns; the most inexpensive finishing option);
- coating with natural veneer followed by tinting and varnishing or without it (excellent imitation of expensive wood species; veneered MDF arches go well with classic interiors)
Unique engineering board Bentline SUPERBASE
Solid board is a popular floor covering that is often chosen, but this coating has its drawbacks: in the Russian climate, the board often begins to dry out, which leads to warping, the appearance of gaps and cracks. Moreover, the thicker the boards, the greater the effort that occurs when they dry out.
But there is a solution - this is a perfect version of an engineered board with a unique design and SUPERBASE fastening system!
Bentline engineered board has a 2-layer construction, with a SUPERBASE fastening, which no other manufacturer has. It is specially designed for the conditions of the domestic climate with sudden changes in humidity and temperature conditions.
Source: homemasters.ru
Features of typical arches
Standard arch models are quite universal, and their choice is so wide that ordering an individual version for standard openings simply does not make sense. Their installation is easy to do with your own hands using a basic set of tools.
Ready-made arches have a modular design consisting of several elements, which allows them to be installed in any standard opening. The standard kit usually includes:
- two arched arcs;
- four platbands;
- two or four locks;
- vault panels;
- two side panels.
Standard set of arched kit
As additional elements that allow you to adjust the depth of the arched opening (thickness of the wall panels and vault), manufacturers offer special arch expanders and intermediate plates of the same color range as the main structure.
Mandatory parameters for the correct selection and subsequent trouble-free installation of the arch with your own hands are the height, width and depth of the opening.
Preparation
We start by preparing the opening. We remove the old door along with the frame. Next, we clean the surface of the opening from dust and dirt. It is not necessary to level the opening, but more on that later.
After this, you can take measurements, based on which we cut the MDF panel using a hacksaw. Corners should be cut after installation of the main products.
How to solve the corner problem?
All arch models can be divided into two types:
- no corner fillers;
- with corner fillers.
The option with corner elements is intended for mounting an arched structure into existing openings of a standard rectangular shape. To install an arch without corner fillers, you must first take care of arranging the arched opening, if there is none.
This problem can be solved in two ways: carefully cut out the upper part of the partition according to the shape of the future arched structure or sew up the corners by constructing an arch using profiles and drywall. However, this option is only suitable for openings of sufficient height.
It should also be taken into account that further finishing will be required (putty, re-gluing or complete re-gluing of wallpaper, painting or repainting the walls, etc.).
To avoid all these problems, it is still better to purchase a model with ready-made corner fillers.
The photo shows a couple of examples of arches with corner fillers
Drywall
The most popular option is the construction of an interior plasterboard arch. It can be created either as an independent element or as part of a complex composition inside a plasterboard partition. This material allows you to create any design, and therefore there is no need to limit yourself to standard options. Not only asymmetrical vaults are available here, but also their smooth transition into another wall design element.
Drywall bends easily, so it can be given any shape. To do this, you need to moisten the material and make cuts on one side along the cardboard.
Installation of plasterboard arches is carried out using an aluminum frame made of different types of profiles. This includes guides and posts, as well as various connectors and adapters. For curved arched vaults, a special profile is used or its alternative is a self-cut post.
Stages of installation of a simple arched plasterboard structure
In order to install a plasterboard arch with your own hands, you need to secure the guide profiles in the opening and screw the rack elements to them with self-tapping screws. Sheets of plasterboard of the appropriate shape and size are screwed onto self-tapping screws on top of the frame. The inner part of the arch in the opening is formed from a bent thin sheet of plasterboard. Next, all joints are puttied and the interior partition is finished, including the opening.
Additionally, you can frame the arch opening with platbands if we are talking about a standard form. Otherwise, you can supplement the structure with lighting, and all the wires can be hidden inside the structure.
It is difficult to say which option is better to choose, since each person has his own taste and priorities. Be sure to consider all options before you begin installing the arch.
Installation of an arched structure
To install the arch, you need to prepare the following materials and tools:
- hacksaw with fine teeth;
- building level;
- roulette;
- 4 clamps;
- carpenter's hammer (mallet);
- PVA glue;
- polyurethane foam.
Preparatory work
First of all, it is necessary to dismantle the old door frame (if present), then we assess the condition of the walls and opening.
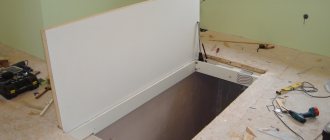
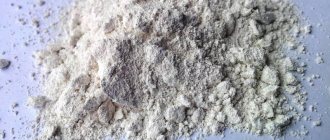
In order for the finished arched structure to look solid and aesthetically pleasing, the opening must have the same thickness and the walls must be smooth and without flaws. If there are minor defects, they must be eliminated using plaster, but serious irregularities and inconsistencies can most easily be corrected by installing plasterboard sheets.
In this case, the unevenness of the wall was leveled with plasterboard.
These measures will help to avoid unsightly gaps in the places where the platbands adjoin the wall surface.
Installation of the vault
- Do-it-yourself arch installation begins with fitting and gluing the arch. The panel sheet must be sawed down in accordance with the dimensions of the opening. If upper decorative locks are provided, another 7 mm is added to the sheet size - this is how much it should protrude beyond the ends of the arcs.
- The arched arch is placed face down on the floor (it is recommended to first lay a soft cloth to avoid damage). The arc groove is coated with PVA glue and one side of the arch panel is inserted into it, lightly tapping it with a mallet. A similar procedure is carried out on the other side and the structure is left for some time for the glue to dry.
- The required amount of mounting foam is applied to the inside of the assembled arched vault for better fixation in the opening and installed in place. To ensure a perfect fit, the structure is crimped with clamps.
Installation of columns
- The columns consist of panels, platbands and decorative locks. According to the dimensions, the platbands and panels are cut in length and width.
- The column panels are installed in place, checking the correct location with a level, and carefully foamed along the edges.
- Glue is applied to the grooves of the platbands and inserted into the panels.
- Having installed both columns, install the lower decorative locks.
- Clamps are removed from the arch and the column elements are secured with them.
This completes the installation of the arched structure. The time for complete drying of foam and glue is on average one day.
In addition, we suggest that you familiarize yourself with the video instructions on the technique of installing an MDF arch:
Standard Installation Instructions
Despite the large selection of materials, independent production consists of general rules and step-by-step design. By following the stages of work, you can avoid mistakes that will lead to a short service life of the structure.
Preparing the vault
To prepare, you need profiles and levels. The profiles are fixed to the base with dowels. First, a frame is mounted on both sides of the opening, describing the top of the future structure.
After this stage, a metal profile bent into a regular arc is attached at the required distance - its sides are cut. Stiffening ribs are fixed between the bent profiles at a distance of 20-25 cm.
Attention! All fixed elements are checked with a level, and the strength and rigidity of the frame is also taken into account.
Arch arch installation
The arcs of the arch are made according to a pre-prepared template. It can be made on plywood or paper. An arc cut from the material is attached on both sides to the frame base with self-tapping screws.
For evenness, craftsmen use another method, in addition to the template. A curved profile is attached to the prepared cut material from the back side.
Preparing the side parts
The side part is equal to the distance between the arcs. Depending on the material used, it is bent. For gypsum plasterboard there are 2 methods of bending the sheet - dry and wet. The finished curved panel is placed between the arches in the opening. The part has dimensions equal to the arch of the structure.
Mounting the interior arch post
A plasterboard structure requires a metal frame onto which the rack elements are attached. Other materials are attached to a frame base or glue.
To make an element, the required distance is from the edge of the arc to the bottom. The resulting length is measured on the material and cut. You will need 2 front parts and a strip between them.
All fixed elements must be checked with a level not only vertically, but also the evenness between the left and right parts.
How to make an arch in a doorway: the material of the wall dictates the technology
Each master builder approaches the work from his own point of view, and it is on this basis that he decides which technology for installing an arch in a doorway will be most optimal in a given situation. Yes, yes, you heard right, and even such a simple product can be made in different ways - at least you can count a couple of radically different technologies, which, in turn, can have different variations. It is this point that you need to familiarize yourself with first, since the choice of technology entirely depends on the material from which the partition is made.
- Concrete, gypsum and other monoliths. If the partitions in your home are made not of brick, but of some semblance of a monolith, then in some way we can say that you are lucky - arches in such openings are made quite simply, despite the fact that this process is quite dusty. In simple terms, it is simply cut out above the doorway, after which it is refined using putty, wood, MDF, and so on. Some materials, such as concrete, are difficult to cut (with a grinder and a diamond blade), and some, such as plaster, are cut with virtually no problems - even a hand saw can be used to cut such soft materials, although it will be faster and easier to cut with an electric jigsaw. easier. The most important thing here is to clearly mark the arch, and everything else, as they say, is a matter of technique. By the way, such numbers do not work with brick partitions, since after removing the lintel from above the opening, the brick begins to slide down, and cracks appear above the opening. There is another technology for such interior partitions.
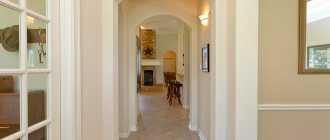
Decorating doorways with an arch photo
It is about how to make a doorway into an arch, using drywall for this purpose, that the conversation will go on.
Some tips
Decorating an arch in an apartment is a process that is carried out after the main work has been completed. The fact is that such structures are made from different materials using different technologies. The resulting architectural element serves to decorate the entire interior, giving it some individuality. We must not forget that cladding can play not only a decorative role, but also perform a protective function.
A few tips to help achieve the desired effect:
- The easiest way to decorate an arch in an apartment with your own hands is to highlight the arched opening with the desired color. Often shades are selected that will contrast with the walls. Thus, it is possible to obtain a completed design with a minimum of effort. This method can be used for other materials.
- Decorating material can be matched to existing colors. For example, if the cladding of interior arches is done with MDF panels, then it is advisable to combine them with closely spaced door leaves.
- The design can be decorated using various embossing and patterned ribbons that correspond to the general direction of the design.
- Nowadays stucco molding is becoming increasingly popular. Indeed, this is an excellent option that allows you to highlight an interior decorated in a classic style.
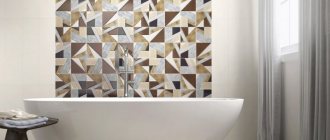
- The mosaic looks quite unique. Its use requires experience in installation. But if everything is done flawlessly, the effect will be amazing.