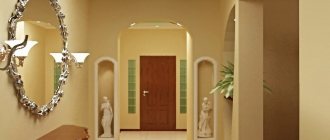
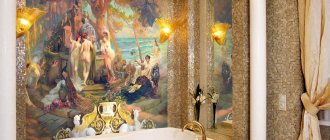
Types of arches in the interior of the hallway
Arches can be based on any variety of geometric shapes.
Square (rectangular)
These designs are similar to a regular doorway, which fits perfectly into any interior. This design of the passage will be a good option for a style solution that does not imply smooth transitions and lines.
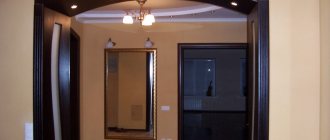
The photo shows two rectangular arches in the interior of the hallway.
Round
The standard, regular rounded shape of the arch with clean and smooth lines is the true embodiment of strict elegance and elegance.
The photo shows the interior of a small corridor with a round arch.
Elliptical (oval)
The ellipse taken as a basis gives the arch a more elongated shape, which will be most appropriate in a hallway with low ceilings.
Half-arch
Such an asymmetrical passage provides a lot of wide decorative possibilities, with the help of which you can create a fairly individual design that matches almost any stylization.
Trapezoidal
It is a rather bright and unusual solution, giving the interior of the corridor some dynamism.
Curly
Fantasy arches in the shape of a wave and other unusual solutions will become a completely unique decor for the room. Curly designs favorably emphasize the originality and aesthetic subtlety of the hallway design, adding a certain zest to it.
Visual increase in space
A little earlier we touched on the topic of visual perception. However, let's look at this from the point of view not of the general style, but specifically of your corridor. If there are no doors and there is a properly designed arch, your corridor will have much more natural light.
And this is a very important parameter, especially for small rooms, which is the corridor. After all, it is sunlight that visually expands any space, filling it with warmth and comfort. And from a psychological point of view, bright rooms are perceived much more pleasant than dark ones.
The location of the arch in the interior of the apartment
Popular options for arch placement.
Between the kitchen and the hallway
For a kitchen and a corridor, made in the same style, an arched opening will be a particularly excellent option, which will allow you to combine two rooms, not only visually, but also physically. This decorative technique will completely change the interior perception and create a more harmonious atmosphere.
The photo shows a rectangular arch between the kitchen and hallway with a staircase.
To the living room from the hallway
The arch allows you to visually smooth out the transition from the corridor to the hall and make the spatial composition much more holistic.
Corridor division
Arched structures are considered an excellent solution for zoning space. They allow you to create a visual partition of various arched, rectilinear or semicircular shapes, which will be in harmony with the overall style of the hallway.
In the wall
With the help of a decorative arch in the wall, it turns out that you can not only give the room character and expressiveness, but also create a truly picturesque decoration of the corridor, which can be used to frame mirrors, paintings, photographs, or use a niche to place other things or pieces of furniture, such as a dressing room .
The photo shows a corridor in light colors and an arch in the wall equipped for a wardrobe.
Which is better: a door or an arch to the kitchen
Many people have at least once thought about visually increasing the kitchen space, so it’s worth turning to the option of replacing the door with an arch. This method externally increases the height of the ceilings and expands the space of the room. When combining a kitchen and a room with arched entrances, they look bright and spacious. But this method has several disadvantages, for example, the complete lack of sound insulation. All advantages and disadvantages are presented in the table.
| Door | Arch |
| Prevents “kitchen” aromas and sounds from entering other rooms | Helps ventilate the room, eliminates air stagnation, poor sound insulation |
| Takes up to 20 cm of usable area | Saves space, making it suitable for small apartments |
| No restrictions | Cannot be installed in kitchens with gas stoves |
| Clearly divides space | Makes the ceiling visually higher and lighter |
| Can visually increase ceiling height | Not suitable for low rooms |
| Doesn't change the style of the room as much as an arch | Requires a clear design project of the apartment, lighting nearby |
What material can be used for corridor arches?
The choice of material determines the appearance of the entire structure, as well as its functionality and durability.
- Drywall.
- Tree.
- Plastic.
- Metal.
The photo shows white plasterboard arches in the hallway interior.
Conclusion
- The arch in the kitchen must be carefully thought out, presenting the result.
- The two most famous forms of acry partitions are semi-arch and rectangular.
- The easiest way to make an arch from plasterboard sheets is in two ways: wet bending and longitudinal cuts. The choice of method is chosen depending on the amount of bending.
- Abundances of decor, acidic colors and tacky decorations will look heavy, and this should be avoided in a small apartment.
- Both doors and arches have advantages and disadvantages, so you need to take into account your desires and home environment.
Shapes and sizes of the corridor and hallway
Design options for corridors of different shapes and sizes:
- Narrow. An arched opening in a narrow room will visually divide the space into functional zones, give it proportionality and make the most efficient use of the entire usable area.
- Long. For a long corridor, an effective solution would be round arches with an enfilade arrangement, with the help of which it is possible to advantageously emphasize the length of the room and turn this planning disadvantage into an advantage.
- Small hallway. Arches in a small room instead of a door allow you to visually expand the space without weighing it down or cluttering it.
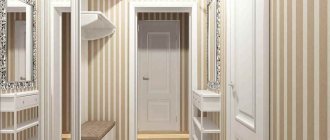
The photo shows the interior of a small hallway with a white rectangular arch.
Saving space
The first and, perhaps, the most basic feature of any arch is that it can significantly save your free space. After all, it is classic doors that require space for free opening and closing. And they themselves are often very massive.
But when using an arch there is no such problem. It is for this reason that it is most often used in small apartments, where free space is worth its weight in gold. In addition, this is a great option for creating a unique design for your hallway.
Arch design
Design ideas for decorating arched passages.
From stucco
This arched structure has an impressive, graceful and luxurious appearance and, thanks to the molded relief and carved details, does not require additional decor.
Decorative rock
With the help of stone masonry, you can unusually decorate and emphasize the arched element, giving it a certain antiquity and medievalism. A rather interesting solution is the artificial creation of decorative chips, due to which the finish takes on an even more natural look.
Backlit
Original arches with lighting in the form of spotlights, light bulbs or LED strips look lighter, airier and more technologically advanced and perfectly serve as a full-fledged lighting element.
Tile
It is a very interesting and at the same time universal and easy-to-use material, simulating various stone, brick, marble or other surfaces. The tiles make the arch more expressive, which adds visual variety to the corridor.
Wood finish
Refined, luxurious and natural wood finishes, thanks to a variety of textures and shades, guarantee the creation of a harmonious and truly environmentally friendly design. However, solid wood is a fairly expensive material, so veneer is often used for finishing.
The photo shows a modern hallway and arch decorated with wooden trim.
Non-standard design
There are a huge variety of decoration options, for example, you can decorate an arched opening with textiles and give the interior more coziness, decorate it with relief elements, molding or baguette, simulate through windows next to the passage, decorate with materials in the color of the walls and make it almost invisible, or vice versa, use contrasting a highlight that will become a real highlight of the hallway.
The photo shows a spacious hallway and a wooden figured arch with columns.
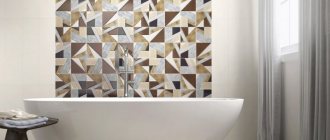
Mosaic
With the help of bright and aesthetic mosaics, you can decorate the entire arched structure or apply partial decoration. This geometric pattern will give the room design a completely new look.
Mirror
Openings decorated with reflective elements create a beautiful play of light in the room and add special sophistication to the interior. The mirror design undoubtedly attracts attention and adds additional spaciousness and lightness to the space.
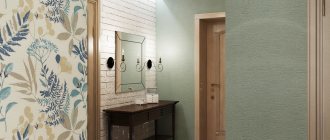
The photo shows elliptical arches with a mirror design in the interior of the corridor.
Brick
It looks quite unusual and has a simple and very stylish look at the same time. Various brickwork gives the vaulted passage massiveness and solidity.
With shelves
A wide arched opening with shelves, small side or corner shelves, provides convenient placement of decorative elements or storage of various small items.
How to make an arch with your own hands from sheets of plasterboard for the entrance to a room, corridor
Do not be afraid of these construction works, because even a beginner with a minimal set of tools can do them. As mentioned above, drywall is one of the easiest materials to work with, so the instructions in this article should be enough to get you started with the installation. This material will tell you which laminate flooring is best for the kitchen.
Trapezoidal will fit well into the design of a small kitchen and save space.
What you will need: tools and material
Equipment:
- screwdriver;
- screwdriver;
- impact drill;
- hacksaw;
- jigsaw;
- ruler (preferably wooden);
- pencil;
- engineering compass.
You should not use plastic rulers to make measurements more accurate. If you don't have an engineering compass, you can replace it with a rope with a pencil attached.
Materials:
- 12.5 mm plasterboard sheets for the frame;
- arched plasterboard sheets for the end;
- metal profiles;
- screws, dowels;
- putty, primer;
- finishing putty and paint if necessary.
Before painting, check whether the paint is suitable for the selected material, consult with the sales staff in the store. Remember that paint with aggressive components can damage fragile sheets.
To install all types of arches, except for the Romanesque semi-arch, you will need to completely dismantle the wall opening. Most types fit wide openings; use a wall saw to widen it if necessary. Read about removing stains from towels here.
By law, you cannot expand doorways if the wall thickness is less than 20 centimeters.
Make sure that all preliminary work has been completed, and that the materials and tools are available, and begin production.
Step-by-step instruction
- The first step is to secure the arched frame. To do this, you need to cut the profile with a hacksaw into 3 unequal parts. One should be equal to the width of the opening, the rest to the height of the arch.
- We attach profiles. The longest one is at the highest point of the niche, and the shortest ones are along the walls. On the other side we repeat this pattern.
- The profile is mounted with an indentation equal to the thickness of the plasterboard sheet with a fastening step of 10-12 centimeters
- Draw the desired arch on paper on a scale of 1:1. Show roundness using an engineering compass. Drywall is cut out using this unique “pattern” using a jigsaw or hacksaw. Be sure to make sure that all the parts are symmetrical so that everything turns out smooth!
- It's time to start installation. The arch elements are installed using self-tapping screws. Use a level to check symmetry. Avoid even small flaws, as they will be noticeable on the finished product.
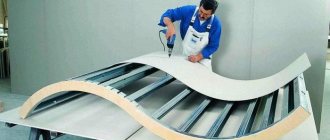
- Let's start making the end part. Here you will have to make a bend, we will look at how to do it later. We measure a strip of drywall of the required size, taking into account the bend, and cut the sides of the metal profile at intervals of 3-5 centimeters (this depends on the planned bend). After this, the strip needs to be cut and, gradually bending, installed on the frame.
- Everything is almost ready. All that remains is to prime, putty and coat with your choice of paint. Also at this stage, you can decorate the opening by any means at your discretion.
Now we need to focus on the most important part of the installation - bending the sheet. This is done using several methods, the main ones being: the wet bending method and longitudinal cuts. This link will tell you how to choose the right knives for the kitchen.
Wet bending method
It is used if a small bending radius is required - from 0.3 to 1 meter; this option would also be appropriate when moving the kitchen into the corridor. The method is to soak the drywall sheet before installation.
- Place the sheet on a wire rack to prevent water from stagnating. It should flow freely.
- We pierce the back surface with a needle roller several times.
- Using a paint roller or spray gun, wet the surface several times and wait for a while.
- After this, the sheet is installed on a ready-made curved arched profile.
- You can also leave the sheet under pressure in the template, wait until the plaster dries, and then install the dry and deformed drywall into the opening.
Dimensions when using drywall.
Method of longitudinal cuts for bending
The second method is suitable for the smallest bending radii and allows for much more painstaking work. It is usually used in interior work, where a strong bend often looks inappropriate. How it's done:
- A network of parallel cuts is applied to the reverse side. You need to saw through the cardboard and the entire thickness of the plaster. This method allows you to leave the front side clean and undamaged.
- We place the sheet on the template and give it the desired shape. After deformation, the cuts open “like an accordion,” and the voids are filled with a special mixture like putty.
- The dried sheet can be mounted on profiles.
Corridor design in various styles
A universal arch can be a great addition to any style direction, for example:
- Modern.
- Classical.
- Provence.
- High tech.
The photo shows a rectangular arch in the interior of a hallway made in a modern style.
With the help of modern materials and various finishes, it is possible to construct a truly unique and unusual arched opening that will successfully fit into any stylistic solutions.
Wood masonry
It looks impressive and is perfect for a kitchen designed in Provence or country style. The material itself is also quite strong and durable.
Unfortunately, you won’t be able to lay out such an arch yourself, since there are many nuances in working with wood. It is better not to risk trying to work with fairly thin products and hire an experienced specialist.
Choice of material
After you decide on the type of interior arch, you should pay attention to the material. Most often, this is done with an eye to what the walls of adjacent rooms are decorated with. The most common today are:
- Natural wood. It will complement the room with natural color, aroma and respectability. Any type of wooden arches can decorate a room. A distinctive feature is increased practicality and natural appearance. The disadvantage is the possibility of the fibers drying out, which will cause cracks or increased gaps.
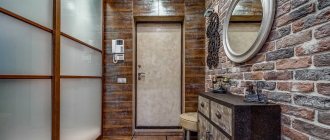
Arch in the corridor Source playard.ru
Healthy! MDF panels can be used as an analogue of natural wood. For example, most ready-made economy-class interior arches sold in hardware stores are made from this material.
Arch to the dining room, trimmed with stone Source www.picnorth.com/
- A natural stone. The interior gives the impression of an impressive structure. The finishing is done in accordance with the style of the rooms. The key disadvantage of the design is the need to build an arch with an impressive supply of doorway. An alternative option could be artificial stone slabs made to standard sizes. After preparing the opening and purchasing the material, all you have to do is glue it in the most appropriate configuration.
The impression of massiveness obtained from a brick arch is not inferior to that produced by a structure assembled from stone. It can be installed already at the stage of construction of internal partitions or load-bearing walls.
Arches in a large private house Source yellowhome.ru
Simplicity and convenience
Among other things, creating an arch is much easier than installing classic doors. After all, you just need a little knowledge, a little more finishing material and good imagination. And the designs of the arches themselves are not very different from each other, which will allow you, even without practical experience, to easily create the option you choose.
It is worth talking separately about the financial side of the issue. After all, the process of creating an arch is quite a budget option than installing classic doors. Thus, you can not only save your money, but also add that same variety to your corridor.
Step-by-step instructions with photos: the fastest way
Do-it-yourself plasterboard arches are made in different ways. This takes a minimal amount of time. Having decided on the shape, we proceed to installation. We attach a frame to the prepared opening, cleared of peeling plaster and relatively leveled, according to the dimensions of the future arch. It is made from a drywall profile or a dry wooden block of a suitable size. Sometimes, if the wall is narrow, you can only choose wood.
A profile frame is screwed to the selected dimensions
To begin, we cut out a rectangle from drywall to the size of the future arch, find its middle, mark it, and then temporarily screw it into place. We retreat from the edge 12.5 mm - the thickness of the plasterboard sheet. If the adjacent walls are already plastered, add a couple more millimeters of putty so that the surface can be leveled.
Screwed the drywall into place
Now we take a piece of profile or hard corner and set aside half the width of the opening from one edge. At this point we make a hole in the corner and insert a nail into it. We stick this nail into the middle of the doorway we marked earlier on the sheet. It turns out to be a kind of compass, with which it is easy to draw an ideal line.
Device for outlining an arc
By changing the mounting height you can get a more or less high arch. If you need a flatter curve, increase the length of the “compass”.
Using a corner we draw an arc
Having removed the sheet, we cut out an arc along the outlined contour. This can be done with a special drywall saw, a metal saw with a fine tooth for a smoother edge, or a jigsaw (there will be a lot of dust). If the cut is not very even, smooth it out using sandpaper attached to a grater. With this device we achieve a perfectly even curve of the shape we need. We fasten the cut fragment of the arch - the side wall - back into place.
We fix the cut out fragment
If everything is smooth, there are no distortions or irregularities, on the other side of the opening we attach the same sheet of drywall as a few steps earlier - a rectangle or square, depending on the shape. It must be fixed strictly vertically. Now we transfer the shape of the arch onto it. We take a square, at a right angle and press one side against the drywall, onto which we transfer the arch, and the other side against the arch. Having aligned the square perpendicularly, mark a point with a pencil. We make such points along the entire arc. The more often they are done, the easier it will be to draw the line and the more accurate the match will be - the less you will have to grind down.
Transfer the arch shape to another sheet of drywall
Why is it so difficult and not just to make a copy of the first sheet? Because few openings are symmetrical. As a result, installing the second sheet so that the lines of the arch coincide is very problematic.
Having marked all the points, remove the sheet, draw a line, and cut along it. We install it in its original place. Now we take the smoother again with sandpaper and now we smooth both edges until they match completely. One point - the trowel should be wider than the opening so that both walls of the arch are captured in one pass.
Level both walls at the same time
We measure the length of the arc, cut out a piece of the profile of the same length, make notches on the walls every 3-4 cm. This tape will need to be secured along the arch arch on one side and the other.
How to cut a profile for an arch
We fasten it with self-tapping screws, carefully, pressing the profile and holding it with a block, not with your fingers: it’s easy to get the screw into your fingers. By the way, you need to wear gloves when working with the cut profile. If you don’t, you’ll definitely cut your hands.
We fasten the notched profile, simultaneously giving it the shape of an arch
By the way, the back of the profile can be aligned along the edge - it’s easier to work this way, but the joint will still have to be sealed later. Screw the strip to the other side in the same way.
This is a bottom view - profiles are attached to the sides
There is a second way to attach the profile - attach it to a quick-setting universal glue, such as liquid nails. This method is acceptable if the opening width is small. If the arch is thick, the glue may not be able to withstand the mass of drywall that will be attached from below.
The next step is to attach the jumpers. First, the depth of the arch is lost, 1-1.5 cm is subtracted from it. This will be the length of the lintels. Cut profile pieces of this length.
Jumpers are cut from the same profile
At the places where the jumpers are attached, the “petals” are cut off, and the prepared fragment is installed and secured. It should not rest against the walls, it should be located approximately 5 mm from the back. Jumpers are needed to make the structure more rigid, otherwise it “walks” when pressed.
Fastening jumpers
Next, you need to cut out a rectangle from drywall that will cover the structure from below. Its width is determined simply - from the outer edge of one sheet of plasterboard to the outer edge of the second sheet. The length is measured with a flexible tape (can be a tailor's tape) or a tape measure with an assistant. We attach this sheet with self-tapping screws to the arch frame. The sheet has to be bent, but read how to do this a little lower - closer to the end of the article.
We attach a strip of gypsum board to the arch
Next came the finishing work: a special corner is attached to the corner, everything is puttied using the usual technology: first the starting joints and corners, then the finishing one.
How to bend drywall
One important detail: standard wall plasterboard does not bend well. For curved surfaces, they specially came up with thin ones - 6 and 6 mm thick. This bent part is easier to make from it. With a slight curvature, such a thin sheet can bend easily and without tricks. If you don’t want to buy thin GVL, there are two ways to bend the standard one.
The first is to take a needle roller and roll the cut section well on one side. You need to roll with force so that the plaster breaks. Then the leaf is soaked in water and left for two to three hours. After such procedures, it should bend quite well. You take it, fix it on one side, and gradually press it against the arch frame, bend it, gradually screwing it along the edges with self-tapping screws. The method is not bad, but if there is a lack of experience and insufficient processing of the gypsum, the sheet may burst. You will either have to mask the gap later, or start over.
Roll the strip with a roller with needles
The second way to bend drywall: on one side, make notches with a knife approximately every 4-5 cm. The notches should cut the paper. This strip is also gradually fixed, breaking the plaster as necessary. It bursts along the cut lines with light pressure.
Notches on one side make it easy to break the plaster