Siding itself is a set of panels made of metal, wood or polymer, which are specially fixed to the surface of the building facade. However, it is not enough to simply install them on the wall - to make the appearance of the house complete, you must also use siding components. They will help to decorate and make beautiful the corners of the building, door and window openings, and other elements of the house. And the installation itself is impossible without them.
Siding components
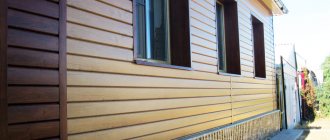
Covering the facade of a house with siding
Preliminary work
Before buying material, you need to decide not only the color and relief of the finishing panels. It is necessary to take all measurements and decide exactly how the facade will be faced: vertically or horizontally, with a highlight of the plinth or a solid canvas, how the openings, eaves overhangs and other elements of the building will be designed. In addition, the need to insulate walls and install sheathing is taken into account.
Before covering an old house, it is advisable to remove the previous wooden paneling, if any, or make sure that it is in good condition: there are no rotten, fungal or cracked boards, replace them, foam the seams. This is done if it is decided to install metal siding or vinyl panels directly on the wall without insulation and creating sheathing. But the walls must be treated with antiseptic and water-repellent agents.
It would be more correct to first cover them with moisture-resistant plywood or OSB boards, or even better - to mount a frame for fastening the cladding, which will become a reliable load-bearing base and create a ventilated space under the siding.
Frame made of metal profile Source the-master.ru
The sheathing is attached in a direction perpendicular to the panels: standing up if the siding will be mounted horizontally, and lying down if vertically. The step between elements is at least 40 cm.
However, insulating the walls will require changes to this scheme. First, a frame is made for the thermal insulation material, taking into account the width of the roll or insulation boards. And after fastening it and installing a wind-hydroprotective membrane on top of it, a load-bearing frame is created in the chosen direction and with the required pitch.
Sheathing diagram with insulation Source files.builderclub.com
Advice! If the pitch of the first and second battens does not coincide, the first (for insulation) can be fixed perpendicular to the main (bearing) one.
All existing openings must be framed around the perimeter, taking into account the angle of the slopes. As a result, the installed sheathing should level the walls and create even vertical planes on which the siding will be laid.
Types of lathing
Let's move on to installation and start with choosing the sheathing. The sheathing is made from:
- wooden beams;
- profiles for fastening drywall;
- metal U-shaped profiles for siding;
- plastic structures designed for the installation of vinyl and acrylic panels.
Before installing the sheathing, inspect the surface. If there are cracks, crevices and other defects on it, they need to be repaired. If the old cladding is crumbling (for example, paint or plaster), it must be removed. If there are strong differences and unevenness on the walls, they should be smoothed out. Otherwise, the geometry of the wall will be disrupted and the siding may crack or deform.
After eliminating the unevenness, you need to treat the walls with a protective coating. To protect the walls of a wooden house, use an antiseptic and a fire retardant: the first will cope with moisture and rot, the second will prevent fire. Treat concrete walls with a deep penetration primer. It will prevent the appearance of mold and mildew.
Wooden sheathing for siding (photo No. 5)
The sheathing is mounted perpendicular to the siding panels. In other words, if you want to lay the siding horizontally, then the sheathing frame must be made vertical. And vice versa. The step between wooden beams or metal profiles should be 30-50 cm.
Hydro-wind insulation is laid under the sheathing. It protects the building from wind and moisture. Thanks to the presence of the lathing, a ventilation gap is formed between the walls of the house and the finishing panels. The gap prevents the appearance of condensation harmful to the walls and cladding. To keep the house warm, you can lay insulation between the sheathing. For this purpose, mineral wool and expanded polystyrene foam are used.
Let's take a closer look at each lathing option.
Wooden sheathing. It is made from beams 4 cm or 5 cm thick
When choosing beams, pay attention to the smoothness of the surface and the absence of cracks. Before installation, you need to dry the wood and cover it with solutions that protect the wood from rot and fire.
If you are faced with the question of how to attach siding to wood, then there are 2 options: with a screwdriver and self-tapping screws or with a hammer and nails.
Metal sheathing of walls and plinth (photo No. 6)
Profile for fastening drywall. If the goal is to save money, then profiles for interior work are used to install siding. Most often, sheets of plasterboard are attached to such structures. Manufacturers do not recommend using drywall profiles outdoors. Due to the thin zinc coating, corrosion occurs on them when exposed to moisture. They are intended for indoor use and are not suitable for attaching siding.
Metal U-shaped profile. To attach the siding, a durable metal profile 1 mm thick is also used. This design is more reliable than lathing with a plasterboard profile, but will be more expensive. If you use heavy cladding panels (for example, basement or metal siding), then you need to use street profiles.
Alta-Profile polymer façade fastening system. Polymer profiles are not subject to rust and rotting; they do not require additional processing or special storage conditions. If you choose vinyl siding to clad your building, you need to take into account that it expands in the hot summer and contracts in winter. Polymer profiles prevent deformation of cladding panels due to sudden temperature changes; they have the same coefficient of expansion as siding.
Plastic profiles are not subject to rust and rot (photo No. 7)
Installation of wall vinyl siding
The technology for cladding houses with metal and polyvinyl chloride panels is generally the same. But the latter are distinguished by a rather high coefficient of thermal expansion, which leads to a noticeable change in the geometric dimensions of any element with an increase or decrease in air temperature. A three-meter strip can be lengthened or shortened by 12-18 mm, and these possible movements must be taken into account during installation.
Fastening rules
You should remember the following rules for installing PVC siding:
- it can only be fastened through special slotted holes on the nail strip;
- fasteners are installed in the center of the hole or close to it;
Basic installation rules Source i0.wp.com
- nails or screws cannot be driven deep, pressing the panel to the frame: there should be a gap under the head that allows the panel to move along the mounting hole;
- the fasteners are installed strictly at right angles to the installation plane;
- Attachment to a lathing made of wet wood is not allowed;
- You cannot make a tight joint between the panels and the internal walls of the extensions; it is necessary to leave a distance between them for possible expansion.
On a note! When installing at above-zero temperatures, this gap should be 5-6 mm, in winter - at least 8-9 mm.
It is also important to ensure proper delivery and storage of the material. The panels can only be transported on a flat surface of sufficient length so that the ends do not hang down. And they are stored protected from direct sunlight - vinyl warps when heated too much.
Accessories and their installation
Installation of vinyl siding begins with the installation of additional elements, some of which are load-bearing, others perform a decorative function.
Accessories (additions) for PVC siding Source fasad-exp.ru
To understand what we are talking about, we will give a brief description of the main extras:
- The starting profile is attached along the installation start line and serves to fix the first panel.
- External and internal corners serve to design the corresponding corners of the building and cover the end cuts of the panels.
- The connecting H-profile is used to extend panels along the length and masks their joint.
- J-profile is an additional element that allows you to neatly design openings, vertical seams, and the ends of the pediment and soffits.
- Soffits are strips for lining eaves overhangs.
- Window trims and trim allow you to trim slopes by installing siding around a window or door.
- The finishing profile is installed along the top installation line and hides the cut edge of the last panels.
Work begins by marking the bottom line of the cladding, for which a water or laser level is used. It must be strictly horizontal. Then the corner elements are placed at the place of their installation and their boundaries are marked on the frame posts.
Marking the edges of corner profiles Source i.ibb.co
See also: Catalog of house projects with siding.
The starting bar is nailed along the horizontal marking line, making an indent of 6-9 mm from the vertical marks. A gap of up to 12 mm is also made between adjacent profiles so that during thermal expansion they do not press against each other.
Note! If the house has a protruding base, then before attaching the starting strip, you should install the base siding, install a flashing to drain rainwater, and install the starting profile on top of it.
The next step is installing corner trims. They are set vertically in level and secured on both sides at the top point of the first mounting holes. Before this, the profiles are cut to length, taking into account a distance of 3 mm to the eaves overhang (taking into account the thickness of the soffits) and an outlet of 6 mm below the lower edge of the starting strip. Having once again checked the verticality, the profiles are fixed along the entire length by driving nails or screwing self-tapping screws into the middle of the nail holes every 20-30 cm.
If one profile is not enough, an additional overlap is installed on top of the lower element, having previously cut the internal strip with holes to a height of 34 mm to obtain an overlap of 2.5 cm and an internal gap of 9 mm.
Diagram of correct installation of external corner profile Source moisaiding.ru
Instead of this additional element, the corner can be formed with two J-profiles, as shown in the diagram. The internal corner is mounted in the same way. If there is a protruding base, the vertical profiles should not rest against it; the same technological expansion gap of 5-6 mm is required.
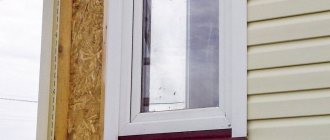
Framing openings
Finishing windows with siding from the outside is one of the most difficult stages that requires careful consideration. All openings are framed before the installation of wall panels begins, and the choice of additions depends on the plane in relation to the walls: in one or in a niche with the need to finish the slopes.
When the windows are not recessed into the wall, they are framed with platbands or J-profiles. It is important to take careful measurements so that the profiles fit together accurately at the corners.
In the upper horizontal elements, cuts are made on both sides and the resulting “tongues” are bent inward, and “windows” are cut out on the side elements so that these pieces of plastic do not interfere with the joining. During installation, the bent “tongues” are placed inside the side profiles.
Why are components needed?
Siding is a type of facade decoration that has a rather rich history. It originally served to protect the facade of the building from the effects of natural factors - rain, snow, wind and sun. Thanks to him, the main walls of the building remained strong longer, did not collapse, and in order for the building to look beautiful again when the siding lost its appearance, it was enough to replace only the external decoration. This is especially true for wooden houses, because wood, as is known, is more exposed to natural factors than other building materials.
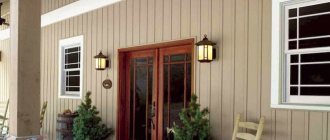
Vinyl siding
On a note! Now there are a huge number of types of siding that can be used for cladding a house. This includes vinyl and metal siding, wood and others. However, all types of panels are durable and strong and can last for decades.
Siding house
But in order for the siding installation to go quickly and the final work to look complete, it is imperative to use special components. These can be all kinds of strips, platbands, which are used to decorate corners, door or window openings of a building, help to complete the roof or strengthen the siding itself on the wall. Components are not only decorative, but also carry a certain load.
Also, the components for siding allow you to beautifully design the joints of various types of finishing material strips and the transitions between them. Without using them, there is no way to secure the siding so that all the elements on which it rests are hidden from view.
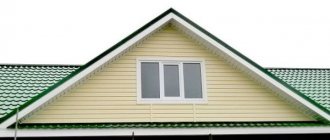
Hemming of roof eaves
Video description
How to finish a window with a profile platband or J-profiles is shown in the video:
When the window is located in a recess, near-window strips are used, which combine both the platband and the slope. The installation principle is the same, but first, a finishing strip is attached along the edge of the window frame (a J-profile can be used instead), into which a slope cut to the required width is inserted. And the plane of the casing is attached to the frame through nail holes.
Installation diagram of near-window profiles Source vseprosiding.ru
See also: Catalog of companies that specialize in materials for finishing house facades.
Installation of spotlights
Installation of soffits is considered the final stage of gable cladding, although it is quite possible to first design the gable overhang, and only after that begin installing row panels on a vertical plane.
First of all, it is necessary to ensure the possibility of fastening the elements, which depends on the type of roof overhang.
There are:
- Closed overhang. It is lined with boards on the bottom; installing profile strips on such a base does not cause any problems.
- Open overhang. In this case, there is a continuation of the roofing material, which does not have any cladding underneath. To install the extensions and the soffits themselves, you will need to lengthen the rafter legs and attach support bars to them. The task is quite difficult due to the inconvenient location of the work site - at a height, the work is carried out from below. This circumstance sometimes forces one to abandon the installation of spotlights.
Soffits are installed in grooves of parallel installed internal corners and J-straps along the edges of the overhangs. The installation rules remain the same - do not tighten the screws all the way, leave temperature gaps.
To install the spotlights, one edge is inserted into the profile groove, and the receiving element is slightly bent to make it possible to insert the spotlight into the groove. It is not recommended to apply too much force, which could permanently deform the receiving element.
To design the angular turns of the spotlights, either an H-profile or two J-profiles are used, tightly installed with their rear platforms facing each other.
The junction of two strips can be made at 45°, or one strip continues to the end of the overhang, and the second adjoins it end-to-end through the H-bar
The second option is somewhat simpler, which is very important when working at height is difficult and inconvenient
The final stage is the installation of L-planks that form the end cut of the cornices.
Video description
The finishing of windows with siding is shown in very detail and in an accessible way in this video:
To prevent the slope from “jumping out” of the finishing strip, hooks are made along its cut edge every 20 cm with a special punch - small tongues protruding outward.
Making hooks with a punch Source transkribator.guru
Installation of the main cladding
When installing horizontally, installation begins from the bottom; when installing vertically, they move from left to right. The first panel with its lower edge is inserted into the lock of the starting bar and pulled up until it clicks; the ends are hidden in the receiving channel of the corner extensions. The length of the panel should be such that its ends do not rest against the bottom of the channels, but recede from it by the amount of the technological gap (6 or 9 mm depending on the air temperature at the time of installation).
On a note! The specified indentations must be observed for entire panels with a length of 3 m or more. When installing short sections, they should be proportionally reduced.
If the length of one panel is not enough to cover the wall from one corner to another, they are extended by overlapping or using connecting profiles:
- The overlap of one panel over another must be at least 2.5 cm. In this case, their inner part with the mounting strip and lock must be trimmed to create a gap. The overlap seams should not be located one above the other; in each row they should be shifted by 50-60 cm.
Scheme for extending overlapping panels Source allfacades.com
- Connecting H-profiles are installed on the sheathing vertically along the joint line; their fastening and extension are similar to the installation of corner profiles.
After fixing in the starting strip and vertical extensions, the siding is fastened to each sheathing post using nails or screws for wood or metal (depending on what the frame is made of). When attaching the lamellas, do not pull them upward, changing the natural angle of the relief.
The second and subsequent rows are installed in the same way, with the difference that they do not cling to the starting profile, but to the locking part of the previous panel. After attaching every third row, it is recommended to check the horizontal installation.
Having reached the row that falls on the window opening, it is necessary to temporarily install the panel in place and make markings to remove excess plastic. The width of the cut part should be 6 mm greater than the width of the opening frame on each side.
Before final installation, hooks are made on the cut edge that will hold this part of the panel in the near-window profile.
Installation diagram of the panel under the window opening Source allfacades.com
Rules for joining materials without a connecting strip
To connect siding, certain nuances are taken into account to avoid serious problems in the future:
- Installation is recommended to be carried out in the warm season. The fact is that at low temperatures, wider gaps are initially established, which are not always possible to set correctly.
Plastic and metal are always mounted with a damping gap
- The locking part of the panel must be trimmed. A space of 4–6 mm is formed between two adjacent elements with holes for fixation, this will compensate for thermal expansion.
- To join two fragments, the overlap should be 25–30 mm. One part must be placed exactly above the second.
The amount of overlap must be at least 25 mm
- The siding is installed in a checkerboard pattern, this will help reduce the visibility of overlap areas. This method has one feature: it is necessary to create a stop under the edge of the inner part to reduce the likelihood of the product sagging.
To make the joint less noticeable, the panels are placed in a checkerboard pattern.
Also, the end sections of the panels should not be folded in order to reduce visible gaps. Too active actions can lead to damage to the material, especially when choosing low-quality products.
Features of metal siding installation
Installation of metal siding is completely identical to vinyl, but there are nuances associated with the difference in the properties of these materials. And first of all, with the coefficient of thermal expansion, which for metal is several times less than for plastic. Therefore, it is not necessary to leave gaps between elements, unless this is caused by the need to simplify installation:
- Panels can only be cut with metal scissors - regular or electric. A grinder with an abrasive wheel leads to strong heating of the surface and damage to the protective polymer coating.
Metal panels are coated with polymer paint to protect against corrosion and give a decorative appearance Source montazh-saidinga.ru
- When taking measurements and markings, you need to use a plastic square and a tape measure with a rubber backing so as not to scratch the paint on the front surface.
Advice! When purchasing siding, purchase special repair paint in a color to hide accidental damage.
- Self-tapping screws and nails used for installation must be galvanized. When fastening panels or extensions through, use self-tapping screws with a rubber gasket and a head painted in the color of the coating.
- If the panels are covered with a protective film, it must be removed before installation, otherwise under the rays of the sun it will “stick” to the surface.
Another nuance concerns additional corner and connecting elements. They can be complex, with locking channels, or simple, mounted on top of the finished cladding by drilling with self-tapping screws.
Add-ons for metal siding Source i2.wp.com
Specifications
Technical characteristics reflect the following indicators:
- Length. An important indicator used when calculating the amount of material;
- Width. Overall size of the strip including the lock;
- Useful strip area. The area excluding the size of the castle is used in calculations;
- Thickness. This refers to the thickness of the material (vinyl - 1.1 mm);
- Temperature operating conditions. Operating temperature limits of the material, for comparison with real operating conditions - summer heating by sunlight and winter frosts;
- Number of sheets per package. Useful information when transporting or delivering material.
For a more in-depth understanding of the qualities of a material or its coating, you can indicate the degree of resistance to UV rays, since some types of protective coatings or materials are weak in this regard and their use is undesirable.
Example technical specifications
Base finishing
Base siding differs from wall siding in its greater thickness and strength, as well as shape: these are not long lamellas, but wide and short panels with jagged vertical joints that repeat the spacing of the elements on the front surface. The facade panels are connected to each other vertically “tooth-tooth”, the ends are hidden in the grooves of the corner elements.
Base siding panel Source torgbest.ru
Due to its large width, the basement siding noticeably expands not only in length, but also in height, so it must be provided with free movement in all directions, leaving a small gap between the rows.
As usual, installation of basement siding begins with attaching the starting profile and corners. Installation is carried out in rows from left to right. The first panel is cut off from the left edge, the next one is joined to it. The last element ends on the right edge; its length should not be less than 20 cm.
Installing the first panel
Excessive fastening density will deform the siding during temperature changes and the panel will “give waves”
We start cladding from the least noticeable wall of the building. This way we can practice and work out all sorts of inaccuracies.
Installing the first siding panel and properly engaging the profile lock
First step. We insert the first cladding panel into the corner profile and into the locking connection of the starting strip.
Second step. Attach the panel to the sheathing.
It is important to maintain the dimensions of technological indents. If the cladding is carried out in warm weather, we maintain a 6 mm gap; if in cold weather, we increase the gap to 9 mm
When installing panel trims, the indents can be reduced.
Siding fastening
Briefly about the main thing
If you carefully read the article, you learned a lot of useful things about siding: how to attach wall panels from different materials, frame window and door openings, finish gables and plinths. When installing vinyl siding, which is prone to significant thermal expansion, careful measurements must be taken to ensure the necessary technological clearances. Metal siding does not require such indentations, but you need to work with it carefully so as not to damage the protective layer. The installation of plinth panels, which differ from wall panels in form factor, also has its own nuances.
Ratings 0
Pros and cons of wooden sheathing
Wooden sheathing is a traditional solution that has its pros and cons.
The advantages include:
- Availability of material.
- Ease of processing.
- Low weight of the material, which does not create unnecessary load on the wall.
- Possibility of making to order in any size.
- Wooden blocks do not require additional insulation, being themselves heat insulators.
- Convenient to attach siding panels.
Flaws:
- The bars do not have a perfectly straight surface; correction is required.
- There is a danger of warping or turning by a screw, which can change the geometry of the finished skin.
- Wood is flammable.
- There is a danger of mold, rot or insects; treatment with antiseptics is required.
- Wood reacts actively to changes in air humidity.
Despite all the shortcomings, there are many supporters of the traditional approach to the manufacture of sheathing. This is explained by the possibility of independently making planks from any available wood using a hand-held power saw.
Wooden sheathing
Additionally
When installing siding step by step with your own hands, you need to take into account certain information:
- installation of heat and sound insulation is optional; waterproofing is indispensable;
- You should not cut the siding panels in advance, this will allow you to achieve a minimum amount of trim;
- when installing basement siding in the cold season, it is necessary to double the expansion gaps;
- the screws must enter the wall strictly horizontally in the center of the mounting hole;
- There is no need to tighten the screws all the way, leave a small gap to compensate for temperature deformation.
If you follow the specified siding installation procedure, this process will not take much time.
Basic Rules
To choose the right products, you need to pay attention to the following features:
The thickness of the panels must be the same, otherwise it will be difficult to lay them level. There must be markings on the inner surface of the material. From it you can find out the production date, batch number and color of the front surface. During installation, additional panels may be required; this marking will allow you to purchase identical material.
High-quality products must be equipped with an anti-hurricane lock. It is a bend that is located above the mounting holes. Decorating the outside of a house with siding necessarily requires the presence of such a retainer, otherwise the panels will not last long and will break off. The package must include the number of fasteners required for installation. Before purchasing, you should check with the seller for quality certificates
It is also important to inquire about the warranty, in some cases the commitment period is up to 50 years. Installation instructions should be included with the material.
Tool preparation
As mentioned above, no special tools are required for installation work.
The list of tools that must be prepared before starting work is as follows:
- Sharp knife;
- Jigsaw. Used as an alternative to a knife; with its help you can get a beautiful and neat cut;
- Drill or hammer drill. Needed to enlarge and make new holes necessary for attaching panels;
- Screwdriver;
- Building level. It is most convenient to use the laser variety;
- Roulette.
CAREFULLY! You can use a grinder to cut the material, but it is recommended to use it only at low power. Otherwise, when cutting, the material begins to melt and deform at the edges. Tools
Tools
Selection of fasteners
To fix the siding, you can use several methods of securing parts:
- Construction stapler staples. Such fasteners are considered the most unreliable. The process can be completed quickly, but it will be of very poor quality. When there are strong gusts of wind, panels or corners and other additional siding elements may come off, which will lead to deformation of the part. Even if under the influence of external factors everything remains in place, then over time the strength of the fixation decreases and the structure may collapse under its own weight. In addition, this option is not at all suitable for metal siding.
- Nails. A very reliable way to fix corners and other finishing details. But there are difficulties with the gap for expansion. With such a tool it is difficult to leave space between the fastener and the part. And when a nail is hammered tightly, it is impossible to remove it. Although if you practice a little, you can cope with such a task.
- Self-tapping screws. The most popular method among professionals and those who are doing the finishing themselves for the first time. Using a screwdriver, the fastener is screwed in until it stops, and then unscrewed one turn. This will be enough so that the part or panel can “walk” freely when expanding.
The most suitable option for attaching siding to the sheathing is to use self-tapping screws. Therefore, if the household does not have a screwdriver, then you can borrow one from friends, rent it from a construction company, or purchase a new one.