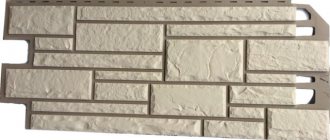
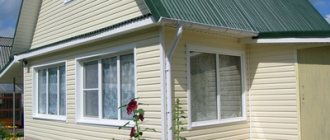
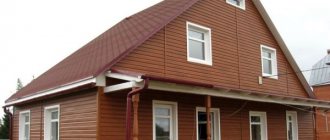
Siding is the external cladding of a house that performs several important functions at once.
First of all, this is the decorative design of the building, giving it a neat, elegant appearance.
In addition, siding allows the wall materials to “breathe” - i.e. promotes the removal of steam from the thickness of the wall pie, preserving the working properties of the structure for many years.
The relative cheapness of the material and the possibility of self-installation are additional, but no less important properties that make the cladding popular and in demand among consumers.
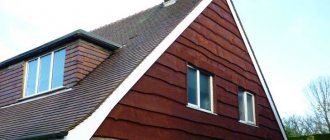
What is the gable of a house
A pediment is a triangular (most often) section of a wall, bounded by the slopes of the roof and, on the base side, by a cornice. Depending on the architectural solution, the pediment can be a continuation of the wall, or a separate element, but in any case it serves as the basis for the roof slopes, whatever its shape.
There are many types of gables:
- Triangular.
- Trapezoidal.
- Torn.
- Luchkovy.
- Stepped.
- Circular.
- Uninhibited.
All types of gables perform the same function - continuation of the wall until it contacts the roof slopes, or serving as the end wall of the attic . For private housing construction, the most typical shape is a triangular shape, or a more complex pentagon shape, which is obtained in houses with a sloping roof.
How to calculate the amount of siding for a gable
To calculate the required amount of siding, you must first calculate the area of the gable. Depending on its shape, ordinary geometric formulas are used to determine the areas of simple figures - an isosceles triangle, a trapezoid.
To determine the area of a pediment with a sloping roof, you can conditionally divide it into two figures - a trapezoid (lower part) and an isosceles triangle (upper part), calculate their area and add up the results.
Remembering the school geometry course, the area of a triangle is half the product of the base and the height, and for a trapezoid - the sum of the bases multiplied by the height and divided in half.
It should be borne in mind that the calculated area of the gable when purchasing siding should be increased by 10-15%, since the skin will have to be cut at an angle, and the trimmings will go to waste, so a reserve area will be necessary.
In addition, errors in measurements, cutting or installation are always possible; the presence of additional material will help compensate for them.
Video description
How to cover the gable with siding and trim the roof overhangs, see this video:
Sheathing with sheet materials
When covering the pediment with corrugated sheets, plywood, or OSB sheets, the frame is mounted taking into account their width so that the joints of the sheets fall exactly on the studs. Installation begins from the central part of the pediment, installing a whole sheet, then moving to the right and left of it.
The corrugated sheet is mounted with an overlap on one wave, and the overlap across the entire width of the pediment should be directed in one direction. Fastening is carried out using roofing screws with a press washer in the color of the coating in the lower wave. The sections are hidden in metal U-shaped profiles pre-installed on the sides, made like additional strips for siding. The lower part of the profiled sheet is placed on a steel casting.
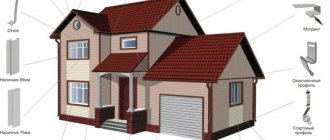
Additional elements
Additional elements that will be needed for cladding the pediment are :
- Starting strip (if the pediment is structurally separated from the wall plane).
- Finish bar.
- H-profile.
- J-profile.
- Soffit, L-strap.
- Molding, decorative overlay, etc.
- Window decoration elements (if any).
IMPORTANT!
You should use additional elements only from the same manufacturer as the main siding panels. In addition, you cannot use metal elements together with vinyl ones - due to the different coefficient of thermal expansion, the tightness of the canvas will be compromised.
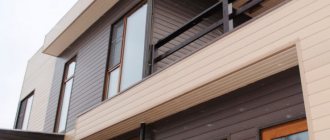
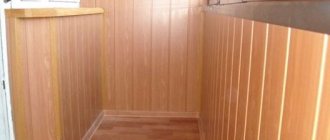
To finish the gable, a different type of siding may be used, different from that on the walls . Sometimes such a solution very successfully decorates the appearance of the house, especially if horizontal siding is used for the walls and vertical siding is used for the gable.
In any case, it is recommended to lay out all the cladding elements on the ground and check the completeness, accuracy of cutting the material and other possible issues. It is better to correct all errors in advance, rather than during installation .
Sequence of work
All work has the following sequence:
- Installation of sheathing.
- Installation of insulation (if necessary), steam and waterproofing.
- Installation of starting rails, H-profiles, corner profiles, design of window openings.
- Installation of main siding panels.
- Fitting of soffits and L-straps.
Depending on the complexity of the house’s architecture, some additional operations may be necessary, but this is the basic list of work.
Installation of sheathing on the gable
The general principle of installing lathing is the same as the rules for installing on walls. If there is a need for external insulation, then a primary sheathing is installed with the direction of the planks being the same as the location of the siding panels .
The plane of the slats is carefully leveled, for which it is convenient to use a stretched cord between the outermost slats installed first. The height above the wall surface should not be less than the thickness of the insulation. The pitch of the planks corresponds to the width of the insulation (usually 60 cm).
After installing the insulating material and steam-hydroprotection, the counter-lattice is installed . It will play the role of a supporting system for the siding panels and, at the same time, provide a ventilation gap between the sheathing and wall materials.
The spacing of the planks is most often made about 40 cm for greater strength of fastening of the sheathing.
The material for the sheathing was traditionally wood - smooth, straight bars of the required thickness were used. This option is not the most successful, since the wood is subject to warping, swelling and other changes in structure, which negatively affects the condition of the cladding as a whole .
Recently, metal guides for gypsum boards have become the main material for lathing; they are free from all the disadvantages of wooden bars, allow precise adjustment of the plane, and are not subject to corrosion due to the galvanized layer.
Considering the minimal difference in price, the choice of metal strips is completely justified and rational.
Video description
This video shows how to insulate an attic roof with frame gables from the inside with mineral wool:
The distance between the frame racks is selected according to the width of the insulation - it should be 1-1.5 cm smaller so that the slabs are tightly sandwiched between the side walls of the racks. The cross-section of the frame elements must be such as to easily withstand the load from the selected cladding material. It is also important to determine the direction of laying out the sheathing to which the trim will be attached.
- Having chosen clapboard, edged board or siding for the gable, the sheathing is laid transversely in relation to these materials.
- Under sheet materials such as corrugated sheets, plywood, OSB or cellular polycarbonate, the lathing is installed in the direction corresponding to the length of the sheet.
Another important point is the step of laying out the sheathing, which is tied to the parameters of the facing panels or slabs. Therefore, it is necessary to select a finishing material before installing the frame.
If there are window or door openings on the gable, the sheathing bars must also be secured along their perimeter.
Pediment frame with one window Source rasco-ural.ru
Installation of internal and external corner profiles
Corner profiles are installed on the sides of window openings (external corners), along the lines of the roof slopes (internal corners) . The task is to ensure the conjugation of the planes of the pediment and soffits or the pediment and the slopes of window openings.
The upper and lower edges of the corner strips located along the inclined lines of the slopes must be trimmed at the desired angle. For longitudinal joining, the profile is cut so that an overlap of 25 mm is obtained, and the upper strip should be above the lower one.
This prevents running water from getting under the casing . At the same time, J-planks are installed on the outer edges of the gable overhangs. They are intended to secure the outer edge of the soffit.
NOTE!
When installing all siding elements, it is imperative to take into account the thermal expansion of the material, for which the longitudinal connection of auxiliary elements (starter strips, J-planks, etc.) is not made tightly, but with a gap in winter - 12 mm, in summer - 6 mm . For the same purpose, the screws are not tightened all the way, allowing the part to move freely within the mounting grooves.
Types of overhangs
There are two types of overhangs in roof construction: cornice and pediment. The first is located at the bottom of the roof and plays an important role in providing ventilation. The overhang on the facade is located at an angle and is the end of the slope. It is usually formed from lathing. This option is used for light coverage:
- metal tiles;
- soft roof;
- euroroofing felt.
The protruding sheathing is hemmed at the bottom, and the end is covered with a metal profile.
Another design can be used when the gable overhang is made with a rafter beam. The extension of the outer rafter pair determines its depth. Supporting elements such as a mauerlat, ridge beam, and intermediate posts are also placed outside the pediment. The reliable design does not limit the length of the overhang and is suitable for any roofing covering, such as ceramic tiles and slate. For a roof with low weight, the rafter leg is replaced with a cornice board; with the help of crossbars it is connected to the rafter system and the eaves overhang.
Installation of ordinary siding panels
Installation of row panels is carried out according to the usual scheme:
The lower (first) row of panels is snapped into the lock of the starting bar, and at the same time inserted into the grooves of the corner and H-profiles on the sides . The upper part of the panel (nail strip) is attached with self-tapping screws to the sheathing.
All subsequent panels are installed in a similar way to the very top. The main task is to accurately maintain the angle when cutting panels and, at the same time, maintain thermal clearances for free movement in the corner and H-planks during expansion.
If the gaps are insufficient, the siding fabric will begin to bend outward, which can lead to the destruction of the panels.
CAREFULLY!
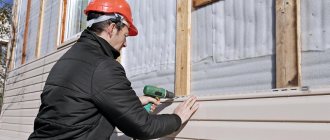
Work on installing siding on the gable is carried out at height, especially if the house has two floors (or more). It is necessary to ensure safe and comfortable work in advance, to exclude the possibility of tools, materials and workers themselves falling from the scaffolding.
Stage one: making the base frame with your own hands
Pediment frame diagram.
First, we attach a wooden beam 50 x 100 mm along the perimeter of our pediment, strictly plumb. This will be the main frame. It's not difficult to do this. It is attached to the roof sheathing. To accomplish this, it may be necessary to temporarily remove the outermost elements of the roof covering. If for some reason this is not possible, then the timber can be secured using metal corners directly to the roof sheathing. The lower cross beam is attached to two inclined beams, to the cross member of the truss or to the top log of the frame.
The resulting base serves to hold the frame of the sheathing. An important point: before using the tree, it must be treated with an antiseptic to prevent the appearance of insect pests. As an option, you can use a galvanized metal profile, which, although more expensive, is not susceptible to rotting. The metal profile is mounted according to the same principle as in the case of drywall installation.
Installation of spotlights
Installation of soffits is considered the final stage of gable cladding, although it is quite possible to first design the gable overhang, and only after that begin installing row panels on a vertical plane.
First of all, it is necessary to ensure the possibility of fastening the elements, which depends on the type of roof overhang.
There are:
- Closed overhang . It is lined with boards on the bottom; installing profile strips on such a base does not cause any problems.
- Open overhang . In this case, there is a continuation of the roofing material, which does not have any cladding underneath. To install the extensions and the soffits themselves, you will need to lengthen the rafter legs and attach support bars to them. The task is quite difficult due to the inconvenient location of the work site - at a height, the work is carried out from below. This circumstance sometimes forces one to abandon the installation of spotlights.
Soffits are installed in grooves of parallel installed internal corners and J-straps along the edges of the overhangs. The installation rules remain the same - do not tighten the screws all the way, leave temperature gaps.
To install the spotlights, one edge is inserted into the groove of the profile, and the receiving element is slightly bent to make it possible to insert the spotlight into the groove . It is not recommended to apply too much force, which could permanently deform the receiving element.
To design the angular turns of the spotlights, either an H-profile or two J-profiles are used, tightly installed with their rear platforms facing each other.
The junction of two strips can be made at 45°, or one strip continues to the end of the overhang, and the second adjoins it end-to-end through the H-bar. The second option is somewhat simpler, which is very important when working at height is difficult and inconvenient .
The final stage is the installation of L-planks that form the end cut of the cornices.
What mistakes should you avoid?
When finishing a house, you should avoid mistakes, otherwise the siding will not last long. There are several common mistakes that stand out.
- Strong clamping of the material, due to which the panels become wavy and uneven. How to cover a gable with siding to prevent defects from occurring? It is important not to clamp the panels too tightly between the inner corners and not to drive the nails all the way to the head.
- The next common DIY mistake is attaching the J-bevel to the end board using fasteners. It will be correct to install the chamfer in the groove of the strip, which ends the row with an open part. In this case, it is absolutely not necessary to drive nails. Special “ears” are placed along the perimeter of the chamfer using a punch or a hammer drill; as a result, the fastening is as strong as possible.
- At the beginning of work, it is important to build reliable scaffolding. The best option is to use ready-made prefabricated scaffolding, but if there is none, you can assemble the structure yourself from boards.
Pediment cladding is of great importance for the design of the facade of a building. The choice of finish can be any, but siding is most often used.
We also invite you to learn about how to install siding panels on a wooden house with your own hands.