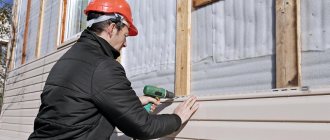
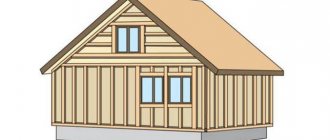
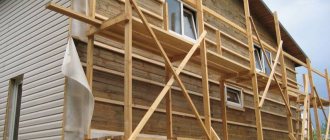
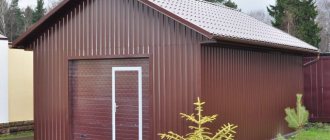
One of the most popular ways to finish a facade is to install siding panels. They allow you to give an individual look due to the wide range of colors, shapes and materials from which they are made.
Affordable technology for installing siding allows you to assemble it yourself like a designer. The variety of types of siding is great, but we will talk about how to install vinyl siding, the principles of working with this material and the stages of installation.
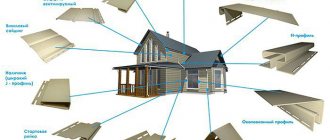
But first, let's talk about the components. Those details with which you can finish the facade of your house.
Important! All components must be made of the same material. With the same coefficient of thermal expansion. To prevent structural deformation.
Description of components
- starting profile - a load-bearing element, the first siding panel is attached to it;
- the finishing strip is the last one in the row, hiding the top edge of the last panel;
- corner elements - they are used to form corners, the profiles have grooves in which the siding panel is placed;
- platbands for doors and windows - perform a decorative function, decorating door and window openings;
- window and door profiles - if the window or door is not located flush with the wall, but in a recess, then these profiles will help close the slopes during finishing;
- J-profile is needed for fastening panels, sometimes used instead of corner profiles;
- The J-chamfer is necessary to decorate the edge of the roof, otherwise it is called a wind board;
- ebb tides are designed to drain water from the walls;
- ceiling soffits can be perforated or solid; they cover the overhanging part of the roof from below; perforated ones provide ventilation between the siding and the wall;
- moldings connect panels located in different planes;
- H-profile is required for joining panels.
Possible mistakes
List of common flaws among beginners:
- An unevenly screwed starting strip will not allow the panels to be properly joined to the corner elements in the future. Therefore, at a certain stage, many are faced with the need to dismantle the structure. To resume all work from the very beginning.
- If you tighten the screws too tightly, then due to temperature changes, the elements may slip out of the fastening locks. This will cause the panels to sag and the appearance will be ruined.
- If you do not leave a 5 mm expansion joint between all connecting parts, then the panels will swell with thermal expansion.
- When purchasing accessories, you must ensure that they are fully consistent with each other. A discrepancy between dimensions or declared strength may lead to cracks.
- Be sure to study the instructions from the manufacturer. It contains important recommendations for arranging the frame. And if possible, it is better to immediately purchase a branded one.
- It is necessary to ensure that all locking connections are fixed to the very end. Otherwise, water will definitely flow into the cracks. This is fraught with freezing of the facade in winter.
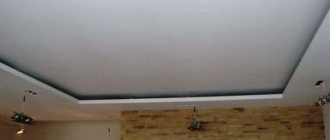
Installation of siding panels Source allsiding.ru
Installation principles
Vinyl is a material that tends to change its shape and size when temperature factors change. This must be taken into account during installation. Therefore, when assembled, the structure of siding panels should not be tightly attached to the frame; parts and elements should be able to move easily relative to other components and parts.
The siding panels have technological holes for fastening, which have an oblong shape. This is not accidental; the self-tapping screw must be screwed into the center of this hole (with the exception of the upper fastener of vertical elements), so as not to interfere with the change in the shape of the material.
Do not screw the self-tapping screw tightly, leave a gap of 1 mm under its head. Do not screw the panel through the vinyl; if necessary, make a hole with a notch. The diameter of the screw must be smaller than the resulting hole.
Leave 6 mm gaps between the end of the siding panel and the profiles (J or H), in case of expansion. If installation takes place at low temperatures (-5 and below), increase the gaps to 9 mm. The gaps at the vertical panels are 3-4 mm at the top, 6-8 mm at the bottom.
Overlaps and joints do not need to be treated with sealant.
A metal profile or wooden beam is used as lathing guides. To make the façade last longer, it is preferable to install a metal frame. But, if you still decide to use wooden ones, make sure that they are well dried. Vertical guides are mounted at a distance of 40 cm.
When installing starting profiles, the gap between them should be 12 mm. When joining siding panels “overlapping”, trim its fastening parts so that there is 12 mm between them.
When installing the panel, do not overdo it, apply just enough force so that the siding lock snaps into place with the lower profile, do not overtighten or deform the structure.
Tips for purchasing extras
Siding experts recommend:
- When purchasing any items, you need to ask the seller to issue a quality certificate for the product. Its presence will guarantee that the batch of goods actually came from a well-known manufacturer, and was not made in the nearest basement.
- Siding elements should not have any defects - curvature or various protrusions.
- To avoid problems with different sizes of elements, you need to purchase all the goods in one place. It is desirable that it be from the same batch.
- It is not recommended to combine elements from different materials. So metal parts have a completely different expansion temperature.
Installation of guides
Installation of the frame begins with the installation of corner guides. They are attached to the wall using hangers, controlling the verticality with a building level. A cord is stretched between them and all the guides are installed in the same plane.
Attention! If you plan to insulate a house, then you need to calculate the distance from the building wall to the frame; it must be greater than the thickness of the insulation in order to provide a ventilated space. The second option is to first install a layer of insulation and then install the frame for the siding.
Installation of the starting profile
Using a building level, find the lowest point on the frame, screw in a self-tapping screw 5 cm above it. At the opposite end of the wall, also screw in a self-tapping screw (at the same level) and stretch a rope between them. Repeat the same operation around the entire perimeter. The line formed by the rope will be the boundary of the starting profile.
Attach corner profile. Mark the boundary of the corner profile on the sheathing slats.
Install the first profile, maintaining a distance from the corner profile of 6 mm, the gap between the starting strips is 12 mm.
You don't have to make a 6 mm gap, but in this case it is necessary to trim the corner profile fasteners.
Important! When installing the starting profile, constantly ensure that it is horizontal. Otherwise, the quality of the final result will be in question.
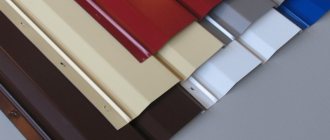
Plastic sheathing: optimal for PVC siding
Plastic sheathing for siding. (photo No. 4)
Plastic sheathing is designed specifically for polymer siding. It is already adjusted to the size of the panels, which greatly simplifies installation and minimizes the possible number of errors. The main thing is to choose exactly the facade fastening system that is designed for a specific type of cladding. After all, the shape of the siding, facade panels and block house are different, which means the sheathing will also be different.
For example, Alta-Profile produces several types of lathing. For more information about which profile to choose for vinyl, acrylic, foam siding or blockhouse, watch the video:
Thanks to the convenient profile size (about 1300 m) and low weight, the polymer sheathing is easy to install yourself, even without assistants.
High-quality profiles have special stiffening ribs that make the entire structure stronger. And the holes in the profiles help improve ventilation under the cladding.
Polymer siding contracts in winter and expands in summer. Most installation errors are associated with this phenomenon. The polymer sheathing has identical linear expansion indicators. Therefore, even if minor errors are made during installation, the siding will not fail.
More advantages of the facade fastening system from Alta-Profile:
Until recently, the plastic fastening system was the most expensive. But since the beginning of 2022, the metal has risen in price very significantly, and now the polymer wins not only in its properties, but also in price.
Installation of external corner profile
Before installing the corner element, mark on the wall where the soffits adjoin it, or install the soffits. When installing the corner profile, make sure that the gap between it and the soffit is 3 mm, fix it with the top screws on both walls. The bottom edge should be 6mm below the starting bar.
After making sure that it is vertical, secure the profile along its entire length. If the length of one corner element is not enough, you need to overlap the second one by 25 mm, cutting it so that the distance between the mounting pads is 9 mm.
You can do without an external corner profile and use two J-profiles. In this case, we gain in time, but lose in waterproofing.
Before you start working
- The plastic used to cover windows and walls changes its physical properties with temperature changes (it shrinks in cold and expands in heat), so during installation it is recommended to leave a gap between the panels of 6-9 millimeters (in summer) and up to 10 millimeters (in winter).
- When installing a profile in the cold season, before starting work it must be kept in a warm room for at least 12 hours, otherwise the plastic will break in the cold.
- When attaching a profile to the frame with self-tapping screws, you cannot tighten them tightly, as this will lead to the destruction of the plastic, which will expand or contract under the influence of temperature.
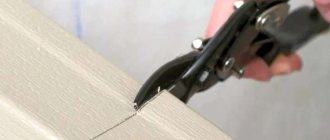
- When calculating the dimensions of materials, approximately 6 centimeters should be added to them so that there is a margin for trimming.
Knowledge of these secrets will allow you to set the profile in such a way that after a while it will not deteriorate and will not have to be changed. This means that the owner of the house will not have to make unexpected expenses and redo all the work.
Installation of internal corner profile
Similar to the outer profile, make sure that there is a gap (3 mm) between the top edge and the soffit, and the bottom is 6 mm below the starting profile. If necessary, the internal element can also be “increased”.
The internal corner piece can be replaced with one or two J-profiles.
Installation of door and window frames
For this operation we use window and door frames. The strips are installed around the perimeter of window and door openings.
If the window and doors are “recessed” into the wall, we use platbands with a profile that covers the slopes.
Installing the launch pad
Insert the first panel into the start profile. Place the ends into the grooves of the corner elements. Make sure there are end clearances. We start fixing the panel from the middle, moving towards the edges. Don't forget about the gap under the screw head.
If the panel is shorter than the length of the wall, use a connecting strip - H-profile - for extension.
You can do without a plank; in this case, we install the siding with an overlap.
Right choice
The correct choice of all components is also important. Firstly, they must be of high quality. Secondly, it is better to purchase those that are manufactured by the same company that makes the siding itself. Otherwise, they may simply not fit and there will be problems during installation of the panels.
Attention! All elements must match each other in size, parameters and fit together without gaps.
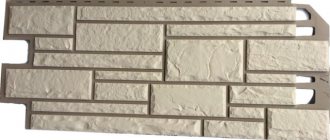
Basement siding with imitation of natural wild stone
As for color, depending on the design idea, components can have a tone-on-tone color or, on the contrary, a contrasting color. It is best to take siding and components in light colors - they heat up less in the sun. This reduces the risk that the material will “lead.” And such elements burn out less.
On a note! It is best to buy matte panels and components rather than glossy ones. This is also related to the intensity of heating. It is very good if the panels are laminated.
Siding prices
Siding
Installation of siding panels under the eaves
Before installing the last (top) panel, a finishing profile is installed; you can use a J-profile or a corner profile. Taking into account the upper gap of 3 mm, the required part is cut out. Since the locking part is cut off, we use a punch to make hooks. We insert and snap the last profile.
Installation of spotlights
In addition to their decorative function (they cover the lower part of the roof), perforated soffits provide ventilation to the roof structure.
Using a level, draw a line on the wall parallel to the bottom edge of the pediment. Attach a J-profile along this line and to the edge of the gable. The planks should be located opposite each other. Measure the distance between the grooves, subtract 6mm, cut the part to the required length. Insert the soffit into the grooves and secure with a self-tapping screw.
Finish bar
This element must be installed before the installation of the last panel begins. It is best if the finishing strip for siding is attached immediately after the installation of the starting strip is completed.
The finishing element is attached tightly to the eaves of the house, just like the others, using screws or nails, leaving a gap between the fasteners and the strip. A gap is also needed between the joints.
The last siding panel, if necessary, is cut and installed in the bend of the finishing element, where it is securely fixed. At the end of the eaves, the house is sheathed with soffit. If it protrudes a little, then to make the picture look complete, use the inner corner. It will help connect the common canvas on the wall and the cornice.
Installation of base siding panels is a separate issue, but for a more convenient and faster process, additional elements are also used. They help protect joints from negative impacts and give a more aesthetic appearance not only to wall panels, but also to basement siding.