Home / Features of various premises / Garage / Using corrugated sheets to decorate garage walls
When decorating garage boxes, people often try to save at least a little, since this is a technical room and there is no need for special aesthetics. Among the different materials that allow you to achieve the desired goal, there is a metal corrugated sheet or, more simply, corrugated sheeting. However, decorating garage walls with corrugated sheets has not only positive aspects, but also some disadvantages that will have to be taken into account.
What are the requirements for finishing a garage?
The material used for cladding must be:
- Resistant to deformation. Remember that when using a garage, its wall surfaces will be subject to significant loads. In view of this, the material used for cladding must have high strength.
- Resistant to chemicals. When carrying out work indoors, you will not avoid contamination of the walls with flammable, oily and acidic liquids.
- Easy to care for. Wall surfaces should be easy to clean. You should not choose a material that will require you to frequently paint or varnish the walls.
Plastering walls
To perform the “wet facade” technology, it is necessary to apply a layer of glue to the surface of the walls on which the polystyrene foam boards are glued. At the next stage, a second layer of glue is applied, onto which the reinforcing mesh is attached, and plaster is applied to the surface.
The main advantages of this method are additional thermal insulation, strength and reliability of the walls, as well as the affordable cost of materials. The disadvantages include a rather complex execution process and the need to level the walls for a high-quality coating.
A special feature of plastering is the ability to create an original and unique coating, which is characterized by practicality and unique design.
Pros and cons of using profiled sheets for garage construction
Profiled sheeting has the following advantages:
- inexpensive;
- quickly installed. 2 people who do not have any special skills can sheathe the entire garage in 2 days;
- has a long operational period (more than 50 years);
- Can be installed in any weather conditions.
Corrugated sheeting also has a drawback. So, it can become deformed from strong physical impact. It is impossible to return the original appearance of the material, all that remains is to change it to another.
Installation technology
You may be interested in: Small oven: technique, necessary materials and tools, instructions and expert advice
By itself, it makes no sense to attach bare corrugated sheeting to the façade wall. To give the structure sufficient protective capacity, ventilated facade technology is used. What is its meaning? A multi-layer functional base is created, the completion of which will be the profiled sheet. Such a facade contains at least three technological levels:
- The profile structure is a load-bearing frame.
- Insulating materials (insulation, hydro-, steam- and sound insulation).
- Protective covering.
For the strength connection and fastening of the elements of a ventilated facade made of corrugated sheets, brackets, anchor hardware, self-tapping screws, guide profiles, etc. are used. The formation of such a complex “pie” is required not only to support the insulation functions, but also to ventilate the cavity behind the metal cladding. This is the most important condition for maintaining the integrity of the wall base, which, thanks to air circulation, is protected from mold and mildew.
https://youtube.com/watch?v=UHSfbmDlg1g
Finishing the outer surface of the garage with corrugated sheets
Before proceeding directly to the sheathing procedure, it is necessary to carry out preparatory work, calculate the amount of material, and prepare the necessary tools.
Preparatory work
Clean wall surfaces from dust and dirt. Make sure that there are no traces of building materials or mortars left on them. Seal the cracks, treat the walls with antiseptic agents and primer.
Calculation of consumables
Knowing the length of the profiled sheets, you can calculate the required amount of material. For calculation you need:
- calculate the area of the walls;
- calculate the area of one profiled sheet;
- divide the area of the walls by the area of one profiled sheet;
- increase the result obtained by 20 percent.
As a result, you will get the number of profiled sheets that will be required to finish the outside of the garage.
Required Tools
To finish garage walls you will need:
Technological process for installing corrugated sheets
The finishing algorithm is as follows:
- Creating markings for installing guides.
- Drilling grooves for metal corners. The corners are fixed using dowels.
- Laying guides on the corners.
- Connecting metal profile shelves and corners using self-tapping screws.
- Laying insulation between the guides (if necessary). If the garage space is used only in summer and spring, then you don’t have to use insulation.
- Fastening the insulation with dowels.
- Stretching a special membrane over mineral wool (if appropriate insulation is used). The fabrics are stretched with an overlap of 1-1.5 centimeters.
- Attaching the blades to the guides using self-tapping screws.
- Fastening the U-shaped guide profile along the base line.
- Fastening corner profiles.
- Installation of profiled sheets on the base ebb, fixing them with self-tapping screws.
This algorithm can be used for any garages made of bricks or concrete blocks.
The exterior cladding of the garage is selected taking into account practicality and durability, as well as the total cost of the work and presentable appearance. Ideally, the cladding material should be resistant to mechanical damage and any weather conditions, easy to clean and not change color during the period of operation. The materials that have received the greatest recognition from garage owners are corrugated sheets, siding and wooden blockhouses.
No cold bridges
An assembly seam is a node where the joining of wall and window structures, which have completely different properties, including in terms of heating engineering, takes place
And it is important to make the knots in such a way that there are no cold bridges on the window slopes. . Basically, the problem of cold bridges is a problem of single-layer wall structures that were used in houses of past years (solid brick, expanded clay concrete, etc.)
In this case, the weak area is the wall itself around the window frame due to its low heat transfer resistance. An area appears on the slope with a surface temperature below the dew point. In this area, firstly, high heat losses occur, and secondly, condensation occurs on it. If moisture condensation on a slope occurs frequently, then fungus (mold) may subsequently form in these places. The same applies to openings without quarters. In their absence, the danger of cold bridges seriously increases, and here you should especially carefully consider the heating engineering of the junction units
Basically, the problem of cold bridges is a problem of single-layer wall structures that were used in houses of past years (solid brick, expanded clay concrete, etc.). In this case, the weak area is the wall itself around the window frame due to its low heat transfer resistance. An area appears on the slope with a surface temperature below the dew point. In this area, firstly, high heat losses occur, and secondly, condensation occurs on it. If moisture condensation on a slope occurs frequently, then fungus (mold) may subsequently form in these places. The same applies to openings without quarters. In their absence, the danger of cold bridges seriously increases, and here the heating engineering of the junction units should be especially carefully considered.
An important recommendation is that if quarters are missing, use window frames with a width of at least 130 mm. With a narrow window frame, high-quality sealing of the seam is difficult and the likelihood of cold bridges is high. The options given in GOST with false quarters from the corners or from the platband are possible only with external plaster, and still remain problematic from the point of view of heating engineering.
If there is effective insulation in the wall (mineral wool or non-flammable polystyrene foam), the window should be placed either in the plane of the insulation or behind a quarter of the insulation. In walls where aerated concrete is combined with external cladding and brick quarters, as a rule, cold bridges also do not occur due to the good thermal properties of aerated concrete.
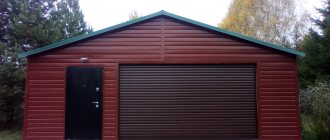
How to sheathe the outside of a garage with corrugated sheets
To sheathe the outside of the garage, you need to purchase a profiled sheet of grade C or NS (wall). The numbers in the marking indicate the height of the wave. The best option is NS-20 grade corrugated sheet with a sheet thickness of 0.5 mm.
With corrugated sheets you can sheathe not only the walls, but also the roof. This material is suitable for making gates. Sheathing with corrugated sheets allows the use of insulation for garages used year-round.
Insulation
You can get rid of the discomfort caused by the strong heating of the metal in summer and the cold of winter in the garage by insulating the frame. The easiest way to do this job is using foam. A sheet thickness of 40 mm will be enough for insulation and placement between the frame posts. Polystyrene foam does not allow water vapor to pass through. This negative quality of the material in our case becomes an advantage, eliminating the need to use a vapor barrier.
Don't forget to ventilate your garage by installing grilles at the bottom and top of the side walls!
It is not necessary to fix a rigid sheet of insulation with glue. It is enough to simply insert it between the posts. From the inside of the garage, the insulation can be covered with OSB board, to which racks and shelves for tools and car accessories are securely and easily attached.
How to cover the outside of a garage with siding
Siding consists of separate panels that are fastened together with a lock. Siding panels are made from vinyl (the most budget option), aluminum, copper, cement, steel, ceramics, wood, etc. The length of the panels varies from 2 to 6 meters, it is easy to choose the best option in accordance with the dimensions of the garage. Siding panels usually imitate wood trim (ship plank, herringbone, blockhouse). You can even sheathe the outside of an iron garage with this lightweight material.
You can sheathe a garage with siding, as well as corrugated sheets, with or without insulation. The panels are installed on a metal (preferably) or wooden sheathing. The racks are fixed vertically (for horizontal siding) or horizontally (for vertical siding) to the walls through long dowel nails or by means of mortgages (when using insulation.
On a note! For Moscow, the Moscow region and other regions, it is recommended to pre-treat all wooden elements with an antiseptic to increase the service life of the finish.
The base flashing and the initial strip are attached along the lower edge of the wall, and special corner profiles are attached to the outer corners. Self-tapping screws are screwed into the holes along the edges of the profiles, and the self-tapping screw cannot be tightened too much; a gap is left between the head of the screw and the profile of up to 0.5-1 mm (the linear parameters of the profiles and the siding itself change at different air temperatures).
Siding panels are attached from bottom to top or from left to right (vertical).
The edge of the siding panel is inserted into the groove of the corner profile, after which it is fixed to the sheathing with self-tapping screws.
Important! When installing siding, it is important to check the horizontal position with a building level to prevent distortion. If the garage wall is long, a connecting profile is vertically attached in advance at the intended junction of the panels. Platbands are attached around the openings. And along the upper edge of the walls there are finishing profiles.
Pouring the foundation
Formwork for a garage foundation
Making a foundation is a long and labor-intensive task; this activity should be carried out with an assistant. Calling the experts will cost a considerable amount, so it’s better to save money.
Sequence of work:
- Carry out markings, remove the top layer of soil, dig a pit.
- Place roofing felt, thick cellophane or geotextile fabric on the bottom of the pit.
- Pour a cushion of sand and crushed stone with a total thickness of 30-40 cm. Moisten the mixture with water, level and compact.
- Mount and secure the formwork tightly.
- Make reinforcement from reinforcement. The rods should be tied together, as welding weakens the metal and causes it to corrode.
- Mix and pour concrete into the mold. This must be done continuously. The best option is when one worker prepares the solution, and the second levels it in the formwork.
- Immerse mortgages and pipes for communications into wet concrete.
The finished foundation should gain strength within 14-28 days, depending on the air temperature. Throughout this period, it must be periodically watered with water and kept under film.
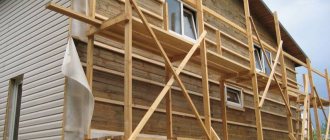
Cladding the garage with clapboard
Wooden lining is an environmentally friendly, very high-quality material that can profitably transform the outside of a garage, and covering the walls with this material is not at all difficult. The outside of the lining is treated with antiseptics and fire retardants to prevent the material from drying out and rotting, as well as possible fire. Wooden siding is attached to the sheathing with nails or self-tapping screws all the way through the top edge.
Clapboard finishing, including blockhouses, is often used by owners of wooden houses to decorate buildings on the site in the same style.
Have you already built your garage? If the foundation is ready, you have erected the box and completed the interior decoration of the garage, then all that remains is to take care of its appearance from the outside. After all, this will be the business card of your garage. It should look presentable and tasteful. If you are not a supporter of external beauty, then we want to assure you that decorating the outside of the garage is not done only for appearance. Thanks to this finishing, you can protect the walls of the garage from external influences and extend its service life for many years. Is this already interesting? If yes, then we invite you to find out what materials you can cover your garage with.
The matter is not limited to banal dyeing or applying a fur coat. There are really a lot of materials for work and they all have their own characteristics. Let's look at each of them separately.
Dimensions, space on the site
When you are just thinking about building a garage, you need to decide on the location. Most often it is built close to the entrance. Sometimes the gate swings open directly onto the street, sometimes they retreat a few meters from the entrance gate, preferring to park the car further away, under the protection of a fence.
Drawing and dimensions of garages made of corrugated sheets for one car
The size of the garage is chosen based on the availability of free space and the work that you plan to carry out. If you don’t plan to do anything, add a meter to the dimensions of the car (to the length and width). These will be the minimum dimensions of the dwelling for your car. If you install any equipment, you will need to add at least another meter to the length.
The comfortable height of the garage is 2.6 m, the minimum is 2.2 m. If there are two cars, the depth is considered greater in size, and a distance of at least 0.6-0.8 m must be left between the two cars.
Dimensions of a two-car garage
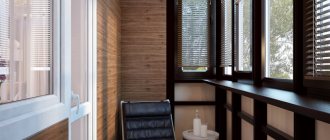
What is special about the exterior decoration?
It is important to consider this issue so that the material you choose does not lose its properties after a couple of months. What is the difference between the inside of a garage and the outside? The differences are obvious. Externally, the finishing will be constantly exposed to external influences. This includes precipitation, ultraviolet rays, constant temperature changes, mechanical and physical stress. All this will have a negative impact on the finishing material, and if it is not of the appropriate quality and characteristics, it will not serve you for long. Have you ever seen wallpaper being glued to the outside? That's funny. The same can be said about other materials.
Calculation of the required amount of material
Before you go to a specialized store for corrugated sheeting, you will need to calculate the required quantity. This is an important procedure: if you buy too much sheet, you will waste money and have to figure out where to put the leftovers. By purchasing too little, the owner is doomed to an additional trip to the store, which wastes time and does not improve the mood.
First of all, you need to determine the outer surface area of the walls. To do this, the length and width of each wall in meters are sequentially multiplied, and the results obtained are summed up. There is no need to subtract the area of window and door openings from the resulting value, otherwise you will have to install pieces and trimmings of corrugated sheets near them, and this is unsightly. Having calculated the total area of the external walls, it’s time to start choosing the type of corrugated sheet for cladding.
If you plan to orient the “waves” of the corrugated sheet in the vertical direction, then it is better to select sheets that are the same in length as the height of the building being sheathed - this will make it easier to install them.
- divide the total area of the external walls by the area of one sheet;
- round the result up (even if it turns out, for example, 41.2 sheets, then you need to round up to 42);
- multiply the resulting value by 1.15 (this is a 15% reserve - a kind of material reserve);
- round the result up again - this will be the required number of profiled sheets.
It is convenient to consider the presented calculation using an example. If you plan to decorate a one-story residential building of a simple rectangular shape with a height of 3.5 m, with a wall length of 15 m (longitudinal) and 9 m (transverse), then the calculation will be made according to the algorithm proposed above, that is, the first step is to calculate the outer area of the walls:
- the area of the transverse wall is calculated - 3.5 * 9 = 31.5 m2, since there are two such walls, the result needs to be doubled - 31.5 * 2 = 63 m2;
- a similar calculation is made for longitudinal walls - 3.5 * 15 = 52.5 m2, 52.5 * 2 = 105 m2;
- to find out the total area of the facade to be covered, you need to add up the areas of the longitudinal and transverse walls - 63 + 105 = 168 m2;
- the selected profile is C10-0.5-1160, its height is 3.5 m, then the area will be 3.5 * 1.16 = 4.06 m2;
- the area intended for sheathing must be divided by the square footage of one sheet: 168/4.06 = 41.38 pieces, if you round the number up, you get 42 sheets;
- you need to add a material reserve of 42*1.15 = 48.3 sheets, then round again to the nearest larger integer 48.3≈49 sheets;
- As a result, for cladding you will need to purchase 49 sheets of corrugated board.
Let's sum it up
Making your garage beautiful and secure from the outside is not a problem. As you have seen, there are many options for finishing a building. The good news is that everyone can choose the finish that they can afford, look beautiful and protect the walls of the garage. But there is a small nuance - having chosen a certain type of finishing, you should not buy cheap materials. They do not always differ in quality and have worse characteristics. It’s better to spend money, but do everything for the long term.
- Author: Maria Sukhorukikh
Rate this article:
- 5
- 4
- 3
- 2
- 1
(0 votes, average: 0 out of 5)
Share with your friends!
Roof structure
For a garage, it is advisable to make a pitched roof from corrugated sheet metal.
If the garage is not planned to be equipped with an attic or a working attic, it is advisable to make a pitched roof on it. It's simple, fast, inexpensive, but practical. The rafter system can not be erected, but at the stage of creating the frame, the front crossbar of the upper trim can be raised higher.
All that remains is to make the sheathing and lay the roofing in a similar way to the walls.
The slope angle should be set within 30 degrees. Snow will flow freely on such a roof and will not be torn off by a strong gust of wind.
Preparatory stage
Construction of a garage begins with planning. Initially, you need to think about the place where it will be located. The best option is for the building to be located not far from the entrance gate, but also closer to the house. Inconvenient and long driveways with many turns should be avoided. It is also inadvisable to choose low-lying areas where the structure may be flooded.
In accordance with SNiP, the following standards have been established for the location of the garage from other objects:
- fence - 1 m;
- residential building - 6 m;
- water well (well) - 15 m;
- underground and overhead communications - 3 m.
After determining the construction site, you should decide on its size and configuration. Options can be for one or two cars, with or without an add-on.
1 car garage project
The next stage will be drawing up a project, where the following information needs to be reflected in the drawings:
- foundation;
- floor;
- walls;
- gates;
- overlap;
- roof;
- ventilation;
- water supply and sewerage;
- boxes and boxes for spare parts, tools and special liquids;
- electrical diagram.
The optimal garage dimensions for one passenger car are:
- length - 600 cm;
- width - 400 cm;
- height - 250 cm.
Based on the completed documentation, an estimate and calculation of the required property is drawn up.
To build a garage from corrugated sheets you will need a welding machine
To make a garage with your own hands from professional pipes and corrugated sheets, you will need the following tools:
- Bulgarian;
- welding machine;
- roulette;
- level;
- shovel;
- spanners;
- riveter;
- drill.
When arranging a buried strip or slab foundation, it is advisable to buy or rent a concrete mixer.
To build a frame garage, you need to prepare the following materials:
- ingredients for concrete (sand, crushed stone, cement);
- profiled pipes for racks 80x40 3 mm thick and for piping 60x40 mm;
- profiled sheet for walls, roofing and internal cladding;
- self-tapping screws with a drill;
- acrylic paint for sealing edges, cuts and holes;
- fittings and binding wire.
If you have no experience with welding, the frame can be made of wood. For racks, timber 80x80 is taken, for lintels and rafters - 40x40 mm.
Do-it-yourself garage made of corrugated sheets - drawing and installation instructions
Every car enthusiast is concerned about the issue of storing and maintaining his faithful “iron horse”. Residents of city high-rise buildings are a little less fortunate, since every evening they have to look for a free parking space, but owners of private houses can easily build a compact, convenient garage in the local area. This simple outbuilding usually performs two functions: it protects the car from attacks by robbers, and also protects it from adverse weather conditions (cold, heat, rain, snow). It greatly simplifies the maintenance and servicing of the vehicle at low cost. In this article we will tell you how to make a drawing and build a garage from corrugated sheets with your own hands.
Material selection
Corrugated sheets are profiled sheets of galvanized steel coated with a polymer coating made of pural or polyester. This is a universal building material from which the roof and garage frame can be erected. It is highly resistant to moisture, corrosion, temperature changes and biological factors. The mechanical strength of corrugated sheeting is provided by a large number of vertical stiffening ribs, which prevent the coating from deforming. To build a garage or other outbuildings, use:
- Load-bearing corrugated sheet. This material is marked with the letter “H”, which indicates high mechanical strength and resistance to external influences of the coating. It has additional grooves that provide rigidity, maximum corrugation height and base thickness. Load-bearing corrugated sheeting is used to make garages, hangars, containers, and massive floors. The roof and walls of the structure are made from it, thereby eliminating the need to purchase other materials.
- Load-bearing wall corrugated sheeting. This profiled roofing sheet differs from the load-bearing sheet in its smaller base thickness, ridge height and rigidity. However, roofs and walls made of this material are considered no less reliable and durable. Most often, a small garage made of corrugated sheets is made from this universal brand due to its affordable cost.
- Wall corrugated sheeting. The profiled sheet, which is a wall type, has the smallest wave height, base thickness and price. It is used for wall cladding. A roof made of this material will not last long, since it is not able to effectively remove atmospheric moisture, especially if the slopes have a small angle of inclination.
Gates
They can be welded from a 40x20 mm profile pipe, equipped with rotary hinges and stoppers for fixing the sashes.
The most important operation - hanging the gate - is performed in two steps. First, the hinges welded to the sashes are secured to the racks with an assembly seam. After checking the gate for absence of distortion and ease of closing, the hinges are welded with a working seam.
Overhead garage doors
Installation of corrugated sheets on the roof is the same as on the walls. To simplify the work, it is better to order sheets with a length equal to the length of the roof slope. An important nuance is the use of sealant in areas where sheets join. It will protect the roof from leaks.
After completing the installation of the corrugated sheeting, a profile is attached to the ridge section to cover the joint of the slopes. To prevent rainwater from getting under the roof, a sealing tape is placed under the ridge profile.