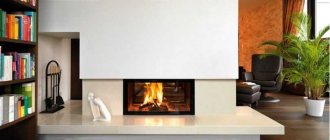
If you have a limited budget, you can use the simplest and most affordable materials to decorate your home. At the same time, you do not necessarily sacrifice the effectiveness of the setting. An inexpensive plywood interior is a stylish, fashionable space with an emphasis on environmental friendliness, simplicity and practicality.
The implementation of such an idea will cost a small amount, but it will look expensive and impressive. This is a simple and economical alternative to wood finishing.
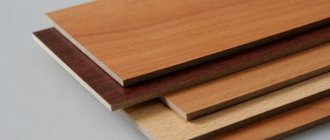
Main types of plywood
FC birch plywood
Knowledge of existing types of plywood can make it easier to choose one or another method of protecting it and giving the ceiling surface decorative properties.
The impregnation of plywood when gluing its veneer layers determines the moisture resistance of the future coating. According to this criterion, the material is marked as follows:
FKM. This plywood has increased moisture resistance. In its production, harmless melamine-based resins are used.
FC
. This type of plywood also has moisture-resistant properties and is used for interior finishing work. The veneer is glued into the material using urea-based resins.
FOF
. This is laminated plywood, it has a wide selection of different shades and does not require any additional finishing.
According to the processing method, plywood also has its own brands: NSh - a type of unsanded plywood, Sh1 - plywood with one-sided sanding, Sh2 - plywood with double-sided sanding.
Unsanded plywood is the cheapest, but for finishing ceilings Sh1 plywood is usually used, with the treated side facing the inside of the room. Plywood can be made from various types of softwood and hardwood.
Plywood made from softwood is not recommended to be treated with stains, as its resinous structure will resist the diffusion of liquid and create a non-uniform surface.
Decorating plywood walls
Finishing work may include the following variations:
Compared to plastered surfaces, the decor of plywood walls is more varied and with proper imagination you can create a unique wall panel
- If high quality material was used, the surfaces can be varnished. To create the desired shade, stain treatment is carried out. The joints are sealed with special putty or glue with sawdust.
- Coloring. An interesting effect is achieved by using several shades and highlighting knots.
- Wallpapering using standard technology.
- You can diversify the design of your apartment using a drawing or pattern on the surface. For this, a independently developed composition or stencil is used.
- The coating can be decorated by firing it with a gas burner.
To decorate the plywood surface and create the desired ambiance, suitable lighting is selected.
Types of finishing
How to decorate the ceiling is up to the owners themselves. If laminated plywood sheets were used for the ceiling, then final finishing is not needed. When using paint or varnish, the ability of plywood to “breathe” is lost. The ceiling in a wooden house can be covered with wallpaper using polymer panels.
If you still choose a painting method, then a water-based type is used, which is permeable to air and dries quickly. Sometimes the question arises: how to paint a plywood ceiling to make the interior unusual. In such a situation, relief and textured types of colorful materials or the creation of paintings come to the rescue.
Before painting the ceiling, you should use a water-repellent mixture to protect the plywood from excess moisture. You can use another finishing material - varnish, glossy or matte. Compositions such as stains are not used due to the unpredictability of the result.
Finishing the ceiling with plywood in a wooden house or other room allows you to save money and simplify installation. This material fits many interiors, creating comfort and harmony.
Video about laying plywood on the floor, step by step
Ceiling: plywood paneling
Covering the ceiling with plywood using self-tapping screws
Covering the ceiling with this material is actually no different from finishing the walls with it. Sheets can be nailed directly onto a flat wooden ceiling; in other cases, a special frame made of wood (beams) is preferable. If you do all the manipulations yourself, do not forget that the electrical cables are laid before sewing the surface. It’s easy to cover the walls yourself, without an assistant. To finish the ceiling you cannot do without it: it is unrealistic to simultaneously hold a sheet of material and secure it in place.
Floor: plywood paneling
An example of finishing with first grade plywood
This procedure has some features. If it is intended to use plywood as the final covering of a wooden house, then it must certainly be the first grade.
The material should be at least 12 mm thick, or even 16 mm, since it will have to bear a considerable load.
To prevent the coating from sagging under heavy objects, the logs should be spaced at least 40 cm apart.
If plywood only plays the role of a substrate for another finishing coating, then low-grade materials can be used. Plywood is often used for stairs, attics, and for finishing the inside and sometimes outside of a wooden house.
What are the advantages of plywood?
- Strength and hardness of the surface after installation. This material is much stronger, for example, drywall.
- Natural origin of the material. It is made from softwood or birch veneer sheets.
- Lightness of plywood. Provides ease of loading and unloading, movement, transportation and direct installation.
- Finishing with plywood makes it possible to obtain the most even surface. It, in turn, can be finished as desired.
- High sound insulation properties, which are of great importance when constructing floors.
- Relatively low price of this finishing material. There are several grades of plywood, differing in their performance characteristics and cost. Based on the specific purpose of the material, the most suitable, optimal option is selected. If plywood is intended to be used as a lining for another finish, then you can get by with a lower grade product at a lower price.
Special Features
Multilayer veneered material can be used for construction, repairs, and the manufacture of furniture sets. It is made by gluing together several layers of wood veneer. Can be assembled from larch (this material has increased resistance to moisture). Birch outer layers create leaves with a pleasant amber-orange color. Pine and spruce building materials are mainly used as raw materials: they are laid under roofing materials and finishing floor coverings. Thin sheets can bend in waves and circles. It is customary to decorate rooms with more durable products. Working with sheet wood building materials is easy. They undergo the same processing as solid wood.
Criterias of choice
The choice of finishing material for interior work in a wooden house will depend on the region in which the object is located and how it is planned to be used. If you plan to spend only the summer outside the city, then it is quite possible that you will prefer to simply paint, treat with a tinting solution or varnish the wall surfaces, without particularly bothering with their leveling and other finishing work.
Walls of a wooden house, varnished
For year-round living, such solutions may not be entirely adequate. We cannot discount the need to create an interior style, where the appearance of the walls plays an important role. In many cases, their surface must be perfectly flat, which is achieved with decorative cladding.
Office building foyer
Another work of art is a composition of plywood boards placed on top of each other in a somewhat chaotic order. Such elements can be of different heights, due to which they can be used as benches, shelving or reception desks.
What to do first
Even before the actual finishing of the OSB walls inside the house begins, they need to be prepared for this. Preparation most often involves thorough cleaning and primer. However, some design options require additional operations. For example, when using varnish as a topcoat, the surface must be sanded with sandpaper with not too coarse grain.
Naturally, it is necessary to recess all the heads of the screws that secure the panels one to two millimeters inside the sheet. This way they will not interfere with further finishing. All joints of adjacent sheets must be inspected for chips, and the gaps between them are filled with sealant. After all of the above operations are completed, the walls made of OSB slabs will be fully prepared for further finishing stages:
- Varnishing.
- Coloring.
- Puttying or plastering.
- Wallpapering.
You need to choose the most suitable design option based on the general design idea and the preferences of the home owners. In addition, it is necessary to take into account the specifics of the room being finished - there is no point in using expensive and beautiful coatings in technical rooms. At the same time, in residential premises you always want to see beautiful walls and decoration is given special importance.
What does it look like
There is no need to delve into the intricacies of surface covering technology with this type of coating - everything is very simple and logical. Therefore, it is much more important to understand what wall decoration with plywood can look like, and several photo examples below will help with this. From them you can get an initial idea of this design option and form your own opinion about it.
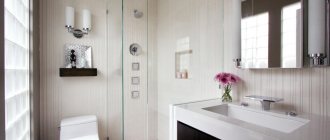
Features of cladding wooden walls in wet rooms
When decorating rooms in a wooden house where a microclimate with high humidity is expected, you need to use only materials for wall cladding that can withstand its effects. On those surfaces that will not be in direct contact with water, you can use moisture-resistant plasterboard or Quick Dec boards as finishing. Those walls where water will get in often and in large volumes are best hidden behind plastic, decorative stone slabs or ceramic tiles.
Moisture-resistant Quick Dec boards
It is important to seal the sheathing so that the wooden walls hidden behind it do not rot or bloom due to water leaks. It wouldn’t hurt to pre-treat their surface with moisture-proofing compounds.
When decorating walls, special attention is paid to areas located behind the bathtub, toilet, and adjacent sinks
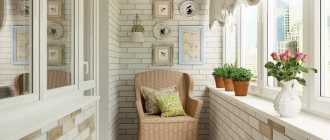
Lightness of space with plywood interior walls
Light plywood in the decoration creates the effect of visually expanding the space. Not only the walls were made from it, but also the ceilings, the staircase to the second floor, and other structures. The interior received a neutral, woody beige tone that does not clutter or burden the space.
Due to this, the house always has a bright and pleasant environment. To improve natural insolation and fill the space with sunlight in the second light zone, a glazed hatch was made in the ceiling. This way the room gets rid of dark corners, and the plywood walls inside the house look even more attractive.
Application in children's room
It is quite easy to completely change the interior of a children's room using wood sheet products. For example, parents can make or purchase a small rack for storing toys, books, and souvenirs. The following products will perfectly complement the overall appearance of the room:
- furniture sets (table, chairs, bed);
- sets for role-playing games (for example, a display case for a toy store, a cabinet for storing toy tools);
- desks (or real game centers with sorters, pencil holders, paper clips);
- doll furniture (cradles, chairs and tables);
- doll or toy houses (suitable for compact and neat storage of dolls, soft toys, cars).
Geometric origami
Non-standard office design using thin stripes on the ceiling is a bright and memorable solution. Upon entering the office, the visitor is presented with an unusual view with a plywood structure hanging 10-20 cm from the ceiling. Unexpected and original.
Use for interior decoration
When using imitation timber, the room will look completely new. Wallpaper will not create such a unique indoor microclimate, because timber is not only color and texture, but also the aroma of real wood! Panels made from false timber will decorate any room - from the steam room to the hallway. They do not require additional decor in the form of paintings and posters on the walls; the wood itself looks very elegant.
In order not to visually reduce the proportions of the room, you need to choose the right texture and shade of wood. For small spaces, shades such as white, milky, light gray, beige, and ecru are suitable. It is these colors that expand space and increase height.
In small rooms, it is not advisable to use contrasting shades, for example, black floors and white walls. A dark ceiling will be even less advisable - it will seem to hang almost above your head. It is better to decorate the entire room in the same light shade. The less furniture in such a room, the more spacious it seems. In rooms with a large area, you can get creative - play with contrasting shades or zone the space using different wood tones.
Kitchen
False timber always looks appropriate in the kitchen. You can decorate only the walls, just the ceiling, or the entire kitchen - it’s up to the apartment owners to decide. If there is a kitchen unit on one of the walls, then the other three can be finished with panels. Or you can use simulated timber to highlight one wall or corner, equipping a dining area there. If the kitchen is small, the trim should be placed horizontally, choosing wide panels.
Living room
The living room is a room in which you can give free rein to your imagination both in the coloring of the slats and in their texture. There are plenty of options for creating a cozy and comfortable environment. If in the bedroom in the vast majority of cases neutral, calm tones and their combinations are used, then in the living room the colors can be bolder and more extraordinary. For example, the walls can be made olive and the floor taupe.
The combination of lilac walls and a light gray floor will also look very fresh and unusual, especially supported by other components - curtains, furniture, carpet, accessories, etc. A popular option is to highlight one of the walls in a bright color - mint, turquoise, lemon, and the rest remain neutral. This way you can zone the room without using a partition.
Bedroom
For a sound and restful sleep, the aroma of wood is just right! Therefore, in the bedroom, finishing with imitation timber is more appropriate than anywhere else. There are a huge number of design solutions for decorating bedrooms. If the furniture has a certain shade of wood, you can choose the same or contrasting tone for the walls. It is not necessary to decorate the room with timber from floor to ceiling - this lumber can be perfectly combined with other finishing materials.
To create a unique style and color scheme using imitation timber finishing, you will not need a lot of effort and money. You can use false timber as a decorative finish only on open areas of the walls, then the rest can be “disguised” with the help of furniture.
Bathroom
In the bathroom, both a play on contrast and a completely monochrome, neutral-colored design are acceptable. For people who are brave and without prejudices, we can recommend a combination of snow-white plumbing fixtures and dark walls and floors. Or you can make the design the other way around - white floors, ceilings, walls and glossy black plumbing.
Such options look best in a combined bathroom or in bathrooms that have enough space for such a design. If the bathroom and toilet have standard, standard sizes, then it is more advisable to refrain from color experiments when decorating them, decorating the rooms from floor to ceiling in one light neutral shade - gray, milky, coffee with milk, cream. It is acceptable to use pastel shades - lilac, powder, blue, yellow.
Other rooms
A children's room is a room where not only the decorative function of false timber is useful, but also its sound and heat insulation. It will be comfortable for the baby to sleep where it smells of freshness and pine, where the walls “breathe”; such finishing is not only not harmful, but also beneficial for the child’s body. As already mentioned, any room (both heated and cold) can be decorated with imitation timber. In the basement in the basement of the house, such finishing will look noble; in the steam room and change house, when heated, a pleasant pine aroma will be released.
Classrooms
Even classrooms at a school, as well as auditoriums at a university or academy can be made from plywood. It is important that natural light enters such a room, since this is extremely important for the learning process.
For these purposes, you can use, for example, shutter doors, which, of course, are made of plywood.
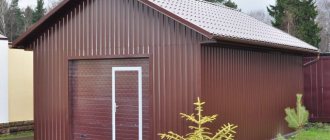
Requirements for external cladding materials
The cladding gives the building frame a certain rigidity and takes on part of the load. This means that one of the main criteria is the mechanical strength of the material in bending and compression, and the absence of shrinkage during operation. The walls must retain their original shape for years, regardless of environmental conditions. In addition, the cladding must be resistant to moisture, sudden temperature changes, and the effects of microorganisms.
Sheathing gives the building additional strength
Next, you need to pay attention to the ease of installation of the material and its flexibility during processing. If you plan to sheathe it yourself, this aspect is of great importance, because it determines how much effort and time the work will require
The material should be easy to cut and drill, but at the same time maintain density in cuts, not crumble, not crack. And, of course, it must be durable so that you don’t have to change the skin every 10-15 years.
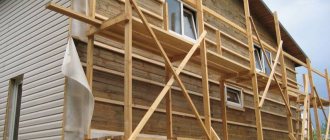
An example of exterior cladding of a frame house
Light and bright store
A shoe boutique can become quite a profitable business if you manage to present it to the buyer correctly. The original design with lots of light and plywood panels is a great example of how to make your business effective. Cafe
Diagonal plywood lines will definitely prevent the cafe from looking boring or cheap. Multi-colored inserts and the original arrangement of panels made of this material are, of course, one of the most important factors in the popularity of this stylish establishment.
Covering walls in a wooden house with plywood. Walls: plywood paneling
Upholstery of walls with plywood is often carried out in dachas and attics. dressing rooms and so on. This process is not complicated, but the specifics of the technology must be observed.
In a wooden house, such upholstery can be done without first constructing a frame.
In that case, of course, if the surfaces of the walls are sufficiently smooth. If they cannot boast of this, then they should first build a frame from a wooden beam.
If it is necessary to sheathe a concrete base with plywood, then a frame must be made. The timber used must guarantee the required rigidity for the entire structure, and provide the ability to attach two sheets to it so that the joints fall on the sheathing. The distance between individual bars should be no more than half a meter. If plywood is intended for finishing, for example, a balcony. then you will have to choose a material option with increased moisture resistance.
After all, during the cold period it will be exposed to low temperatures and high humidity. In some cases, insulation is placed under sheets of plywood. Then the distance from the wall should be one centimeter greater than the thickness of the insulation used.
Mineral wool is well suited for this role. It is an excellent heat insulator, lightweight and resistant to rodents.
The layout of the sheets relative to their location on the wall is thought out in advance, so that later you do not have to redo the entire frame. Whole sheets should be located in the center of the wall, individual parts and pieces are arranged along the edges, below, where they are not very noticeable. When finishing a van, the material is fixed to its metal structures.
Use special self-tapping screws with a special drill tip, or high-strength polyurethane adhesive mixtures. It is advisable to cover the joints with connecting steel strips. How to cover plywood-covered walls as protection and for greater decorative effect? You can use any compositions intended for wood processing - varnishes. azure, paint. impregnation. whatever you like.
Plywood in construction - decorativeness, low cost and wide possibilities
Set in the New Zealand countryside, the house's three frontal, peaked forms follow the contours of nearby buildings. The architects were given a task; build a convenient and comfortable home with minimal construction costs.
Construction materials have been selected to reduce operating costs. Metal profiles for the facade, wooden frames, metal structures and plywood interior decoration fully meet these requirements. This made it possible to build an affordable and comfortable cottage for a family of several people.
Lightweight and inexpensive structural elements give the building an effortless gracefulness and at the same time reduce the cost of building a foundation, since the requirements for its strength and volume are reduced.
Cork
- 100% environmentally friendly;
- excellent sound insulation;
- magnificent relief;
- solid and expensive look.
This is the case when the obvious visual advantages of a cork correlate with its technical characteristics and the numbers on the price tag. This option is certainly suitable for a respectably furnished wooden house, in which a lot of money has been invested. If you plan to cover the walls inexpensively, then you can use a little trick - use cork to decorate individual wall fragments. In this case, the costs will not be so high - and nothing will interfere with the pleasure of contemplating the spectacular wall cladding in the house. It is better to glue cork to a wall in a wooden house using special contact glue. It grips the sheet perfectly even with low consumption. Of course, before this it is necessary to prepare the surface of the wall itself:
- remove irregularities;
- clean from dust and debris;
- remove any remaining old material.
It is best to thoroughly level the walls before doing this, but if you don’t really want to do this with plaster, then gypsum board sheets will be an excellent and, most importantly, inexpensive alternative.
Tips and tricks
Despite the fact that new materials for cladding ceilings are appearing on the market today, many craftsmen still recommend using plywood. Finishing with this material will significantly simplify installation and spend less money on renovations.
When working with plywood sheets, you should follow the correct technology and perform the work carefully:
First, you should decide where the solid sheets of plywood will be located so that they do not sag after finishing the work. Using a ruler, pencil and tape measure, make markings on the sheathing, taking into account that the edges of two adjacent plywood sheets will be located on one sheathing strip.
- It is necessary to apply the sheet to the sheathing so that its edge is located exactly in the center of the beam. One screw is enough to fix it. The first sheet must be well centered to the rest of the sheathing, only after this the sheet is secured with the remaining screws. The distance between the screws should not be less than 20 cm.
- After all the solid sheets have been installed, the cut pieces should be secured along the edges. You can hide the seams between the sheets using baguettes; they should be placed on glue and fixed.
Wall panels for interior decoration
Decorating the inside of a wooden house with wall panels gives a completely different stylistic result. This finishing material is made from different materials with different textures:
- wood;
- bamboo;
- MDF (laminated and veneered);
- glass (smooth with photo printing, embossed, colored, transparent, matte);
- plastics and plastics;
- skin.
They come in typesetting or panel form. Stacked - long thin elements connected to each other according to the tongue-and-groove principle. Lining is essentially also wall panels. It’s just that it has long been used as an independent category of finishing materials. Panel wall panels differ in geometry - they have comparable length and width.
Everything is usually assembled onto a sheathing (like lining), the bars of which are filled taking into account the dimensions of the chosen finish. This material is loved by designers: the materials, texture and color solutions allow you to realize a variety of ideas. Such interior decoration of a wooden house can be very expensive - made of leather - or cheap - MDF panels. But the appearance is quite decent.
If, according to the technology, wall panels must be laid with glue (gypsum, for example), then backing boards - plywood, gypsum fiber board, etc. - are attached to the sheathing (you remember that in a wooden house it needs to be made floating). The slabs are installed on this substrate with glue. An example is shown in the video.
Underground studio
This house can be called a kind of dugout.
The upper level is above ground and includes a lightweight roof and stairs leading to the studio itself. Everything inside is upholstered with plywood, which creates a very warm and cozy atmosphere even at a certain depth below the ground surface.
When do interior wall decoration work begin?
“It’s better not to rush and let the new building sit for at least 10 months”
The final finishing of a “fresh” log house can begin no earlier than the shrinkage process is completed. For a structure made of laminated veneer lumber, this period lasts about four weeks, for others it lasts for many months. To calculate the time required to shrink a new house, you need to know the percentage of humidity of the raw materials used for construction, the climatic features of the area where the cottage is located, and take into account the duration of construction. In any case, it is better not to rush and let the new building sit for at least 10 months. During this time, the logs themselves will dry out and the insulation lying between the crowns will shrink. Externally, it is difficult to notice the processes taking place with the eye, however, if you ignore the recommendations and sheathe the walls before the shrinkage is complete, you can clearly see that it is quite active. The finish will definitely become distorted, covered with a network of cracks, or even completely torn. In general, nothing will save you from remodeling, not even the installation of a floating frame.
If you need it beautiful and safe
In the designation of a plywood sheet, let’s pay attention to the “combination of veneer layers on the outside” and “emission class”. The first is responsible for “beautiful”, the second for “safe”
The highest quality of plywood surface is “E”. No defects and expensive. Classes I to III are applicable for interior decoration. I - with a small number of defects in the form of “live”, i.e., knots that have not fallen out and some “multi-colors”. Further - worse, but cheaper. Class IV should not be used. Not comme il faut. The defects are described in detail in GOST. For a non-professional of “plywood” matters, remembering them is problematic and unnecessary. It is better, when choosing a material, to trust common sense and a sense of proportion in assessing the price-quality ratio. As for emissions, there are two gradations: E1 and E2. The standard establishes the maximum permissible emissions of harmful substances 3 days after the manufacture of plywood. E1 is less than E2. Pay attention to the specified time interval, and estimate how much time will pass from the purchase of the material to the start of operation of the premises in which it will be used. To be completely sure, ask the seller for a “Certificate of Conformity” and use FK brand plywood.
Materials
You can hem the ceiling along wooden beams with various materials. Designs that combine original finishing options from several panels look beautiful, resulting in a completely or partially smooth coating. Such a surface can be additionally covered with foam tiles, textured wallpaper or painted.
In addition, in modern design, a variety of materials are used for cladding ceilings.
Fiberboard. Sheets of the product are cut in such a way that their end parts are placed in the middle of the beam. The fiberboard is attached to the structure using wooden beams measuring 20×40 mm or fixed with special logs. To do this, recesses are cut out in the boards and an additional corner or beam is inserted.
With this type of finishing, it is important to ensure that the fiberboard panels do not sag. Therefore, they are nailed and laid with a seam offset or in a checkerboard pattern.
Plywood
If the texture of the wood is not important for the interior of the room, then the ceilings are sheathed with plywood, it is attached with self-tapping screws and nailed down. In this case, you need to pay attention to the thickness of the beams, since this material is heavy. The thickness of the sheets is selected depending on the distance between the logs. Upon completion of the cladding, the seams are sealed with wood putty or mastic.
Then the surface is well primed and covered with finishing.
- OSB (OSB) boards. This material is considered inexpensive, easy to install and easy to process. OSB boards can be used to cover ceilings in any room. The only drawback of the product is the presence of resin in its composition, but if the material is made with high quality, then during its operation the emission of formaldehyde will be small. The slabs are assembled quickly, since their design is similar to lining and has special grooves. After such covering, the ceilings acquire a smooth and seamless surface.
- Drywall. It is the most common material for covering surfaces; it is easily attached to both wooden and aluminum frames. With its help, you can create beautiful multi-level systems or simply create an insert between wooden beams. After installing the drywall, it is necessary to seal all the joints; to do this, apply a special construction mesh and cover it with putty.
- Sandwich panels. They are an excellent insulation material that is easily joined using a special connection. The panels are screwed to the beams with self-tapping screws and then painted. The material is available with a matte and glossy surface and does not require additional processing. They can either completely cover the ceiling or make separate inserts vertically or horizontally.
- Wooden lining. It is one of the most popular types of material that looks beautiful in the cladding of private houses; wood products are environmentally friendly and have a pleasant aroma. The board-lined ceiling maintains a certain microclimate in the room and absorbs excess moisture. If such a structure is installed correctly, it will last for many years and provide good sound and heat insulation. Most often, clapboards made of cedar, alder, pine and oak are chosen for cladding ceilings. Its width varies from 30 mm to 150 mm, and its length can reach six meters. Of course, such cladding is considered expensive, since, in addition to installation, the boards must be additionally coated with varnish, which, when dried, creates a protective film and makes the coating resistant to moisture.
Puttying plywood seams.
Before starting finishing work, you also need to get rid of the seams that remain between the sheets of plywood. To do this, you need to apply putty on them.
For this, a special wood putty is used; there is a large selection in the store. You can make your own putty for plywood. To do this, you need to mix PVA construction glue with fine sawdust approximately 1 to 1, the finer the sawdust the better.
It is very important that the thickness of the layer of this building composition is minimal. Only under this condition will the skin be truly smooth. When the putty dries, primer is applied to the plywood sheathing.
In the future, finishing work can be carried out using a finishing coating.
It can be laid on a high-quality plywood sheathing without difficulty.
Watch the video: Insulating walls indoors. Training course
Admit it: you've tried leveling sheets of plywood. We, too. We tried weights, clamps, wetting the concave side, drying the convex side in the sun and gluing opposite folded sheets together. In fact, there is very little chance of alignment if the sheets have not been stored properly. The only solution is to save the straightest sheets for larger parts and use the worst sheets on smaller projects, minimizing any curvature.
We hope that our tips will be useful when creating your next projects. What tips would you add?
Follow us on Pinterest for more inspiration.
Types and grades of plywood
There are a huge number of brands of plywood, but the following brands are widely available:
- FC (not very resistant to water, adheres to formaldehyde resin);
- FSF (extremely resistant to water, contains phenol-formaldehyde);
- FOF (used in furniture production, covered with laminated plastic and has an attractive appearance);
- FB (resistant to moisture, including salt water due to impregnation with bakelite solution).
Before buying material, it is worth calculating the required amount based on the measurements of the room. In addition, you need to decide what thickness of plywood is ideal for your needs.
Most often, when decorating walls in a wooden house, the following types of plywood are used:
- FSF;
- construction plywood on a glued base;
- laminated plywood (coated with phenol film, which provides high water resistance and allows it to be used for finishing baths, country cottages, private wooden houses);
- FC.
The fewer leaf defects, the higher the grade
Design
It is no coincidence that plywood is very popular when decorating residential interiors. With its help, you can create an original, beautiful ceiling covering without a large investment of money. When installed correctly, a plywood ceiling is practically indistinguishable from more expensive wood coverings.
When choosing plywood, you should pay attention to its thickness: the thinner the sheet, the more convenient it is to use it for making decorative elements. A thin sheet of plywood can be used to cover not only flat ceilings, but also dome-shaped, curved surfaces
This material makes it possible to produce original decoration elements. Curly cut-outs are made from plywood; such a carved ceiling will become a real decoration of the room.
When making decorative panels, a sheet of plywood of the required size is cut out. A sketch of the ornament is drawn on paper and transferred to the material. Holes are drilled using a drill, and the final stage of work is carried out with an electric jigsaw.
What else is made from finishing plywood?
Plywood is such a versatile material that you can make anything out of it.
For example, original stands for bowls will make the life of pets even more comfortable. You can choose a folding or non-folding design, choose the color and size depending on the interior and the available free space.
Your pet's favorite piece of furnitureSource www.kb-zigzag.ru
Plywood also makes original door handles. They can be either single-sided or double-sided, painted or simply impregnated with special compounds.
Door handles in a simple styleSource sudokuweb.ru
Elegant wine stands will become a real decoration for the interior of your living room or kitchen, or an original gift for any occasion.
Original wine coasters are a great giftSource projbuild.ru
Bathroom mirrors look no less original and fit perfectly into any design.
Stylish mirror with plywood shelf for the bathroomSource stapico.ru
Garden furniture is also popular. For example, a light and airy plywood swing chair.
A chair-shaped swing will become a real decoration for your garden plot. Source instaphenomenons.me
Plywood doors, which are an excellent alternative to natural wood products, belong to the middle price segment. You can easily purchase both solid models and those with glass or inserts made from other materials.
Plywood doors - inexpensive and beautifulSource the-dots.com
The advantages of such doors include light weight, original appearance and low cost.
The video below shows an example of a plywood attic interior:
Visual affiliation of the plywood interior with nature
Plywood trim is suitable for a small open forest house. Wooden surfaces look harmonious when surrounded by forests, combine with wildlife and emphasize the integration of housing into the environment.
Due to its simplicity, the plywood interior is combined with inexpensive metal trim on the facade of the house. This is important, since the environment is clearly visible through the large panoramic facades of the building.
Modern minimalist solutions, stylish lamps, spots, laconic and functional upholstered furniture, and built-in appliances look impressive in plywood furnishings.
Thanks to the light tone, it is good to place accents here, to use dark structures for zoning and highlighting the functional parts of the space. Due to the universal beige color scheme and matte finish, the light from the lamps and from the window is softly and evenly diffused in the house.
Advantages and disadvantages
Scheme for fastening plywood to the wall: a - the beginning of the cut must be clamped with a clamp, b, c - fastening the plywood, d - closing the corner seams with quarters.
The advantages are:
- excellent external data;
- heat preservation and noise absorption;
- good flexibility;
- strength;
- efficiency.
The disadvantage of using the material is that some of its types are treated with toxic substances, which somewhat reduces its environmental friendliness compared to other materials used for interior wall cladding.
Plywood is easy to drill, cut and glue, so it is used to make partitions between rooms.
The layers of veneer are glued together so that the direction of the fibers of one layer is perpendicular to the direction of the fibers of the next layer.
The following types of plywood are used for interior wall decoration:
- glued construction;
- laminated;
- FC;
- FSF.
Residential premises and warehouses are usually finished with construction plywood.
Layout of plywood in the wall of a frame house.
Laminated plywood tolerates moisture well, is very strong and durable. It is covered with phenol films; it is also used for finishing country houses and cottages.
Plywood is used for baths:
- from coniferous species, which is not susceptible to microorganisms;
- laminated, which has good strength;
- combined, having excellent quality and low cost.
Plywood is produced in the form of large sheets, which is convenient for installation. You can choose sheets that match the height of a particular room.
During installation, the result is a flat surface with no extra charges. Thanks to the flexibility of the material, you can create smooth transitions and decorative shaped structures in rooms, such as arches.
Since the material has high heat and sound insulation properties, the interior decoration of the rooms provides comfortable living conditions. The material retains heat in the room and has a lower cost compared to wood. The light weight of the material allows you to install it yourself. The sheets can be easily processed, bent, cut and drilled. Cladding with plywood does not require much labor.
General information
Nowadays, there are many building materials that can be used for wall decoration, while many prefer to use wood from plywood on the wall, since this material has the following qualities:
- environmental friendliness - does not emit harmful substances even when heated;
- looks attractive;
- strength and mechanical stability;
- good thermal insulation properties;
- moisture resistance (not applicable to all brands);
- due to its light weight, it is not difficult to carry out finishing work with your own hands;
- can be used as a finishing coating, for example, covered with varnish or stain, or as a rough coat under wallpaper or other finishing materials.
As for the disadvantages, they only include a higher price compared to other wall coverings.
Advice! Home craftsmen are often interested in what is better: drywall or plywood for walls? The choice depends on individual preferences. For example, if you want to decorate the walls with paintings or even hang furniture on them, then, of course, you should give preference to plywood.
FK grade plywood sheets
Finishing a frame house with plasterboard
Regardless of whether the frame will be assembled with metal or wooden sheathing, the cladding technology is practically the same. But the manufacture of the base itself has some differences, dictated by the characteristics of the material. The main rule is to start finishing the frame house from the ceiling.
Frame on the ceiling for plasterboard in a frame house
Installation of a plasterboard ceiling in a frame house follows the same technology as in other types of buildings. With fastening of guides, hangers and rack (ceiling) profile.
Wooden frame
Assembling a wooden frame is quite simple, and if the sheathing is installed, then the whole work is simplified even more:
- Initially, the walls are marked where the sheathing bars will be fixed.
- Wooden blanks are cut to size.
- Fastening is done using wood screws. Their length must be at least 75 mm for reliable fastening of the timber to the walls. The pitch between points is 300-350 mm.
- When installing lintels, first install the load-bearing support bars. They are mounted on the floor and ceiling according to the markings.
- The frame posts are installed on the guides, connecting them to the guides by attaching mounting angles.
- Jumpers made of the same material are attached to the racks with the same corners.
After assembling the frame, you can route the wiring directly through the posts by drilling holes in them. They also lay sound insulation and a mandatory vapor barrier layer.
Metal carcass
The base from a metal profile is assembled according to the classical scheme: marking and installing guide profiles, fastening direct hangers to the walls, installing and connecting frame posts, installing lintels.
Installation procedure:
- Markings for the guide profile are made along the floor and ceiling.
- The lath is laid on the surface and holes are drilled for the fastening dowel nails. The distance between fasteners is 350-400 mm.
- The walls are marked with lines where the frame posts will be installed.
- Straight hangers in the amount of 3-4 pieces are attached along the lines with dowels - nails or screws - for each rack.
- A rack profile is inserted into the guides and connected to the supporting rails with small self-tapping screws. Direct hangers are bent and also connected to the racks. The number of racks is at least 3 pieces, with two sheets of drywall joined at the outermost ones.
- Jumpers are mounted between the racks, alternating their position up and down through 1-2 sheets.
After installation is completed, sound insulation and insulation, a vapor barrier sheet for the walls, and wiring in a corrugated pipe are placed in the frame, if necessary.
Drywall installation
Sheathing sheets are attached to the frame using the same technology and without any differences:
- the sheet is laid on the base and the lower right corner is first fixed, moving upward, then along the perimeter. Gaps should be left at the bottom and top within 10-20 mm;
- the next gypsum board is joined to the adjacent element on the frame post, leaving a gap of 2 millimeters;
- Self-tapping screws for mounting drywall sheets must be attached to the sheet at a distance of 250-300 millimeters. The caps are slightly sunk to a depth of 1-1.5 mm, but without damaging the cardboard shell.
- You can prepare holes in advance for wiring terminals for switches, sockets and distribution boxes. When attaching such a sheet, the wiring is pulled into the openings.
In general, finishing a house built on a frame with plasterboard is not very different from the usual options for performing the same work.
Watch the video: covering the inside of a wooden house with plasterboard.
We attach plywood not to walls: glue or frame?
To attach a sheet of plywood to a wall, you can use several basic methods:
| Name | Short description | Applicability |
| adhesive | Sheets of plywood are installed directly on the glue. Those. plywood is attached directly to the wall, and not to a mesh frame made of timber. In this case, it is advisable to provide in advance any devices that rigidly hold the plywood sheet on a vertical surface - until the glue completely sets. | Suitable for covering smooth, plastered walls with not too thick sheets of plywood. And besides, this finishing method does not involve obtaining complex (convex-concave) structures. It is recommended only for decorative finishing of walls with plywood - when in the future there is no provision for attaching additional, especially highly loaded structures to plywood. For example, this method is not recommended for organizing climbing walls or attaching folding beds to a plywood wall, etc. |
| frame | First, a supporting frame made of wooden beams or slats is mounted on the wall. Or from metal guides. After that, the pre-cut and prepared sheets of plywood are attached to the sheathing using self-tapping screws or dowel nails. | A universal method, which is also suitable for the implementation of geometrically complex structures or structures that subsequently imply greater loads on the plywood sheathing of the wall. And also for finishing with plywood non-pre-leveled walls made of any building materials (brick, reinforced concrete, wood, etc.) In addition, this method allows you to add additional sound, steam or heat insulation to the wall cladding. The disadvantages of the method include the need for subsequent additional sealing and masking of screw heads, for example. Although in some cases the fasteners themselves can act as decoration and even style-forming elements. |
| mixed (frame-adhesive) | As in the frame method, the sheathing is first attached to the wall. Wooden blocks are attached to this sheathing (according to a certain pattern) with dowels or using the same screws. And plywood sheets are already placed on these bars with glue. | A method quite rarely used by specialists, which is mainly applicable for cladding smooth plastered walls with plywood. Or to obtain decorative structures that do not require significant loads during further operation. The advantages include:
|
Let's look at each of the methods described above in a little more detail.
Plywood finishing with glue
Plastering walls under plywood: what is important to know?
Please note that when choosing plaster for walls, if you plan to cover these walls with plywood sheets in the future, be sure to choose cement plaster rather than gypsum. Because Glue will not adhere firmly to gypsum plaster.
Which glue to choose?
If you want to glue the plywood to the walls, and not mount it using the frame method, then you will need to choose the “right” glue. Which will hold your plywood firmly on the plastered surface.
After all, as we already mentioned above, the adhesive method of covering walls with plywood is only suitable for fairly even, smooth surfaces - as a rule, for pre-plastered ones.
When choosing an adhesive, be sure to ensure that the description indicates that the adhesive is suitable for gluing both wooden and cement surfaces.
This could be, among other things, specialized professional parquet adhesive, the description of which directly states:
- Material to be glued: parquet ;
- Base material: concrete , wood , plywood ;
Many experts recommend, for example, one-component rubber adhesive made in Poland - “ARTELIT RB-110”.
Although there are other equally high-quality compositions: both single-component and two- or multi-component.
We also draw your attention to the fact that sometimes on forms, for example, you can find advice to use mounting adhesive foam to attach plywood to the wall. However, we would not recommend following these tips if you want a truly smooth surface. Because when drying, polyurethane foams can expand in different directions not evenly enough. And the plywood sheets will also “prop up” unevenly. Which can lead to unsightly protrusions and distortions.
Sequence of work:
Wall preparation:
- If the wall has not yet been plastered, then we will plaster it.
Attention! The plaster must be completely dry.
- Carefully remove dust and dirt from the surface.
- Next, we prime the surface - also with complete drying. As a rule, no separate waterproofing is required between the plywood and the surface.
Placement and fastening of plywood sheets:
1. Mark and cut the plywood. It should be taken into account that:
- The plywood is attached with an indentation along the perimeter of the wall (from the floor and from the ceiling - approximately up to 10 mm).
- Between the sheets of plywood you also need to lay a technological gap - about 2 mm.
- It is recommended to cut the sheets into squares and/or rectangles of smaller area (size).
- We also thoroughly clean dust, sawdust residues, etc. from the surface of the plywood.
2. Next, apply glue to the plywood:
- the glue is applied in a continuous layer over the entire area of the plywood sheet;
- We form furrows with a notched trowel.
3. Press the plywood firmly against the wall surface. We fix the plywood until it dries completely and the glue sets.
| The walls are leveled and primed | Glue is applied to a plywood sheet |
| The plywood sheet is pressed against the wall | If necessary, the plywood is additionally fixed with self-tapping screws |
If rough wall cladding is planned, then the fastening of plywood to the walls can be duplicated using screws and dowels. The heads of the screws are recessed into the plywood.
Thorough drying completes the process. If necessary, and if this is provided for in the initial design project, the joints are puttied and further finished.
Wall cladding with plywood on frame
In fact, plywood is a fairly heavy material for wall cladding. Therefore, craftsmen prefer the frame method of attaching plywood to walls and ceilings, when a special reinforced sheathing with transverse strips is mounted under the slabs.
Wooden or metal?
As a rule, when covering walls with plywood on a frame, a metal or wooden frame is used:
- If the wall is brick or concrete, then preference may be given to a supporting frame made of metal hangers and guides - usually galvanized. In this case, installation of frame structures on the wall is done using dowels.
- If plywood finishing is required for wooden walls, then the frame is also easiest to make from wooden beams or slats. In this case, the slats are mounted to the walls using self-tapping screws or other types of wood screws.
| Wall cladding with plywood on a metal frame | Wall cladding with plywood on a wooden frame |
The simplest frame, for example, can be made from wooden slats with section dimensions:
- 100 x 25 - for the perimeter (to which adjacent sheets will be attached vertically and horizontally, 2 per rail)
- and 50 x 25 mm - for intermediate parts.
If there is a need for heat or sound insulation, then the wooden frame elements should be selected approximately 1 cm thicker - to form a gap; to be able to place appropriate insulating materials.
Don't forget about isolation...
By the way, mineral wool mats or foam panels are usually used as thermal insulation when covering walls with plywood:
In addition, depending on the type of wall surface or the characteristics of the room, you may need additional waterproofing or vapor barrier.
The waterproofing layer is most often mounted on the prepared sheathing, directly under the plywood sheets. We recommend using penofol for these purposes, for example.
But the vapor barrier, on the contrary, is mounted almost on the wall - under the sheathing.
Sequence of work
Preparing the frame:
- First, the attachment points of the main frame elements are marked on the wall - both along the perimeter and in the spaces - with a predetermined step. The optimal spacing for racks is considered to be 450 or 508 mm.
In this case, it is important that the vertical and horizontal elements of the frame are located taking into account the size of the plywood board or prepared cutting elements. The main rule here is simple - the edges of the plywood should not “hang”; those. be above the void, not attached to the frame.
In addition, if you are mounting large sheets of plywood entirely on the wall, it is also recommended to “pull” them, fixing them in several places in the center and across the entire surface of the sheet. For this purpose, you should provide intermediate frame slats, to which you will then “attract” the plywood.
- If you have chosen a wooden frame, then do not forget to dry the wooden beam first (after transporting it in the open air, for example). It is also recommended to carry out a comprehensive treatment of all elements of the future frame with specialized protective antiseptic solutions, which will protect the insides of your future wall from unwanted damage by fungi, mold, rot and even insects.
- Mounting the frame on the wall begins with installing the upper and lower beams. In this case, the so-called “direct fit” method is used for fastening to the wall. Or use metal hangers:
Attention!
At this stage, we recommend not to forget to use tools such as a plumb line and level. All frame parts are aligned with each other; taking into account the existing irregularities, the required distance from the wall is set; unevenness is corrected using substrates.Do not forget that in the future the resulting plywood wall surface should become absolutely flat and level.
- Then they begin to mount the vertical posts of the frame - also be sure to remember to align all the parts relative to each other using a plumb line and levels.
- The space inside between the vertical segments of the frame is further strengthened by horizontal jumpers.
- Insulation is laid between the sheathing elements. Mineral wool or other insulation is fixed - for example, using double-sided construction tape, or placed on a suitable construction adhesive, for example. It all depends on the type of insulation you choose and the specifics of working with it.
- If necessary, waterproofing material is laid on the sheathing (for example, “shooting” it with construction staples to the finished sheathing).
Wall design options
The construction market is replete with various offers, forcing the modern consumer to rack his brains over the choice of finishing material.
Some opt for the simplest and most affordable methods, which are suitable both for finishing an old country house and new houses, which will be discussed below.
Painting
To implement this finishing option, you can use various types of paints (see photo), among which the most common are water-based and acrylic materials.
The advantages of this finishing method:
- painting is a very simple procedure that does not require special skills and tools;
- the painted surface can be easily repainted in a different color if necessary;
- an endless selection of colors and shades;
- ease of cleaning and disinfection.
Now about the disadvantages:
- Before painting, the walls require careful preparation, since if there is a rough surface, the paint will lie in an uneven layer, which will lead to the formation of peeling over time;
- the painted surface needs systematic wet cleaning;
Drywall
Installing drywall will not only allow you to perfectly align the walls in the room, but also lay thermal insulation material between the sheets and the main wall, if necessary.
Advantages of using drywall:
- quick and easy installation;
- the ability to construct structures of any complexity;
- drywall makes it easy to disguise wiring and various communications;
- Possibility of finishing with various finishing coatings.
Flaws:
- the usable area of the room decreases;
- low resistance to mechanical stress;
- the need for additional puttying of seams and joints after installation, as well as puttying of the material over the entire area;
- Drywall is susceptible to high humidity, which negatively affects the service life of the material.
Textile
This finishing method was often used in the old days, but now it has received a rebirth. Both natural textiles and artificial materials are used to cover walls.
The fabric is attached in various ways: pasted like regular wallpaper, stretched onto pre-constructed wooden frames, which are then installed on the wall, and fixed to the wooden wall with a stapler.
Advantages of the method:
- there is no need to level the walls (except for those cases when fabric is glued instead of wallpaper);
- resistance to various mechanical damage - textiles simply stretch under load without being subject to ruptures or cracks;
- the room acquires a special chic thanks to the texture of the material;
- fabrics for wall decoration are made in a wide range, so there are many options to choose from, as well as the possibility of combining the material with curtains and bed linen.
Flaws:
- the fabric absorbs a large amount of dust, so the material must be vacuumed regularly;
- textiles quickly lose their appearance, get dirty and rubbed easily.
Wallpaper
A traditional option that provides the modern consumer with a wider range of options than in the old days.
Today you can purchase not only paper wallpaper, but also vinyl, duplex, non-woven, textile and other types of materials.
Advantages of wallpapering:
- walls require less thorough preparation, unlike painting, which requires repairing even the smallest cracks and irregularities;
- large selection of different types of material;
- the ability to independently carry out finishing work with minimal skills.
Flaws:
- the need to replace wallpaper (except liquid wallpaper) after 5-7 years, as they quickly lose their appearance;
- susceptibility to mechanical damage;
- difficulties in removing dirt, even when it comes to washable wallpaper.
Wall panels
Wall panels are products intended for decorative finishing of walls. They can be made from various materials (chipboard, fibreboard, PVC, wood) and in different shapes - in the form of slabs, sheets and slats.
They are mounted like drywall on a frame, which in this case can be either steel or wood.
Advantages of panels:
- relatively simple installation;
- the possibility of equipping the wall with sound insulation, which is laid behind the panels;
- there is no need to level the walls before installation;
- the ability to dismantle the panels for use in another location.
The disadvantage of this finishing method is that it reduces the size of the room, since the lathing on which the panels are installed takes up a lot of space.
Installation nuances
Plywood can be laid on different substrates. Technologically, it is a universal material that has no contraindications. At least, taking into account the appearance of fire- and moisture-resistant modifications. The same logs, screed, reinforced concrete slabs, etc. are suitable as a base. The main requirement is stability and relative smoothness of the laying surface. It should not have deep depressions, defects or cracks. The point is not only about future problems for the flooring, but also about the fact that a collapsing concrete screed, for example, will in any case require repairs in the future. The laminated type of plywood is one of the most resistant, so it can be laid on a cork backing without special sheathing. But thin sheets must be fixed to a wooden supporting structure. There can be two methods of fastening - glue and self-tapping screws. In the first case, not ordinary glue is used, but “liquid nails”
Self-tapping screws are also suitable in most cases, but when working with them it is important to correctly calculate the step between the fixation points