At the moment, there are many specialized finishing materials that are designed for installation in specific places: on the ceiling, on the wall, on the floor. But the high cost of certain materials forces us to look for alternative and cheaper analogues. Therefore, some finishing elements sometimes have to be replaced with other materials that may be created for other purposes. When it is necessary to carry out repairs cheaply, quickly and with sufficient quality in an apartment or in a country house, then covering the walls with ceiling tiles is one of the good alternative solutions. To the question: is it possible to cover the walls with ceiling tiles? – the author of this site clearly answers: Yes, you can! After all, the advantages of such installation are: speed of finishing, low cost of materials and the possibility of painting it to create a unique interior.
In this article, the following sections are presented in the text: - Which ceiling tile to choose for gluing to the wall; — Preparing walls for gluing ceiling tiles; — Schemes for gluing ceiling tiles to the wall; — Ceiling tiles on the wall in the bathroom.
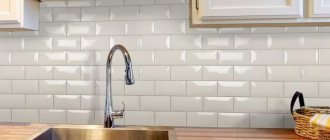
When covering the walls with ceiling tiles of different colors, you can create your own unique design, for example: a boot, edging, snake, etc. However, when pasting walls, you need to familiarize yourself with some features, which are presented below. It is no secret that the cost of ceiling tiles is much lower compared to the cost of facing tiles or wallpaper. In addition, ceiling tiles are warmer and have better soundproofing properties compared to, say, paper. So why overpay for materials. Modern industry produces many types of ceiling tiles: from polystyrene foam, polyurethane, mineral fiber, plastic, light metals, etc. The surface of such materials can be smooth or embossed, with or without patterns, with imitation of wood, marble, waves. In addition, ceiling tiles, as a rule, can be painted and varnished, which will give the interior a unique look and will also prevent scratches. Ceiling tiles cut well and are easy to install (easier than on a ceiling). It is worth noting that in inexpensive tiles the main component is polystyrene foam. This means that such tiles are not recommended to be used near open heat sources: near a gas stove or stove. Expanded polystyrene cannot be used in rooms with high temperatures. But in ordinary rooms, covering the walls with ceiling tiles is a good solution.
Choosing ceiling tiles
When making repairs, first of all, choose and purchase quality materials . Quality indicator - good condition, correct dimensions and clear drawing.
- Quality of material. You can check the quality of the material by taking the panel by the corner and shaking it lightly. If it does not break or deform, then the material is suitable. Each panel should be identical in size with strong edges and a dense surface.
- Correct form. Tiles with straight and even edges fit together correctly on the ceiling, creating a perfect finish. The angle of each panel corresponds to 90 degrees, rectangular or square.
- High quality drawing. The pattern on the panel should be clear and even with the correct relief.
Types of tiles
Ceiling tiles are available in several types and differ in the production method (pressed, extruded and injection).
- Pressed tiles. It is made from polystyrene blocks using the stamped method. The thickness of the slabs is from 6 to 8 mm. Has a smooth or embossed shape. The cost of the material corresponds to the quality, so it is often chosen for finishing the bathroom.
- Extruded blocks. They are made by pressing from polystyrene strip. Each slab has a smooth and even surface, similar in structure to natural materials (cut of a tree trunk, marble slab, etc.). Since it has waterproof qualities, it is glued in the bathroom.
- Injection. Expanded polystyrene, the material from which the panels are made, is sintered. The tiles are obtained with a regular geometric shape, thickness from 9 to 14 mm, with a clear pattern. Suitable for sticking in the kitchen or living room; it is better not to use it in the bathroom.
No. 7. The best manufacturers of polystyrene foam boards
The best guarantee of quality is the name of the manufacturer. In order to protect yourself, you should look towards the products of famous companies that value their reputation. Among the largest manufacturers it is worth noting:
- Armstrong is a company that produces both the most common and quite non-standard tiles. Performance qualities are excellent in any case;
- Ormit is a tile made in Germany, characterized by high moisture-resistant qualities, a wide range of sizes and colors;
- Antares – accepts all types of slabs, the color range is varied. Also produces skirting boards and corners;
- Matrix is a Chinese-made tile of small thickness. The main advantage is the low price;
- Angara, another Chinese manufacturer with an attractive pricing policy, produces panels with a thickness of no more than 8 mm.
When buying tiles, in any case, it is better to make sure that they have quality certificates.
Using ceiling tiles on walls
A wide range of ceiling tiles made from polystyrene allows you to use them on the ceiling and walls. of different shapes and textures, imitating wood, metal or stone, will become a spectacular decoration, for example, at the head of a bed. There are several options for using the material on walls, as a simple sticker, as an additional decoration or to create a canopy effect.
- Easy gluing. Pasting material with a pattern at the head of the bed in this way will look interesting. Laminated, white or colored tiles will decorate any bedroom, highlighting the focal area of the room. To visually reduce the wall in a large bedroom, it is laid out the width of the head of the bed and the height of the ceiling. To prevent a small room from being visually divided into parts, the entire wall is decorated with panels. When using a seamless material, it appears that the wall panel is solid.
- Additional decoration. Painting the tiles will give the wall the texture and desired shade. For this purpose, paints in pearlescent shades or containing glitter are suitable. Paints that imitate wood, stone, and silk will also look impressive. The combination of panels of different sizes and textures will create a complex pattern similar to a panel. A section of wall with tiles will look solid if you make a decorative frame around it.
Not everyone likes to use polystyrene material in their bedroom. A similar decor is created from a material made of gypsum or polyurethane . The disadvantage of this type of finishing is the complexity of the work and high cost.
Features of the material
Expanded polystyrene is a gas-filled mass made from polystyrene and its derivatives, which also includes styrene polymers. In everyday life, the material is mistakenly compared to polystyrene foam, but this is only a type of the latter. At the same time, the polystyrene foam that is common in households is indeed expanded polystyrene. The manufacturing technology is expressed in filling the granules with gas dissolved in polymers. Then the mass is heated with steam. As a result, the granules increase to such a size that they occupy the entire shape and begin to press against each other. And high quality natural gas is used. In polystyrene foam for finishing, additives play an important role. This improves sound insulation characteristics and strengthens the material. Some varieties imitate metal, wood and marble. Special versions are also produced. These include:
- Fire-resistant raw materials. Its granules contain carbon dioxide.
- Vacuum polystyrene foam. There are no gases in it.
Ceiling tiles - how to glue in different ways, photo
To work you will need a level, a tape measure, a simple pencil, a construction knife and a painting cord.
First, prepare the surface for work. The ceiling is completely cleaned and leveled. If the base is covered with plywood or chipboard, then they are carefully primed. The panels are glued onto a flat, dry, grease-free surface of the ceiling. How to glue ceiling tiles? There are several gluing options: parallel, diamond or diagonal. Parallel and diagonal masonry are the most common. You can create various combinations of installation using plain or colored tiles: snake, intersecting and alternating lines, checkerboard, around the perimeter of the ceiling.
Parallel to the wall
Some apartment owners use the parallel installation method, as it is easier to do. To prevent the remaining gaps between the wall and the panels from being noticeable, start gluing from the wall opposite the window or door.
Diagonally
When starting work, the first thing to do is mark the ceiling.
- To do this, pull two threads from the corners of the room. The point where the threads intersect is the center of the ceiling; installation begins from here. If a chandelier is located at this point, then the corners at the joints of the ceiling panels are cut off, and the figured glass from the chandelier will cover these places.
- The glue is applied to four panels at once and allowed to dry. After this, take one element and apply it at an angle to the center of the ceiling. Then the remaining three panels are glued on, creating a central square. Glue is applied to the remaining parts and glued side by side.
- If the panels on the ceiling lie unevenly, they are trimmed with a construction knife. The cut element is applied cut side to the wall. It will not be noticeable when covered with the ceiling plinth.
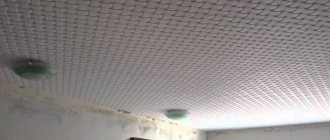
How to glue ceiling tiles with a diamond pattern
By laying out the panels in a diamond pattern, more material is consumed. The material is glued in a diamond shape according to a special pattern. On the ceiling, from the central point, mark squares. Then mark diagonal lines in each square. The panels are glued by fitting them at an angle to the central point of the ceiling, with its sides corresponding to the drawn diagonal lines.
How to properly glue a ceiling
- In small rooms, it is better to start gluing tiles from the corner located opposite the entrance, gradually moving towards the center. In this case, less material is consumed, and visually the surface looks solid.
- The remaining gap between the wall and the tile, less than 15 mm, is covered with a ceiling plinth. A gap of more than 5 mm is sealed with a strip cut from the panel. The cut strip should match the pattern on the ceiling.
- To ensure that the cut panel has a smooth edge, it is laid on corrugated cardboard and cut off.
- The resulting gaps between the panels are closed with white acrylic sealant. White sealant is only suitable for non-laminated white tiles.
- Fragile panels are sometimes pressed through by hand during installation, so they are glued by pressing them to the ceiling with a wooden beam.
Variety of surface types
Based on surface type, there are 3 categories of products: laminated, seamless, mirror. Laminated tiles have a special film layer. Thanks to this processing, a wide color palette becomes available, and the shades retain their brightness for a long time. Laminated products are resistant to moisture. Seamless options have perfectly smooth edges, so gluing them and applying them to the surface will not cause any difficulties. In this case, the joints will be practically invisible, the rows will be precise and regular, and the ceiling covering itself will have no signs of curvature. Mirror materials receive a reflective layer, and, thanks to this ability, are used to visually increase space and design techniques. Mirror products are given a variety of shapes.
To clean “washable” options, solvent-free products are used!
Can I use ceiling tiles in a bathroom?
When doing a major renovation in the bathroom, the question arises of what material can be used to decorate the ceiling. If you use ceiling tiles for the bathroom, the room will look rich and original , and the tiles on the ceiling in the bathroom will be in perfect harmony with the tiled walls. The most reliable tile is extruded. It is available in different colors and patterns, suitable for any interior. Panels covered with film can be washed; other types can be cleaned with a vacuum cleaner or wiped with a dry cloth.
Preparatory stage: how to glue ceiling tiles
Before gluing tiles to the ceiling, the surface must be prepared.
Preparatory work:
- If there is whitewash on the ceiling, it must be washed away, the wallpaper must be removed, and the paint must be removed. The ceiling must be completely cleared of previous finishing. If there are remnants of old materials on the surface, in some cases this may pose a threat to the quality of the new tiles.
- All noticeable irregularities, cracks, pits and other defects must be eliminated using an acrylic-based putty mixture or sealant. If this is not done, then in places of obvious unevenness the tile will simply break or will not lie down and a large amount of glue will not save the situation. If you tile (use the word tile incorrectly) a ceiling that has minor irregularities, the aesthetic appearance will be ruined.
- When the putty is completely dry, you need to mark the ceiling. This is done using a beating thread. The diagonal is cast, the center is marked horizontally.
Which paints should I choose, matte or glossy?
In addition to composition, paints can vary in degree of gloss.
Glossy paints visually increase the height of the room. The glossy surface is less susceptible to contamination and is easier to clean. But at the same time, giving the surface shine, they will make all irregularities noticeable. Matte - will help hide surface imperfections. We paint in one direction then, then at an angle of 90° to this movement
It is worth considering the question of how to paint polystyrene foam, or rather, some of the features of this process. Before starting painting, it is worth applying sealant or putty to the joints between the tiles, thanks to which the paint will lie more evenly. To reduce paint consumption, you need to pre-treat the ceiling with a primer. If the ceiling tiles are embossed, it is better to paint them using a special sprayer. You need to start painting not from the center, but from the corner. Only with the correct choice of paints, based on the previously described properties, and compliance with the specifications of painting work, can you obtain a high-quality result.
Ideas: how to glue ceiling tiles with a diamond pattern and other methods
Methods for gluing ceiling tiles depend on the options for their location on the surface. There are only four of them: in a row, in a diamond (diagonally), in “bricks” (offset) or in the form of a chessboard.
Let's look at each method in more detail:
- Diamond or diagonal. First you need to make diagonal and perpendicular marks. You need to start gluing from the center. The advantage of this method is that it will help hide the curvature of the walls. The disadvantage is a large amount of waste.
- The row method is the simplest and most common. The tiles are laid parallel to the walls along perpendicular markings. You should also start laying from the center, but you can also start from the window.
- The checkerboard method involves using two colors of tiles. Installation begins from the center of the ceiling. The tiles are laid in rows with alternating colors.
- The “brickwork” or offset method may include one color of tile, two or more. The starting tile is laid from the center of the ceiling, subsequent elements are shifted relative to the previous row to the side by half a tile or by a third (quarter). Each row is performed with an offset.
The last offset method looks interesting in several color schemes, if the use of a “rainbow” allows the interior.
Wet rooms: is it possible to glue ceiling tiles in the bathroom
Ceiling tiles are made from environmentally friendly materials, they are practical and easy to maintain.
There are different types of tiles, they differ in their manufacturing method and technical characteristics:
- Pressed (stamped) tiles are the most affordable and very widespread. They are a universal material for all rooms.
- Cast elements are cast at factories in special molds. This type of production is considered more reliable and is recommended for use in rooms with high humidity levels.
The process of finishing a bathroom ceiling is not much different from standard gluing tiles to the ceiling. After preparation, the surface must be primed for better adhesion. According to the markings, the tiles in the bathroom can be laid in any acceptable way.
Detailing the sketch
Brushes come in different shapes and fiber types
Brushes come in different shapes and fiber types, and the strokes of each are very different. You should try painting with different types of brushes, so you can determine exactly what is right for you. The most versatile are synthetic and sable mixtures - these brushes can be used with most types of paint. Also, brushes come in flat and round types, and it makes sense to have them available.
I have many different brushes that I use. For the early stages of the work I use larger, flatter, wider brushes. The hazelnut shape brush is good for creating shapes and painting. It combines a flat and a round brush so it can cover both details and large areas. I only use smaller brushes in the final stages of painting.
Options for using ceiling tiles on walls
On the walls, ceiling tiles can be used as a panel at the head of the bed or, for example, to decorate a fragment of one of the walls. A wide selection of textures, textures and colors allows you to make budget decor very sophisticated. Americans have been using this method of decoration for a long time.
There are several options for using ceiling tiles on walls:
- As a decoration, instead of photo wallpaper, one of the walls is covered with relief tiles completely from floor to ceiling.
- You can completely cover all the walls of the room with this tile, customizing the patterns.
- Ceiling tiles are an excellent budget option for finishing walls in patchwork style. To do this, you need to have tiles with different patterns and colors; the more options, the better.
- Using ceiling tiles as a material for panels at the head of a bed or above a tea table creates an undeniable effect.
For walls, depending on the use case, you can use any type of ceiling tile, but you should remember that the material is not resistant to mechanical damage and is capable of deformation.
Different methods: how to glue ceiling tiles (video)
When using ceiling tiles to decorate walls or ceilings, remember that the glue sets quite quickly, so sluggishness will only hinder the work. During the gluing process, it is important to monitor the joining of the plates and not leave gaps. The elements cut off from the walls are hidden by the ceiling plinth. If you are decorating with different types of tiles, you should first lay out the pattern on the floor, then move the elements to the ceiling or wall. Following the recommendations of specialists is a key rule, thanks to which even a novice home craftsman can make proper, high-quality repairs.
Why can't it be the other way around?
Starting work with tiling the walls has more compelling arguments. Everyone can come up with new ones, but, in general, the following statements are the most popular:
- Washing off the glue. In the process of laying tiles on the walls, even the most careful craftsman drips glue, so experienced people strongly advise laying the tiles on the floor at the very end.
Help: of course, you can cover the floor with newspapers or film, but they can move during work and simply get in the way. In the case of film, the process becomes completely less safe, since it is easy to slip on it.
- Tools falling. During the installation process, there are often cases when a working tool unexpectedly slips out of your hands. If the floor is already laid, then dropping a heavy object on it can damage the tiles.
- Time for downtime. After laying the tiles, you need to give it time to “rest”, avoiding any impact on it as much as possible. If you start tiling from the walls , then you will not have to interrupt your work, but can immediately start on the floor. Otherwise, you will need to leave the floor for several days, and only then continue laying tiles on the walls.
How to glue ceiling tiles to an uneven ceiling
Tiling is one of the most popular ways to finish a ceiling. It is economical and provides the room with an excellent appearance. At the same time, gluing tiles is not difficult, and you can cope with the task on your own, without resorting to the services of repairmen. The main thing is to choose the right type of finishing material, study all the nuances of finishing the ceiling and do all the work without unnecessary haste.
How to glue ceiling tiles to an uneven ceiling
Original crafts
Creating beautiful figures with your child is not only fun and interesting, but also useful. Expanded polystyrene tiles are considered an excellent material for making voluminous Christmas tree decorations, toys for collections, original Christmas trees, airplanes, and so on. All you need to do is make templates, transfer them to the tiles, cut them out and decorate them. Creative people manage to create real masterpieces. For example, full-fledged doll houses.
Types of tiles
First of all, you need to take into account that each of the finishing tile options requires its own approach.
Foam tiles
Table. Types of ceiling tiles.
| Material | Advantages and disadvantages | Features of gluing |
| Foam tiles are the most popular of all types of ceiling tiles. There are several main types of it - stamped, cast, extruded; in addition, this type of finishing material generally has a wide variety of manufacturing options. From them, everyone can choose something that fits perfectly into the interior. | Gluing foam tiles is a simple process that does not take much time. On the shelves of any hardware store there are many adhesives that are suitable for this. The main thing is not to use glue with a solvent, which will corrode the foam. In order to fix the polystyrene foam tile, just grease it with glue and apply it to the ceiling surface for just a few seconds. | |
| Acrylic is one of the relatively new materials that continues to gain popularity in a variety of areas, including in the production of finishing materials. Such tiles expand the space; they visually enlarge the room. | Acrylic tiles are also a lightweight finishing material, so there are no big problems with them. To glue it, it is enough to purchase an adhesive that holds the plastic well and grabs the surface of the ceiling. | |
| This material needs no introduction, just as everyone is well aware of its properties. Wood is environmentally friendly and looks very attractive, and after special treatment it can last a very long time. It can be successfully used to decorate a wooden house or to create a designer textured interior in the same city apartment. | In order to extend the life of the tile, before installation it must be impregnated with a special composition to protect it from moisture and mold. | |
| Ceramic tiles are very strong and durable, but their main advantage is that they are highly resistant to moisture. Therefore, ceramics are ideal for finishing the ceiling in the bathroom. Ceramic tiles can also be used to decorate a toilet, which is also most often covered with tiles. | With ceramic tiles the situation is more complicated than with foam or acrylic tiles. This material must be fixed with great care. The technology is the same as when covering walls with tiles: first you need to level the surface - for this you can use cement, rotband and putty. Then you need to outline the surface of the ceiling and finish it using a special adhesive for ceramic tiles. | |
| This tile looks very impressive. It is also very durable, environmentally friendly and fire resistant. You should only use it to decorate the ceiling in an apartment if you are creating an exclusive and expensive interior (high cost). | Metal tiles are usually not glued, but mounted on a metal frame. This suspended ceiling is very durable and will serve faithfully for many years. |
Advantages of this procedure
Polystyrene foam is used for finishing the external (less often - internal) walls of houses to insulate the room. Putty is usually applied over the slabs, as this provides the following advantages:
- Its thermal insulation properties are preserved for a long time.
- The material becomes stronger, the risk of damage is greatly reduced. If left unprotected, the granules will swell and stick together in high summer temperatures. From cold weather, on the contrary, it will become even more fragile, and with minimal damage it will simply crumble.
- Fire retardant properties increase - sensitivity to high temperatures and the risk of fire are reduced, although the foam itself is very flammable. Modern high-quality putties contain substances that prevent the penetration of fire.
- Obstacle to moisture penetration. Although the foam is not afraid of water, it still gets wet and then takes a very long time to dry. This noticeably reduces its thermal insulation properties, and when exposed to damp for a long time, its structure is destroyed and increased fragility appears.
- Protection from ultraviolet rays and gusts of wind. In the open sun, the surface will turn yellow, the material will begin to crumble excessively, and a strong wind can even tear off part of the insulation.
- Preparing the wall surface for finishing, improving its appearance.
For painting
- If you plan to paint the surface, then you need to put a layer of grain-free primer on the putty. It is more convenient to apply it with a short-haired roller.
- After drying, a second layer is applied.
- Then you need to coat the wall with the finishing mixture, level it over the entire surface using the rule, and after complete drying, sand the roughness in a circular motion using a jointer with a P120-P150 mesh.
- After sanding, wipe the surface from dust with a damp cloth. Now it is ready for painting.
Uneven ceiling: solutions to the problem
So, often those who want to decorate the ceiling with tiles are faced with a problem - if the ceiling is uneven, it will not be possible to stick it on so easily. But this issue can be solved if you know how to approach it. The easiest option is to glue the tiles directly onto an uneven surface . As noted above, you can do exactly this with expanded polystyrene if the ceiling defects are not too large and the tiles can be positioned in such a way that they are fixed securely enough.
It is important to consider two points:
- you need to choose the right tile size taking into account the size of the ceiling unevenness;
- You should also carefully consider the choice of pattern - panels with a large relief image will be the best choice, since thanks to it, unevenness on the ceiling surface will not be noticeable.
Attaching the panels directly to an uneven ceiling is a simple, quick-fix option that won’t take much time, and the result will look pretty good.
Many people choose it because of its simplicity and complete the ceiling repair very quickly. At the same time, they have every chance to be satisfied with the result, because few of the apartment residents or guests will look closely at the ceiling. At the same time, a room with a ceiling decorated in this way will look great - of course, if everything is in perfect order with the floor and walls. Unlike the ceiling, they are constantly in front of your eyes, so it makes sense to pay attention to them first. It takes a lot of time and money to make high-quality repairs to the ceiling and walls, so you can save on the ceiling and even if it is uneven, stick tiles directly on it.
Prices for ceiling tiles
Tiles for uneven ceilings
However, if you want to get a really high-quality result, you cannot glue tiles directly onto an uneven ceiling . This applies primarily to tiles made of heavy materials - ceramics and metal, which will not adhere to such a surface. However, it is better to mount even light polystyrene foam tiles only on a flat surface. There are two main options for solving the problem: completely level the ceiling or install a special metal or foam frame on it , to which the tiles will be attached.
Video - How to quickly glue foam tiles
Leveling the ceiling with putty
In order to level the ceiling using putty, you will need:
The procedure itself can be carried out in 8 simple steps.
- First you need to remove old paint or plaster from the ceiling. This can be done using the dry or wet method. The procedure is mandatory if the coating is already crumbling, there are peelings, mold, traces of leaks and other defects. If the old paint or plaster is holding up well, you can level the surface directly on top of it.
- After this, the surface must be treated with an antiseptic. Suitable products can be selected at any construction site. It is better not to save at this stage and choose a high-quality and modern antiseptic - such compositions penetrate better into the ceiling material and reliably protect it.
- Using deep penetration primer, you need to prime the ceiling surface.
Deep penetration primer for exterior and interior use
Leveling the ceiling with putty
Then you can proceed directly to laying the tiles. Before doing this, it is enough to wait 3-4 days, but in order to be guaranteed to get a first-class result, it is better to start working in a week. In this case, the cement and putty will definitely adhere well, and even ceramic tiles or metal tiles will not be able to damage them.
Prices for putty
Is it possible to replace putty with grout?
Anything is possible, but the result may not always be satisfactory. When trying to use grout instead of putty, you must remember that the use of these materials is fundamentally different. The putty should be applied in a thin layer, it is designed to quickly lose moisture, and the grout is used to penetrate the seams and fill them.
Inexperienced self-taught finishers may be misled by the similar fraction of both materials. Sometimes they try to putty a surface with defects using grout, hoping for an acceptable result. But all the disadvantages of this approach are immediately visible. The grout will crack and peel off from the surface, and using it in this capacity is a waste of time. In most cases, you then have to clean off the applied composition and redo everything.
Foam frame for gluing tiles to uneven ceilings
This simple method is suitable for rooms where the ceiling plane is generally flat, but there are small bulges on it. For example, in the case when the ceiling consists of several separate blocks, the joints between which are sealed with a compound in order to hide the cracks, while it protrudes from the plane of the ceiling. In this case, it will be impossible to glue the tiles over these joints.
In such a situation it is necessary:
- take sheets of foam plastic of suitable thickness and cut strips from it;
- stick them to the ceiling at a distance corresponding to the size of the tile (it will need to be glued in such a way that one panel is glued to two pieces of foam at once);
- In places where there are uneven spots on the ceiling, you need to make indentations on the foam strips with a knife.
Leveling the ceiling with foam plastic
At this point the frame will be ready, and immediately after that you can start gluing the tiles. When choosing the width of the strips, you need to take into account the dimensions of the panels with which you are going to finish the surface , just as when choosing the distance between them.
This method is less reliable than leveling the ceiling with putty, but its important advantage is its simplicity. It won’t take much time to create a foam frame, and you won’t have to wait a week—all the work can be done in an hour. Of course, if you are doing this for the first time, you will probably work slower. How much time exactly it will take depends on the area of the room and how many irregularities there are on the ceiling and how exactly they are located.
In this case, you will not have to wait for the cement and putty to set, and the ceiling repair can be completed as quickly as possible. In addition, you must keep in mind that the foam frame is only suitable for lightweight tiles - for example, polystyrene foam. Ceramics or metal cannot be attached to it.
How to attach PVC panels to the ceiling?
On our website you will find detailed instructions for installing PVC panels to the ceiling! You should also be interested in which ceiling is better - suspended or plasterboard?
Gluing ceiling tiles
After the ceiling is leveled, the process of gluing the tiles occurs in a standard manner. Let's look at its main stages using the example of finishing with foam panels.
Prices for foam tiles
Finishing the ceiling with foam tiles
The first step is to decide on the layout of the panels.
- Parallel to the wall : this is a simple gluing option, it is suitable if the walls in the room are even. In order to finish the ceiling, you must first glue a row of tiles along the wall, and then lay the next rows one after another.
- Pasting diagonally : this original finishing option looks very beautiful. In order to finish the ceiling in this way, you must first make markings. You need to pull two ropes between the corners of the room diagonally and thus find the center of the room. Then you need to draw lines along these ropes and after that you can start gluing.
- Diamond : in this case, it is necessary to measure several squares from the center of the ceiling and draw diagonal lines from each. The corner of the finishing tile should be placed in the center of the ceiling surface, and its sides along the lines.
Laying ceiling tiles in a diamond pattern
Once the tile arrangement method has been chosen, you can begin to work.
- The first step is to make markings on the ceiling.
- Then you need to apply glue to the first tile along the perimeter, as well as crosswise along the diagonals, and press the panel at the desired point on the ceiling for a few seconds.
- After this, you need to glue the remaining tiles in the same way;
- When all the panels are fixed to the ceiling, you can putty the seams; another option is to fill the gaps with silicone sealant.
- The final stage is the installation of ceiling plinths.
Methods for gluing ceiling tiles
It is worth keeping in mind another option - you can not glue the tiles, but fix them on a metal frame. This finishing method is also very reliable, and assembly of the structure itself will take less time than completely leveling the surface. For an uneven ceiling, this option may be preferable.
Prices for ceiling skirting boards
By following these recommendations, you can tile an uneven ceiling in any room. As you can see, in fact, anyone can cope with this work, since there are no special difficulties here.
Some points may seem incomprehensible only if you are faced with the need to hang tiles for the first time. The main thing is to approach the matter thoroughly, choose high-quality finishing materials and take your time during the work process. Try it - and you will definitely succeed!
Video - Gluing ceiling tiles
General algorithm
Before dyeing, the master needs to pay attention not only to the future hair color, but also to the natural color, the condition of the hair, the haircut, the shape of the face, and the general style of the client. General hair coloring algorithm:
General hair coloring algorithm:
- Hair diagnostics (initial hair color, physical properties, structure), choice of dye and dyeing method.
- A test for an allergic reaction (usually done on the elbow or behind the ear). Apply a small amount of paint to an area of skin and wash it off after 15 minutes: if there is no redness on the skin, then the dye can be used.
- Preparation of equipment (bowl, brush, comb, foil, gloves, disposable peignoir) and preparation of the coloring composition (mixing dye and oxidizing agent).
- To protect the skin from dyeing, a thick cream is applied along the hairline to protect the skin from dyeing.
- Applying dye to hair. If this is tone-on-tone coloring or tinting, then for convenience, divide all the hair into 4 zones (parting from ear to ear and from the middle of the forehead to the middle of the neck). First, dye the hair along the partings and along the edge hairline. And then the strands are separated with horizontal partings, starting from the occipital zone (since it is the coldest, and therefore coloring occurs more slowly here), and all selected zones are dyed strand by strand. If this is highlighting or coloring, then they act according to the chosen technique and the desired result.
- Wait the required time and wash off the dye with shampoo, and then neutralize the effect of the dye with a special balm. The use of balm after dyeing is necessary because during the dye’s action the scaly layer opens and sometimes becomes damaged; the balm closes the scales and fills in the damaged areas. Thanks to this, the hair looks healthy and shiny, and the dye stays on the hair longer.