No matter how beautiful artificial materials may seem, natural solids are always valued higher. For this reason, restoration of wooden doors has become especially in demand recently. Next we will talk about how to restore an old wooden door with your own hands in three different ways.
Restoring a wooden door with your own hands makes sense only if there is no serious damage to it.
It should be noted right away that we will talk specifically about how to renew solid wooden doors. There are also veneered doors - this is when the base is made of wood or MDF and covered with thin wood veneer. The principle of operation there is different, and if you have a veneered canvas, then you can read about its restoration “here”.
In what cases does it make sense to undertake restoration?
It would seem, why bother with an old wooden panel if now you can easily buy a new door? However, if you dig deeper, there are several reasons:
- The first, and perhaps the main reason, is the price. For reasonable money, you can only buy a hollow box, decorated to look like wood, which will last a maximum of 5–7 years, after which it will “fall apart” irrevocably.
- Restoring a wooden door with your own hands makes sense if you decide to change the overall style of the room, and the wooden panel simply does not fit into the color scheme.
- Restoring old doors is justified when the design is of real artistic or even historical value. Simply put, when your door is an antique.
Classic wooden door.
- It’s also worth tinkering if you know for sure that the canvas you restored will become the pearl of the interior, an exclusive thing made with your own hands.
- Many doorways and door panels do not meet modern standards, and updating old wooden doors will cost several times less than manufacturing the same structures to order.
- Lastly, many people get into this hobby simply because it is a great and very rewarding hobby.
As for prohibitions, they practically do not exist. The only thing that even professionals don’t take on are doors that are seriously damaged, have large holes on the surface or parts that are completely rotten. In this case, it is very difficult to renew a wooden door; it is cheaper to buy a new one.
Conclusion
Restoring a wooden door with your own hands is a troublesome task, but the result is worth it, because for such work the craftsmen charge at least half the cost of a new door. The video in this article contains examples of various restoration works. Together with the instructions described above, you can update your wooden doors yourself.
Wooden doors before and after restoration.
Required tools and materials
When repairing old interior or balcony doors, it is necessary, first of all, to carry out preliminary work, preparing the surface for work.
Some tools will help you with this:
- Solvent suitable for the door covering material;
- Construction hair dryer, iron or blowtorch;
- Skin with large and small crumbs;
- Sander;
- Screwdrivers, hammer, knife, pliers, film.
For the renovation work itself, you need a spatula, glazing beads, putty, stain, varnish, paint, impregnation, paint brushes, sponges, rollers, door lock, hinges.
Preparation
Whatever method you choose to update an old interior door, you will need to carry out a number of preparatory work.
Usually old painted specimens are going to be decorated. Painting is usually amateurish, so there are more than enough unevenness, sagging and other minor defects. They all need to be leveled. Remove the door leaf from the hinges and lay it on a flat surface. You can - on a trestle or a table. We take wood putty (even if they are made of chipboard or plywood) and cover all the holes, chips and depressions with it. After drying, we move on to the next stage - sanding.
We buy wood putty
We take sandpaper with coarse and fine grains. We process to achieve a smooth surface. If you work manually, it takes a lot of time and effort. With a hand sander, work moves faster. If painting is planned next, we try to achieve as smooth a surface as possible. If you plan to decorate with wallpaper, fabric, self-adhesive film, you don’t have to bring it to perfection, but it should still be exactly right.
Hand sanding takes a long time
Next, remove the dust and wash off the residue with water and diluted dishwashing detergent. Dry it. Further actions depend on the selected update method. If you are going to glue fabric or wallpaper of any kind, you can prime the surface (with thinly diluted glue or a special primer). After the primer has dried, you can glue the selected type of decor or apply paint. By the way, if you are going to paint the doors, you need to select the same type of paint that was there before, otherwise you will have to remove everything to a clean base, and this is very difficult.
Subtleties of the process
Old or damaged interior doors are subject to restoration. The cause of mechanical damage can be, for example, a fire. High humidity can also negatively affect wooden panels. Mechanical damage often occurs after opening the doors using improvised tools. When restoring a product, it may involve replacing the door leaf, updating the door jambs, painting or tinting the surface.
To restore functionality, it is often necessary to update the fittings or locks. In case of minor damage to interior doors, restoration work can be done with your own hands.
It is better to entrust the repair of original doors to a specialist in this field. The work should also be left to a professional if the restoration requires replacing the door frame or repairing the entire door frame.
For your information, some advantages and features of restoration of interior doors are presented:
- It is more profitable to repair doors made of solid wood, bringing them into proper and working condition, rather than spending your budget on a new product.
- They update an old door when changing the interior style of the house. The procedure is carried out even when the canvas is still in excellent condition and does not yet need to be replaced.
- Restoration of old wooden structures is carried out when the door leaf and door frame are handmade and have a unique ornament and texture.
- Decorating the surface of the doors with your own hands will allow you to create a unique product that will harmoniously decorate the entire interior.
- An interior door must be repaired when replacing the door may compromise the integrity of the opening or wall cladding.
- Due to the non-standard size of the old door, it is better to carry out restoration work than to carry out a labor-intensive replacement of the product.
- Restoration is convenient, since replacing a product is often accompanied by replacing the entire door frame. This procedure will definitely create the need to seal the resulting cracks, plastering and gluing wallpaper around the doorway.
To work independently you will need a lot of free time. Step-by-step implementation of all procedures will be the key to successful restoration of the door leaf.
The successful use of techniques for restoring a product, first of all, depends on the characteristics and properties of the door leaf material.
Possible defects
Restoration begins after determining the extent and type of damage. The defects of wooden doors of different designs may differ; to eliminate them, a suitable method is selected:
- Deformation of a multilayer door leaf. A curved product is almost impossible to close, or large gaps remain due to a loose fit to the frame. The defect is common for products made from several layers of wood. The reason is a violation of gluing technology, poor-quality material or intense exposure to moisture. Minor curvature is compensated by adjusting the frame. In case of severe bending, replace the top layer of sheathing to relieve stress.
- Peeling of covering sheets from the frame. The defect occurs as a result of the manufacturer using low-quality glue or when the recommended operating conditions are violated. It can be restored by re-gluing and then keeping the product under pressure. However, the solid frame and covering sheets react differently to moisture and temperature changes. When peeling, the decorative coating often cracks or breaks in pieces. Small cracks are hidden with putty. If the peeled sheet cannot be restored, it is replaced.
- Loosening of the glued door frame. The result of the defect is loose closure, as well as the formation of cracks. It can be assumed that the product itself is bent. To make the right decision, both structural elements are inspected. If the problem is in the box, it is strengthened by removing the trim.
- Door leaf skewed. Diagnosis begins with inspection of the loops. If the door is too loose, it may not close. If a misalignment is detected, which is often found on a frame where the elements are connected by a notch, leveling is done using wedges. Grooves are cut out in the corners of the structure and filled with glue. Wedges sharpened at an angle of 10° are driven in with a hammer until the frame is completely level.
- A slight increase in the gaps between the leaf and the door frame is likewise a defect. Heat escapes from the house through a loosely fitting sash, reducing the quality of sound insulation. The problem with small gaps is solved by gluing seals.
Don't miss: Replacing glass in an interior door: repairing broken glass, how to insert or change it yourself
Materials
Previously, interior doors were made exclusively from solid natural wood. Currently, door panels include polymers and glass. The surface can be coated with high-quality varnish or laminated. Oak doors or beech products are premium door leaves that have an elegant natural texture and come in a variety of shades.
Increased strength and durability make such interior products desirable and practical. Only the price due to these advantages is very high. Carrying out work on the restoration of products is much more economical than replacing the entire canvas.
The most popular material in the manufacture of canvases is fiberboard. Methods for restoring such doors differ from restoration work on products made from solid natural wood. To remove a layer of old paint from the surface of a fiberboard product, an iron and a hair dryer are used. Considering the fine structure of the surface of the product, grinding work is carried out only using fine sandpaper.
Using finishing elements, slightly changing the surface relief, you can get an analogue of paneled fabric. Expensive models consist of dense tile material. The quality of the surface finish of the product determines the cost of the product.
Innovative veneer veneers are often used. The basis of the door will be inexpensive pine material, lumber or particle boards. Under the influence of temporary changes, veneered products may lose the integrity of the top layer. To restore such doors, special wood glue is required. When using glue, you must also take into account the favorable temperature conditions and avoid humidity. Violation of this regime can negatively affect the veneer surface, which leads to swelling and peeling of the material.
The use of metal structures in the house is not for everyone. Iron doors also tend to wear out, unless, of course, they are armored products. Even on high-quality canvases, over time, the external finish deteriorates, locks break, and fittings fall apart. Long-term operation significantly affects the appearance and design mechanism of such doors. In iron interior structures, aluminum or stainless steel is mainly used. Metal parts are successfully combined with other materials.
If you purchase a new door, high-quality metal products are expensive. Therefore, it will be much more profitable to repair the old door. Based on the experience of professionals, it can be noted that any type of metal door can be restored. Professionals can replace hinges, handles and locks in accordance with the color scheme of the door leaf to be restored.
To ensure the restoration is completed correctly, it is recommended to use only high-quality components and locks. The further service life of the product will depend on this selection.
Preparatory stage
Before painting the door or performing other manipulations to restore it, it is important to properly prepare the surface. Some old doors are already varnished, others are painted, and others are finished with veneer. Under the layer of paint and varnish there is a natural or artificial material that must be completely exposed, otherwise the quality of the restoration work will be low.
To clean the door leaf from the old coating you need to prepare:
- construction hair dryer,
- grinding machine,
- sandpaper (sheets of different grits),
- metal spatula,
- solvent (removal),
- brush,
- rags.
First, you should remove the door from its hinges to make it easier to work with. It is imperative to remove the fittings - hinges, handles, locks, and parts that are outdated or not suitable for the new look will have to be replaced. For ease of operation, the door is placed horizontally on two installed stools. It is important to carefully remove the glass and set it aside for a while, otherwise it may break during the grinding process.
There are several methods for removing varnish and paint from a door leaf:
- Warm up the base with a hair dryer. This will help the coating soften, after which it can be wiped with a rag or scraped off with a spatula. It is important to move the hairdryer evenly over the canvas, without lingering on any areas, otherwise the paintwork will catch fire. Due to the risk of releasing toxic fumes during heating, all work must be carried out using personal protective equipment and in a ventilated area.
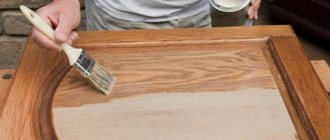
- Apply a universal remover suitable for wood to the door. Such products are made on the basis of acids, alkalis, and organic solvents. They are applied with a brush, and after the action has expired, the paint is cleaned and the base is washed.
- Rub off the paint with sandpaper and scrape off with a spatula. Such methods can be carried out if the paint or varnish has already begun to peel off in pieces. The work will require accuracy (it is important not to scratch the door) and a lot of free time.
- Clean the door with a sander. This is the method used by professionals. Using a special tool, you can quickly and efficiently clean the door leaf from any old paint and varnish coatings, as well as make it smooth.
After eliminating unnecessary contamination, you can proceed to the next stage of work. It is important to get rid of all cracks and crevices that appear on the old product. The door must be carefully treated in the area of any defects using a special wood putty of a certain color. Pencils, putty, and, if there are shallow cracks, furniture wax are suitable for this purpose. The latter must be melted to soften before application. You can use homemade putty made according to the following recipe:
- take wood dust, which was obtained when sanding the top layer of wood,
- dilute the dust with furniture varnish to the desired thickness.
You can also connect equal parts of sand, alabaster, cement, and apply the resulting product to the defective areas of the door. After drying, excess grout should be sanded with sandpaper. For this purpose, it is advisable to use a grinder, especially if the treated area is large in size. Do not press the machine too hard, as this may leave dented stripes. As a last resort, you can use sandpaper with the finest grain. After completing the preparatory activities you need to:
- wash the door thoroughly,
- dry the product
- apply drying oil or stain (when required).
If in the future the door is treated with white or other light paint, artistic painting will be done on it, only colorless stain should be used.
Options for different models
One can confidently classify the “Stalinist” door as an antique. Indoor products from this era are usually double-leaf, often with glass inserts. In the “Stalin” style, the products are heavy and bulky, which makes restoration work a little difficult. A professional craftsman can easily select modern material for their cladding, the necessary fittings and type of decoration.
Door leaves and the surface of historical “Stalinist” doors are usually wooden. If the cause of damage is not mechanical impact, then abrasions are the influence of time. Restored wooden doors should have an aesthetic appearance. Craftsmen will help you choose the main material and finishing material, giving a laconic look to antique doors.
In an apartment with an atmosphere of Provencal or Scandinavian interior style, the restoration of doors is also decorative. Finishing with patina and painting will turn an ordinary old white door into a stylish decorative element. The presence of frames and crossbars characterize a prefabricated interior door, which is also called paneled. For example, panels can be in the form of MDF sheets or glass inserts. This way it is possible to create figured elements and make the appearance of the canvas quite interesting. Restoration of paneled doors implies preservation of existing reliefs or complete replacement of the surface of the product.
This option is suitable for offices, bathrooms and toilets, balconies and other rooms with high humidity. Economical and moisture-resistant models are indispensable for such premises.
Glass is often used as an insert; there are also options for completely transparent doors for the newfangled living room interior, for example. Only types of glass sheets with special textures are used. For safety reasons, the material must have a protective film and not form sharp fragments when broken, which is also taken into account when restoring such paintings.
Rules for restoring a metal door
Not only wooden doors can be restored. Metal entrance doors that have lost their appearance are also being improved.
Restoration of a metal door
Step one. The metal sheet is removed and laid horizontally. This makes it easier to carry out all subsequent work.
Step two. You can cover it with masking tape, or better yet dismantle it:
- peephole;
- door handle;
- all other fittings.
Step three. Using a drill or wire brush, remove any signs of corrosion. The surface is sanded with sandpaper with a grain size of 80-150. After this, the canvas should be vacuumed and treated well with a solvent.
Step four. Using car polish, the entire door is treated.
Polish for cleaning stainless steel
For your information. Wood putty is not applicable here, because its adhesion to metal is weak.
Car polish hides all kinds of micro-scratches and small dents that are revealed after removing the rust. The polish is smoothed out with a spatula. The composition dries in about 30-40 minutes.
Step five. The entire surface of the door is polished with sandpaper (selected with 400 grit). The canvas is wiped with a damp cloth, always clean. After this, the surface is degreased. White spirit, another degreaser, is used.
Step six. The door is coated with an anti-corrosion primer (for metal). Use either a narrow brush or a roller. When the primer layer is completely dry, you need to sand the canvas using sandpaper.
Restoration of a metal door
Step seven. Metal paint is used to paint the door. Paint is applied in several layers. After applying each new layer, you should wait until it dries. You can paint:
- brush;
- roller;
- spray gun.
Cleaning and painting the door frame is done in the same way. After completing the work, remove the masking tape and replace the fittings. You can hang the door leaf in place.
Sometimes not the entire surface is restored, but only the damaged area. Then you will need to select paint of exactly the same tone as the remaining sections of the door structure.
For step-by-step instructions on installing a metal door, see here.
Where to begin
You should start with a careful inspection and study of damage not only to the door leaf, but also to the frame, hinges, locks and other fittings. To do this, the canvas is removed from its hinges, and all fittings are dismantled. Even if it does not require repair, it will interfere with restoration efforts.
The main defects that force you to think about how to restore interior wooden doors are:
- changes in geometric parameters, due to which the deformed canvas does not fit into the box or does not close tightly;
- drying out, loosening of connections between paneled door elements;
- the appearance of dents, chips and scratches on the wood, through holes from old fittings;
- fading or peeling of the paintwork, indelible stains on it;
- tearing off hinges and handles, breaking locks and other malfunctions of door hardware.
This requires repairing not only the door itself, but also the frame with platbands Source takprosto.cc
After this, you can evaluate the upcoming scope of work and decide on the tools and materials that will be required for the work.
How to extend the life of the coating?
To ensure that veneer doors last longer and remain like new, they must be properly cared for. Veneer should not be cleaned with abrasive compounds, otherwise micro-scratches will remain on the surface and it will quickly lose its shine. It is not recommended to install veneered doors so that they are constantly exposed to direct sunlight. This will cause the coating to fade; veneer doors will need to be renewed quite often: varnished or painted.
You can wipe the veneer with a damp cloth, but it must be wrung out well. This material cannot be literally washed with water or used in high humidity conditions. You also need to be careful when washing floors, since this can cause damage to the lower part of the sash and frame. Periodically, to add shine, it is good to polish the structure with wax-based products (polishes). They repel dust and mask minimal defects.
Veneered doors, if properly cared for, will last for a decade. But even in this case, minor scratches and damage cannot be avoided. Therefore, you need to know how to update a veneer door with your own hands. This is easy to do with inexpensive materials and simple tools.
Reasons for renovation
Solid, but old doors can be restored with your own hands
Interior doors, unlike entrance doors, are quite lightweight in design. Its function is to restrict access to the premises, and not to prevent burglary. Locks, if they are installed, are also among the simplest.
The ability to use different materials for construction provides a variety of designs. The device may also differ. Hinged sashes are easier to install, sliding sashes do not take up space, and folding sashes are easy to operate.
However, low weight and varied design are accompanied by not very high strength and durability. Over time, the sashes need to be either replaced or restored.
Interior wooden doors need repair and renovation in the following cases:
- if the top finishing layer is damaged – peeling of the decorative film, scratches;
- wear and tear of the finish - fading in the sun, the appearance of abrasions;
- damage to the base material - cracks, chips;
- desire to change the design - after renovating rooms, old doors often do not fit into the interior.
There are many ways to decorate interior doors - for every taste and budget. The only condition is compliance with the style.
Care Tips
In order for a veneered door leaf to last as long as possible and look like new, it must be properly looked after. It is forbidden to clean the veneer with abrasive materials, otherwise small scratches will remain on the coating and it will quickly lose its gloss. It is not advisable to install veneered doors in such a way that direct sunlight always falls on them. This will cause the cladding to fade; veneered doors will have to be updated quite often: apply varnish or paint.
It is allowed to wipe the veneer with a damp cloth, but it must be thoroughly wrung out. Literally washing with water; using the structure at high levels of humidity is prohibited. You also need to be careful when washing the floors, because the bottom of the door frame and sash will suffer from this.
From time to time, to add gloss, it is worth carefully polishing the structure (for example, with polish) on a wax basis. It repels dust and hides minor damage.
Veneered doors, if properly cared for, will last for decades. Only in this case they cannot protect themselves from minor scratches and defects. Therefore, it is necessary to have an idea of how to reconstruct a veneered door with your own hands. This can be easily accomplished using available materials and basic tools.
Staining
Let's start with the simplest method. This is an antique door finish using a special staining technique. It should be of two types: water-based and solvent-based.
The work consists of the following stages:
First coloring. It uses a water-based stain.
We cover the product evenly with a continuous layer without drips
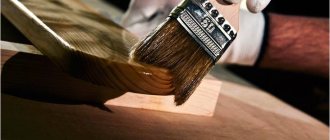
Wash. Immediately after painting, without waiting for the layer to dry, take a wet rag or sponge and wash off the stain. But not entirely. Typically, corners, panels, depressions and cracks, as well as the edges of the boards if the door is plank, are left untouched. But from their middle the tint is washed off.
Wash off the stain
Processing of individual areas. To give the product relief and expressiveness, you can shade chips, recesses and edges with a darker color using a thin brush.
Drawing the depressions
Second coloring. Apply the second continuous layer of stain based on white spirit or another solvent after the door has completely dried.
Applying a second layer
Consolidation of the result. To preserve the resulting effect, the product must be coated with clear varnish or antique wax.
In this way, you can decorate old-style wooden balcony doors and furniture facades. It is also suitable for veneered products. They will look faded, but retain the old coating in the recesses and individual places.
How to properly care for a veneer door?
If the process of caring for an interior door is correct, then it will not lose its original appearance for a long time, and its performance will not deteriorate. Do not use substances with active chemicals to care for the surface of such structures, as they will leave scratches.
Attention! In order not to spoil the material, pay attention to special products that are available on the market in a wide range. They are used to remove dust or other contaminants from the surface.
Painting
This restoration method is almost similar to varnishing, there are only a few differences:
- The cleaned surface is treated with a wood primer.
- Defects are repaired with putty, sanded by hand or with a grinder and also primed.
Painting is done in several layers.
When painting, it is important to prevent smudges, stains and other “ugliness” so typical for beginners. But we warn you, it may take you quite a lot of time to learn how to paint correctly, as it is actually difficult
However, the acquired skill will be useful many times in life, so the effort is worth it
But we warn you, it may take you quite a lot of time to learn how to paint correctly, as it is actually difficult. However, the acquired skill will be useful many times in life, so the effort is worth it.
Ways to strengthen an old frame: do-it-yourself repair of an old wooden entrance door
Photo from the site vanprofi.ru
In some cases, the box no longer fits snugly against the walls of the opening and begins to dangle. There are several ways to solve this problem:
- Get rid of old trims.
- Align the entire structure vertically.
- Place the box in the correct position.
- Make several shallow holes in the posts.
- Drive pins or dowels into them.
- Install new trims.
If the loops have nothing to do with it
You can often notice that the cause of the breakdown is not the fastenings of the canvas, but more serious things. For example, if an object changes its geometry: it becomes larger or smaller, then it’s all about the moisture balance.
If the structure is often painted, then over time an additional layer of materials will appear on it, which will increase its size.
Photo from misliche.ru
How to deal with such problems? Here are some useful tips:
- First, cover the room tightly, and then check how large the gap is between the canvas and the box. If there is none at all, or it is too narrow, then clean off a few words of old paint.
- If the door cannot fit into the folds of the frame, you need to stand on the side of the porch, and then press it against the frame, looking at the canvas. This way, you will be able to get the necessary contour, and also, when using a plane, you will be able to cut off all the excess.
Before moving on to reducing the canvas and planing it, make sure that the box is upright and has the correct U-shape. Measure its diagonals and angles to make sure.
