Wall covered with plaster
During the renovation process, plastering walls with cement mortar is an important part of finishing the room. Despite its simple composition, this solution is able to reliably hide wall imperfections. In this way, structures in old houses with brick or concrete walls are strengthened. Plaster is used to improve the thermal insulation and fire resistance of premises. This material is often used due to its moderate cost, and a wide choice of further decoration ensures that plaster is in demand in the field of construction and renovation.
Advantages of using the mixture
Plaster material has certain advantages:
- the surface is able to resist the effects of water, dries quickly after getting wet, without deteriorating its properties;
- excellent vapor permeability ensures a comfortable indoor microclimate;
- the material is environmentally safe and meets all hygienic and sanitary requirements;
- with the help of such a mixture it becomes possible to change the decor style;
- the composition fully complies with fire safety requirements;
- low cost and low expenses associated with organizing plastering work;
- provides additional protection from extraneous noise.
The plastered surface gets a presentable appearance, and it becomes possible to perform finishing with various materials - wallpaper, paint, etc.
In addition to the listed advantages, developers also note a number of disadvantages of the material:
- During the operational period, cracks may form on the surface of the plaster layer. This is associated with shrinkage of the structure or violations committed in the technology of making the mortar and carrying out plastering work;
- working with such a mixture is allowed only at positive temperatures;
- plastering walls with cement-sand mortar involves preliminary preparation of the walls - installing a reinforcing layer, applying notches, priming;
- the work is performed manually, which takes a lot of time;
- According to established construction standards, it is allowed to apply a layer of plaster of a certain thickness.
Selection of plaster solutions
Basically, the above compositions are used when decorating walls:
- Cement-lime. It is distinguished by its plasticity, but is susceptible to high humidity.
- Cement-gypsum. Work with the material is carried out, as a rule, indoors.
- Cement-clay. Adding clay increases adhesive properties and plasticity. It is most often used on adobe bases and shingles.
- Standard mortar using cement. The classic solution for leveling various substrates.
When choosing a mixture, you should not rely on generally accepted rules. Before purchasing plaster, you must read the manufacturer’s recommendations, which indicate what purpose it is intended for.
Necessary equipment
Before plastering the walls, it is recommended to prepare everything you need to complete the work. The kit looks like this:
- trowel or ladles;
- rule;
- grater and grater;
- construction level;
- lighthouses;
- a shovel and a container of a suitable size for making a batch (for large volumes of work, it is allowed to use a concrete mixer);
- buckets;
- spray bottle for moistening walls;
- fishing line or cord;
- hammer, chisel, brushes.
What plastering tools will you need?
To plaster walls you will need the following tool:
- Container for mixing the solution. This can be either a construction bucket or trough for small repair work, or a concrete mixer for large volumes of finishing work.
- The tool for mixing the solution is a shovel or a hammer drill with a mixing attachment.
- Trowel for applying plaster to the wall.
- Plumb line and building level for even application of plaster on the wall.
- Spatula and rule for leveling the surface of the plaster.
Preparing the walls
This stage is always performed, because the solution is applied in a thick layer, and poor adhesion to the surface leads to its peeling and collapse.
Preparatory work is carried out for all walls according to the same principle, but there are some aspects related to the type of building material.
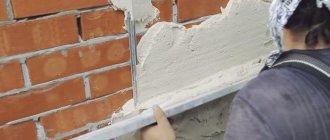
Made of brick
If you plan to plaster brick walls with cement-sand mortar, carefully inspect the surface of the masonry and remove excess mortar. The thickness of the applied layer depends on the evenness of the wall, and if this value does not exceed three millimeters, then it is quite possible to do without a reinforcing mesh.
Dust is cleaned off, dirty stains are washed away, the dry wall is covered with a primer mixture that prevents the absorption of water from the applied solution.
Made from concrete
The preparatory process for such a surface is somewhat simpler. Protrusions are removed, dirt stains are washed away, priming can be omitted, because the concrete wall does not absorb moisture.
Immediately before plastering, the concrete is moistened.
Made of wood
Wood material is more susceptible to negative influences than others, so the wall will have to be prepared carefully.
To improve adhesion, a primer must be applied, and a mesh for reinforcement is fixed along the entire wall with self-tapping screws.
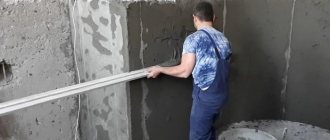
Instructions on how to plaster walls with cement mortar
After all the preparatory work, you can proceed to the most important thing. You will need the following tools:
- Master OK
- level
- plaster ladle
- rule
- bucket or basin for mixing
Mix as directed by the manufacturer in the instructions. Then we wet the brick. This is very important, because if this step is skipped, it will absorb all the moisture from the prepared coating. Because of this, it will harden quickly and make further finishing difficult.
If the masonry in your house is made of a smooth and non-porous material, then you should apply a millimeter layer to it with a wide spatula and let it dry. This way you can avoid the material slipping.
After moistening the surface, use a ladle to begin pouring the solution onto the wall. Let the mixture dry for a couple of hours, then repeat the process. As soon as you notice that the material has begun to extend beyond the beacons, remove the excess using the rule. If after this bald patches have formed on the surface, then throw the material into this place and re-level it. This way we achieve a uniform coating over the entire surface.
We advise you not to pull the solution again if you develop small depressions. It is better to level such places with a spatula.
After the final coating, profiles with a thickness of 6 millimeters can be left inside, but large ones must be pulled out from the inside, otherwise they, like the reinforcing mesh, may become covered with rust, which will subsequently appear from the inside on the facing material. Fill the voids from them with a solution and level with a spatula.
Please note that you cannot dry the plaster with a hair dryer or using a heater. For its proper drying, fresh air is required, and accelerating this process is fraught with the appearance of cracks.
After watching the video, you can reinforce your idea of how to properly plaster a brick wall.
We display beacons
How to properly plaster a wall with cement mortar? Masters recommend setting up beacons. This is done as follows:
- the wall is checked for vertical evenness;
- guides of appropriate length are prepared;
- at a distance of twenty to thirty centimeters from the corner area, a line is drawn from the ceiling to the floor, and mortar slats are thrown along it in increments of fifty centimeters;
- According to the applied markings, the rail is installed.
The remaining beacons are placed in a similar way, the distance between which should be slightly less than the length of the rule. As a rule, the pitch varies from 150 to 160 cm.
Main indicators of material reliability
Cement plasters are produced by domestic and foreign manufacturers, but generally accepted standards are taken as a basis.
- Air temperature. During the lining process, the air temperature should not be lower than +5°C. When working with winter mixtures, the indicator increases to -10 degrees Celsius.
- Freezing/thawing up to 30-100 cycles.
- The maximum layer thickness (without reinforcement) is up to 40 mm. When using metal or plastic mesh up to 70 millimeters.
- Compressive strength ranges between 2.5-12 MPa. This parameter depends on the brand of plaster.
- The shelf life is specified by a time frame, from six months to a year.
- Suitability for application varies from 30 minutes to 3 hours.
- The degree of adhesion with the base is from 0.4 MPa.
Compositions without technological additives, which have a positive effect on thermal insulation and other characteristics, are included in the category of heavy solutions, where the specific gravity in the hardened state reaches 1600-1800 kg/m³.
In order to improve productivity, a certain percentage of builders enrich cement plasters with highly effective additives.
- Plasticizers. They improve key characteristics, in particular mobility, ease of working with the material and reduced mixture consumption.
- Detergents. The addition of such components has been criticized.
- PVA glue. Increases adhesion, reduces shrinkage, increases resistance to fungus and cracking.
- Slaked lime. The binder component gives the compositions lightness and plasticity.
Excipients can also adversely affect the quality of the prepared solution. For example, the main disadvantages of slaked lime are the properties of low strength, high shrinkage, plus the possibility of cracking of the hardened layer.
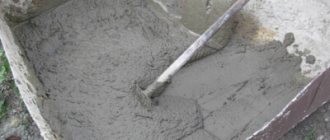
Preparation of working solution
Having completed the preparatory activities, we begin to prepare the plaster solution. We recommend that you act in a certain sequence:
- we clarify the proportions for making the batch, measure out the components in the required proportions;
- add the required amount of sand to a portion of Portland cement and mix the ingredients thoroughly;
- Water is added portionwise, everything is kneaded to the required consistency.
You should understand which solution is best suited for plastering walls. The consistency of the mixture of sand, cement and water, reminiscent of thick sour cream, will facilitate the spreading process and prevent it from slipping if the solution is applied in a thick layer. Particular attention should be paid to ensuring that there are no lumps of sand or cement in the mortar mass.
If the mixing is completed in accordance with the requirements, the solution retains its original shape without spreading over the working surface of the trowel.
Specifics of using cement plaster
In the process of preparing the solution, other criteria must be taken into account:
- Under what conditions will the lined base be used?
- Surface material: cinder block, reinforced concrete, brick, etc.
You should also take into account: inertness, plasticity, viscosity of the materials used. Below is a table of consumption of components for cement plasters based on the addition of water 30-50%.
| Mixture | Ratio in kilograms to sand | Brand |
| 75 | 1:6, 7 | Cement II 42.5 N (M 500) |
| 75 | 1:5, 4 | Cement II 32.5 N (M 400) |
| 75 | 1:4, 2 | Cement II 22.5 N (M 300) |
| 50 | 1:7, 4 | Cement II 32.5 N (M 400) |
| 50 | 1:5, 8 | Cement II 22.5 N (M 300) |
| 25 | 1:9, 5 | Cement II 32.5 N (M 300) |
When using cement plaster, the consumption of the mixture along with the expected losses should be taken into account. The indicated indicator is taken per square meter and layer thickness. To better navigate, it is proposed to use the data given in the table.
| The amount of mortar for plastering vertical bases | ||||||||||||
| Materials | Plaster thickness (in centimeters) | |||||||||||
| 1 | 1, 5 | 2 | 2, 5 | 3 | 3, 5 | 4 | 5 | 6 | ||||
| Cement, cement-lime mixtures m³ | 0, 012 | 0, 017 | 0, 022 | 0, 028 | 0, 033 | 0, 039 | 0, 044 | 0, 055 | 0, 066 | |||
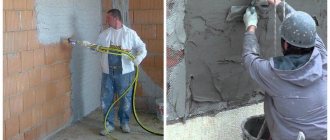
Applying plaster
Let's consider the technology of plastering walls with cement-sand mortar. Having mastered all the techniques, it is possible to level the walls yourself quickly and with good quality.
Considering the expected thickness of the plaster layer, you should choose a tool suitable for the job - a trowel or ladle. The second one is used in most cases when working with large volumes.
A distinctive feature of a mortar made from sand and cement is that it does not require rapid production, so during work there is always the opportunity to inspect the plastered area and make certain adjustments.
Before you start plastering the DSP with your own hands, the wall surface is sprayed with a liquid mortar mixture that improves the adhesion rate. This layer can be applied unevenly, the main thing is to cover the entire area. After two hours, you are allowed to begin finishing with a second, thicker solution. It is applied by throwing it on to improve adhesion. Work is carried out from the floor to the upper section of the wall, in areas whose boundaries are indicated by beacons.
The mortar layer is leveled by the rule, which is carried out in the same direction - from the floor covering to the ceiling, in a zigzag motion. If during the leveling process small defects are revealed on the surface of the wall, mortar is added to such places with a trowel, and everything is leveled again according to the rule.
To achieve greater evenness, the final working stage is grouting.
The surface is carefully plastered if the work is carried out according to beacons. They move on to the next section when the previous one is completely completed.
What is included in cement-sand plaster?
The cement-sand mixture already contains both components, as you might guess from the name. All that remains is to add water and mix the required amount of solution mechanically.
Interesting! Different types of plaster contain different grades of cement. It could be M100 or M500, the information will be indicated on the packaging in any case.
The brand of cement affects the strength of the coating and its purpose. It all depends on the finish coat and the location of application. For facades, values in the range M250-M500 are recommended. For most interior work, a cement-based mixture M100-M250 is quite suitable. Exception: working with tiles.
Various types of sand are added to the cement-sand mixture. Sea sand is rarely used in the finished mixture, so usually the choice is between river sand and quarry sand. Professional builders prefer river and sea. Many parameters of the finished mixture will depend on the quality of the sand: color, reliability of adhesion, strength, shrinkage, tendency to crack and final wear resistance.
If you still manage to purchase a mixture based on sea sand, then you can expect it to be free of impurities that can reduce the adhesion of the solution to the surface. DSP based on sea sand, as a rule, is more expensive than samples from river or quarry sand.
Usually the following proportion of sand in relation to cement in the mixture is used: 3 to 1. However, the composition will also contain other components with different purposes. Here are some of them:
- plasticizers: make the solution more plastic, facilitate application and especially leveling with a rule and a spatula
- copolymers: including improving thermal insulation
- redispersible powders: hinder moisture absorption and increase adhesion to the substrate
How to get to hard-to-reach places?
A developer who plasters walls with cement mortar with his own hands should know that in the most difficult places it is better to work at the final stage of the process, when the main surface of the wall has dried. Such areas are the corners of walls, abutments to the ceiling, spaces surrounding the elements of the heating system.
When plastering corners, you must initially apply the solution in the usual way, then press down the thrown mass with a rule, the corner of which is cut off. In this case, the lighthouse installed first from the corner is taken as a landmark.
The mortar mixture is poured into the openings near the pipes with a spatula or trowel, and grouting is done with them. It is recommended to finish the areas near the ceiling on the second day after completion of the main work. When leveling the layer, they are usually placed vertically, and are oriented not towards the lighthouse, but towards the dried plaster layer.
To prevent the layer of cement-sand plaster from cracking in the future due to rapid drying, several techniques are used:
- eliminate strong heating of the room and the possibility of drafts;
- during plastering work, the wall surface and working tools are often moistened;
- grouting is carried out several times;
- the surface of the plaster layer is coated with a moisture-repellent composition.
Each method increases the drying time of the wall surface, while maintaining the evenness of the coating, which, after such finishing, can withstand any negative impact.
Flaws
The composition is not without several drawbacks, the most significant of which is the large weight of the finished solution, which creates an additional serious load on the plane.
Another drawback is the labor-intensive finishing work, which involves applying cement plaster in several stages, which also affects the implementation time of the rough layer.
In addition, the mixture itself reaches its maximum strength only after 3-4 weeks. Failure to follow the mixing instructions will inevitably lead to cracking of the applied layer.
The material is incompatible with plastic, previously painted, or other smooth or wooden surfaces. Even with a very smooth concrete base there can be some difficulties.
It should also be remembered that cement-based plaster for interior work requires additional putty. Such solutions are not suitable for final finishing.
Finishing work
As soon as the walls covered with plaster mixture have completely dried, the final stage of repair begins - finishing. It is performed in several ways:
- using spraying, they form the original texture of the wall surface;
- the walls are painted with compositions of different color shades;
- The surface of the wall is made rough.
The required finishing option is determined taking into account the individual wishes of the developer.
Carrying out surface grouting work
When working with cement plaster, one should take into account the time indicator, the so-called viability of the mixture. After applying the solution to the prepared wall, you still need to have time to stretch it. Therefore, finishers, as a rule, work at a pace - they apply the construction rule to the base perpendicularly and with energetic movements, from bottom to top, in zigzags, they move the tool, focusing on the beacons.
Grouting with special trowels must be performed when the cement plaster has not lost its plasticity properties. That is, the tool is used to work on a slightly damp layer. It is performed in a circular motion without strong pressure. During work, the remaining recesses are filled and the protrusions are cut off. It is necessary to wet the base so that when grouting a liquid of a characteristic color is released.
In some cases, finishing grouting is used with tools with a soft working surface made of felt or felt.
Possible difficulties
Many people are trying to find out how to quickly complete plastering work without spending extra time and money on it. In a hurry, repairmen neglect some rules, and the consequences after this become very dire.
It would not be superfluous to talk about the mistakes made by beginners who do not have proper experience in plastering work. This mainly relates to the process of preparing the mixture, observing the ratios of the components used for this. If you add more cement than is required according to the norm, you will get a solution that does not have the necessary plasticity. This means that at the drying stage, during shrinkage or under the influence of unfavorable factors, cracks will appear on the surface of the layer and its partial collapse will begin.
If an inexperienced craftsman, in pursuit of the goal of saving money, adds more sand to the solution than is required according to the norm, the composition does not adhere well to the surface, and after drying a lot of dust will form in the room.
The problem can be determined visually using a spatula - a mixture with excessively added sand does not stay on the tool, and plaster with excess cement sticks to the working surface and is difficult to clean off.
It is recommended to carefully examine the previous covering layer of the surface. The cement mixture is applied boldly without preliminary cleaning if the coating was previously made of a similar material.
Please note that this plaster composition is not used on gypsum or lime coatings.
It is important to first apply a layer of spray to the wall surface if painting is planned in the future. If this condition is not met, the mortar mass dries unevenly, shrinks, and all defects become clearly visible after applying paintwork materials.
Splash
This is the first layer of plaster, for which a more liquid composition is used than for the main layer. The prepared plaster is scooped onto a spatula or trowel and transferred to the surface using the “throw” method. If the master has experience, then you won’t have to stretch and level the mortar; home craftsmen are recommended to treat the walls with a trowel.
The first layer of plaster is a spray, applied by “throwing” the solution onto the wall
On a note! The thickness of the spray differs depending on the base material. For concrete - 3 mm, brick - 7 mm, wood - 1 cm.
Review of manufacturers
Weber Vetonit TT and TT40
products have universal application and adhere well to different surfaces. Used for facades and inside the house. The manufacturer guarantees quality, increased strength, and there are options for manual and machine application.
The plastic solution Ceresit CT 24 Light has gained popularity because it is suitable for any substrate. However, its vapor permeability is slightly reduced.
Knauf Unterputs is a leveling compound for universal use. The mixture does not set within 2 hours. The medium grade filler creates a smooth surface that is suitable for adhesion to the finish. Experts note low consumption.
Founder Profi Startwell RS22N is used outside and inside buildings. The layer is durable and retains its properties for a long time. It fits well under tiles, but painting will require finishing putty. Increased flexibility allows the composition to be used in vibration conditions.
Decorative plaster on a brick wall
For decoration, first select the desired effect, then select a suitable mixture. For example, textured mixtures are not suitable for bark beetle, but “bark beetle” and “pebble” mixtures are not suitable for Venetian.
Popular finishing finishes include:
- for the facade - travertine, bark beetle, lamb, American, rain, fur coat, mosaic, sgraffito or pebble, or rusticate;
- for indoors - wet silk, Venetian, craquelure, imitation brickwork, wood, etc.
You can get acquainted with the types of effects and implementation technology in the “Decorative plaster” section.
General recommendations and nuances
When you already know what the general technology for plastering external and internal walls looks like, you need to familiarize yourself with some of the nuances of the work that you may encounter:
- Beacon plaster is an excellent method for leveling surfaces. But it is inconvenient to work with the rule under the ceiling. If you leave fifteen centimeters uncovered, they can be leveled the next day after the mixture has dried. The new portion is leveled in a vertical position.
- To prevent cracks from forming on the surface, you need to spray it with water from time to time or protect it with film. At the same time, you should avoid high temperatures and drafts in the room. If cracks still appear, then you need to re-grout.
- In niches, corners or places where pipes pass, it is not very convenient to work with the rule. It is replaced with a template of the required shape, which is easy to make yourself. The lighthouses are placed closer here.
- The corners are aligned using a special metal corner; you can also do them yourself.
- You should not apply TsPSh to lime or gypsum. Heavy material will simply fall off the wall along with the weak base.
- The proportions when mixing are strictly observed: if there is an excess of cement, the coating will become hard and will crack when shrinking. Excess sand will give a weak, loose plaster and it will crumble easily.
- The mixture needs to be turned over with a trowel: the fatty mixture will stick strongly, and the lean mixture will drain. This is how the quality of the batch is determined.
- If the thickness of the coating is uneven, then after drying it will look uneven. After painting it will be especially noticeable. This defect appears even when applying a thin layer of plaster.
There is nothing difficult in applying cement-sand plaster, with which you can create a smooth wall surface in any room. The main thing is to approach the work responsibly, perform all steps carefully, following the instructions.
Preparatory stage
An important stage is the preparatory work. It includes several points that cannot be ignored. First of all, you need to check the availability of tools. Next comes surface preparation.
The walls need to be examined carefully. Loose bricks, if any, are fixed with cement or foam. Cracks and chips are covered, deformed areas are removed. If this is not done, the plastered surface may begin to deteriorate quite quickly. The old composition needs to be removed.
A plumb line will help identify imperfections and surface unevenness. The seams are cleaned, dirt and dust are removed. The rest of the surface is also cleaned, after which it should be primed. It is the primer that will help the materials adhere better. The next step is the installation of beacons.
To begin with, self-tapping screws are installed in the upper corners, protruding a couple of centimeters above the surface. Plumb lines are placed, and screws need to be secured to their cords. Next, a tourniquet is stretched, which forms straight lines horizontally, and beacons are placed under them, the distance between which is 2 meters. The fixation points should be located 20 centimeters from each other. As a result, the wall will have vertical dividing strips.
Purpose of the plaster mixture
The main purpose of cement and sand plaster is to level walls. At the same time, this solution can be used to level walls made of almost any building materials. But this type of plaster has many other advantages:
- protecting the walls of the house from moisture;
- it is a “breathable” material through which air passes, that is, optimal conditions are created inside the house to obtain a good microclimate;
- protection from noise and external temperatures;
- creating a layer with high adhesive properties on which the finishing can be laid;
- high maintainability of the leveling layer, which can be corrected with the same composition.
Production of cement-lime mortars
Work on the production of such materials begins with slaking lime. For this operation you will need:
- lime;
- capacity;
- clean cold water;
- personal protective equipment (goggles, gloves, thick clothing).
First of all, dry lime is immersed in a container and filled with water. Lime slaking is accompanied by a violent exothermic reaction, so the volume of lime and water should not exceed 30% of the container volume to prevent splashing of the material.
The preparation of cement-lime mortars begins with slaking lime
After 10 minutes, the reaction will subside, so you will need to add water again and leave the mixture to steep for about 1 hour. After this, add some water again, cover the container and let it brew for 2 weeks.
You should know! When using quicklime, the above reaction will occur on the walls, causing the plaster to crack.
After two weeks, you need to remove the lime from the container and rub it through a sieve with a 3 mm mesh. Then mix it with cement in a separate container, and then add sand. For 1 part of cement, it is recommended to use 1 portion of lime and 3 sand. Then you should pour a small amount of water and mix the plaster thoroughly.
Slaked lime is rubbed through a fine mesh sieve.
Cement mortars cannot be soaked with water after they have dried, so it is better to prepare a small amount of material so that it does not have time to dry in the container.
Varieties of plaster compositions - not everything is so simple
Mixtures of different types can be applied to walls and facades. For example, interior work is usually done with so-called simple plaster. It is used for the following purposes:
- Before installing the mesh for reinforcement. It is mounted for applying decorative plaster solutions.
- For sealing various defects that walls have (gaps, cracks). In this case, simple plaster serves as a composition for preliminary finishing work.
- As an antibacterial solution. In this situation, cement compositions with special additives that suppress fungus should be used.
Plastered wall
Simple plaster is used in a two-stage scheme. First, the walls are sprayed with it, and then a primer layer is applied to them. Standard finishing of external elements of buildings and internal surfaces is most often carried out using universal cement compositions. They are also used to increase the waterproofing characteristics of wells made of reinforced concrete rings, household septic tanks and similar structures. In some cases, blind areas and concrete screeds are leveled with a universal solution.