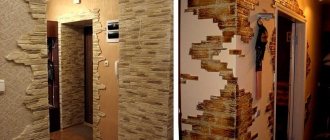
Venetian plaster for interior wall decoration can be a wonderful decoration for any interior. Walls or surface areas with such a coating look great, especially in classic interiors. You don’t even need a lot of money for this, because the mixture can be prepared from putty. The main thing is to properly prepare the base, use the right tools and follow the technology exactly.
Features of preparing walls for Venetian plaster
When applying Venetian plaster, half the success depends on properly preparing the surface.
A mandatory requirement is that the surface must be flat, smooth and durable so that it can withstand the weight of the applied material.
Concrete, brick, stone surfaces (previously carefully treated with an acrylic primer), even walls covered with old oil paint or whitewash are suitable for the base, but they must first be cleaned of dirt.
The surface preparation technology is the same as before wallpapering, you just need to take a more serious approach to each stage of work.
A deep penetration primer must be applied to the surface, all sagging and irregularities must be thoroughly sanded. If the base is poorly prepared, cracks may appear on it in the future.
The main property of determining the quality of applied Venetian plaster is surface preparation. Moreover, Venetian is one of those types of materials where careful preparation is mandatory. For this, various types of primers and putties are used.
Primers are used to prepare highly absorbent substrates and enhance the adhesion of these substrates to the subsequent coating.
Consumption and restoration
The manufacturer lists the consumption per 1 m2 in the catalog or on the packaging. You can use a calculator to calculate the required amount of composition. The consumption of Venetian plaster depends on the type of application technology used, the level of skill, and the composition of the solution.
The consumption per m2 layer by layer looks like this:
1st – 500-600g/m2 (maximum quantity),
2nd – 220-250 g/m2,
3rd – 80-100 g/m2 (minimum quantity).
You can also use our online decorative plaster calculator.
Stucco Veneziano is a repairable coating. There is no need to redo the entire wall, and minor defects or minor damage can be restored. In case of chips, scratches, large areas of contamination, or peeling, Venetian plaster is repaired. In this case, it is not necessary to remove the entire coating; it is enough to restore the suitability of the desired area.
Restoration of marble finish step by step:
- If there are cracks in the plaster or crevices, tap the area to determine whether there is peeling of the coating from the base. Anything that comes off the wall is removed.
- The vacated area is cleaned with a brush to remove any remnants of the previous finishing composition and dust.
- The base is primed with a brush with the desired primer or a composition of PVA and water 1:5.
- Plaster mortar or gypsum putty (if the base is made of plasterboard) is applied to the base of the area to be repaired. The surface of the putty/mortar is rubbed to the desired smoothness.
- Select a decorative solution of the same brand or use a white acrylic composition. Select a color and paint the composition to match the color of the wall finish.
- Apply the solution with a soft spatula (if the repair area is large, try to repeat the pattern of strokes).
- Remove excess solution that has fallen on undamaged surfaces with a damp cloth.
- After drying, apply wax or glaze. Polished to a shine.
Technological sequence for preparing the surface of walls for the Venetian
Venetian plaster can be applied to almost any surface, including drywall. Therefore, the stages of surface preparation may be different. They are presented in the table.
Stages of wall surface preparation
| Type of operation | Plaster | Concrete | Previously painted surfaces | Drywall |
| Cleaning | + | + | + | — |
| Smoothing | + | — | — | — |
| Joining seams | + | — | + | — |
| Primer | + | + | + | + |
| Sealing joints “flush” | — | — | — | + |
| Sealing seams and cracks | + | — | + | + |
| Sanding greased areas | + | — | + | + |
| First full putty | + | + | + | + |
| Grinding | + | + | + | + |
| Second full putty | + | + | + | — |
| Grinding | + | + | + | — |
Surfaces previously painted with old alkyd, oil-based or water-based paint must be cleaned of peeling paint with a spatula. Sand the surface until the shine is completely removed, followed by removing fragments of abrasive material with compressed air and a dry rag.
Depending on the quality of the surface, puttying has to be done from one to three times. After applying each layer of putty, the treated areas must be cleaned with sandpaper or pumice.
It is better to apply the second layer of putty over a previously primed and dried surface - it is applied in a thinner layer, and in addition, it is easier to putty over a primer. Remaining roughness and scratches are corrected by repeated filling and cleaning (grinding).
The next layer of putty must be applied when the previous one has dried. As a rule, the layer takes about a day to dry completely, but this also depends on the thickness of the layer and the ability of the base on which the putty is applied to absorb moisture.
After you have finished puttingtying the surface and it has completely dried, you need to sand it (this procedure is necessary to level out all the small protruding processes of the putty).
Source
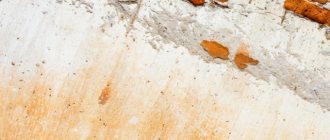
Preparation and priming
Initially, you need to make sure that the surface is completely dry. If you see fungus, it must be eliminated as quickly as possible. It is necessary to remove the old layer, remove dust and grease stains, if any. As for minor defects and cracks, they do not need to be repaired. The fact is that decorative plaster usually has a peculiar relief, so such small deformations are usually not visible. If the cracks are large, they should still be repaired. To do this, use a regular side grinder with a side disk. The cleaned cracks are filled with a building compound. Next, apply a special basalt layer to strengthen it.
As for Venetian plaster, particularly careful preparation is required. Sometimes it is even necessary to reinforce the wall with fine mesh. Make sure the surface is as level as possible. Otherwise, pieces will fall off over time.
The preparation process includes priming . It is necessary to ensure that the plaster is securely held on the wall. The composition should be well absorbed, you need to wait a little time before starting work. Most often, when purchasing Venetian plaster, you will be offered special compositions designed for priming walls under the plaster of your choice. Of course, it will be better if you buy the primer recommended by the manufacturer, but you can also choose absolutely any other one intended for the Venetian.
If the layers are thick enough, you may not need to putty the wall. Before application it is necessary to carry out a test. To do this, simply cover one of the corners with plaster. This way you can immediately see the subsequent structure. In addition, the shade will be immediately noticeable. Before applying, you should take care of smooth transitions, because you will not have the opportunity to correct them later.
Application of the first and subsequent layers
There should be no problems with applying Venetian plaster. The fact is that it is sold in liquid form. You need to open the bucket and start applying the composition using a spatula or sprayer. You should work quite carefully with Venetian plaster. This is due to the sequential application of several layers. They are all quite thin and need to be applied unevenly. Each layer must dry for at least 24 hours.
To illustrate the process, we recommend watching our video tutorials on applying decorative plasters.
Conclusion
If you need to prepare the surface for applying Venetian plaster, you will have to clean the wall first. As for applying the first layers, extreme care is required. Most owners are able to carry out this work themselves. If you are not sure that you will succeed in all this, then it is best to turn to trusted professionals.
Source
Preparing the surface for applying Venetian plaster
| Preparing a surface for applying Venetian plaster is both a simple and complex process. Why is that? The point is that you need to strictly follow the algorithm and avoid mistakes. In this article we will figure out how to do everything correctly. |
Preparing a surface for applying Venetian plaster is both a simple and complex process. Why is that? The point is that you need to strictly follow the algorithm and avoid mistakes. In this article we will figure out how everything needs to be done.
Progress and stages of work
The most labor-intensive process is required for walls that are plastered but not painted. It includes 10 stages:
- cleaning walls from dust and other particles located in the porous surface;
- smoothing;
- jointing;
- primer;
- crack filling;
- sanding off excess leveling mortar after it has dried;
- the first continuous application of decorative material with a spatula;
- sanding the dried layer of Venetian plaster;
- second application of decorative material over the entire surface to be treated;
- wax treatment.
When working with a bare concrete surface, the number of steps is significantly reduced, there are only six. There are no processes for smoothing the surface, filling seams, sealing joints and cracks. Accordingly, there is also nothing to grind yet. Based on the above, it turns out that when working with a concrete surface, the only preparatory process that remains is cleaning and applying a primer layer, which is necessary to create adhesion - good adhesion of the Venetian plaster to the concrete base.
If a previously painted wall that has no damage (cracks, blisters) is selected for applying the Venetian, then the preparation process is practically the same as that provided for a plastered surface. Only the smoothing process is excluded. If there are defects in the paintwork, they must be eliminated using a spatula and sandpaper.
How to prevent cracks?
Experts recommend reinforcing walls. In some cases, the recommendation can be ignored, although if the thickness of the future Venetian plaster exceeds 3 cm, it is better not to do this. The presence of reinforced mesh will prevent cracking of the decorative finish and will additionally strengthen the walls. A mesh made of synthetic or natural fiberglass is used for reinforcement. The size of the cells does not matter. The mesh is applied to traditionally plastered surfaces and puttyed before applying the “Venetian”.
There is another way to prevent cracks from appearing. For these purposes, non-woven wallpaper intended for painting can be used. Stick them on the wall, seal the seams with putty, and then open everything up with paint. Thanks to the good elasticity of the wallpaper, a good base for Venetian plaster is obtained.
Cheaper paper wallpapers can also be used. They must be coated exclusively with acrylic paint or primer. Other types of paints and varnishes are not suitable for these purposes. When painting, it is necessary to ensure uniform application. There should be no marks from a brush or roller.
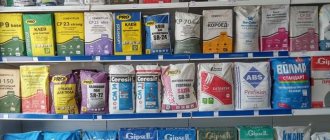
Materials and their properties
Compositions for decorative plasters are produced in dry or ready-made form. Before use, dry mixtures must be diluted with water or an organic solvent, following the manufacturer's instructions. Ready-to-use materials do not require additional mixing with any thinner.
Decorative mixtures are made on a mineral or polymer basis. In the first case, cement or gypsum is used as a binder, in the second - acrylic. To structure the finishing surface, coarse or fine-grained fillers are added to the composition - marble chips, polymer dry chips, fibers, quartz sand.
General properties of decorative plasters:
- elasticity;
- high adhesion to any surfaces - concrete, wood, aluminum profiles, drywall;
- fast hardening speed;
- easy application;
- durability;
- the ability to clean and restore the coating.
When diluted with water, gypsum and cement plasters have a lifespan of no more than 3 hours and cannot be mixed again. To add color, the dried surface is painted. An undeniable advantage of mineral mixtures is excellent vapor permeability. The walls can “breathe”, maintaining optimal humidity in the room.
Acrylic plasters are stored in a closed container for up to 2 years without loss of plasticity. They can be immediately tinted to the desired color, thereby avoiding additional painting work.
The vapor-permeable properties of polymer compositions are worse than those of mineral ones, but they have higher resistance to humidity, ultraviolet radiation and wear. Modern loosening additives bring acrylic coatings closer in their ability to transmit steam to gypsum or cement mixtures.
Primer selection
Nowadays, manufacturers produce different types of primers:
- alkyd;
- phenolic;
- acrylic;
- synthetic, etc.
The latter type of soil is not used in residential premises. In addition, primer compositions can be universal or designed for a specific type of surface (concrete, drywall, wood, etc.). Such compositions take into account the characteristics of the base, and therefore are considered the best solution. Before purchasing, you should familiarize yourself with the assortment, and then choose the appropriate option for your specific goals.
Main types of plaster
Plaster compositions have been known since ancient times as a building material and as a type of finishing. The ancient Latin name - stuk, stukko has survived to this day.
Plaster compositions are:
- for interior finishing;
- for plastering facades;
- universal application.
Next we will talk about plaster for interior wall decoration.
Finishing solutions are:
Conventional compounds are used for rough plastering of walls and ceilings, and for sealing joints.
Depending on the quality of the surface, plaster finishing can be:
- high-quality – wall finishing ready for painting or wallpapering, done by spraying, multi-layer application of primer and final coating;
- improved - for utility rooms in residential buildings, and also for rough finishing, consists of three layers - spray, primer (main layer), covering, leveled with a rule and rubbed with a trowel;
- simple plaster, consisting of two layers - spray and primer, applied without hanging, leveled with a float, used for plastering basements, warehouses, and utility rooms.
Decorative compositions that differ in texture and color are used for finishing, which does not require wallpaper, cladding or painting. Special plastering compounds are used to perform certain tasks. For example, they are used for additional thermal insulation of an apartment (thermal insulating plaster), protection of medical equipment from ionizing rays (barite plaster), and treatment of damp walls of a house (sanitizing).
Next, let's look at ordinary plasters.
Cement
From the name it is clear that the main binder of this type is cement. The simplest plaster composition is cement-sand. The finish is durable, frost-resistant, inexpensive. Suitable for indoor and outdoor plastering work. Manual or mechanical application is possible. It is commercially available in the form of dry mixtures (MS), which contain modifying additives. You can prepare the solution yourself.
Cement-lime
Lime was used as a plastering substance long before the invention of cement. Plaster lime mortars are highly plastic. Using this quality, lime is used as an additional binder in cement-lime mortars.
Manual application or mechanized plastering is possible. Prepare the composition yourself, or purchase a ready-made dry plaster mixture. Used for rough and decorative finishing. Suitable for finishing wooden surfaces.
Plaster
The natural material is easy to lay and plastic. More expensive than previous plaster mixtures, but it has its advantages. Gypsum compounds are used for high-quality plastering of walls in rooms with normal humidity. Decorative SS are also produced. Application is manual and mechanized. Good for foam concrete.
Clay
A natural binder used not only in rural homes. Clay is environmentally friendly and helps maintain a favorable microclimate in the house. Clay plaster coating can be applied by hand. There is practically no waste. Even a dried solution can be soaked again, mixed and applied to the base. Repairable.
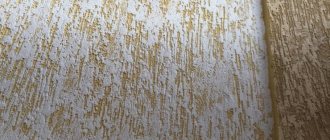
Decorative
This type of plastering materials is the most diverse. SS and ready-made solutions are produced by many companies, both Russian and Italian, French, German and others. Available on mineral, acrylic, silicate, silicone, polymer bases. There are textured, structural, colored, pebble, and terrazite compositions.
Composition and history of appearance
How did Venetian decorative plaster appear?
The beginning of the use of coatings with mixtures based on natural binding materials is lost in millennia. Theophrastus, who lived in the 2nd-4th centuries. BC. describes the mineral gypsos, remarkable for its stickiness and warmth released during mixing. It was crushed and moistened, and then stones were connected with it. The word "gypsos" was used for gypsum and lime. In the 1st century BC. Vitruvius describes the production of a six-layer finishing coating that strengthens the wall - marbled plaster, which was as strong as natural material. The ancient technique differed from the techniques for creating stucco (stucco - the highest grade of plaster) of the Venetian of our time.
In archaic Greece VII-VI centuries. BC. marble stucco or stucco/stucco was used to decorate temple walls. The finish imitated white marble and consisted of gypsum, crushed marble and lime. The Greeks spread this technique during the Hellenization era. Stuccos with a shiny, glossy white surface appeared among the Etruscans on the Italian Peninsula before the formation of the Roman Empire. The Venetians of ancient Rome had a thickness of 1.6 mm inside buildings, and up to 76 mm outside. Their main advantage was specularity, high strength, and resistance to weather changes. Often their surface was decorated with fresco paintings. Later, the baton was taken up by the Venetians, who were the fashion trendsetters of their time.
Since then, the composition of the Venetian has changed little; the components of the solution are:
- marble dust,
- fine-grained stone chips,
- lime dough,
- water.
In addition to classical components, the composition may include natural or artificial dyes, marble chips can be replaced with chips of other types, and the solution can be mixed with latex emulsion. There is also marble plaster for interior work consisting exclusively of calibrated marble.