Preparing walls for plastering is an intermediate procedure between leveling the walls and applying a decorative layer. This stage is considered one of the most important, since the quality of the work determines the future appearance of the surfaces, their service life, as well as strength and resistance to moisture, temperature changes, and so on. Most decorative plasters do not require perfectly smooth walls, but their surface must be clean.
It should be immediately noted that preparing walls for decorative plaster is practically no different from preparing for painting or wallpapering. With the clarification that such a plastic material as decorative plaster can smooth out some unevenness and close cracks or small potholes. Before you begin preparing the surface for plastering, you need to stock up on the necessary tools and materials.
What is needed for preparation
Preparing walls for decorative plaster requires the following tools and consumables:
Tools necessary for preparing walls for decorative plaster
- spatulas;
- building level and plumb line;
- sandpaper, sanding machine with polishing and cutting wheels;
- paint brush;
- drill with impact function (the hammer drill is too heavy and powerful for this work);
- plastic film, masking tape or tape;
- sponges and rags;
- screwdrivers;
- mixer attachment;
- mixing container;
- putty;
- solvent;
- primer.
A spray bottle may also be required. If the walls were previously covered with wallpaper, then they may have to be soaked using this product.
How the preparatory work is carried out
It should be said right away that this work should be one of the last to be carried out. That is, at the time they begin, double-glazed windows and door frames must be installed in the apartment, the flooring must be laid and ready for use. In general, all work has been completed that may directly or indirectly appear on the surfaces of the walls.
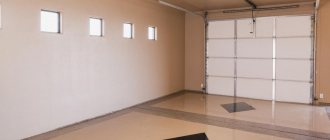
The room must be completely ready for decorative finishing
Preparing walls for decorative plaster includes the following steps:
- The first step is to remove the remnants of the old coating, such as wallpaper, paint or putty. The wallpaper is removed with a spatula after preliminary soaking, the paint is washed off with a solvent, and the putty is beaten off with an impact drill. Then you should remove all fasteners from the wall. Self-tapping screws and dowels are removed with a screwdriver, nails with a nail puller. Also, after removing the old coating, reinforcement elements may appear; they must be cut off with a grinder.
Removing old covering from a wall
- After this, you should tap the wall with a hammer to identify weak spots. If potholes and cracks appear, they are sealed with putty. If they are deep and wide, then they are sealed in several stages.
- The next step is to apply a primer with strengthening properties, after which you need to wait about 4 hours for it to dry. If we are talking about bathrooms, kitchens or other rooms with high humidity, you need to treat them with a special antifungal substance and wait again for about 4 hours.
Applying primer to the wall with a roller
- After the primer has dried, they begin to putty the surface. This procedure is carried out using wide and narrow spatulas. After applying the putty, it is necessary to check the evenness of the surface with a building level and plumb line. The putty layer is the basis for decorative plaster, so it should be carefully leveled. At the end, it is necessary to sand the surface using sandpaper or a grinding machine, and its surface should be fine-grained.
A layer of putty is the basis for applying decorative plaster
- Next, you need to apply a layer of deep penetrating primer. A paint brush is used for this. Most decorative plasters do not have a high level of adhesion, so over time the material may simply fall off. To ensure tight contact, a primer is needed. It is required to apply 2 layers with an interval of 3-4 hours to allow them to dry.
Now that the preparation of the surface for plastering is complete, you can begin decorating the walls.
On a note! If you plan to apply a thick layer of textured or textured plaster, then finishing the surfaces with putty is optional. But for thin layers of the above types of finishing materials or for “Venetian”, puttying is mandatory. The fact is that a small layer will not be able to fill cracks and potholes, which will appear after the decorative material dries, which will affect the appearance of the walls and their service life.
Some types of decorative plaster require the walls to be puttied
Technology
The ideal option for preparing walls for decorative plaster is like “for painting.”
Such work includes the following stages: leveling with gypsum or cement mortars, puttying, grouting walls, priming. Expert opinion Alexander Guryanov Plasterer and master of decorative finishing
I note that it is not always worth achieving perfect smoothness. It is needed only for thin-layer smooth plasters such as Venetian. Textured finishing coatings, such as “fur coat”, imitation stone, liquid wallpaper, pebble plasters, hide minor irregularities and flaws in the walls.
Necessary tool for work:
- to remove old coating: spatula, brush or scraper;
- for priming: painting tray, brushes and rollers;
- polyethylene film to protect the floor covering.
Preliminary work largely depends on the material from which the walls are made. Let's consider the general rules that are relevant for both interior decoration and the facade.
Concrete wall
The surface of the concrete panels itself is quite smooth. In order for gypsum plaster to adhere better, it is necessary to use an adhesive primer with quartz sand (concrete contact).
Wooden surfaces
It must be remembered that wood may slightly change its size when air humidity changes. To prevent this from causing deformation of the plaster layer, it is necessary to waterproof the surface with special means.
To prevent dry slats from splitting during fastening, you cannot adhere to one axis when driving nails. Leave small gaps between the slats at the edges.
An alternative to shingles can be a reinforcing mesh made of wire.
Old plaster
delete
Remove old paint from the wall. Loose plasters such as lime plasters are primed with a strengthening penetrating primer.
Brick base
Heavy cement-based plaster is often used to level such walls. In this case, mesh reinforcement is necessary to increase strength.
Read more about plastering brick walls in our article.
Drywall
Only moisture-resistant material should be plastered, otherwise the surface and coating may become deformed.
Most often, decorative plaster is applied to drywall, choosing it as an alternative to wallpaper or paint. If you plan to plaster with a gypsum mixture, then the surface under such a coating must be treated with an adhesive primer for better adhesion. For acrylic decorative plasters, it is enough to apply a universal primer to the gypsum board.
Aerated concrete / foam concrete
For interior finishing, it is enough to plaster smooth aerated concrete masonry with a gypsum mixture. For wet rooms and facades, cement mortar or a special adhesive composition is suitable.
Often the exterior finishing of a house is done using insulation using the “wet facade” technology.
Chipboard, OSB boards
The joints between the slabs must be puttied in the same way as plasterboard walls. To protect against moisture and improve the adhesion of a smooth surface to gypsum plasters or putties, use materials such as concrete contact.
An important step before leveling or decorating walls made of any material with plaster is cleaning, because... On a dirty surface, the solution does not adhere well.
- Grease stains must be removed with a solvent or cleaned with a scraper/brush. After removing the wallpaper, you also need to remove the remaining pieces of paper.
- Dust and grains of sand from the walls should be removed with a brush, damp cloth or vacuum cleaner.
- Almost always the surface needs a primer. The composition is applied to the walls from bottom to top using a roller. In corners, near window openings, as well as in particularly difficult places, you can use a brush.
Before finishing the decorative finish, putty is applied to the surface, which, after drying, is rubbed down with fine-grained sandpaper or an abrasive mesh on a special block. Grouting is done in a circular motion until completely leveled without pressing hard on the tool.
At the intersection of different materials
Plaster will dry and adhere differently on different materials. That is why the places where surfaces of different types are connected must be additionally strengthened after preparation using reinforcing mesh.
The width of such a tape should be at least 20 cm. The mesh is nailed to the tree with nails or self-tapping screws, and attached to concrete or brick with dowels.
Expert advice
Preparing walls for plastering should be carried out taking into account the following nuances.
Before starting work, it is recommended to cover the floor surface, windows and furniture with plastic film. The ceiling area near the wall and baseboards must be sealed with masking tape. For each layer of putty, it is necessary to allow at least 48 hours for complete drying, and it is forbidden to use heaters or hair dryers to speed up the process. Otherwise, the surface may crack.
Important Tips
We must not forget about our own safety before and during work. The following recommendations must be followed:
- You need to work in thick clothing that covers all parts of the body.
- Shoes should be closed-type, as it is possible that a heavy object could fall on your foot.
- It is advisable to use a hat to avoid getting the plaster solution on your hair.
- Although the plaster does not have a pungent odor and is not toxic, it is still recommended to wear a respirator and protect your eyes with special glasses.
- To work even at low heights, you should choose reliable means of scaffolding. Instead of a ladder, it is better to use a table, cabinet or special platform.
Advice that any person should take into account, no matter whether he is a beginner or not, is that you should not do work when you feel unwell, dizzy, weak, or have gloomy thoughts; it is better to wait until your mood returns to normal. This is the only way to get the expected result.
Test application of plaster
Professionals with many years of experience can skip this step, but inexperienced people are strongly advised to do a trial application. To do this, you need to select a small section of the wall closer to the corners or use a sheet of plasterboard that has been previously finished in the same way as the surface of the walls. After the test layer has dried, you need to evaluate the quality of the resulting surface, its texture and color. If everything suits you, you can safely start plastering.
Test application of decorative plaster allows you to evaluate its texture and color
Selection of formulations
Manufacturers offer a wide range of plaster mixtures. Some of them are intended for exterior use, others for interior decoration. Moisture-repellent putties are used to level the walls in the bathroom. By understanding their differences, everyone can save money and ensure the durability of the finish coating.
Cement putty is gray in color and difficult to paint. Source stroidomsait.ru
So, experts conditionally divide all existing proposals into three large groups. Available for sale:
- gypsum putties;
- cement compositions;
- polymer mixtures.
The former have high plasticity, fit well on any base, but do not tolerate high humidity. Therefore, gypsum putties cannot be used for bathroom renovations.
The second ones are more durable. They withstand weather conditions well, making them ideal for façade work. They are expensive, which is why their use indoors is considered inappropriate from an economic point of view.
The color of the gypsum putty is slightly pink Source remont-book.com
Preparation of material and its consumption
The modern construction market offers customers ready-made mixtures in plastic containers and dry powdery substances that must be diluted with water. In the first case, it is enough to simply open the container and mix the composition with improvised means (a long screwdriver, a wooden plank, and so on). In the second, you must first study the instructions provided by the manufacturer, and then prepare the solution in the required proportions. To do this, you will need a mixing container and an electric drill with a mixer attachment.
Preparing a solution of decorative plaster with a mixer
Consumption of main types of decorative plaster:
- Structural compositions - approximately 3 kg of material per square meter of surface.
- Textured plasters - on average 1.5 kg per square meter.
- Venetian plaster - about 150 g per square meter. meter for one layer, the total consumption must be calculated based on the number of layers.
The above data is approximate. Actual consumption depends on application method and desired result.
Preparatory work is both a simple and important part of finishing. In order for the stage of preparing the surface for plastering to be successful, and for the coating to last for many years, it is necessary to follow the above instructions and the recommendations of the manufacturers.
How to independently prepare walls for decorative plaster
It is easy to choose the technology and the appropriate tool yourself, depending on the hardness of the wall, its dimensions, wear and tear and the type of decorative mortar, including the size of the fractions - fine or coarse plaster will be laid. Antiseptics, fire retardants - such drugs are a separate matter. You will have to decide for yourself whether they need to be used when preparing the base, since decorative plaster is applied to various surfaces.
But regarding priming compositions, the recommendation is clear - their use is mandatory.