Plaster is not an eternal thing. Owners of houses and apartments are faced with a problem when it begins to crack or fall off in places. What to do? We will look at the reasons for this phenomenon, as well as how to repair plaster walls in individual places and surface restoration technology.
Defects on the surface, causes and method of restoration There are a number of defects that are formed when the proportions of the components of the composition or the technology of its application are violated. The list is as follows:
- Formation of tubercles on the surface and swelling.
- Sedimentary cracks.
- Fresh plaster is peeling off the wall.
- Formation of cracks throughout the entire depth of the solution.
- Efflorescence, spots and stripes appear on the wall after the plaster layer has dried.
What is the reason for such defects? Bulges and bumps may appear if the limestone composition is unseasoned and has unslaked particles. How to repair lime plaster in this case? It is necessary to withstand the plaster until the lime is completely extinguished. The defects are exposed, abundantly moistened with water and filled with plaster mortar. All that remains is to wipe the surface.
Sedimentary cracks are formed when the composition is poorly mixed and when there is an excess of binder. Precise adherence to proportions and dosage in accordance with the packaging will help solve the problem. All that remains is to thoroughly mix the plaster and level the surface.
When the base has not been prepared, cleaned, rough, too dry and dusty, fresh plaster may flake off when applied. To solve this, you will need to pause work and start preparing the surface. The application technology is as follows: notches are made on the surface for better adhesion (or shingles are made), the wall is cleaned of dust and dirt. In addition, it is moistened with water. Then the mixture will not peel off, and repairs to the plaster and surfaces inside the building will not be needed for a long time.
If the problem is cracks throughout the entire thickness of the plaster layer, then there is exactly one reason - there is no reinforcing mesh between the wall and the plaster. The base material is not rigid and is not reinforced in any way. The technology for applying the mixture is that the subsequent finishing layer should be less durable than the previous one, that is, it contains less binder. To prevent the intermediate layers from drying out, they must be moistened with water and reinforced with mesh.
The last defect is spots and stripes. They most often appear on walls from the outside. The cause may be a very damp or wet surface. Especially when the plaster is applied after rain. The solution is to treat the dried walls and waterproof them to prevent moisture from being drawn up from the ground. Local repairs of plastered walls are performed differently. The technology is simple, but requires careful consideration.
Repair of old plaster
Repairing wall plaster is an operation necessary when in some places it begins to crack and move away from the masonry. Most often, cracks and chips appear near window frames and doorways, but sometimes defects appear in other places. If cracks are clearly visible on the surface of plastered walls, then delamination is not easy to notice. In certain areas, swelling appears, and when tapped, the layer of plaster collapses and falls. The reasons are varied, but the most common is improper surface preparation before applying the plaster mixture.
Preparatory work
Repairing old plaster does not require complete removal of the previous layer. It is carried out in small areas where damage or detachment is found.
If the area of the wall section to be repaired exceeds the length of the rule, then construction beacons must be installed.
In cases where the area of the damaged surface is quite small, the edges of the previous coating act as beacons.
Before you begin surface restoration work, you need to identify all existing defects.
To do this, during the preparation process, all detected cracks are opened using a spatula, and with its handle it is necessary to tap all suspicious places.
Where the sound is dull or swelling of the old plaster is noticeable, beat off the damaged layer with a hammer and remove it with a spatula, exposing the masonry.
When repairing old plaster in large areas, it is necessary to perform reinforcement using a chain-link mesh for this purpose, which is attached to the wall using self-tapping screws or special mushrooms.
Reinforcement
Reinforcement is performed with a mesh with small cells attached to the wall in such a way that the subsequently applied solution penetrates under it.
This means there should be a small gap between the reinforcing mesh and the masonry.
If the layer of old plaster does not exceed 1 cm, then for full-fledged high-quality reinforcement you will need a special nylon mesh. Removing the damaged layer:
- the area is given the shape of a rectangle;
- clean the open surface from dirt and dust;
- treated with a deep penetration antiseptic primer.
The next stage is fastening the reinforcing mesh. To repair small areas, there is no need to install beacons and reinforce the surface with a mesh, but it is necessary to prime the base.
Plaster repair
In an effort to achieve a positive result, to perform work related to the repair of old plaster, they use the same composition that was applied previously.
Most often it is a cement-sand mixture or a ready-made composition with the addition of gypsum. Modern manufacturers offer a huge variety of ready-made dry mixtures, but it is better to purchase formulations from well-known and time-tested manufacturers.
When choosing a primer, you need to pay attention to the substances included in its composition. The most effective solutions are those that have antifungal and antiseptic effects, which can provide complete protection for walls against the appearance of mold and mildew.
The primer dries on the prepared surface after 3-4 hours, and after this time you can begin preparing the composition. In accordance with the instructions, water is first poured into the container, and then the dry mixture is introduced in small portions.
The consistency of the solution intended for repairing old plaster is similar to thick homemade sour cream.
Excess water will cause the layer to crack after drying.
A solution is applied to the lower part of the prepared surface, the excess of which is removed using a rule or a large spatula. The choice of tool depends on the size of the damage. Large embroidered and primed cracks and cracks are filled with mortar in layers. This must be done with a swing, a slap, so that upon impact the solution penetrates into the depths of the crack. How to repair plaster, watch this video:
After final filling, remove excess mixture with a spatula, holding it at a right angle to the wall surface.
When restoring damaged areas of a large area, you need to periodically wet the masonry so that water from the solution is not absorbed too quickly.
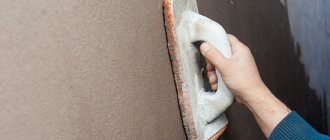
Complete drying of the solution occurs in 2-3 days, and a day after applying the new plaster, finishing grouting is performed. Rub the surface with a wooden or plastic grater in a circular motion, after wetting the tool with water.
Poor quality of working mixture
There is a rule - when mixing a solution, water is first poured into the container, and then the mixture itself is added.
If you do the opposite, then no one can guarantee the quality of mixing dry material into a mixture of the required consistency.
Even a good mixer may not cope with this task. If the plaster contains poorly mixed components, lumps, pebbles, then it will not allow the master to work normally and will begin to fall off at the first opportunity.
Repair of plaster in separate places
Plaster is not an eternal thing. Owners of houses and apartments are faced with a problem when it begins to crack or fall off in places. What to do? We will look at the reasons for this phenomenon, as well as how to repair plaster walls in individual places and surface restoration technology.
Defects on the surface, causes and method of restoration There are a number of defects that are formed when the proportions of the components of the composition or the technology of its application are violated. The list is as follows:
- Formation of tubercles on the surface and swelling.
- Sedimentary cracks.
- Fresh plaster is peeling off the wall.
- Formation of cracks throughout the entire depth of the solution.
- Efflorescence, spots and stripes appear on the wall after the plaster layer has dried.
What is the reason for such defects? Bulges and bumps may appear if the limestone composition is unseasoned and has unslaked particles. How to repair lime plaster in this case? It is necessary to withstand the plaster until the lime is completely extinguished. The defects are exposed, abundantly moistened with water and filled with plaster mortar. All that remains is to wipe the surface.
Sedimentary cracks are formed when the composition is poorly mixed and when there is an excess of binder. Precise adherence to proportions and dosage in accordance with the packaging will help solve the problem. All that remains is to thoroughly mix the plaster and level the surface.
When the base has not been prepared, cleaned, rough, too dry and dusty, fresh plaster may flake off when applied. To solve this, you will need to pause work and start preparing the surface. The application technology is as follows: notches are made on the surface for better adhesion (or shingles are made), the wall is cleaned of dust and dirt. In addition, it is moistened with water. Then the mixture will not peel off, and repairs to the plaster and surfaces inside the building will not be needed for a long time.
If the problem is cracks throughout the entire thickness of the plaster layer, then there is exactly one reason - there is no reinforcing mesh between the wall and the plaster. The base material is not rigid and is not reinforced in any way. The technology for applying the mixture is that the subsequent finishing layer should be less durable than the previous one, that is, it contains less binder. To prevent the intermediate layers from drying out, they must be moistened with water and reinforced with mesh.
The last defect is spots and stripes. They most often appear on walls from the outside. The cause may be a very damp or wet surface. Especially when the plaster is applied after rain. The solution is to treat the dried walls and waterproof them to prevent moisture from being drawn up from the ground. Local repairs of plastered walls are performed differently. The technology is simple, but requires careful consideration.
- Step-by-step instructions for eliminating defects
- Restoration work
- Removing cracks
- Conclusion
Step-by-step instructions for eliminating defects
You can repair a wall with fallen pieces of plaster yourself. The work is not difficult. You just need to follow the instructions. Alternatively, you can completely remove the layer and apply a new one. But it is more profitable to plaster the damaged areas. It all starts with an inspection. It is important to identify areas that need repair. You will need a wooden mallet. You will have to lightly tap the wall. If a dull sound is heard, then the train has moved away.
Then the sequence is as follows:
- After the inspection, you need to remove the old plaster. We do not touch the places where it holds well.
- Next, the seams are cleaned if it is brickwork. The surface is cleaned of debris and dust.
- A primer is applied to the wall. It is needed for better grip.
- After the surface has dried, the wall is slightly moistened and the solution is applied. If a large part of the wall has peeled off, you will have to use beacons and a rule. This is the only way the surface of the wall will be perfectly flat.
- For minor damage, the plaster is removed in the shape of a square or rectangle. The area is processed according to the previously described method, and the recess is filled with the prepared composition. It is important to adhere to the proportions so that the mixture has the correct consistency.
- Another restoration option is restoration with corks. In the right places, a hole is drilled to the base, primed, filled with mortar and plastered.
Note! For wooden walls, use lime plaster mortar. However, it is not suitable for wet surfaces. It is better to resort to a cement mixture. It is recommended to treat corners with gypsum plaster, as it sets faster.
Restoration work
Plaster repair also involves removing stains from the wall surface. They appear during operation and can be caused by grease, soot or rust. It also happens that the stains formed before the finishing work. In this case, you will have to solve this problem before you start gluing wallpaper or laying tiles. Restoration work is as follows:
Preparation
Removing old coating
The first step is for you from the entire area that you plan to renovate. Then the masonry seams are cleared to 1.5-2 m, the surface is washed with warm water.
Installation of beacons
If the area planned for repair is large, layers should be applied along beacons to obtain the desired result.
The distance between the beacons is set so that the solution can be placed between them as a rule. The thickness of one beacon should not exceed the thickness of the plaster without taking into account the covering. Instead of beacons, part of the old strong finish can be used.
Leveling by rule
Depending on the season there are. For example, in summer, in dry and hot weather, the surface must be periodically moistened so that it does not dry out too quickly.
Defects are usually eliminated with a brick, a scraper or the end of a dry tree. Repairing walls in a wooden house can be done with lime mortar; in wet rooms, a more complex cement plastering method is used.
Protruding corners can be repaired with gypsum mortar, which has the property of rapid hardening. To do this, clean the area to be repaired from any remaining solution and dust, periodically wetting the surface with water. Then apply the plaster mass with your own hands and carefully level it into the correct corner shape.
Note! You can determine the area where the plaster has peeled off by lightly tapping it.
Repair of plaster of internal walls and corners – Blog Stroyremontiruy
Despite all the advantages of plaster, it is not a permanent material and often requires repair. Below is an overview of the main causes of damage to the plaster composition and clear instructions for restoring wall coverings on your own.
Causes of damage to plaster
Repair of plaster walls inside the house may be required due to:
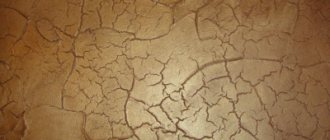
- — Appearance of cracks in the plaster (photo 1),
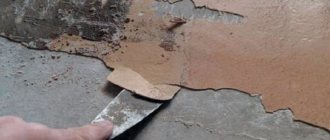
- — Peeling of material,
- — Formations on the coating of large chips.
These defects appear in turn due to:
- — Incorrect application of the solution to the walls,
- — Errors in surface preparation,
- — External factors (for example, earthquakes),
- — Internal factors (errors during installation of doors and windows),
- — Long service life of plaster at high humidity,
- — Defects in wall materials (photo 2).
If you are going to putty on old walls, then you must first check the quality of the plaster layer, because the visual absence of defects is not always the ultimate truth. The check is as simple as a nail - pick up a mallet or a simple piece of wood and tap the walls - a dull sound will tell you that the material is peeling off and the need to repair the plaster .
Repair solutions
It is incorrect to believe that a certain type of plaster should be repaired with the same composition. Lime-sand mortar can be restored with the same mixture and gypsum plaster, but gypsum mortar cannot be repaired with lime-sand mortar.
If you plan to repair old lime plaster with a classic mortar, then you need to add cement to it until a light gray composition is formed.
For the repair of internal walls and corners plastered with lime mortar, it seems optimal to purchase a dry ready-mix with cement and polymer additives. This solution adheres well to the old layer, does not crack and is easily rubbed. Suitable brands are “OPTIMAL” from Sarmat LLC, “Lux” from Typhoon LLC or their analogues.
Technology
If the plaster has peeled off over a large area of the wall, then it makes sense to think about completely cleaning the surface of the old composition and applying a new solution along the beacons. The installation of beacons is carried out according to these instructions; the wall is wetted with water before applying a new layer, regardless of its type. In this case, water plays the role of a primer, ensures good adhesion of the plaster layer to the wall and trouble-free operation of the coating.
The solution is applied in any convenient way between the beacons, and its excess is removed using a plastering rule, after which the wall is ground, taking into account the type of solution used. The thickness of the covering layer is up to 3 mm.
Much more often it is necessary to repair individual sections of internal walls, that is, to correct cracks, chips and peeling of the plaster mortar in a small area. In this case, the optimal option is the Rotband gypsum mixture (photo 3) or its technological brother.
Cracks are opened to maximum depth, peelings are removed, and the wall in adjacent areas is tapped for hidden defects. Next you need:
- - Moisten the defect area with water,
- - Apply plaster on it with a spatula or trowel,
- — Remove its excess using a rule, a flat strip or level, using intact walls instead of beacons,
- — Rub the area with a damp spatula (metal).
If lime mortar is used for grinding, it is ground with a polyurethane or felt float while the walls are generously wetted with water. Note that the grinding should also include adjacent areas of plaster that do not require repair.
If cracks or peeling are found at the internal corners, then after knocking down the old mortar, a new layer is applied first to one plane along the wall line, then to the other. The corner line can be cut with an acute angle of the plaster rule.
Questions and answers
Is it necessary to knock down the plaster for small cracks?
As a rule, it is enough to grind small cracks. Before grinding, tap the wall; if there are no voids and the old mortar does not flake off, then this is 100% sufficient.
Which solution is best to use for repairs?
Craftsmen prefer gypsum mixtures of the Rotband type indoors with normal humidity. They are elastic, do not require the use of rubber gloves and dry quickly. Do not forget to moisten the damaged area before applying the new mixture.
How to properly repair an external corner if damaged?
The best option is to remove the old perforated corner and install a new one at a level. This makes it easier to achieve precision work, and the corner itself will receive additional reinforcement. Remember that the plaster corner comes without a mesh!
Methods for sealing large through holes
Sealing through holes
They can be divided by size - large and small.
Large holes will require a significant amount of work.
Most likely, in this case you will have to finish the entire surface of the wall in order to hide it again.
Fixing a small hole in a wall is much easier.
Here you can limit yourself to finishing work on a local scale.
For large holes, it is necessary to fill the hole using stone materials.
How to repair a hole in this type of wall? Best of all is what the wall was made of before. For example, for a brick wall, brick sealing is suitable; for a wall made of aerated concrete, you can use aerated concrete. For a tongue-and-groove wall, take a piece of a tongue-and-groove block. For a concrete wall, take a brick.
The material for laying in the hole is selected taking into account the material from which the masonry is made. For brick and aerated concrete, you can take cement mortar and place a piece to fill the hole on it.
For the tongue-and-groove, be sure to use gypsum masonry mortar. Be careful - it hardens quickly! You should not use rotband and other gypsum plasters for this purpose - the adhesion will be fragile. But you can use fine-grained gypsum putties, such as Fugenfüller - they will adhere well to the tongue-and-groove block. In this case, it is advisable not to make the layer thicker.
Plaster repair
Restoration of plaster walls: tips and stages of work.
Nothing is eternal in our world; plaster can crack over time and even begin to move away from the base due to flooding by neighbors or other external factors, for example, due to shrinkage of a new house or dismantling work in neighboring premises. This is especially dangerous when such phenomena occur on the ceiling; the plaster has considerable weight and can cause injury to a person if it falls from a 3-meter height. To prevent this from happening, it is necessary to monitor the condition of the plaster, especially if it was done many years ago. There are two types of damage to the plaster layer:
- Cracks
- Detachment from the base
How to tell if wall plaster needs repairing
Cracks are easy to detect; just look carefully at the surface. As a rule, they show through the final finish and can even tear the wallpaper. But the detachment may not be visually noticeable. In order to detect separation of the plaster from the base, it is necessary to tap the entire surface. If you hear a dull, hollow sound, it means the plaster is peeling off from the base of the walls or ceiling.
Stages of plaster restoration
- Removing old plaster. All plaster that comes away from the base must be removed; this can be done with a spatula or a hammer drill. The plaster layer, which adheres tightly, does not need to be knocked down.
- Padding. After all loose plaster has been removed, the surface is dusted with a brush or vacuum cleaner and the surface is primed. The primer should be selected based on its properties, since different primers are used for different wall surfaces. If it is necessary to repair plaster after flooding, then it is necessary to use special primers to destroy mold and mildew. The edges of the old plaster layer must also be carefully primed with a brush.
- Installation of plaster mesh. Plaster mesh should only be used if there are cracks on the wall itself (this is often found on foam concrete partitions), and on the ceiling the plaster usually cracks at the joints of the floor panels. The plaster fiberglass mesh is smeared into the thickness of the plaster layer, only in this case will it work to its maximum potential! If no cracks are found on the base, then there is no need for a mesh. The plaster may also crack or begin to lag behind the base due to the large thickness of the plaster layer, exceeding 50 mm. In this case, it is better to attach a metal plaster mesh to the base to improve the adhesion of the plaster to the base.
- Applying plaster. A plaster mixture for repairing plaster must be used that is identical in properties to the old layer. If there was a gypsum mixture, then it needs to be repaired - with plaster. Otherwise, new cracks will inevitably appear at the junction of different materials! This stage is no different from the usual application of plaster; you can use a spatula or rules if the scale of the restoration work is large.
- Leveling the surface. The main task at this stage is to equalize the old layer with the new one. This is easy to do, just take a long spatula or plaster rule and, leaning on the old plaster, pull and level the new layer to form a single plane. That is, the old plaster will act as beacons. The main thing is to try to make sure that where the new plaster joins the old one there are no irregularities or differences.
- Drying. Before finishing, the entire surface must be completely dry (white). This usually takes from 3 to 14 days and depends on the thickness of the plaster layer and the humidity of the room. Then you can start puttingtying, wallpapering, etc.
Microcracks
Very often, microcracks appear on the surface of the plaster, which did not go through the entire plaster layer, but only damaged the very top layer of 1-2 mm, while the plaster adheres tightly to the base. This can occur due to the rapid drying of the top layer of plaster when using heat guns or similar heating equipment for drying. To hide microcracks, it is enough to putty the surface with putty using a painting mesh with a mesh size of 2x2 mm. If the surface is to be painted in the future, then it is better, instead of putting putty under the mesh, to paste over smooth non-woven wallpaper, putty the joints and paint.
Important: there is no need to dismantle plaster with microcracks on the surface!
By following our advice, you can repair the plaster yourself.
Tool
To repair plaster you will need:
- a hammer drill (for removing the plaster layer and making notches on the concrete base) or a chisel with a hammer;
- trowel or trowel (for applying and forming a new layer of plaster);
- metal brush (for cleaning the surface);
- grater or grater;
- spatulas;
- paint brush (for wetting with water);
- jointing (for clearing cracks, deepening masonry seams);
- plumb line or level;
- roller (for priming for large repair areas);
- solution container;
- sandpaper (or sander);
- construction cord;
- mixer;
- rule;
- masking tape;
- rags.
How to repair plaster on old walls
When making major wall repairs, the first thing you should think about is plaster. It can be completely dismantled and replaced, or you can simply patch it up. Let's look at how to repair plaster on old walls.
Cleaning the wall from wallpaper
Replacement
Repair of plaster begins with its inspection. After all, it is necessary to redo not only the fallen areas, but also those where greasy spots or fungus have appeared:
- Once you have identified the work area, you will need to remove the old plaster layer from it;
- After this, they clean the masonry seams for about two meters and wash everything with warm water;
- Plastering is carried out in three steps. First, the wall is wetted, then primed, and after that a new layer of mortar is applied with your own hands. For large areas, masonry is done using beacons. The beacons are located from each other, at a distance according to your rule, as shown in the photo. In this case, it is necessary that the edges of the rule lie on the surface of the beacons when editing the solution. If the area being treated is not too large, then the edges of the old layer can serve as beacons.
Considering the time of year in the yard, plaster has its own nuances. At high temperatures outside the window, fresh solution must be wetted from time to time, otherwise everything may crack. If defects are found, they can be removed with a scraper or a piece of brick.
Removing old plaster
For plastering wooden surfaces, lime mortar is used, but rooms with high humidity require the use of cement mixtures. For protruding corners, a gypsum-based solution is used. It has a quick setting effect. The corner is cleaned of dust and dirt, moistened with water, a pre-mixed solution is applied and the corner is given the correct shape.
To find an area with a loose layer, use a hammer or wooden mallet. The entire surface is tapped, and a dull sound will indicate exactly where the finish has come off.
Restoration
In addition to peeling and destruction, the plaster layer may have other defects that will require repairs to the plaster of interior walls. Over time, stains of grease and soot appear on the wall:
- Before applying paint or wallpaper, they must be removed. Grease stains are removed with a two percent solution of hydrochloric acid;
- But for rust you need a 3% solution of the same acid. In addition, copper sulfate will help get rid of rust;
- If the stains are too deeply ingrained and cannot be removed, they can be painted over with whitewash or special dyes.
In addition to stains, defects also include holes and, naturally, they must be repaired before facing with any materials. To do this, the hole is shaped into a rectangle, cleaned of dust and covered with a solution.
Any surface on which restoration is carried out must first be cleaned in separate places from dirt and dust. After this, it must be treated with a soda solution.
Operating at the wrong temperature
It is recommended to plaster walls at a room temperature of +5 - +25 degrees Celsius. If, for example, the temperature is too high, then the water from the solution will dry out too quickly, and the gypsum will not be able to harden correctly, according to technology.
Low temperatures are also dangerous as the material will crystallize too slowly.
Repairing cracks in plaster
The beauty of any building, both inside and outside, largely depends on the perception of the walls. These surfaces occupy the largest area and are constantly exposed to destructive factors. What to do if the finishing on the outside or inside of the house is damaged? What caused the destruction?
In this article, we will look at why plaster cracks, peels, or crumbles, and we will also give recommendations on how to repair these damages yourself.
Restoration technology for façade and interior plasters
Renovation of residential and commercial buildings cannot be carried out without exterior and interior decoration. For these purposes, rough, finishing facade, or decorative plaster is used. But no matter how well the repair is done, it is impossible to 100% exclude the appearance of cracks or peeling in the future. They may appear due to improper construction or operation of the building, or atmospheric phenomena.
What to do if the decoration on the walls has come off, peeled off, crumbled, or cracks have appeared on it? Let's consider the main defects and the technology for eliminating them by repairing the plaster walls in individual places.
Blistering, peeling of coating
There are three reasons for this phenomenon:
- the solution was applied to a dry wall;
- the first layer of plaster was of low strength;
- the solution is prepared incorrectly - if the lime mass contains unslaked particles, this can cause the formation of tubercles on the walls.
Remember: before starting repairs, you need to tap the entire wall with a hammer - a durable coating makes a dull sound, while a peeling coating makes a ringing sound.
Repair of swollen areas is carried out after complete removal of the loose finish. The plaster is beaten with an axe, chisel and hammer. On wooden surfaces, the strength of the filled shingles is checked. Notches are made on brick, concrete, and stone walls (or the surface is cleaned with metal brushes). After this, the surface is primed and a new composition is applied.
Replacing a swollen coating with a fresh high-quality mortar mixture - repairing monolithic plaster
The plaster is cracked, what to do in this case?
Cracks occur if the finishing solution was not mixed well enough, was too greasy (too much binder), or dried quickly. If small cracks appear on the surface, the damaged area is rubbed with a gypsum compound or mortar during the repair process.
Note: you can avoid the appearance of cracks in the coating during operation by observing the proportions when preparing the plaster mixture, as well as by thoroughly kneading it before use.
During repairs, deep cracks should be opened, cleaned, moistened, and then sealed with plaster.
Alignment
Wall alignment can be achieved in three ways:
- using special panels for finishing;
- applying a layer of plaster;
- by combining.
Drywall can also be used for leveling. The most ideal option for any surface is to use plaster and drywall at the same time. By hanging a wall, you can find out how much it deviates from the norm. To do this, hammer a nail at a distance of 30 cm from the ceiling. A plumb line is attached to it and a second nail is driven in from below. The same thing is done on the other side. Cords are stretched between the nails from the upper right nail to the lower left. The cords are pulled similarly between the second pair of nails. If the distance between the wall and the cord is more than 5 mm, then the surface must be leveled.
Let's sum it up
Before any cosmetic work, old plaster must be checked. Its restoration will not take you much time and effort, but will save you from completely redoing the renovation and unnecessary financial costs.
The plaster is crumbling, what should I do? It happens that, saving on cement, builders make plaster almost from sand. And this material is used indoors and for external decoration of walls of any building.
Plaster increases the strength of the wall by almost 30 percent, which is very important, and only then the owners decide for themselves: to paint the walls, tile them or glue them with wallpaper. In addition, such a coating helps to level walls, hide defects on them and ideally prepare surfaces for applying liquid or gluing regular wallpaper.
Plaster can crumble due to high humidity in the room if the technology was violated during its application or a low-quality solution was used. To ensure that the plaster holds firmly, it is better to entrust the work to an experienced craftsman.
If the walls of a home are plastered with old cement-sand mortar (see Let's look at how to plaster with cement-sand mortar), which begins to crumble at the touch of a spatula, or you are not sure whether it is possible to putty on the old coating without damaging the mortar, the plaster should be:
- Strengthen.
This method is used if the coating is just crumbling. In this case, before starting puttying, it is enough to apply a deep penetration primer to the old plaster or treat the wall surface with concrete contact, which should fix the surface well in cases where the primer cannot cope with this. - Use a more radical method - completely remove the coating
. This method is used if the plaster is crumbling. This usually occurs due to non-compliance with the technology when applying it or due to incorrect temperature conditions, when the room temperature is very low.
To do this you need:
- tear off all the old plaster (see How to remove old plaster from walls without problems);
- treat the walls with a primer;
- putty everything again.
After this, you can apply the finishing coat. In this case, the price of the work will be higher, but the result will be better and more reliable.
Which method to choose is up to everyone to decide for themselves; the main thing is to determine when the plaster becomes unusable. Plaster, in principle, should not have high strength - it is just a finishing material, and not a load-bearing element of the building.
Price list
| Plastering | Price |
| Local repair of areas | from 200 RUR/m2 |
| Joining and sealing cracks | from 200 RUR/m2 |
| - one continuous layer | from 350 RUR/m2 |
| - solid reinforced | from 450 RUR/m2 |
| — with insulation (“wet facade”) | from 1400 RUR/m2 |
| - decorative plaster | from 500 RUR/m2 |
| - cornices, slopes | from 250 RUR/m2 |
| - coloring | from 50 RUR/m2 |
| - cleaning and preparing walls | from 35 RUR/m2 |
Portfolio. Building on the street Shabolovka
Year: 2019
Total façade area: 1800 m2
Work completion time: 60 calendar days
Within the framework of the project:
- Joining and sealing cracks;
- Local plaster repair;
- Priming and painting walls;
- Sealing of ebb tides;
- Replacement of gutters;
- Dismantling, sandblasting, installation of window grilles, powder painting.
House in Lobnya 2022
Description: total facade area: 411 m2, work completion time: 45 calendar days, 4 working days.
As part of the overhaul, the following work was carried out:
- Dismantling of rolling plaster;
- Local plastering;
- 100% reinforcement of the facade with plaster adhesive mixture and fiberglass mesh;
- 100% reinforcement of window and door slopes using PVC profiles;
- Restoration of facade decor;
- Replacement of tides;
- Application of stone decorative plaster;
- Relocation of air conditioning units.
Wall surface treatment
Puttying methods.
The stages of repair and finishing of walls primarily depend on their condition. If the wall covering is severely damaged and uneven, then repairs can take quite a long time. To complete the finishing in this case, a large amount of material will be required, and it is very important that its quality does not raise any doubts. All stages of repair must strictly comply with the instructions, otherwise the result of a DIY job may seriously disappoint you.
Before you start finishing the walls with your own hands, you need to understand that almost any repair work depends on how level your walls are. An example is the fact that the installation of suspended ceilings is carried out only after finishing (plastering the wall surface). Finishing work also includes the selection and finishing stage of baseboards, door and window openings. As a rule, this stage begins after the completion of repairs and finishing of the wall surface in the room.
Source
Will surface strengthening help?
You can often come across the opinion that in order to restore the appearance of the facade, it is simply enough to cover it again with a decorative composition, but this is only a temporary solution. Due to the formation of an air gap between the deeper layers, such actions will only aggravate the situation; moreover, it is impossible to predict in advance how increasing the thickness of the protective and decorative layer will affect the vapor permeability of the wall as a whole.
Even if a new base is applied over the facade and attempts are made to save on dismantling the coating, the repair will not give the expected result. Yes, a new strong crust is formed on top of the coating, which quite possibly can withstand the total weight of the finish and the tearing force for some time. However, all external finishing layers must comply with the rule of increasing hygroscopicity from internal to external, which is absolutely impossible when performing double plastering. It must be remembered that only the aesthetic lifespan of plaster facades is at least 10 years, after which the building is simply painted again. The mechanical durability of a “wet” facade is at least 30 years, so a consistent and thoughtful approach to the problem of destruction of the finish, as a rule, turns out to be more economically feasible than taking temporary measures.
vote
Article rating
Finishing the blind area and plinth
The plaster facade can also be destroyed due to deformation of the base. It is damaged by shrinkage of the building, erosion of the foundation, and mechanical stress. In this case, before starting a major overhaul of the facade, it is necessary to first restore the base. Otherwise, cracks in the plaster will appear again and again.
Major repairs of the basement are carried out in several stages:
- Replacing the blind area. It is covered with crushed stone or gravel, after which it is thoroughly compacted.
- The blind area is fixed to the foundation with reinforcement and filled with concrete. This will prevent it from peeling off.
- A fine reinforcing mesh is placed around the entire perimeter of the base.
- The surface of the base is primed or moistened with water to improve adhesion to the concrete mortar.
- The solution is poured onto the mesh. It should completely cover it.
- Insulation is installed (optional).
- Decorative finishing is being carried out. Clinker bricks, plaster, etc. can be used.
Requirements
Regardless of where the installation of the partition wall, which is structural and thermal insulation, will take place - in a house or apartment, the general requirements for building materials are as follows:
- Compliance with the declared characteristics and dimensions specified by the manufacturer in the instructions, quality certificate and other related documents.
- A proven manufacturer whose activities are regulated by Russian quality standards and requirements for the manufacture, storage and transportation of industrial products.
- Cost-effective and light weight, which does not place additional load on the foundation.
- Stability, density and strength of the installed structure, with the simultaneous use of a metal profile (aluminum or any high-quality steel alloys).
- Adhesion with any substances and fasteners during installation.
- Moisture resistance (especially for bathrooms, washrooms and kitchens).
- Hygiene and environmental friendliness (the use of products made from natural materials must guarantee the safety of human health, be easy to clean, and not be prone to the formation of mold and mildew - vapor permeability and ventilation must be sufficient).
- Fire resistance (should not spontaneously ignite from electrical wires located in the walls, as well as from household appliances used).
- Be no more than 6 m (corresponding to one floor, or plus or minus this indicator), and carry only its own weight.
- Have sufficient illumination and ventilation of the space without violating its spatial integrity.
The partitions themselves, regardless of the material used, must also have sufficient thermal properties (not be cold) and be suitable for their purpose and market price.
A structural thermal insulation wall can be insulated or additionally soundproofed.
At the same time, they never forget about installing it on 2 layers of waterproofing laid on the floor, as well as arranging a ventilation system in the kitchen, bathrooms and bathrooms.
Important points
Important points include the following:
- When working with paint, you must have a solvent that can be used to remove stains from unnecessary places (for example, from furniture).
- the workplace should be spacious and clean.
- When preparing, you can use old fashioned methods that will make the work easier.
- It is better to repair walls at lunchtime, so as not to disturb the neighbors.
Repairing walls is not a complicated process; every city dweller can handle it. You only need to follow the work algorithm and pay attention to the advice of professionals. Then the walls will not only be smooth, but also beautiful!
Applying a new coating
If the insulation has become unusable, then before finishing it is replaced with new insulation. Most often used: penoplex and mineral wool. A reinforcing layer must be provided on top of the insulation. Its role is played by fiberglass mesh. The mesh is fixed with glue. This finishing method is called “wet facade”.
The final finishing with plaster is carried out 24-48 hours after installing the mesh. The surface must dry well. Plastering large areas is carried out using plastering machines. They allow you to apply the composition as evenly as possible and do it faster than by hand. Conveniently, the plaster composition can be automatically mixed inside the machine’s tank; for this you only need to add the dry mixture itself and water. The plastered surface should be left to dry for at least 24 hours before carrying out other work.
When leveling walls, it is important to avoid the following mistakes:
- the plaster is applied in too thick a layer;
- no additional reinforcement is provided;
- the technology for preparing the solution is violated;
- the angles were not measured and remained crooked.
To eliminate crooked corners, you will have to chip off part of the plaster or add mortar where there is not enough of it. If there is no reinforcement or the plaster composition is applied in too thick a layer, then after cracks appear, the wall will have to be completely cleaned and plastered again.
Average price in Russia
Prices for materials for the construction of partitions in Russia are most often indicated by construction companies on their official websites.
The average price for services can be presented in the form of a table:
| № p/p | Type of work, with own consumables (per 1 m2) | Price (RUB) from… |
| 1. | Installation of wall structure | 450 |
| 2. | Installation of metal profile structure | 480 |
| 3. | Additional heat and sound insulation | 90 |
| 4. | Waterproofing | 350 |
| 5. | Formation of openings, work with communications | 900 |
The most expensive is the formation of glass partitions - from 800 rubles/m2, since all types of work with this material are considered to be of increased complexity.
The material is fragile and requires clarity and coordination, as well as attentiveness.
You should not purchase materials yourself, especially if the work of qualified specialists is expected. Companies, as a rule, cooperate with manufacturers directly, and wholesale purchases of building materials and fasteners for them are much cheaper than independent retail purchases.