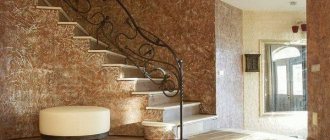
The main reasons for coating damage
Decorative
Decorative plaster has two types of defects::
- Technological.
- Operational.
The first type of defect is possible if production recommendations are severely violated during installation and deviations from building codes are allowed.
In this case, you can find minor growths or bumps on the surface. Sometimes these are white spots of different sizes and diameters, which later swell. Ducts are characteristic of decorative plaster due to improper preparation and mixing of uncured lime solution. When worn, the performance properties of the material begin to be lost and the plaster peels off. This relates to the second reason; it occurs twice as often as technological defects. It can be difficult to avoid this phenomenon. You have to do some minor cosmetic repairs 2–4 years after use.
Facade
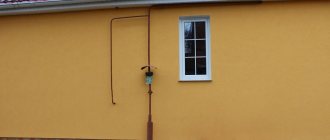
Cracks usually appear on facade plaster . They most often arise as a result of preparing the rough surface, when significant mistakes are made, leading to deformation of the external facade.
If the components of the solution do not mix well as a result of preparation, then a problem arises, leading to cracking and severe creases on the wall. If the solution layer is mixed too poorly during preparation, its application becomes uneven. The layer may turn out to be either too thick, or, conversely, not dense enough in structure and filling.
Attention
Most often, the problem with applying a greasy layer occurs when applied to a reinforced wall. This is the main problem in which the plaster crumbles and cracks in different parts.
Swelling and peeling of façade plaster is less common, but is possible when working on damp surfaces. If the technology is violated, the top layer may not dry well, which requires more time for the final finish. Most often, the problem is characteristic of lime-gypsum or lime mortars.
In what cases is it necessary to overhaul facade plaster?
Repair of a plaster facade always begins with a preliminary assessment of its condition. At this stage, you can understand exactly how much work remains and what materials will be required.
The need for façade repair is indicated by the presence of the following defects:
- the plaster is destroyed in an area of more than 25% of the entire wall area;
- cracks were found between the panels or blocks where moisture could penetrate;
- the insulation protrudes from under the finishing material, it has crumbled or felted;
- The drainage system is deformed, which leads to rainwater entering the façade.
It is important to know!
Defects in plaster on the facade include cracks, chips, and swelling of the coating. At the same time, you need to understand that if they occupy a large area, this may be due to a violation of the technology for applying it over the entire area.
If cosmetic work is performed, after a short time, other parts of the facade that previously seemed solid may begin to collapse. So it’s better to immediately opt for a major overhaul. This will help save time and money.
How to find out if a material needs repair work?
By characteristic signs you can determine whether the plaster needs repair. Among them are the following:
- Color change . Faded stains of greasy composition are visible. Rust stains appear, and sometimes soot appears.
- Serifs and protruding fragments appear . The wall does not crumble, but it bulges greatly and its appearance is lost.
- Fragments of plaster begin to peel off from the wall . The walls are crumbling, the floor has to be washed or vacuumed every day.
The appearance of the plastered wall changes greatly; flaws and faded areas become clearly visible. If defects cannot be immediately noticed even visually, then a simple tape measure and a bar with a level can come to the rescue. These tools are used to inspect surfaces. Any deviations in level lead to conclusions about an incorrect or outdated external façade.
If misfires and defects are detected, you should think about whether the surface needs to be radically repaired. Simple calculations will allow you to do without complex manipulations if the defects are minor. For example, if the plaster is peeling off in one place, you can stick embossed wallpaper . This simple solution saves time.
You can level the old layer, but most often you will have to tear off the surface layer and apply a finishing base. You can do this yourself. You just need to select the materials and mix them well together.
Coloring
There is nothing complicated here; just purchase facade paint, which can be applied to the plaster in the required quantity. If you plan to radically change the color, then calculate the quantities for 2 or even 3 layers. But when choosing, be careful and consider what kind of plaster was used to decorate the facade previously.
The work process is as follows:
- Cleaning the facade from dust and stains, if any.
- You can apply primer.
- Cover the walls with 1 coat of paint. To do this, you can use a wide brush, roller or spray gun. The latter option will significantly speed up restoration work, but such a device will be difficult to find. Therefore, the best option would be to use a roller.
- After 1 layer has dried, you can apply 2.
Types of DIY work
Repairing cracks
Cracks appear when an excess amount of solution is applied to a unit of surface. Each layer must have a certain maximum. Do not spread additional thickness of the solution on a base that has not dried or not completely hardened.
Poor mixing or adding too much fat will cause a similar problem. Cracking is detected in 90% of cases, the lower layers are destroyed, they dry out poorly, and the next layer is applied to them, which has nothing to grab onto the previous one.
In the hot season, you need to constantly moisten the fresh surface and dry the top layer well. The colder it is outside, the more carefully the components in the mixture (fatty substances) are dosed. The composition must correspond to the natural environment.
The cracked plaster is thoroughly cleaned, everything unnecessary is taken out, and the remains are thrown away. All deep cracks are thoroughly cleaned of dust and dirt, and then allowed to dry completely. Prepare a solution.
The cracks are first soaked from the inside and then covered with fresh solution. If the mixture does not have time to dry, then you need to glue reinforced paper or special tape along the edges. It can also be coated with mortar and sanded after drying.
The finishing must be carefully thought out . The following characteristic points are important:
- For gaps less than 5 mm wide, the cracks must first be filled with assembly adhesive.
- If the main cracks have been eliminated, and the wall is covered with small holes, then a reinforced mesh fixed on top will correct the situation.
- Concrete cracks require a special approach. A small amount of PVA glue is added to the composition, then all cracks in the plaster are sealed with the resulting cement mixture.
Coloring
Painting is carried out after surface preparation . The old coating needs to be restored, since when the mortar is applied to a poorly prepared wall, rapid peeling can occur the very next day.
There should be no defects in the form of:
- depressions;
- mounds;
- cracks
If there are any, they are removed with putty. The dried layer is restored to its proper form. The fresh surface is cleaned with medium-dispersion sandpaper. In this case, a high degree of adhesion will be observed.
When renovating from scratch, certain time limits must be observed. For example, from the moment of applying cement plaster to the start of painting work, at least 60 days must be allowed. This time period is needed for thorough drying and proper shrinkage.
The putty surface must be treated according to all the rules so that there are no peelings after the work is completed. To do this, a number of conditions are met:
- The surface is cleaned of debris with a brush. If necessary, use a damp cloth (in case of heavy contamination with small dust particles).
- Priming the surface with a deep penetration compound. The soil fills more massive cracks and spreads evenly over the surface.
- Before painting, you need to dry the prepared surface thoroughly.
Restoration of peeling areas on walls
Detached parts can be restored:
- First, inspect the surface well, tap it to identify flaws and weak points. If deficiencies are found, they are corrected.
- The plaster that is crumbling or coming off the wall is cleaned down to the very base. There should be a layer left that will hold subsequent applied layers on the surface.
Attention
You should be careful when removing each layer, as excessive removal will lead to peeling of subsequent applied layers. In this case, you need to be guided by the principle of gradualism and layer-by-layer removal.
Do not scratch the surface too much. The strongest and most intact layer should remain, which will hold the subsequent ones.
Subsequence:
- The remaining cleaned surface is thoroughly washed to remove any remaining dust and dirt. To do this, take a paint brush, which is well moistened in plain water. You can use a washer, but the pressure should be medium.
- Dry the base well. It is enough to leave it alone for several hours. Ventilating the room in the form of a slight draft will be useful in case of rapid hardening effect. If there is a gusty wind outside, then this idea should be abandoned. Air will flow through the exhaust valves in the apartment when the windows and doors are closed, which will speed up drying.
- The wall itself and the remaining layer of plaster must be well treated with deep penetration primer. This action will help to avoid excessive absorption of the solution, which will be applied as the first layer. In this case, the adhesion will increase many times and will be good both with the base, the new layer with the old one.
- Everything dries out again.
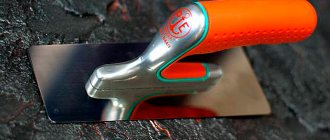
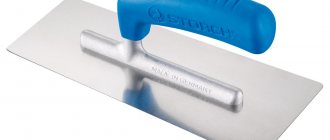
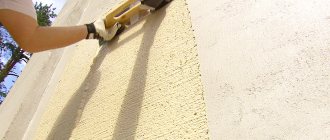
- All areas are filled with the solution. The solution is distributed with a spatula and spread evenly over the entire surface to achieve an even thickness of the layer.
- Wait 30–50 minutes, depending on the climate in the house (the drier the apartment, the less time it will take). Rub the surface well until an even, smooth layer is formed.
- Wait about an hour, sand until perfectly smooth.
AdviceTo check the layer, its evenness vertically and diagonally, use the same level.
- Paint the wall. The facade is covered with several layers of paint. For durability, apply 2-3 layers sequentially, waiting 15 minutes between them.
Fixing Bloat
- First, the base is cleaned of old plaster, using tapping, which will help poorly located elements crumble onto the floor.
- All seams must be carefully processed: remove all contents by at least 1.5 cm.
- The treated area is then thoroughly swept to remove dust and moistened with water.
- After preparing the liquid cement mixture, cover the entire surface with it.
When the primer dries, use a lime mortar. For quick drying, a small amount of gypsum dough is added to the composition. Proportion: 1 part gypsum solution is added to 6 parts of solution. - The surface to be treated must be rubbed with the resulting composition and rubbed with a trowel.
- Carefully treat the boundaries of the old and new coating with adhesive paint, then rub it well with the tool again. The joints must be carefully smoothed so that no bumps or depressions appear on the wall.
- Go over the entire hardened mortar with a damp brush or sponge. The entire treated area should be level and smooth.
- All joints, depressions, and bumps are sealed. The entire area is treated with a damp brush or sponge.
Tinting
The composition for plastering walls is obtained in three ways:
- purchase a ready-made solution in the store;
- buy the dry mixture and dilute with water to the required consistency;
- Mix the marble chips and slaked lime in the required proportions yourself.
But in all three cases, you need to add the selected color and additional additives (glitter, mother-of-pearl) into the solution. The process is carried out with a mixer or drill with an attachment. When there is a layer of water in a jar of Venetian plaster (protection from drying out), it is drained.
Preparing the mixture
The coloring pigment is poured into the solution and mixed thoroughly for 10 minutes. After which you must check the uniformity of paint distribution. A clean wooden block is passed along the walls of the container so that the paint material gets into the place where it is not. Then repeat the mixing again. To be sure, this procedure is done several times.
Most Venetian plaster formulations change color slightly after drying completely. Therefore, before the main work, it is necessary to apply the solution to the template. After waiting for it to set, adjust the coloring.
It is impossible to create two solutions that are completely identical in color. They will always be different. Therefore, it is necessary to prepare so much mixture at once so that it is enough for all the work. Saving can end badly. And it’s better to have leftover mortar than a wall with different shades.
Features and technology
When repairing decorative plaster, it is important to remember:
- If there is a slope or there are protruding bumps and depressions, level the solution after applying it. But the defects will be hidden when they do not protrude too much from the base and can be repaired.
- The applied composition should be leveled using the following rules.
- If defects are noticeable to the naked eye, beacons must be installed before applying the composition to fix and bond the surface.
Repair technology:
- It is important to first prepare the surface for work well. The hardness and quality of the finish will depend on the quality of this stage.
- The solution must contain mixtures proportional in quantity and composition. When working with internal surfaces, it is best to use a lime compound. It is better to treat the outer surfaces with cement compounds. To obtain a seam with a specific color, it is better to use a dry mixture. The shade can be any.
- The quality of the plane depends on the technology of applying the solution.
ImportantIt is important to follow the instructions and not deviate from the specified parameters.
Decorative
Venetian plaster can be used to decorate the walls of rooms decorated in almost any modern style: from classic to art deco or even high-tech.
Fits organically into the interiors of swimming pools, bathrooms and other premises for both residential and public purposes.
The breadth of the scope of application of this type of finishing is due to the color and texture diversity, as well as the skill of specialists who have the opportunity to demonstrate their artistic taste and technique to the maximum.
In appearance, Venetian plaster can have a glossy or matte surface, which is determined by the type of wax used.
Venetian plaster in loft style
Read in a separate article what the trick is to designing an apartment in the loft style and what it is.
Expert advice
Experts in the field of decorative plaster repair advise adhering to the following tips:
- If repairs are made using a cement-sand mixture, then the rule must be followed: the thicker the layer required, the larger the sand grains contained in the mixture.
- To prevent the prepared mixture from drying out prematurely, it is kneaded in small portions. For thin layers, you can use a liquid solution. To make it more dense, you can make the composition thicker.
- Peeling occurs when plastering a very dry surface. To eliminate this defect, it is necessary to dismantle the plaster on the damaged area and reapply it.
In rooms with high humidity it is better to use cement plaster, and for wooden surfaces use limestone material.
- To repair old plaster, you need to clean the seams by 5–10 mm, sweep away dust and dirt from them. Then they are thoroughly cleaned with a metal brush and treated with warm water so that the new layer of plaster adheres tightly to the old one.
Decorative plaster is easy to repair. To complete it, you need to calculate the amount of material required and take the correct measurements. The solution must be mixed in strict proportions to obtain a quickly hardening mixture.
Removing cracks
Removing cracks on the surface is much easier. Repair of plaster walls in this case consists of two stages: surface preparation and plastering. To begin with, the wall with cracks is cleaned of old facing material and dirt. After this, a primer is applied to the surface. When it dries, you can start cleaning it to give the wall a smooth finish.
Section of wall reinforced with mesh
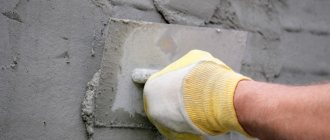
Next, the plaster is mixed and applied to the surface in a thin layer. The composition is leveled using a spatula. If there are large cracks, it is better to strengthen the structure with reinforcing mesh. With it, the plaster layer will be much stronger and will not crack.
Interior solutions
If you have previously worked primarily with wallpaper or paint, then most likely plaster appears to be an inconspicuous cement mortar that can hardly be used in finishing.
Let's dispel the misconception.
"Silk" on the walls
- Mother-of-pearl coating, differences in degree of gloss and grain. Adding sophistication to the room. Various application methods, use of almost any color scheme. All of the above is a brief description of this type of decorative plaster.
- Its composition includes rayon, cotton and cellulose fibers, as well as water-soluble glue flakes.
- This is a unique material that imitates a silk surface, while creating the illusion of transparency of the walls. You can definitely create a stylish design, you just have to remember to carefully prepare before application.
Sandstorm effect
- Externally it resembles sandstone. Apply with a brush. The technique is different, so the drawing depends on your hand. Ideal option for interior decoration.
- The composition most often includes quartz sand, but river sand can also be included. For a sparkling effect, finely crushed shell particles are added. There is a coating with reflective beads. In the interior it looks impressive and unusual.
- Textured sand is resistant to dampness, and the fine quartz included in the composition protects against fungi.
"Travertine"
- This decorative plaster imitates the calcareous tuff used for construction in Ancient Rome. Can be applied smoothly to walls or rubbed in until glossy. The thickness of application is determined by the size of the fraction.
- It contains marble powder to create shine, pigments, binders and slaked lime. The material itself is durable and acts as protection for the wall.
- It can be used to create various designs, such as a world map.
"Texture"
- Masks unevenness and other wall defects. A universal material that is suitable for those who do not want to waste time on perfectly leveling the wall. Can be used to imitate natural materials.
- The composition includes small stones, elements of granite or marble chips, and sometimes cotton and flax fibers are present. Coarse fillers are placed in a thick layer, due to which all defects are covered.
- When applying, stencils, structural rollers are used, and artistic modeling is performed.
"Bark beetle"
- Currently one of the most popular decorative plasters. The material is used not only for interior decoration, but also for the facades of the house. For this, different factions are taken. The interior looks restrained and sophisticated.
- Consists of mineral filler, granules (of different sizes) and liquid.
- Several application methods: horizontal, vertical, circular.
"Fur coat"
- Acts as a protector against sudden temperature changes. Otherwise called pebble plaster. Most often this coating is used in the bathroom and kitchen. Can be applied to concrete, stone, gypsum and cement plaster, drywall.
- Acrylic, cement, silicate are the main components. Texture is achieved through mineral chips.
- Small price. Anyone can handle this finishing method, so professional help is not needed.
"Home Venice"
- Venetian decorative plaster is a complex and capricious material. However, it can be found in the interior with noticeable frequency. It will be difficult to recreate this type of coating without experience, but the result is worth it.
- Three important components: stone dust, slaked lime and pigments to give color.
- This coating can be single-color or multi-color. It replicates marble with a glossy surface. Sanding can be done by hand or using polishing equipment.
Golden glow or noble mother of pearl
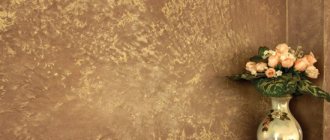
Venetian-decorated walls become mirror-smooth. You can never achieve a similar effect with paint or wallpaper. The texture design is always exclusive, because the wall is created spontaneously, at the hand of the master. Overlapping each other, several thin translucent layers create a fantastic, unique pattern:
— Veneto – classic Venetian plaster, made with the best lime, aged for 36 months after slaking. This makes the finish unsurpassed in hardness and beauty of the pattern.
— Encausto – for an impeccably smooth, artistic “marbled” finish with piquant terracotta ripples.
— Imperiale – to give the walls a delicate, sophisticated golden shine. An inexpensive way to showcase luxury walls.
— Marbella – to recreate the antique roughness of marble. A luxurious illusion of imperfection for a perfectly even finish.
— Marmorella – to give surfaces a calm and self-sufficient matte finish, an optical trap for fans of polished stone. The price of such a coating, unlike marble, will be low.
— Tierrafino – the nobility of subtle mother-of-pearl shimmer combined with the surface, rough processing of marble - visible, but intangible.
— Trevignano – the radiance of immaculately polished marble, in which, like in a mirror, silhouettes and interior items are reflected.
