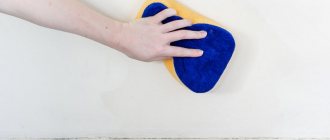
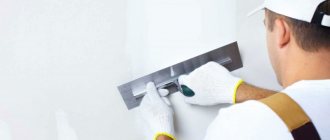
Repair is always an event. But whether it’s joyful or problematic depends on how quickly and successfully you cope with cleaning up after it. Whitewash, paint , and other building mixtures leave dirty marks; they need to be washed quickly in order to give the home a renewed look.
Tiles require special care - after all, stains on tiled or porcelain stoneware coatings after repairs do not decorate them at all. So let's start fighting them.
It is clear that each type of pollution requires its own remedy. We suggest moving from simple to complex, i.e. we will analyze the different types of stains on tiles and how to eliminate them.
How to clean paving slabs from cement deposits?
Remove dissolved cement. Cover the tiles with a neutralizer (5% solution of soda, slaked lime or caustic soda). If acid gets on the ground, cut off the contaminated layer of soil and dispose of it. After this, the paving stones should be thoroughly washed with water (to prevent the surface from fading, use trisodium phosphate).
Interesting materials:
How much cash can you take abroad? How many people are there in Russia? What is the population of Britain? What is the population in Kazakhstan 2020? What is the population in Kyiv 2022? How many nations live in the USA? How many nationalities live in Bishkek? How much personal income tax for one child? How long should you not eat after training to lose weight? How many weeks are there in summer?
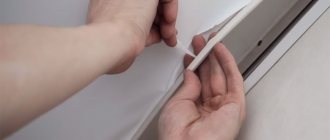
How to clean the seams between tiles
Baking Soda and Vinegar
- To clean the grout between tiles after renovation, prepare a thick paste by mixing baking soda with water (to 3 parts baking soda to 1 part water). This product is suitable for seams of any color.
- Apply the prepared paste with your finger to the seam line.
Despite the fact that baking soda is absolutely harmless, you should work with rubber gloves to avoid scratches and inflammation of the skin on your hands.
- Then prepare a solution of white vinegar and water (1: 1), pour it into a spray bottle and spray it onto the grout (on top of the soda paste). Instantly forming bubbles will indicate the beginning of a chemical cleaning reaction. However, it should be borne in mind that vinegar can harm some natural materials (for example, limestone or marble); using vinegar for treating such surfaces is strictly not recommended.
- As a rule, the cleansing process lasts several minutes. When the solution stops bubbling, the cleaning is complete.
- Scrub the seams with a nylon bristle brush or an old toothbrush. Be especially careful with corners and joints with walls or flooring.
- To remove any remaining baking soda and vinegar, thoroughly rinse the tiles with clean water.
Oxygen bleach
- We offer another answer to the question of how to clean the seams between tiles after renovation. Prepare a solution of oxygen bleach (take 2 tablespoons of bleach for two glasses of warm water). For best results, mix the solution thoroughly and prepare it immediately before use. It must be borne in mind that oxygen bleach can harm colored grout and the pigment will fade.
- Before using the solution, test it in an inconspicuous place. Apply to a small area and see if the grout and tile colors change.
- Pour the solution onto the grout lines until it completely covers them. To avoid flooding the entire floor, clean in small areas.
Rub in the solution using a nylon bristle brush. To achieve the best effect, leave the solution in the joints for a few minutes.
- Brush the seams with the brush, moving it back and forth.
Pay special attention to cleaning in corners and joints with a wall or floor.
- To best clean tiles after refinishing, you can simply dip a dampened brush into powdered bleach.
Note: in order not to wet and spoil the entire package of bleaching powder, pour the required amount into a separate container.
- Pour clean water directly onto the floor, wash and dry with a cloth or towel.
Recommended articles on this topic:
- Arrangement of a small apartment
- Stages of renovation in an apartment
- Turnkey cosmetic repairs
Steam cleaner
To wash and disinfect tiles after repairs, it is convenient to use steam cleaners. Buy your own device or borrow it from friends or at a rental office. When choosing a steam cleaner, make sure it is suitable for cleaning the joints between tiles. To perform this function, its kit must include:
- steam hose;
- small nozzle with brush.
When preparing the steam cleaner for use, read and strictly follow the operating instructions supplied with it.
- Fill the tank with clean water (without any cleaning products).
- Plug in and let it heat up to the desired temperature (heating time is indicated in the instructions).
- Start cleaning on one side of the room and gradually move to the opposite. Move the steam cleaner back and forth over the seam line. Steam perfectly removes dirt and kills mold.
- Remove excess moisture with a rag or towel. If using a steam cleaner is your answer to the question of how to clean tiles after repairing the floor, then be extremely careful while working - due to condensation, the floor covering becomes slippery.
Note: Steam cleaning can remove grout, so use a steam cleaner on non-grout joints or when you decide to get rid of old caulk.
How to remove grout from tiles video:
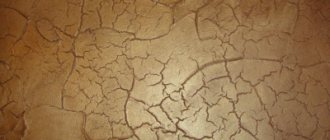
Types of pollution
In order to choose a way to fix the problem, we need to figure out what we have to deal with. During renovations, many different liquids, mixtures and other chemicals are used that can literally leave a mark on your apartment for many years.
It is worth noting that such consequences are much easier to prevent in advance. This is not so difficult to do: just cover the surface with a special protective film. If you ignored this action for some reason, you simply cannot do without cleaning. Most often, in the process of finishing work, the following fall on the tiles:
- lime;
- plaster;
- grout mixture;
- silicone sealant;
- primer;
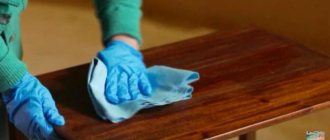
Cleaning tiles in the bathroom after renovation
- adhesive solution;
- polyurethane foam;
- dye;
- construction dust.
Naturally, they all cause damage to varying degrees, so each of them should be considered separately.
Household chemicals for cleaning tiles
Here it is also worth considering the type of surface being treated, because glossy surfaces are much easier to clean than matte and porous ones.
Why do divorces occur?
In order to carry out quality cleaning, it is important to know the reason for the appearance of certain defects.
The most acute problem is the appearance of stains on the surface even after thorough cleaning. Why does this happen? Let's look at the possible reasons:
- Unwashed dirt. A standard problem is when, when the tile is heavily clogged, dust particles are spread across the surface and it becomes very difficult to completely clean the tiles.
- Dirty water. During cleaning, you need to change the water as often as possible, as it contains dirt particles.
- Hard water. The problem of whitish stains and deposits is mainly associated with the high salt content in tap water.
- Unwashed product. Some cleaning products may remain on the surface of the tiles after washing them. Unless otherwise specified in the instructions, it must be washed clean.
- Dirty rag. In case of heavy contamination, it is recommended to rinse the cloth frequently under running water to remove dust particles.
Types of stains on tiles in the bathroom
Divorces can be of different types. The most common problems are:
- dirty stains;
- limescale;
- traces of detergents;
- greasy stains.
To cope with these problems, you need to select acidic media. They perfectly destroy dirt and at the same time give the tiles a glossy shine.
Construction dust
The most harmless type of pollution, perhaps, is construction dust; its presence is inevitable when carrying out any repairs, both major and light cosmetic. After repairs, the tiles have to be washed to remove the accumulated layer of dust particles. At the same time, the question becomes relevant - how to wash the tiles and remove dirty stains without damaging its coating.
To begin with, it is recommended to sweep away the dirt with a dry cloth, and if possible, vacuum the surface. This will remove the main layer of dust and large particles that could damage the glaze. If possible, carefully scrape off any hardened finishing materials with a blade. Only after this will it be possible to begin wet cleaning to completely clean the tiled surface.
You can clean the tiles using the following means:
- Soapy water. The simplest, but very effective way. You can use washing powder.
- Water with lemon. Gives shine to a glossy surface and has a pleasant aroma.
- Vinegar. Also diluted in water. Suitable for cleaning serious stains, it also makes the surface shiny and creates a protective film.
- Glass cleaner. A simple, convenient and effective product that allows you to wash away dirt and remove stains from the surface.
Basic products for cleaning tiles from construction dust
Methods for cleaning ceramics from various contaminants
We will present for review an effective method for cleaning tiles from the most common types of contaminants, using both special products and cleaning methods with improvised materials and substances.
Due to the fact that the cladding of the bathroom walls occurs after the installation of ceramics on the floor, there is a danger that the primer compositions used to prepare the wall surface for finishing will come into contact with fragments of the floor covering. Wipe off stains from dried primer is a serious test of endurance and patience, so you should not allow it to get on the ceramic surface, and if this happens, then you need to remove the spills immediately using ordinary water.
Since tile is a material that is resistant to various types of adverse effects, many products are suitable for washing it
The following methods are used to clean dried primer:
- stains are dissolved with a special remover;
- the primer is washed off with acetone;
- the contamination is treated with a liquid primer;
- use of vinegar essence.
To make the dried primer easier to remove, the contaminated areas are covered with a wet rag, and some time is given to soften the dried stains.
Particularly difficult areas can be cleaned mechanically, namely using a special scraper. It is a device consisting of a handle and interchangeable blades. Pre-soaked stains are carefully removed with a scraper so as not to damage the tile; the tool must be held at an angle of 30 degrees to the surface of the tile.
Cement mortar that has not set is easily washed off with a wet sponge or rag and clean water. But you will have to tinker with the frozen solution:
- Cleaning with special removers.
- Toilet bowl cleaner works well on dried cement mortar.
- Mechanical cleaning method. Traces of the solution are removed with a metal spatula or a metal mesh for washing dishes.
We remind you that when using the mechanical method, the dried solution must first be soaked and when cleaning with metal objects, do not damage the surface of the finishing material.
After repairs, the cement should be removed from the tiles immediately before it has time to harden.
Tile adhesive
- Traditionally, the easiest way to promptly remove glue residues during the installation process is with a wet sponge.
- The frozen glue is soaked in a solution of water and vinegar or ammonia.
- Chemical treatment of contaminated areas with potent substances.
- Mechanical cleaning. Traces of glue are removed using a metal spatula, scraper, metal mesh or fine sandpaper.
Key moment. In “hopeless” cases of strongly set glue stains, it is advisable to use chemical and mechanical methods in combination.
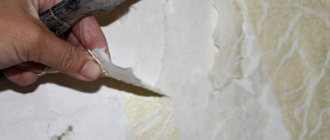
To facilitate the process of cleaning grout from the surface of tiles in the bathroom, you must strictly follow the technology of finishing joints with fugue, do not apply too much grout to the surface to be treated and remove its excess in a timely manner.
First of all, we need to remove traces of glue as soon as possible, especially if we are dealing with ceramic tiles
There are two removal methods:
- Chemical. The method is based on the use of potent, acid-containing substances. Using this method, you need to take into account the properties of the ceramic used and its resistance to acids. We should not forget about safety measures when working with active substances, be sure to use personal protective equipment.
- Mechanical. The method is used to clean heavily dried grout or grout that is resistant to chemicals. The following tools and devices are used:
- metal spatula, brush or scraper;
- various cutting devices with a sharp blade;
- sandpaper or metal abrasive mesh.
Construction dust
The most common and “obligatory” type of pollution after construction and repair work is the presence of construction dust. Removing it is a simple process and does not require the use of any special or potent substances.
It is necessary to remove dust as soon as possible so that dust and dirt do not become embedded.
First, dust is removed from the surface with a dry cloth or using a vacuum cleaner, after which wet processing of the cladding begins, for which the following means are used:
- warm soapy water;
- water with lemon or citric acid added;
- vinegar solution;
- compositions for cleaning glass.
Ceramic tiles should be washed from top to bottom.
Primer
Now let's look at how you can clean ceramic tiles from primer after repair. White stains often remain on floor tiles, since the installation of wall cladding is carried out after it has been laid. It is advisable to spread a protective film on the floor, but this does not always provide a 100% guarantee of protection against stains.
If the primer gets on the tile, it is advisable to wash it off with clean water as quickly as possible. When the substance dries it will harden and it will be much more difficult to wash it off. For this purpose, you can use the following tools:
- special solvent-based remover;
- acetone;
- polyurethane foam;
- fresh primer.
As soon as the stain softens, you can try to clean it off. You can also use a special scraper with a sharp blade, which can be used to remove drops of frozen paint from glass surfaces.
The primer is best washed off before it hardens with clean water or solvent