For a man, the garage is practically his home. It is also a “club of interests” and a place where the opportunity to demonstrate skill is accompanied by the work of engineering. Rearrangements and cleaning of the garage are carried out exclusively by the owner. He often repairs it himself, because it is undesirable to trust strangers to restore all categories of order in your favorite possessions.
In addition, the process of restoring the technical condition of a beloved property sometimes brings true pleasure and increases self-esteem. It is quite possible for a home craftsman to independently repair the roof of a garage roof if he is armed with information about how to do it.
Content
The roof of buildings of any type, size and purpose tends to wear out, to the great regret of the owners. Its strength is regularly tested by gusty gusts of wind, hail, heavy rains, birds, abandoned stones and suddenly fallen trees. Similar factors with equal consistency attack the roofs of garages, which sometimes do not cause as much concern among owners as a leaking ceiling in an apartment. Due to absolutely unjustified frivolity, the beloved “iron horse” or “swallow” suffers in a manner not childish, slowly rusting from excess moisture.
Leaks are a clear indicator of a violation of the integrity of the roof or flaws in the construction of the roofing pie. However, you should not wait for smudges to appear on the walls and ceiling. In order not to encounter serious facts that require expensive repairs, it is necessary to carry out preventive inspections of the upper floor of the garage from the outside regularly 4 times a year and monitor the condition of the ceiling daily.
Garage roofs, like the buildings they cover, are a term that combines a wide range of structural varieties. They are erected above standard free-standing boxes, and above garage boxes lined up in a row, and above household structures of vast private estates. They can be single- and double-sloped, hipped, attic, etc. They can be equipped with any of the existing types of roofing materials, the choice of which depends on the status and financial capabilities of the owners.
Criterias of choice
When deciding how to cover a garage, consider the following features:
- service life of the material declared by the manufacturer;
- degree of reliability;
- price;
Criteria for selecting roofing materials
- technological features of installation;
- possibility of self-installation;
- maintainability.
Do not forget that if the building is located next to a residential building or permanent structure, then it must be in harmony with them. In this situation, cover the garage with the same type of material that covers the house. A separate building for transport can be equipped with an inexpensive ceiling.
What can you repair yourself?
Regardless of the cost of the material used in the arrangement, repairing the garage roof is an inevitable result of its service. Of course, the more resistant the coating is to destructive factors, which is almost always directly related to price, the less often it will be necessary to restore its technical perfection. True, wear resistance rarely coincides with the ability to lay and repair it yourself. Therefore, in the ranks of independent owners of car houses, adherents of soft coverings predominate, and in construction and repair they are most often used:
- Bitumen-polymer descendants of roofing felt for the repair of pitched garage roofs made of reinforced concrete panels.
- An elastic vulcanized membrane labeled EPDM, popularly known as “rubber roofing.” It is used in the repair of similar low-pitched roofs.
- Flexible tiles, which are figuratively cut pieces of bitumen-polymer material, used in the arrangement and repair of gable, hip and mansard roofs with slopes of slopes from 11º.
In the vastness of our country, people rarely get carried away with bituminous shingles, although this is a completely promising and easily repaired type of coating. It is mainly used when it is required by the aesthetic culture of the design of the estate, made in a single stylistic spirit.
Let us mention that in the field of arranging garage roofs, slate, ceramics, corrugated sheets and metal tiles are used. They are in much less demand, and most often require professional repairs. Therefore, we will pay attention to the most common soft options and methods of their restoration.
DIY garage roof photo
Read here - Do-it-yourself wall decoration - an overview of possible options, secrets and interesting ideas of masters, recommendations and instructions
Current and major repairs - what's the difference?
Damage typical for soft roofing includes punctures, breaks, swelling, slipping of the covering, depressurization of seams and areas adjacent to adjacent walls or to the parapet. Not all of the listed reasons are accompanied by leaks, but, nevertheless, need to be eliminated. Based on the degree of effort and cost, repairs are divided into two types:
- Ongoing correction of coating defects. Current repairs consist of correcting small isolated damages and minor construction flaws, if the total area of the repaired surface is approximately 10% of the roof area.
- Roof overhaul. It consists of a complete replacement of the damaged coating, carried out when 60% of the damaged roof area is detected.
There is a noticeable interval between the indicated percentages, giving the owner the opportunity to actually give preference to one or another type of repair. He himself will be able to decide what is more profitable, endlessly patching up the holes, or laying a new covering.
Current repair operations involve spot correction of damage. But during a major overhaul of a garage roof, the waterproofing carpet is often completely changed, abutments and joints are sealed again, and drainage funnels, if any, are sealed. The slope of the slopes may also be changed, additional ventilation elements installed, or the roof insulated. However, before making major design changes, you should consult with the designers.
Particular care should be taken when installing thermal insulation. It will, of course, reduce heating bills if the car house is heated autonomously. If you have to repair an ordinary section of a long garage complex with a general heating network without heat meters, there is no point in adjusting and saving the supplied energy.
Again, insulating the roof can lead to a violation of the temperature conditions for storing the car. Indeed, according to the clear requirements of SNiP II-93-74, the thermometer scale in the garage should not show higher than +5ºС. In order for the vehicle’s maintenance conditions to meet the regulated standards, accurate calculations are needed. Otherwise, condensation will appear in the thermal insulation, and its drops will “sharpen” the external seams and the paintwork of the body all year round.
Let's focus on the basic replacement of the coating, which corresponds to the efforts of the home craftsman and his level of skill.
Technology for complete replacement of old coating
Major roof repairs are carried out in the warm season. It is recommended that restoration processes be timed to coincide with a period with minimal precipitation. Only in case of emergency situations is it permissible to carry out work in cold and rainy times with the obligatory installation of an awning over the repaired site. The amount of work on the roofs of private garages is usually small, but it is advisable to complete all operations in one day. As a last resort, on the first day of repairs, the roof waterproofing should be completely installed.
Typical sequence of work for a complete replacement of the coating:
- Dismantling of tin aprons, if any, drainage elements, cornice and front metal strips.
- Removing worn-out coverings and waterproofing carpet using a gripper. Its primitive replacement can be a shovel with a steel bayonet. To facilitate the removal process, the rolled coating can be chopped with an ax ahead of time.
- Thorough cleaning of the base from crumbled material, removal of old roofing nails. It is not advisable to hammer in the fasteners remaining from the removed covering. Surely he is already infected with rust, and this infection will not stop there.
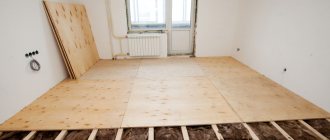
- Thorough repair of the base for laying a soft garage roof. Sealing joints between reinforced concrete slabs with a cement-sand composition. The joints between solid flooring boards, OSB panels, flat slate or moisture-resistant plywood compounds are treated with silicone sealant and glued with fiberglass mesh.
- Laying a waterproofing carpet, the construction of which uses reinforced polyethylene or a water-repellent bitumen-polymer barrier. Roofs with a steepness of more than 18º, covered with flexible tiles, are insulated along the perimeter, along the valleys and hips, and if lower - with a continuous carpet. Insulation of flat roofs under rolled materials is carried out around the perimeter. In both cases, the areas adjacent to walls, parapets, ventilation pipes, and drainage funnels are reinforced with additional strips and pieces of waterproofing.
- Laying a new coating according to standard technology.
- Installation of metal roof elements, aprons, coating fastening strips on vertical surfaces, aerators, funnels, if any.
Repair work can only be carried out at the temperature specified by the manufacturer of the material. You cannot work with coatings if the thermometer shows a value below its frost resistance limit. If there is an urgent need to carry out installation at sub-zero readings, the material is pre-cured in a heated room. Its adaptation temperature is from 15º to 20ºС, the holding time is at least 4 hours.
Repair using built-up materials
Let's start by preparing the base. Repairing minor potholes and cracks will not require a significant period of time or special effort. It’s worse if the surface of the reinforced concrete floor is noticeably crumbled, if the boards or slabs of solid flooring are rotten. Such troubles require either pouring a cement screed or constructing a new prefabricated base.
Let us assume that the labor-intensive process of completely restoring the foundation is not our lot. Then we will find out whether its humidity allows us to begin laying bitumen-polymer waterproofing. The restrictions specified in SNiP 3.04.01-87 allow you to start work if the humidity does not exceed 4-5%. Without a device, literally “by eye”, it is impossible to determine the exact humidity parameters, but there are traditional methods, these are:
- A small spill of bitumen heated almost to a boil onto the surface. If the bitumen begins to bubble, the humidity is higher than the established norm.
- Laying a piece of polyethylene on the base with sides measuring up to a meter. The edges should be secured around the perimeter with adhesive tape.
If condensation accumulates on the inner surface of the polyethylene, the base must be dried. Cover the base area before noon and check the next day.
You don’t have to resort to traditional testing methods if the old roof didn’t bother you with swelling. The base can then be immediately primed with a bitumen primer to optimize adhesion to the waterproofing laid on top, then:
- We glue a reinforcing layer 50-60cm wide around the perimeter of the roof.
- We glue reinforcement strips 30-40cm wide to the junctions. The middle of the reinforcing strip should pass along the triangular lath of the fillet, and strips of equal size were placed on the vertical and horizontal mating surfaces. Adjacent brick walls are pre-plastered and primed.
- We glue pieces of reinforcing fabric measuring 70x70cm around the funnels and ventilation pipes. To install the reinforcement carpet, we use material without gravel top dressing.
- We begin laying the bitumen-polymer coating from the lowest part. We first roll out the material on the roof and let it rest to even out dents and waves. Then we roll the back outwards towards the middle. We will roll it out, simultaneously melting the inner surface of the material. You need to move along the uncovered part of the roof, rolling out the roll towards yourself.
- We place the first strip across the slope. We lay the covering in strips, heating its back side with a gas burner. The fixed material is rubbed in with force with a roller.
- We lay the next strip with an overlap along the upper edge of 8-10 cm on the already deposited fabric. Using this method, we form seams, the weak points of which are directed along the water drainage.
- At the ends of the strips the overlap should be at least 15cm. Cross-shaped joints of four coating sheets are unacceptable, because the thickness of the joint will be too large and the 4 layers of material will not heat up with sufficient force.
Upon completion of laying the covering, metal parts are installed: aprons, strips for fastening to parapets and vertical walls, etc.
The quality of joining the coating sheets into a single web is judged by the flow of the binder along the side edge. The width of this protrusion beyond the edge is 5-15 mm. After laying the next strip, the leakage on the previous element must be carefully trimmed with a spatula. Poor-quality seams with peeling strips are difficult to restore using a torch. It will be more convenient to warm up the defective area with a hair dryer with a flattened nozzle.
If the flat top floor does not have parapets, then before you begin repairing the garage roof yourself, you should nail the eaves block along the perimeter or where possible. It is needed for subsequent fastening of the metal strip and for decorating the edge of the roof.
Bitumen and bitumen-polymer rolls can be used to repair the roof without removing the old roofing felt or similar material, if it was properly repaired during ongoing repairs, and even when applying a 2-meter lath, no depressions larger than 5 mm were detected.
Ruberoid
Suitable for solid substrates only. It can be laid not only on a concrete slab, but also on a continuous sheathing of boards. Ruberoid is lightweight, protects well from precipitation and is affordable. Sold in rolls, so it is quite easy to install. You need to lay it in 2-3 layers.
Work order:
- Treatment of the rough roof surface with bitumen mastic.
- Installation of the first lining layer of roofing felt. It should be laid immediately after applying the mastic.
- Treating the base with bitumen mastic and laying 2 layers of roofing material.
- Re-treating the roof with mastic after laying the last layer.
The sheets must be overlapped, otherwise water will flow through the joints. Laying is done in the direction of inclination.
To heat up roofing felt and mastic before installation, you will need a gas burner.
Laying a new EPDM membrane
All currently existing types of roofing membranes are suitable for roof repairs. However, for a garage, a membrane labeled EPDM is considered the most acceptable. The material is absolutely indifferent to the proximity of the old membrane and bitumen coating, and is very resistant to atmospheric attacks. And another plus: it is wide, thanks to which the garage roof can be covered with a single piece without seams.
Algorithm for repairing a garage roof with EPDM installation:
- We dismantle the metal parts of the roof.
- We clean the roof down to its base and repair minor defects. Differences in the relief of the old coating should not exceed 0.1-0.15 cm. Such bumps and dents will be “smoothed out” by the new rubber shell. But it’s better if they don’t exist at all. If it is necessary to level the surface, fiberglass mesh or geotextile is pre-glued to the base.
- We mark a strip along the perimeter with a marker or pencil, stepping back from the edge of the overhang along with the cornice strip by 10 cm.
- Having been spread out on a lawn, lawn or similar area ahead of time, we lift the well-straightened covering onto the roof. We spread it in dry weather, the material should not get wet.
- We place the coating in its future location.
- Fold the fabric in half, covering one side with the other.
- We apply an assembly adhesive on a neoprene-rubber base with a roller to the freed half of the base, if we are gluing it to concrete, cement-sand screed, brick, metal sheet, to a screed made of OSB panels or water-repellent plywood. We use water-based mounting adhesive if we are gluing the coating to a wooden base. We do not apply contact adhesive to the outlined border around the edge, because it is designed for attachment to horizontal planes.
- We return the bent half of the covering to its place and smooth it with a roller. We work with the roller from the middle of the glued canvas to the periphery in order to expel the air and press the material more tightly.
- We do the same with the second half of the sheet.
- We bend the non-glued edge of the material and treat the very back side of the coating and the remaining free base with adhesive for vertical planes.
- Glue and roll the material around the perimeter.
Finally, we install the cornice strips, elements of the drainage system and aprons into place.
If it was not possible to do without butt seams, we glue the EPDM panels together using an adhesive with a synthetic rubber base. The above compositions cannot be used to form seams of the material.
Owners of garages with communications passages through the roof and adjacent to walls or parapets will need to add additional layers of reinforcement on top of the covering. Reinforcement carpets around drainage funnels, aerators, and pipes are given a rounded shape. The size is calculated so that the edge of the reinforcement deviates from the edge of the hole by 20-25 cm. Along the abutment line, the reinforcing addition is applied in strips of self-adhesive membrane so that half of the strip is on the vertical plane and half on the horizontal.
Corrugated sheet
It has gained great popularity among other materials for covering garage roofs. Its advantages include: a large selection of colors, accessibility, easy installation, and durability. If you lay it correctly, you will get not only a beautiful-looking ceiling, but also a durable one.
There are different types that differ in height, width of sheets, and what kind of galvanized steel is used. In order to purchase high-quality corrugated sheeting, you should make sure that there is a GOST mark or another standard; if it is not there, then most likely the product is of poor quality.
Replacing bitumen shingles
It is also better to completely replace fairly worn bitumen shingles. Especially if you forgot to stock up on materials from the batch that was used in the initial arrangement. The sequence of actions for replacing bitumen shingles is reminiscent of the process of repairing a garage roof with roofing material or an upgraded bitumen-polymer coating. The difference is that shingles are installed and attached individually. They are not fused, but glued to mastic and secured with rough nails or self-tapping screws.
You should be very careful about dismantling work, because undamaged coating elements can find subsequent use. The nails must be carefully pulled out with a nail puller so as not to damage the sheathing and not to provide yourself with additional work on installing a new base. After removing the old coating, waterproofing and fasteners, the surface is thoroughly cleaned. Then the reinforcing carpet is laid again and the covering is laid.
Finally, the video will help you refresh your memory about the principle of the simplest repair of a garage roof using bitumen roll material:
The described technologies and folk techniques for repairing a garage roof will help put your beloved property in order, so that the car will be provided with proper storage conditions with minimal costs.
Specifics of installing slate and ondulin
Ensure the roof is airtight by performing work according to the following algorithm:
- Install the sheathing. Use boards with a thickness of 15 mm for ondulin, and 25 mm for asbestos-cement slate. Maintain a lathing interval of 30 centimeters.
- Install waterproofing using an underlayment type of roofing felt. Glue the layers with bitumen.
- Lay the sheets, ensuring an overlap of half a sheet. Distortions are not allowed.
- Use special nails that have a seal for fixation.
- Secure the ridge and secure the cornice below.
You are convinced that the overlap technology is simple. Get everything you need and be patient.
