This finishing material, known as tadelakt, is used when decorating residential premises by supporters of ethnic orientation. This finishing option is considered indispensable for creating a Moroccan design. The coating has special technical and aesthetic characteristics, which is why Moroccan plaster has been used in renovations since ancient times.
Main characteristics of plaster
A distinctive characteristic of Moroccan plaster is its unusual composition, which includes only natural ingredients and is 100% environmentally friendly. The presence of special natural substances gives the building composition a slight shine and complete waterproofness. Due to its ability to repel moisture, tadelakt, also called Moroccan plaster, can be used not only for finishing bedrooms and living rooms, but also in damp rooms as an alternative to tiles. Initially, the material was invented in Morocco for lining water tanks and only then began to be used in interior decoration.
Water tanks in Morocco
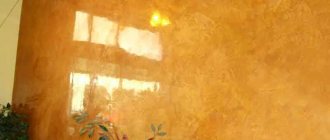
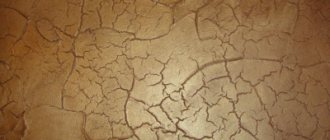
The decorative properties sharply distinguish the Moroccan from the background of its “brothers”. After drying, the coating is smooth with small raised areas, while beautiful golden flashes shine through from its depths. The recipe for Moroccan plaster is complex, but if desired, the mixture can be made with your own hands.
It is equally important to follow a special application technique, otherwise you will not be able to obtain the desired decorative effect. Moroccan decorative plaster usually includes two layers: preparatory and relief, and they can vary in color. After applying the mass, the walls are polished to smooth out the contours of the relief and give smooth transitions.
How to do it yourself?
The process of plastering walls is considered fascinating, interesting and at the same time quite difficult to perform. The fact is that applying decorative plaster is a certain creativity. To understand whether you can do such work with your own hands and what results you will get, it is recommended to test your strength on a small piece of plasterboard material.
It is likely that the result will satisfy you, and the work itself will not only bring pleasure, but will also save you a decent amount of money.
Composition of Moroccan plaster
The main component of plaster is lime - it helps the particles stick together and provides antiseptic and antifungal properties. To give the texture a certain structure, additives are added to the composition:
- marble flour;
- quartz sand;
- clay;
- diatomite
These substances also help to reinforce the mixture and enhance its adhesion to the surface. To obtain a durable water-repellent film after drying, the plaster is coated with a special polishing soap - it reacts with lime and makes the mixture waterproof on the surface. Also in the composition of Moroccan or in its finishing coating there are:
- pigments - to add decorativeness, to obtain rich shades of the material;
- linseed oil - to enhance water resistance, facilitate application of the mass and care for the finished coating;
- wax - to additionally impart hydrophobic properties.
Finishing the decorative coating with wax
Advantages and disadvantages
Moroccan plaster has many advantages:
- versatility, the ability to use in different interiors, different rooms, for facade work, instead of tiles in the bathroom and kitchen;
- seamless coating, absence of unsightly joints;
- glossy surface with unique decorative properties, high aesthetics;
- complete fire safety - the material does not ignite and does not support combustion;
- resistance to high temperatures, can be used for lining fireplaces;
- environmentally friendly composition - no release of toxins even when the temperature rises;
- no proliferation of bacteria, fungi, mold on the finish;
- excellent tolerance to high humidity and direct contact with water;
- vapor permeability, maintaining an optimal indoor microclimate, no clogging of pores, “breathable” properties;
- the ability to select any shade, suitability for any interior style;
- hygiene, easy care and washability;
- long service life, wear resistance;
- ease of use due to elasticity and pliability.
Among the disadvantages of Moroccan plaster, it is worth pointing out the complexity of its application technique for beginners. Without proper experience, it will be difficult to cope with the formation of a decorative layer, so you will have to practice on a rough surface in advance. In addition, plaster is quite expensive, because it contains expensive components. This is especially true for factory mixtures that are sold in finished form.
Tadelakt also has other disadvantages. To reduce costs, it is better to start the solution yourself. Before starting work, you will have to carefully prepare the walls, otherwise the quality of the coating will decrease. Moroccan plaster is not resistant enough to impacts and other mechanical damage - you need to handle the coating with care.
Visual effect
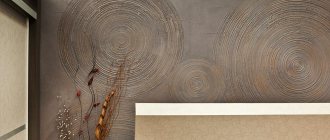
Of course, we cannot help but touch on the topic of beauty that Moroccan plaster has. Walls covered with such material look, as they say, expensive and rich. A wonderful visual effect is created. It seems that the walls are covered with a pleasant-to-touch precious stone with the addition of silver or gold inclusions.
In order to create a “golden” effect, Moroccan plaster is coated with a special wax composition, which imitates gold. Using this technique in interior design, you should think about whether it can handle such luxury. After all, in the end you will get a real palace style.
Where is the material used?
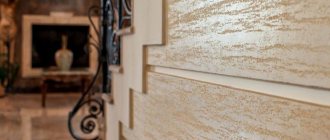
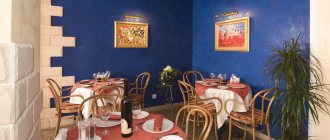
In the homeland of plaster - Morocco - it is used to make sinks and also cover containers for storing water, because it is not at all afraid of moisture. However, the use of tadelakt for finishing apartments, houses, cottages and public buildings is considered more traditional. The material is no less suitable for decorating shopping centers, halls for various purposes, cafes, restaurants, and hotels. Fireplaces, stoves and even floors are finished with plaster.
Tadelakt in a Moroccan interior
Customer Reviews
Those who took the risk of creating an unusual interior using decorative Moroccan plaster unanimously say that they did not regret the choice of finishing material. The walls turned out to be relief and expressive. Despite their rough appearance, they exude warmth and strength, strength and solidity.
Other buyers say they liked the simple, uncluttered look of the walls the most. They turned out as if covered with velvet, warm, calm and serene. The interior has become more stylish, luxurious and expensive.
Source
Tools for applying plaster
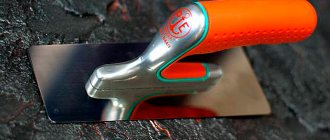
To apply the decorative mixture you need to prepare several spatulas. The narrowest of them should be at least 4 cm wide, the widest - about 60 cm. Medium-sized stainless steel tools (about 15-25 cm) are used for cladding walls in hard-to-reach places and on small-area coverings. For surfaces with rounded shapes, buy a rubber spatula or trowel with rounded edges. The following devices are also prepared:
- bristle brushes for soap solution, priming;
- polishing stone for finishing with a hardness of 7-10 on the Mohs scale (often included with ready-made mixtures);
- wooden spatula for the final stage of work;
- a grinding machine for polishing the finishing layer;
- a rubber roller for painting with a second shade (if it is decided to give a different color to the protruding parts of the relief);
- additionally - masking tape, rags, containers.
Surface preparation
The finished coating has a small thickness, so all irregularities and defects will stand out through it. In this regard, the walls are prepared especially carefully - they are cleaned of old finishes, leveled, rubbed off or sanded off stains of dirt and grease. Any metal elements are isolated using special means.
Immediately before tadelakt, a layer of finishing plaster is applied (gypsum solutions can be used in rooms with normal and low humidity). Afterwards, the walls are primed with a deeply penetrating compound, which is applied in 2 layers with a brush, crosswise. The first layer is dried for at least 3 hours, the second - 8 hours. In addition, to enhance adhesion, the base can be coated with tile adhesive in one thin layer.
Priming plaster crosswise
The whole process step by step
As noted above, decorative plaster can be applied to a carefully treated surface. The advantage is that you can even work with plasterboard walls.
Regarding surface preparation, it is worth noting that it is best to treat the wall with a small layer of glue, which is often used to attach tiles. In this case, the material will hold up better.
After this you need to start working with plaster.
- The first layer is applied to the surface, which should dry within 24 hours. As a result of pre-treatment with glue, the material will look better and be leveled on the surface.
- After the plaster has dried, it is necessary to apply a second ball. Both in the first and second cases.
- This must be done using a metal tool - a spatula. To process defects, it is better to use a plastic spatula.
- After all layers have dried and gotten rid of moisture, the plaster must be compacted and rubbed using smooth stones.
- After this, you need to take soap (grout) and use a soft brush to treat the surface. In this case, the surface will have water-repellent characteristics. The glossy shine that is formed in the final result will also be an advantage.
There are also some nuances that need to be taken into account when working with such material. For example, for the plaster to dry and for each layer to take the correct shape, it takes approximately 10-11 hours.
To prevent the material from being damaged and deformed by many factors, it is necessary to use special protective substances in the form of wax or oil.
Application technology
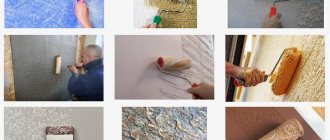
The classic technique of applying tadelakt is considered the most difficult, but there are also easier techniques. The plaster powder is diluted with water immediately before use, the finished mixtures are simply mixed in buckets. The amount of pigment introduced can be quite large - up to 1/10 of the total mass of the plaster. A specific shade should be selected by performing test colors. If you plan to apply a design with plaster, its contours are covered with masking tape in advance.
Classic Moroccan plaster - working technique
The first layer of plaster is applied thinly - it can be only 1 mm. The work is carried out with a trowel or metal spatula. The layer is applied without compaction (if work is carried out on the floor, 2 such layers are performed at once). Leave the tadelakt to dry for 14-16 hours.
The second layer is also applied with a spatula, its thickness is slightly larger than the grain size of the plaster. As soon as the mass has set a little, apply polishing soap with a brush and then polish the wall with a stone, performing small circular movements without pressure.
Compacting the second layer of the mixture with a wooden spatula followed by the use of stone is considered even more effective. The work is completed when shine and a characteristic solid sound appear. Allow the plaster to dry for 24 hours.
Applying plaster with a brush
The first layer is applied in the standard way - using a spatula. To perform the second layer, plasters of two colors are prepared, located in different containers. Dip the brush into the first solution, make strokes using the trimming method. Each stroke is rubbed with a spatula, making cross-shaped movements. After completing several strokes of the same color, others of a second shade are made between them. Next, the surface is allowed to dry and polished with a stone, and then this operation is performed a second time, but with polishing soap.
Easy application
The first layer, 1 mm thick, is applied with a brush, trowel, spatula or other convenient tool. After allowing the solution to set, it is compacted with a wooden spatula and polished with a stone. Then cover the layer with soap and polish it again to a shine.
Polishing stone for tadelakt
Sponge application technique
Using a small spatula, apply the plaster onto an elastic sponge with rounded edges. Distribute the mixture evenly over the sponge, then apply it to the wall using circular or poking movements. After some drying, the mass is ironed and polished with a metal trowel, erasing the tops of the relief. The instrument is wiped regularly so that there are no lumps left on it. Next, polish the layer with a grinder with a special polishing disc, using soap.
Moroccan with cracks
The walls are primed in advance with a special primer containing quartz sand. The first layer of plaster is applied to the scratch, using cross strokes, leaving no gaps. After drying, apply a second layer, leaving no more than 5% of uncovered areas. While the mass has not dried, cracks are scratched with the sharp edge of the tool (initially wide, a scattering of small cracks are removed from them). As it hardens, the wall is treated with sandpaper and a layer of varnish is applied, and then wax with mother-of-pearl.
Decorative plaster with cracks
Imitation of Moroccan with acrylic plaster
Before work, ordinary acrylic plaster is tinted. The first layer is applied evenly, and after an hour, the second layer is made with short cross movements of the spatula. After another hour, golden varnish is applied in strokes to the strip.
Experience of our craftsmen
One of the portal participants, with the nickname Marpasha, used tadelakt as a finishing layer when finishing the niche of the future wardrobe; the niche itself was made of foam blocks and plastered with tile adhesive.
In the same thread dedicated to tadelakt, they also thought about replacing the expensive composition with a cheaper one for application in the shower. Marpasha, who is a professional decorator, advises not to go crazy with the components, but to buy ready-made lime plaster at a lower cost.
MarpashaFORUMHOUSE user
You can take any lime plaster (marmorino, travertino), in fifteen-liter buckets, the price is quite reasonable, open hours are not limited. The hydrophobicity of lime plasters appears after treating them with a soap solution (as a water repellent); after soap, wax can be applied.
Whether it is a branded Moroccan or an analogue, the key to decorativeness and durability is the correct preparation of the base. As Marpasha noted, if we are talking about the walls in the shower room, then they must first be plastered with a cement composition, and then applied with lime. As for maintaining the appearance, it’s also nothing complicated - a one-time coating with soap and periodic replenishment with wax, as it becomes cloudy.
The professional himself finished the kitchen with tadelakt.
Another of our craftsmen, who worked with tadelakt, revealed the step-by-step application process, which will be very useful for those who decided to save on hiring specialists or want to control what they are paying a considerable amount for.
C4BooMUser FORUMHOUSE
In short - if you have experience applying ordinary plaster, half the job is already done.
- The first stage is simple: apply the plaster in an even layer without sagging.
- The second stage is similar to the first and instills confidence that everything is going like clockwork.
- Third stage: applying a second layer of plaster, rubbing with a stone, applying soap, rubbing with a stone.
He advises not to apply the solution over a large area at once, especially if you are doing it alone, you have to rub it thoroughly, and the solution will “sag.” He and his assistants barely managed to process six meters with three hands, and this was with experience. There is another important nuance.
C4BooM
You need to moisturize heavily between layers (when you apply lime to lime) and where you will rub with stone a little later, you can cover it with stretch film so that the water does not escape.
A day later the plaster looked like this.
As already noted, the lion's share of success depends on the foundation.
C4BooM
The product is cast from concrete, for rigidity there is a reinforcement frame (knitted, step 20 cm), otherwise it would not have withstood, the mixture was used from the factory. Lime plaster, and this is exactly what tadelakt has, cannot be applied to a wood base. And only on a well-absorbing base - waterproofing disappears. For example, in a hammam, two layers of tile adhesive are applied first.
Finishing
For rooms with normal humidity, a single polishing with soap is sufficient. If the humidity in the room is high, the work is repeated after 3 days to further strengthen the coating, and a little olive oil is added to the soap. To give it a velvety feel, you can treat the Moroccan with wax mastic. If necessary, mother-of-pearl, gold leaf or other pigments are introduced into the latter. The wax is polished with a grinder at minimum speed. The finished coating will be incredibly beautiful, moisture-resistant and durable; it will fit perfectly into the interior and will serve for many years.
Main advantages
- The mіtsna itself is a plaster facing, which replaces the cement coating.
- Absolutely environmentally friendly, which allows for use in any premises, including children's rooms and installations.
- Handy for use on any surface: concrete and lightweight concrete, clay, clay, gypsum, wax and cement.
- Resistant to wear and tear of a mechanical nature, which allows for resistance to high-intensity movements of people.
- Waterproof.
- The heat is good, allowing for the processing of fireplaces.
- Anti-allergenic, disinfectant through the meadows in the warehouse.
- It is plastic and lends itself well to polishing and tinting.
- The special relief structure and application technique create the uniqueness of the coating.
- Durability? 15 rocks.
The only shortcomings are the high quality of cheese and work, the versatility of the wicked.
