Owners of private houses have recently increasingly inclined their choice towards natural materials when finishing the surfaces of their homes. Clay plaster is a great example of this. It does not contain harmful ingredients, and among its advantages are the ability to absorb moisture, allow air to pass through, as well as the characteristics of high adhesion to various materials.
Advantages and disadvantages of clay compositions
Before making your choice towards one or another finishing material, you should consider its features. Plastering with clay allows you to achieve soundproofing of walls, and such work can be done on a limited budget. The material is cheap, elastic, and therefore easy to apply.
Clay plaster for walls also has its disadvantages. Among others, the ability to absorb and release moisture well should be highlighted. This quality can cause the wall to become covered with cracks over time. Despite the fact that the composition lends itself well to application, finishing work requires the specialist to have relevant experience. Clay is a finicky material. Therefore, it must be used in conjunction with special additives to achieve a good aesthetic result.
Is it worth buying a ready-made mixture?
Undoubtedly, a factory-made mortar purchased on the construction market will be more reliable when plastering the stove. They are made from special components for interior decoration, which give the mixture many useful properties: it will be able to withstand higher temperature changes (up to +200...+250⁰C).
Plastering a stove with such a solution is practically no different from the process of applying a clay solution prepared by yourself. In addition, all factory mixtures have special instructions, which indicate the subtleties of working with the composition you have chosen.
Ready mix
The disadvantage of this approach is the price: the cost of a solution prepared by yourself will be slightly lower than the cost of a product purchased on the market.
Specifications
Clay-based plaster has very good thermal insulation characteristics. In terms of this property, the mixture is somewhat worse than only clay-sawdust coating. The thermal conductivity of the first is 29 W/(m K). If we compare this characteristic with cement-sand mortar, for clay this indicator is 1.5 times lower.
A fairly important property is also vapor permeability. Since moisture must leave the premises, this characteristic is valued in finishing materials. In this case, it varies from 0.11 to 0.15 mg/(m h Pa). This value in this case is even greater than that of a log, so the composition is also applicable for wooden buildings.
When choosing such a composition, it is also important to take into account the density. This characteristic denotes the ratio of mass to volume. In this case, it is equal to 1700 kg/m3. This indicator is characteristic of brick. To calculate the required amount of material, you need to know its consumption. The material can be laid on walls 1 cm thick. Then about 15 kg will be needed for each square meter.
Preparing clay walls for putty
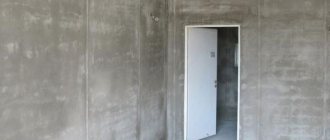
It is necessary to remove whitewash, lime and paint if they are on the surface of the clay. For wide cracks, you will need to fill them with gypsum plaster or clay mortar. If there is dampness on the walls or fungal formations, first you need to exclude the possibility of moisture getting into this area, and after thorough drying, treat it thoroughly with antiseptics. When, during a visual inspection, you find pieces that hang and easily come off, they need to be removed and clay or starting putty applied to this place.
Prime the surfaces to be finished with a deep penetration compound. It is known that clay itself has good moisture absorption, so you cannot skimp on the primer. To be absolutely sure, you can apply a couple of coats.
Types of clay plasters
If you want to decorate the walls with clay, it is important to understand what compositions exist based on this material. They are classified by ingredients and are:
- sandy;
- combined;
- with sawdust.
The first ones are recommended for interior walls, then an additional layer of insulation will not be needed. But the mixture with sawdust can be used both indoors and outdoors. The mentioned fillers play the role of reinforcing elements and add thermal insulation qualities.
If clay plaster is prepared with the addition of fibers and sand, you will get a combined mixture that tolerates external influences well, so the material can be used under difficult conditions, for example, frost and high humidity. The layer acquires the qualities of crack resistance and strength, and it can be used under the influence of the sun and moisture.
Attention! If you do not want the mixture to crumble, you should add cement or gypsum to the ingredients. This composition also acquires the qualities of viscosity and strength.
Construction of houses
0 votes
+
Vote for!
—
Vote against!
The modern building materials market offers a wide selection of finishing products that allow you to cladding the facade of a house or interior walls in an original and high-quality manner. In this article we will look at the features of plastering walls with clay with detailed instructions for preparing the solution and applying it to the surface.
Table of contents:
- Advantages and disadvantages of clay plaster
- Clay plaster: composition and types of mortar
- Technology for preparing clay plaster
- Step-by-step instructions for plastering with clay
- Recommendations from experts on applying a clay plaster layer
Advantages and disadvantages of clay plaster
Clay plaster is considered an environmentally friendly and natural material that has been used in construction since ancient times. The practical use of plaster will provide a beautiful design for the room. Walls plastered with clay will breathe without releasing harmful substances into the air. Moreover, this material is not harmful, unlike other putty solutions made on the basis of polymers and other synthetic substances.
Previously, plastering walls in this way was the only option for finishing work. Despite the fact that modern manufacturers offer a wide selection of different solutions, many buyers still prefer to use natural materials. Plastering a house with clay has many advantages, which will be described below:
- Eco-friendly and natural product.
- Clay mortar is capable of absorbing moisture, which will prevent walls from collapsing.
- Low cost of materials compared to other types of products.
- After using the solution, there is practically no waste left, and the remaining clay can be reused.
- Ease of preparation of the mixture.
- Clay for plastering walls will protect the surface from mechanical and other influences.
- The material is elastic in its structure.
- Clay can be used for finishing work indoors and for the facade.
- Technologies for applying clay will allow you to create an original decorative pattern on the walls, and adding paint will create a certain shade.
Clay plastering has its drawbacks, which are determined by the following parameters:
1. Natural clay, which does not have various additives, is a unique material that requires experience to work with. When preparing a solution, the main thing is to correctly calculate all the components, because there is no specific recipe for making the mixture.
2. Plastering the facade of a house is not an easy task. It is important to consider that clay absorbs all moisture well, which is why small cracks appear from time to time around the perimeter of the building. Thus, clay walls will need to be renewed every year.
3. Recently, there are not many craftsmen who would professionally plaster walls with clay, and therefore paying workers can be expensive.
Most hardware stores offer a wide range of products, and on the shelves you can see decorative clay, as well as mixtures of different shades and variations. The physical and other characteristics of the clay are usually indicated on the packaging, and manufacturers also provide short instructions for use. In fact, it is not necessary to purchase clay in its natural form, because you can buy a prepared mixture, which will make the work process easier for a beginner.
It is important to know! If you decide to choose natural clay for your summer cottage or other places, you need to remember that using the material without special additives can cause the plaster to crack when exposed to moisture or active sunlight.
Clay plaster: composition and types of mortar
To preserve the properties and the original layer of clay, many advise applying a layer of plaster over the clay base of the wall. This will strengthen the finish or facade of the building, as well as protect the material from excess moisture and the like. But, most specialists use only clay mortar, the preparation technology of which has the following sequence:
- sand;
- clay;
- water;
- sawdust from wood or other type of material.
It is worth knowing that sawdust of various kinds, as well as different fibers, are added to the clay so that the solution is held together and cohesive. This will help prevent cracking of the wall surface under the influence of the sun or other natural factors.
Clay mortar for plaster can be divided into several types, depending on the materials added to the mixture. So, there are these types of plaster mixture:
- solution with added sand;
- mixture with sawdust from different tree species;
- a combination with the addition of the two previous components.
In certain situations, when it is important to create a high-quality mixture for finishing the facade of a building, you need to add cement or putty. These materials will help hold the solution together. Before starting finishing work, it is important to calculate the climatic zone of the house. This is explained by the fact that clay is a heat-insulating layer. Before starting work on plastering with clay and sawdust, it is necessary to study the characteristics and features of the surface being treated.
Technology for preparing clay plaster
When preparing the solution, you need to know that the addition of synthetic fibers is recommended for rough finishing of walls or for forming an insulating layer. You can add cement or sand to the plaster, which will reduce the elasticity of the mixture and also help retain heat in the thickness of the walls.
It is recommended to apply a clay solution for plastering walls when the insulation layer has already been installed in the room. The main positive property of clay is that it is excellent for adhesion to other materials, for example, wood, stone, cement or concrete. To prepare a clay solution you will need the following equipment:
- a vessel for mixing the mixture;
- bayonet shovel;
- screwdriver;
- a set of spatulas for applying and distributing clay over the surface;
- a large sieve for sifting various components that are added to the mixture;
- drill with additional attachment for mixer;
- To attach the metal mesh you will need a hammer drill.
Also, to prepare the solution you will need different materials, which are:
- metal mesh that will be used to reinforce the wall surface;
- clay;
- additional fibers or sawdust, which depends on the type of work;
- dowels that will attach the mesh to the wall surface.
After preparing the necessary tools, devices, and materials, you can begin preparing the mixture. Many people are interested in the question: how to dilute clay for plaster? As a rule, the technology of work depends on the type of clay, which may differ in different parameters. However, there is no specific procedure for stirring the clay and preparing the solution. However, when performing work, you must adhere to the sequence, which determines the quality of the mixture produced:
1. First you need to prepare all the components used in the work.
2. After this, the clay is soaked in water and left for a day.
3. After the time has passed, the wet mixture must be mixed again and excess water removed from the container.
4. It is important to sift various fibers, sawdust, and sand through a sieve.
5. After cleaning the additional components, they are added to the clay along with water, and all components are thoroughly mixed.
6. The prepared mixture should have a thick and sticky consistency, and the proportion of clay and sand for plaster should be 1:2 or 1:5.
After completing this work, the mixture becomes ready for use. If the composition of the solution is too sticky, then to remove this property you need to add a little sand. The prepared mixture can be tested for plasticity using several methods:
- Visually, the clay mixture should resemble the appearance of thick sour cream.
- You can also make a small ball. It must be pressed against a solid base, creating a plane 1 cm thick. If all components are mixed correctly, then the pressed edges of the ball should not crack.
Another option for checking the plasticity of the solution is the following procedure. To do this, you need to create a ball, after which it is dropped to the floor from a height of one and a half meters. The net effect should be that the ball should not crack.
On a note! If the ball cracks in one of the ductility testing methods, this may indicate an overabundance of sand. If the ball has spread, this is indicated by the presence of a large amount of water in the solution. All shortcomings can be easily corrected by adding the necessary components to the mixture and mixing them.
Step-by-step instructions for plastering with clay
The technology for working with clay is reminiscent of the method of applying cement mortar. To prepare the solution, the main components of the plaster are: sand, clay, cement, which can be added to hold the mixture together. When carrying out work, you should adhere to the following instructions:
1. First, attach the mesh and metal to the working area using dowels. This is important for reliable application of the solution.
2. Using a spatula, the solution is applied to the wall surface. The thickness of the clay layer should be no more than 5 cm. This layer is rough and does not need leveling.
3. After applying the first layer, you need to wait until it is completely dry, after which you can begin further finishing.
4. When the rough surface has dried, you need to clean it and sand it using sandpaper.
5. The last and final stage of applying plaster is the finishing coating of the wall surface.
Plastering walls with clay is an excellent solution for insulating and finishing a country house. This option of applying plaster is perfect for a rustic style or the design of houses made of logs or wood, which will ensure the environmental friendliness of the building. As decoration, you can use volumetric embossing or clay modeling technology. To protect the wall surface from external influences, you can paint the clay with paints and varnishes of different shades.
Recommendations from experts on applying a clay plaster layer
Experts in the field of plastering houses advise adhering to some recommendations for carrying out work. For example, it is not recommended to start finishing work immediately after building a house. Otherwise, the house will still succumb to sedimentation, causing the plaster on the walls to crack. The approximate settlement period for a house is 1.5-2 years for wooden or brick structures. A building constructed from foam concrete or aerated concrete has a lower load, which determines the settlement period of 4-6 months.
After the erected house has stood, you can begin plastering with clay, video of the work, which can be seen at the end of the article. First, it is important to do the interior decoration of the room, and lastly, you need to start external work. This point is explained by thermal and physical parameters and the peculiarities of finishing. This will prevent cracking of the plaster layer from exposure to steam.
Before plastering, you need to prepare the walls. First of all, they must be even. After all, with an uneven surface, the layer of clay in different places will be different, which is not very good. In this case, the layer of plaster will be thicker, which is not very favorable, because the standard layer thickness should be up to 2 cm. With a large thickness of clay plaster, it will begin to crack and fall off over time. Also, a layer of 4 or 5 mm plaster is also not recommended, otherwise the mixture will not stick to the wall.
When applying the plaster layer, you need to remember about the adhesion of the mortar to the wall. To do this, the surface is pre-moistened with water, after which plaster can be applied. This will create a reliable connection between the finish and the wall. At the same time, clay can be applied to the surface not immediately, but in thin layers. This will allow the building material to bond better, which will extend the life of the clay plaster layer.
The technology of plastering walls with clay is not labor-intensive, however, it requires some care when preparing the solution and applying it to the wall surface. All work can be done with your own hands, the main thing is to follow the recommendations of specialists and step-by-step instructions for the expected result of the work.
Where is clay plaster used?
There is no point in plastering walls with pure clay - it is used in all kinds of masonry mixtures, which are easy to use and have many positive features. To prevent the formed layer from crumbling, special substances are added to the plaster composition. This makes the cladding durable. Among the most common areas of use are external and internal walls. The following are added to the clay:
- cement;
- gypsum;
- lime.
This increases strength and provides moisture resistance. In addition, such a composition can be whitened after drying. A similar mixture can also be used for basement floors. In such basements you can prepare vegetables, because the ideal level of humidity and comfortable temperature will be maintained inside. In this case, clay is often used unchanged, because the quality of finishing is not very important here.
You can also decorate stoves with this plaster. The layer is durable, and to improve the characteristics, cement is added to the clay, this increases crack resistance. In general, it is best to finish homemade heating devices with clay compounds, since they perform well when exposed to high temperatures. This also applies to fireplaces.
If you want to achieve quick drying, you should add alabaster to the composition. The surface will be smooth, so the plaster can also be used for residential premises. If you have a wooden house, it is best to line its walls with the composition described, since it simply cannot be found better for these purposes.
If you want to get a smoother layer, you should add cement, which also increases the strength of the finish. But it will need to be protected from moisture by additionally covering it with another layer of another cladding with the appropriate characteristics.
Attention! Clay plaster, although it has a wide range of uses, is not recommended for use on balconies and loggias, since the coating will not have the quality of durability.
Is it worth plastering the outside of a wooden house? Plastering wooden walls: types and production
Plastering the outside of a wooden house will improve the appearance and protect the wood from adverse weather conditions, extend the life of the structure and improve the microclimate of the home.
You can plaster a wooden house from the outside or inside with the following compounds:
- Cement.
- Izvestkov.
- Gypsum.
- Clay.
The solutions got their names from the type of binder that forms the basis of the composition. If cement, lime and clay mortars are suitable for both external and internal work, then gypsum-based mortars are used for internal work. In addition, combined solutions are often used: clay - sand, gypsum - lime and other mixtures.
Clay is considered the best material for plastering the walls of a wooden house. This is an environmentally friendly material, although difficult to work with. For the solution, take the following components in equal proportions:
- Clay.
- Water.
- Sand.
- Sawdust.
- Manure, preferably horse manure.
The sand used is quartz, with a fraction of 1.2 mm. For finishing, a clay-sand solution is prepared.
You can plaster the walls from the inside with a gypsum-lime mixture in a ratio of 1:4.
A simple and effective old-fashioned way to plaster a log house with “warm” mortar over a factory-made mesh or woven wire using nail markers directly on the wall:
- Prepare a solution of composition 1/1/1 from sawdust and clay straw, use a concrete mixer to speed up the mixing, pour water into the eye.
- The solution is applied in a layer up to 50 mm thick; the layer above the reinforcing mesh cannot be made more than 30 mm - a larger thickness will lead to cracking.
- After the layer has dried, the facades are rubbed down with a cement solution.
In addition to self-prepared mixtures, you can plaster a house with special industrial compounds that are prepared from dry construction mixtures.
How to choose clay plaster
In order to know which composition to choose for the job, you must know the features of its operation, the purpose of the mixture, as well as what properties the layer should have. For example, if plaster is used to form the first leveling layer, you will need material with added sand, the fraction of which is 2 mm. If a covering is needed, then the sand should have a fraction of 1 mm. If you have clay concrete walls or bases covered with shingles, the mixture should not contain sand at all - it should contain straw.
The coating may have reinforcing properties; for this purpose, the solution is prepared with the addition of sawdust. This also reduces thermal conductivity, so the walls are warmer. The top of this lining can be covered with a clay-sand mixture to level everything well. If the walls need to be warmer, you should choose plaster with the addition of perlite. But it is more difficult to apply, since the components easily fly apart.
Useful tips or how to avoid defects and cracking
In order for the finish to be reliable and last a long time, maintaining aesthetics, before clay plaster the surfaces must be thoroughly cleaned of weak layers of the old finish, dust and greasy stains must be removed. Apply primer.
How to avoid cracks when plastering with clay mortar
Before work, wet the surfaces well. The basic rule is to choose good quality clay and prepare the solution correctly. Strengthen the surfaces with reinforcing mesh or shingles (thin slats stuffed diagonally crosswise), for thin layers - jute or linen burlap. It is better to apply clay plaster in 2 layers: the first thick - clay-sand-straw, the second - finishing, clay-cement-sand-lime, to achieve a smooth surface.
The shingles perform two functions - lathing for insulation and reinforcing mesh for finishing
Plastering a wooden house inside with clay - the secrets of the masters
Plastering wooden walls inside a house with clay begins with carefully sealing the joints with tow; this will create an additional thermal insulation layer and help reduce the consumption of the mixture. Wooden walls should be treated with an antiseptic, then waterproofed - roofing felt is placed on the walls, the joints overlap 100 mm. After which the lathing is made and the wooden house is plastered with clay.
Important: It is not recommended to use metal reinforcing mesh for wooden houses. Wood and clay are microphobic materials, and humidity will lead to corrosion of the metal and damage to the finish.
This is an environmentally friendly, practical and inexpensive method of finishing, but despite the obvious advantages and disadvantages of clay plaster on a log house, they also exist: wood works under the influence of delta temperature and humidity, and over time, small cracks are inevitable on the surface. But they can also be turned into advantages, turning them into trendy craquelure.
Texture of finishing with a mixture with the addition of sawdust
Design
Clay is an almost universal material; thanks to additives and coloring, you can achieve different shades of the material: white, terracotta, gray, beige, etc. In addition, the solution can be applied using different techniques according to the principle of decorative plaster. The main thing here is to show your imagination, and as a result you will get not just a durable, but also a beautiful finish.
Properties of clay for plaster
In order for the solution to be of high quality, you should use clay with certain properties. This is especially true for the reason that the solution can only be prepared independently. And if you take sand of the wrong fraction or in the wrong volume, you can get cracked walls, the material of which comes away from the surface in pieces.
Clay mortar for plastering walls should be prepared with a certain ratio of the main ingredient and sand. The preparation features depend on the fat content of the clay. If this figure is quite high, more sand will be needed. The proportions might look like this:
- 1 to 5;
- 1 to 4;
- 1 to 3;
- 1 to 2.
The average indicator is relevant for clay with normal fat content. If the clay is thin, you can avoid sand altogether. Ingredients should be measured by volume, not by weight. To do this, you should use containers, not scales. In order to determine the fat content of the clay, four balls should be made with different amounts of sand. Each of them is thrown to a height of about a meter, and when they fall, they are checked for condition. The correct clay should not change too much. When this happens, the raw material is too fatty. When the material dries, it will lose the integrity of the coating.
How to prepare clay.
The lumps are crushed, sifted through a coarse sieve, and filled with water for 1-2 days. To speed up the soaking process, the trough can be placed in the sun and covered with film so that the mixture warms up but does not dehydrate. The viscosity of hot water is lower; it penetrates better into rock particles.
Obtaining fine clay.
The quality of clay (including moisture holding capacity) depends on dispersion. Therefore, old masters advise preparing clay for future use: it is poured into shafts (not more than a meter in height) and moistened. In winter, as the mass freezes, it swells and becomes loose. This material is more flexible, more pleasant and easier to work with, and produces fewer cracks. This is especially important when creating decorative, glossy clay plaster.
For plastering stoves, it is better to use dispersed clays, ground by hand or by defrosting. The thickness of the finishing of the heating shield should be minimal so that the brick can release heat without hindrance.
Required tools and materials
Initially, the master must prepare a certain set of tools and materials. Among the first are:
- capacity;
- sieve;
- electric drill;
- perforator;
- shovel;
- spatulas;
- grater;
- rule.
Containers will be needed not only for preparing the mixture, but also for measuring materials in a certain volume. The spatulas should have different widths, and a grater will be needed for grouting.
As for materials, you will need:
- net;
- clay;
- sand;
- sawdust;
- cement;
- nails;
- dowels
In order to reinforce the walls, you can also use shingles. Dowels are sometimes replaced with nails, which will strengthen the layer of reinforcement. You can also use special fibers to prepare the mixture.
Features of using clay
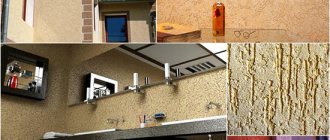
Today, many hardware stores already provide this material for sale (photo), while many manufacturers are beginning mass production of it with various physical characteristics and color options. The packages with the finished material contain instructions from the manufacturer, which indicate the rules for preparing the mixture and the scope of application.
In the store you can purchase the ready-made clay you need.
Important! When using clay from your own site, it is worth paying attention that without additional additives, the plastered surface may crack when exposed to direct sunlight or excessive exposure to moisture.
To preserve the integrity of the clay layer, many people use clay plastering on walls. This allows you to decorate the facade of the building and at the same time protect the clay layer, which in this case is used as insulation for the load-bearing walls of the building.
Instructions for applying clay plaster
Before you begin applying the composition, the walls should be prepared. They are cleaned of old finishes, this is especially true when it comes to cement plaster. The area to be trimmed is made rough using a sander. If you have to work with wooden walls, you should install shingles.
Which composition to choose?
Solutions for plastering walls are divided according to the main binder component; the most popular mixtures are prepared based on:
- cement;
- lime;
- clay;
- gypsum;
- complex mixtures also exist.
I return to the question: “Which composition to choose?” I answer that for concrete and brick walls, mixtures based on cement and lime with the addition of other materials from the list above, but in a smaller proportion, are more suitable.
For example, for the interior decoration of brick and concrete walls, lime, lime-clay, lime-gypsum, cement-lime and lime-clay-gypsum plaster compositions are used. For external finishing of the same surfaces, lime, cement-lime and cement-clay mixtures are used.
If you are faced with the task of finishing a wooden wall with your own hands, then you need to add gypsum to any of the above compositions. Current options for plastering wooden walls: lime-gypsum; clay-gypsum; clay-cement; lime-clay-gypsum.
Preparation of the solution
Typically, clay plaster is made by hand. The clay should be soaked in water for 24 hours, after which it is mixed and excess liquid is removed. Sawdust and fibers are passed through a sieve. The same needs to be done with sand. After this work is completed, all ingredients are combined with clay and water, and then mixed well. The correct mixture should have a sticky, thick consistency. If the composition turns out to be too sticky, you should add a little sand.
The mixture is tested for plasticity. First of all, this needs to be done visually. The plaster should resemble thick sour cream. The second method is to make a ball that is pressed against the surface. If the ingredients were mixed correctly, then the edges of the crushed ball, whose thickness has become 1 cm, should not crack.
Applying the solution to a previously prepared surface
Stove plaster can be classified as one of the types of plaster for interior decoration.
Let us remind you once again that you can only work with a previously heated stove . It is very important! But let's not forget about some other subtleties of the stove business. Thus, it is recommended to install a large-mesh metal mesh (the cells should not be larger than 2x2 cm) on the stove before applying the solution.
This will greatly strengthen the plaster layer, giving it additional strength.
Application of the solution
Do not forget that the plaster is applied in several layers (the thickness of each of them should not exceed 5 mm, and the total thickness should not exceed 1 cm). After applying each such layer, you should give it a little time to set on the surface. The solution must be applied evenly, from top to bottom.
Don't forget to rub the plaster with a special trowel to make it smooth and neat. It is recommended to do this in a circular motion, without strong pressure on the surface.
Next, you should let the plaster dry and set. Usually this takes 12 hours. If after this period you find cracks on the stove, you should carefully moisten it with water and rub it with the solution that we used earlier.
Plastering adobe walls inside. Plastering on adobe, how to plaster adobe, technology
Plastering on adobe, how to plaster adobe, how to prepare an adobe wall for plastering.
Adobe, or as they are also called, adobe houses, are quite common in the southern latitudes of our country.
Since clay is a fairly cheap building material that lies right under your feet.
In addition, clay buildings are practical and convenient. Adobe buildings are the most environmentally friendly buildings in the world. Houses made of adobe retain heat well in the cold season. And on hot days, they delight the owners with coolness and freshness.
As a result of this, clay, as a basis for the construction of residential premises, was and remains a fairly common building material.
It is clear that this technology will not solve the housing problem on a planetary scale. However, it was and remains the basic basis of all modern technologies.
Because clay was the first building material that allowed humanity to build its own, comfortable housing.
The adobe houses basically consist of a single-layer, fairly wide wall. To improve technology and increase performance properties, the following can be added to adobe:
- Brushwood;
- Straw;
- Reed;
- Manure and so on.
Any additive reduces the negative property of adobe - loss of geometry when the wall is waterlogged. Today we will look at issues related to the finishing of adobe buildings. Let's find out which plaster on adobe will help maintain the microclimate in the room and extend the life of the building.