Cement plaster is a commonly used type of wall finishing, which can be decorative or rough. It can be used to plaster surfaces made of any materials. The work is not difficult, but there are some secrets and subtleties. Non-professionals should know them so as not to make mistakes, save nerves, time and money. Let's talk about how to make cement mortar for plastering walls, proportions and how to properly carry out finishing work.
Marking of plaster mixture
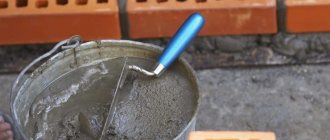
Let's start with the fact that previously this composition was prepared directly on a construction site or inside a building that was undergoing renovation. Because the composition of the material is simple. It includes cement and sand, which were mixed and diluted with water. The main task is to strictly adhere to the recipe, that is, the exact ratio of ingredients in order to provide the required brand of solution.
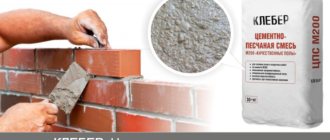
Today, manufacturers of dry mixes offer ready-made solutions into which the components are added strictly according to the recipe. Of course, except for water. The finished leveling material is obtained by mixing the dry mixture with a certain amount of water, which is indicated on the packaging.
As for labeling, manufacturers offer a complete set. Namely:
- M50 - used for repair work, for example, sealing cracks and seams;
- M100 is a cement-sand plaster for interior work;
- M150 – for external use;
- M200 and M300 - for special structures where increased strength is required.
Let’s make a reservation that M150 can be used both as a repair mixture and for interior spaces. But it’s better not to use M50 for leveling.
Variety of cement plasters Source rem177.ru
As for making it on site, as plasterers did in the past, there are no restrictions. You just need to know the recipe and strictly follow the proportions of the mixed materials.
- To obtain the M50 , you need to mix cement and sand in a ratio of 1:6.
- M100 – ratio 1:5.
- M150 – ratio 1:3.
It should be taken into account that cement grade M300 is used for this. If you add a higher grade of cement, for example M400, to the mixture, the ratio of ingredients will change. So, to obtain a cement-sand mortar of grade M150, it is necessary to mix the components in a ratio of 1:4.
Manufacturers of ready-mixes add plasticizers and modifiers to the composition, which improve the technical and operational characteristics of the material. For example, they increase plasticity and viscosity. By adding particles of insulation, the thermal insulation properties are increased.
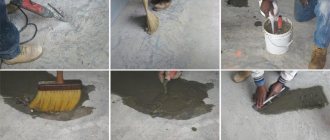
How to prepare cement-sand mortar Source fasad-exp.ru
For what purposes is DSP with additives used?
DSP varies in purpose depending on the additives:
- rough leveling work, including installation of reinforcing mesh
- for filling depressions, cracks, chips, potholes
- special mixture with additives against the development of fungus and mold for wet rooms
Purpose of the plaster mixture
The main purpose of cement and sand plaster is to level walls. At the same time, this solution can be used to level walls made of almost any building materials. But this type of plaster has many other advantages:
- protecting the walls of the house from moisture;
- it is a “breathable” material through which air passes, that is, optimal conditions are created inside the house to obtain a good microclimate;
- protection from noise and external temperatures;
- creating a layer with high adhesive properties on which the finishing can be laid;
- high maintainability of the leveling layer, which can be corrected with the same composition.
Necessary equipment
Before plastering the walls, it is recommended to prepare everything you need to complete the work. The kit looks like this:
- trowel or ladles;
- rule;
- grater and grater;
- construction level;
- lighthouses;
- a shovel and a container of a suitable size for making a batch (for large volumes of work, it is allowed to use a concrete mixer);
- buckets;
- spray bottle for moistening walls;
- fishing line or cord;
- hammer, chisel, brushes.
Plastering rules
Plastering walls with cement-sand mortar is not an easy process. Experience is required to obtain a high quality end result. Therefore, novice builders spend a long time as apprentices to become plasterers.
Let's start with the fact that plastering brick walls, or those built from other materials, begins with determining the evenness of the treated surface. That is, it is necessary to determine the curvature of the walls, and, accordingly, the thickness of the plaster layer. It is clear that the thicker the latter, the more material will have to be spent on it. Usually the plane difference is determined by a plumb line; today a laser level is used for this.
Determining the curvature of a wall with a laser level Source klademkirpich.ru
See also: Catalog of companies that specialize in finishing work and insulation of houses.
Now pay attention to the thickness of the layer. If this parameter exceeds 5 cm, then a plaster mesh will need to be installed on the wall. And the plastering process itself will have to be carried out in several layers. At the same time, in order to apply the next layer, the previous one must dry well. And this can take a lot of time. That is why, increasingly, large differences in wall planes are leveled with sheet or panel building materials. For example, drywall.
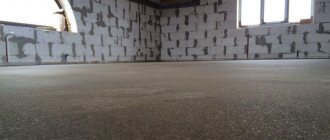
Plaster consists of several layers Source odzakladov.sk
If the difference in plane is small, then plastering is still carried out in three layers:
- Spray . This is a semi-liquid cement-sand mortar, the purpose of which is to fill the seams, gaps and cracks between the wall material. Before applying it, the brick wall must be wetted. Because a dry wall will begin to draw water out of the solution, which will reduce the characteristics of the latter. Typically the spray recipe is: 1:2.5 – 1:4. Apply it in a layer of no more than 1 cm.
- The second layer is called soil . This is the main leveling layer that is applied along the beacons. It is the thickest and heaviest, so the solution for it must be very plastic. According to the recipe, it is made based on the ratio of cement and sand - 1: 2-3.
- Covering . In fact, this is, so to speak, the finishing plaster layer, also known as grout. He is the thinnest. And its task is to cover all soil defects. It is made in the form of a liquid mixture in a ratio of cement and sand - 1:2. The proportions were chosen as such because the last layer should be the strongest.
Applying a coating to the ground Source yandex.net
How to apply the solution correctly?
First you need to wet the wall. This will give the solution more tenacity to the surface. Then apply the solution between the nearest beacons. Work is carried out from bottom to top, then right and left. The movements are sliding, allowing you to stretch the mixture over the surface. The solution will gradually fill all the necessary places and lie tightly.
Then, when the wall dries, you need to remove the roughness.
All defective places are erased. To do this, use a solution that is not as thick as it was originally. A thinner consistency will eliminate defects. To work, you should take a spatula; they are easier and more convenient to work with. You will also need a grater, which you need to go over the entire surface with circular movements.
Author of the article
Facade plaster
To level the internal walls of houses, putties are increasingly being used, leaving space for plasters on the outside. Therefore, manufacturers place the main emphasis in the production of external leveling mixtures on cement varieties. One of the main ones is cement-sand. But there are others. Therefore, a few words about plasters for facades - which is better, why, and how all mixtures differ from each other.
In principle, there are few varieties. The second most popular mixture is lime-cement. From the name itself it becomes clear that it contains lime. This material makes the solution plastic and bactericidal. In all other respects, it is not inferior to the TsPS. But it should be noted that in this mixture lime does not completely replace sand. And this variety should not be confused with the lime-sand variety, which does not contain cement.
There are several subtypes in the classification of cement plasters. These are decorative and special. The first ones are not leveling. With their help, facades become decorative. They are applied in a thin layer. There is quite a wide range here, for example, bark beetle plaster, fur coat, mineral plaster, etc.
Bark beetle plaster on the facade of a house Source prohor-stroy.ru
Preparation of the “correct” solution
Experienced builders advise using the following proportions:
- sand - 4 shares;
- cement - 1 share.
This condition is acceptable if M400 cement is used for work. Or:
- sand - 5 shares;
- cement - 1 share.
This option is applicable for M500.
The components of the CPR are mixed with a shovel in a container, adding water. This is where the plasticizer goes. The solution should have a thick consistency, but not too much. This makes it easy to use and does not spread, but fits well on the surface.
Experienced repairmen recommend not mixing a lot of mortar at once. This creates a danger that the solution will set faster than the work can be done. It is better to dilute the amount needed to work between a pair of beacons.
Briefly about the main thing
Cement-sand mortar belongs to the category of leveling plasters, consisting of cement and sand, combined in certain proportions. The brand of the mixture depends precisely on the ratio of the two components. The more sand, the lower the grade, the lower the characteristics.
The classic leveling of walls with a cement-sand mixture is a three-layer cake consisting of spray, soil and cover. The second is the base of the plaster on the wall.
If the plaster layer is more than 5 cm thick, then a reinforcing frame in the form of a plaster mesh made of galvanized wire is laid on the wall.
The category of cement plasters also includes lime-cement, decorative and special.
Ratings 0
We display beacons
How to properly plaster a wall with cement mortar? Masters recommend setting up beacons. This is done as follows:
- the wall is checked for vertical evenness;
- guides of appropriate length are prepared;
- at a distance of twenty to thirty centimeters from the corner area, a line is drawn from the ceiling to the floor, and mortar slats are thrown along it in increments of fifty centimeters;
- According to the applied markings, the rail is installed.
The remaining beacons are placed in a similar way, the distance between which should be slightly less than the length of the rule. As a rule, the pitch varies from 150 to 160 cm.
Preparing the walls
In order for the plaster to hold tenaciously, meet technical qualities, not be covered with stains of emerging rust or efflorescence, and serve for a long time, it is necessary to prepare concrete surfaces before plastering. That is, the surface at the time of applying the mixture must be clean, dry, and rough. There should also be no cracks, large shells, or excess metal inclusions.
Preparation procedure:
- Remove unusable old coating (whitewash, wallpaper, peeling plaster layers, paint);
- Protrusions and swells of concrete are cut down. The protrusions of cellular concrete are planed. To repair chips, cracks, and sinkholes, DSP with proportions of 1:3 is used. In case of large defects, “patches” are made with reinforcement.
- The smooth concrete surface is “speckled” with notches to increase adhesion.
- Remove excess metal elements, otherwise, once they rust, they will cause rusty streaks to appear on the finishing surface. The remaining metal objects are insulated using oil paint.
- The surface is cleaned of stains of various origins (foci of mold, grease, efflorescence, rust).
- Dust is swept or washed off the walls.
- The clean surface is primed and then dried.
- If the thickness of the plaster layer is ≥7 mm, beacons are installed.
- If the thickness of the leveling coating is large, a reinforcing mesh is attached to the concrete.
If hidden internal wiring is provided, then grooves are made when preparing the walls.
Do I need to plaster concrete walls?
Concrete is a high-strength, durable material that is most often found in construction. The surfaces of concrete structures are unsuitable for wallpapering or painting, as they cannot boast of evenness. The best option for finishing concrete, leveling and smoothing out unevenness, is plaster.
This is a material with sufficient strength, forming a monolithic, even coating.
Advantages of plaster finishing:
- versatility;
- workability;
- possibility of additional insulation, sound insulation;
- it is possible to create the creation of various textures or structures;
- wide selection of materials (both in price and in other parameters);
- maintainability;
- environmental friendliness, etc.
By plastering concrete walls, they are protected from moisture, mechanical stress, mold, efflorescence, UV rays, and other destructive factors.
Finish plastering can be done with decorative mixtures, thus imparting originality to the facade or interior, which corresponds to the aesthetic taste of the owner. Since a long life for plastered structures is ensured by adherence to technology and the right choice of plastering materials, it’s time to talk about them.
Application technology
Choosing the right mixture
Preparing the walls
Plaster with cement mortar
Plastering with plaster
Decorative plaster
Brick is a reliable and durable building material in itself. However, if we talk about it in the context of the decor of an apartment or house, then it is not appropriate in all interiors and styles. Therefore, we suggest considering ways to plaster a brick wall with your own hands.
Tool
To apply plaster to a brick wall, prepare:
- Master OK;
- ladle;
- steel spatulas (wide, narrow);
- grater;
- rule;
- trowel (for decorative work);
- level, plumb line or construction laser;
- roulette;
- pencil;
- mixer;
- containers;
- rags;
- masking tape;
- devices or tools for removing old coating;
- individual protection means.
Finishing work
As soon as the walls covered with plaster mixture have completely dried, the final stage of repair begins - finishing. It is performed in several ways:
- using spraying, they form the original texture of the wall surface;
- the walls are painted with compositions of different color shades;
- The surface of the wall is made rough.
The required finishing option is determined taking into account the individual wishes of the developer.
Final grout
This step applies to both materials. Grouting is done on fresh plaster using a plastic or wooden trowel in a circular motion. At this stage, the surface becomes perfectly flat and ready for painting and wallpapering. If you plastered the walls for tiling, then you can completely skip this step.