Rotband plaster what is it?
Rotband is a universal dry plaster mixture based on gypsum binder with light filler (perlite or sand is most often used) and polymer additives that provide increased adhesion. Rotband has been produced worldwide since 1962, in Russia since 1997.
It is standardly produced in paper bags of 30 kg, and also comes in small packaging of 5 and 10 kg.
This is a hand applied mixture for interior use. A direct analogue for mechanized application is Knauf MP75 (Knauf MP75).
Gypsum plaster Rotband - technical characteristics, properties, Rotband, scope of application
Details Published: 08/25/2014 14:58 Author: Alexey Lukin (Prorab) The first gypsum-based plasters, which began to be produced in the form of a packaged mixture, appeared in the middle of the 20th century.
That is, relatively recently. Before this, builders used mainly cement or lime plasters, giving preference to the latter, since lime plaster, firstly, is cheaper, and secondly, has a unique property: being diluted and in a container, it does not set for several days. If the cement mortar needs to be worked out within one, maximum two hours, then the lime mortar can easily wait a week, remaining in working condition. Well, the fastest is the gypsum (alabaster) solution - it must be worked out within a few minutes. And if you also smoke after kneading, you’ll have to do it in a few seconds, because plaster doesn’t like boobies. Actually, that is why it was ignored for quite a long time by finishers around the world. It’s not very convenient to mix 20 kg of mortar, apply half of it to the wall, and knock the other half out of a bucket or other container with a hammer, because it (the second half of the mortar) has already petrified.
But everything changed when special retarders were invented - substances that allow the gypsum mortar to remain in working condition for at least 1.5 - 2 hours, that is, similar to cement.
And since the production of gypsum is much cheaper than cement, this fact could not go unnoticed by business sharks. This is how gypsum plasters came into the world of finishing.
And one of the first companies to establish mass production of gypsum plasters was one that had been working with gypsum for a long time, making gypsum board sheets from it, and its name, as you might guess, is Knauf. One of the most famous brands is called Rotband, which means “red ribbon” in German. It would seem, what does some kind of tape have to do with it? The answer is simple, it's just an element of marketing. It just so happens that the Knauf company produces more than one type of plasters, and each package has a stripe of a certain color, apparently so that even citizens who cannot read understand which plaster they need to buy. The main thing is that an illiterate citizen should not also be colorblind. So, in addition to the Rotband brand, the Knauf company also produces Goldband (gold ribbon), Grunband (green ribbon), and once upon a time there was also Blauband (blue ribbon). By the way, an analogue can be seen at any kiosk: people who smoke know that many cigarettes are also divided by the color of the pack, and buyers often say not “light LM”, but “blue LM”. Although, as one famous Kiev philologist says, now this can be seen not only in any kiosk, few people can do it, because the new law prohibits it.
How long does it take for Rotband to dry?
Drying of plaster depends on many factors, but on average the drying time of a layer of 15-20mm at a temperature of 20C and air humidity of about 60% is approximately 7 days.
For quick drying, it is necessary to ensure good ventilation and absence of drafts in the room. Do not point the heat gun at the plastered surface, as this may lead to defects.
To speed up drying, you can use dehumidifiers that condense moisture from the surrounding air.
Polymer-based mixtures
Polymer-based dry mixtures for interior work are represented by Finishnaya KR, Finishnaya Plus and PoliArt , which are compatible with all types of bases and decorative coatings. These finely dispersed compositions are plastic, easy to apply and combine layers. They create a high-quality smooth surface for thin-layer finishing.
Finishnaya KR and Finishnaya Plus putties with a filler fraction of no more than 0.2 mm can be applied in a layer 0.3–3 mm thick. The pot life of the solution is 24 and 6 hours, respectively, and the base is ready for further work within a day.
A special feature of the “Finish Plus” mixture is that it contains cement, is reinforced with fiber and is suitable for use in rooms with high humidity levels.
"PolyArt" is a putty that provides impeccable final preparation of walls and ceilings for finishing. It is intended for indoor use with normal humidity. It has exceptional whiteness, is applied in a layer of 0.2 to 5 mm and forms a very smooth, non-chalking surface with a silky texture (mixture fractionation 0.1 mm).
"PolyArt" can also be used to fill seams in gypsum plasterboard and gypsum plasterboard (in combination with reinforcing tape) and to create decorative textures. The mixed mixture remains in working condition for at least 100 hours, and dries in 24 hours.
The shelf life of “Starateli” brand putties is 12 months. The exception is the polymer mixtures “Finish KR” and “PoliArt”, the service life of which is estimated at one and a half and three years, respectively.
Another representative of the family of polymer putties is the ready-to-use “Superfinish” paste for work in dry rooms. The product contains filler with a fraction of only 0.06 mm, antiseptic additives and is fiber reinforced. In addition to high-quality ultra-thin leveling of surfaces with a layer of up to 2 mm, the paste is used for gluing fiberglass, as well as for sealing seams along reinforcing tape on gypsum plasterboard and gypsum fiber board bases.
Rotband color
Rotband in Russia is produced at several factories. On each bag, after the date and time of production, a digital code of the manufacturer is indicated. Depending on the presence of various natural impurities in the raw material (natural gypsum), the color of the plaster may vary.
Letter designation of the manufacturing plant:
- A - Knauf Gips Krasnogorsk LLC, Moscow - gray mixture;
- B - Knauf Gips Kolpino LLC, St. Petersburg - gray mixture;
- C - Knauf Gips Kuban LLC, Krasnodar - light (white) mixture;
- D - Knauf Gips Baskunchak LLC, Astrakhan - light (white) mixture;
- E - Knauf Gips Chelyabinsk LLC, Chelyabinsk - light (white) mixture;
- F - Knauf Gips Baikal LLC, Irkutsk - gray mixture;
- G - Knauf Gips Chelyabinsk LLC, Samara - gray mixture;
- H - Zvenigovsky Construction Gypsum Plant LLC, rep. Mari El - gray mixture;
- I - Knauf Gips Novomoskovsk LLC, Tula - gray mixture.
Preliminary work with the base.
Cleaning from previous coating.
The surfaces to be processed are pre-dried, the required temperature is + 5 degrees Celsius. This contributes to less plaster consumption and better application. It is also necessary to clean off the previous coating (whitewash, plaster, paint, tiles or wallpaper). Remove uneven surfaces and protrusions from the base. Be sure to treat metal elements with anti-corrosion liquid. Otherwise, corrosion may appear.
Primer.
- Substrates with increased moisture absorption must be coated with a primer. This is done to ensure uniform adhesion of the plaster to the base. Primer can be applied using brushes, rollers or sprayers. According to the instructions, it is recommended to use Knauf-Grundimittel primer.
- Surfaces that, according to their technical characteristics, do not absorb moisture should be coated with Knauf-Betokontakt primer. This is done to increase adhesion.
Displaying beacons and corners.
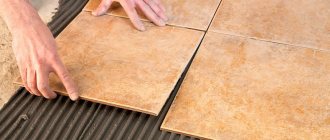
Apply Rotband plaster to the wall with gaps of 40 cm. Press the beacons into the moldings and align them in one plane. The leveling rule should be 20 cm longer than the pitch of the beacons. Corner profiles are aligned in the same plane, with the beacons. The moldings are applied to the side inside the profile. Rotband plaster, consumption per 1 m2 with a layer of 10 mm.
- Knauf Rotband plaster – 30 kg; consumption 8.5 kg per 1m2.
- KNAUF-Betokontakt – 30 kg; consumption 0.3 kg per 1m2.
- KNAUF-Grundirmittel – 30 kg; consumption 0.1 kg per 1m2.
You can make detailed expenses using the calculator on the manufacturer KNAUF website.
Subsequence.
Kneading
Pour 18 liters of water into a metal or plastic container and add 30 kg rotband plaster to it. First, put 6 spatulas of the mixture and stir everything until completely mixed, only then pour the entire bag into the water. Mix the entire mixture with a construction mixer until all lumps disappear. The mass should be homogeneous. If the composition is too liquid, add more dry plaster. After mixing everything, you need to wait 5-6 minutes, then stir again. The technical characteristics take a little time to mature.
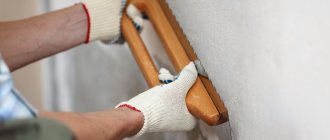
Application.
Apply the matured mixture to the surface to be treated for 20 minutes. On the ceiling you need to work like a “falcon”, making movements towards yourself. The surface is covered with a spatula. This does not affect consumption, since everything evens out in the future.
Note: If you bought plaster for machine coating, you should use special stations to simplify and automate the process.
After sketching, everything is leveled with a tool - usually making wave-like movements.
When it is necessary to increase the thickness of the coating, repeated layers are applied, having previously created roughness on the first layer. Which will serve to adhere the layers. The second coating can be done only after a day. This is the drying time for rotband plaster.
Leveling and grouting.
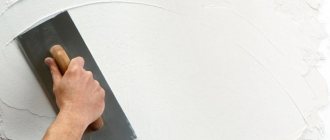
The setting period according to the technical specifications is 50 minutes, after which it is leveled with a large spatula or metal lath. Excess is removed by covering up all irregularities. In this way, lower consumption is achieved. The wall for painting or wallpaper is additionally rubbed with a tool - a grater. To do this, they are moistened generously with water and made in a circular motion, this makes the surface perfectly smooth.
Creating a structure.
If relief is needed, it can be easily achieved; to do this, simply on a soft surface (after leveling with the rule), you need to run a roller with a relief on the wheel over it. Structures can also be created using a trowel.
Recommendation: Rotband plaster dries faster if you create a ventilated room. To do this, simply open the windows and doors to allow air to pass through.
Do not forget that the dried structure is very difficult to remove, so wash the tool you are using in advance.
More from personal experience.
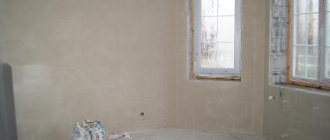
The brand appeared on our market quite a long time ago, winning the love and trust of many builders. Its characteristics can be read above in the text. Today it is a sales leader compared to its main competitors - “Starateli”, “Volma Plast plaster” and “Osnovit”. Despite the fact that it is considered German, it has been produced in Russia for a long time. Rotband plaster is packaged in 30 kg bags. As a rule, these are paper bags with increased strength that contain rotband plaster. Instructions for use are on the bag itself.
Special properties.
After reading rotband plaster and instructions for use, you will see that the recommended layer thickness is 5-50 mm, but this is not always correct. As numerous practice shows, layers of 1 mm adhere very well due to increased adhesion and proven strength.
You can calculate the consumption per 1m2 using the calculator on the Knauf website. It has three colors, as the manufacturer assures, they do not affect anything and appear as a result of the difference in gypsum from nature. On the market you can find Rotband in pink, white and gray colors.
Still, it is worth paying attention to them, since there is a difference in the technical characteristics of rotband plaster.
When a thick layer of white and gray Rotband is applied, small smudges appear in the form of horizontal waves; when using pink plaster, this does not happen. But, if you want to line the wall with wallpaper, according to the instructions it is better to use white and gray colors, just go over the grout a little after finishing.
The difference in color properties is due to the grain size; pink Rotband plaster has a fraction of 1.2 mm, while others have a fraction of 0.5 mm. This is not written in the instructions. At the same time, the consumption of the compounds is approximately the same.
Therefore, it is worth considering this when purchasing. Unfortunately, there is no color information on the packaging itself. You can determine it by manufacturer (there are several factories).
- White Rotband is produced at Knauf Gips Baskunchak CJSC, Knauf Gips Kuban LLC
- Rotband gray – Knauf Gips LLC
- Rotband pink – Knauf Gips Kolpino LLC, Knauf Gips Chelyabinsk LLC
Preparation of the solution and how long it takes to dry.
Remember that Rotband plaster dries according to technical specifications when diluted with water for no more than 20 minutes. Therefore, do not dilute a large amount of solution at once. Determine in advance a 20-minute workload so as not to waste your money in vain. Having decided on the volume, you need to choose a container for stirring, preferably without angularities.
Otherwise, the composition will not be completely mixed. The simplest and most convenient option is a simple bucket. You can knead manually or mechanically using additional mechanized tools.
Pour water into the container according to the proportions in the instructions for rotband plaster on the bag. Two parts water to three parts mixture. It’s better not to report than to say too much, at least you can always add. Use cold water, this will increase the drying time.
By mixing the mixture with a construction mixer, achieve the consistency of thick sour cream. It is necessary that it does not flow down from the trowel turned down. Did it turn out a little runny? No problem, add more dry plaster. Next, you should wait for the solution to fully ripen for 5 minutes and stir it again.
Important: It is not recommended to add water or dry plaster to the completed, mature solution. This can lead to deterioration in quality in the form of peeling.
A necessary tool.
The entire plastering process involves a lot of work. In addition to the application itself, there is also the preparation of the plane in which brute force often has to be used. Using hammers and chisels to remove humps and bulges from bricks or concrete base. Sanding may be required. Therefore, safety is first and foremost important. Get gloves, construction glasses, and a respirator.
Important: It is better to cut off all the bumps, no matter how difficult it is, otherwise the plaster consumption will be greater, because you will have to add a few millimeters over the entire area.
After stripping the base of paint or wallpaper, you need to check the evenness of the area being treated. To do this, according to the instructions, use a building level or a homemade plumb line in the form of a thread with a load at the bottom. You can secure it with a nail on top. Tie the thread so that it does not touch the application area. Afterwards, simply measure the distances in several places with a ruler.
Covering and leveling is done using hand tools - trowels, spatulas of different sizes and rules. Typically used to work on beacons. In addition to manual application, application can also be mechanized. After completely applying the solution and drying it, you will need grout, which you will use to complete the final leveling. Having prepared for further work on decorating with wallpaper or finishing plaster.
Alignment with beacons.
When you have prepared the tool and the previous coating has been removed, you should level the walls horizontally. To do this you will need ropes or strong thread. At the corners of the wall or edges, nails are hammered onto which a rope is tightly tied and pulled. We look at it and measure the evenness of the wall with a ruler.
We set beacons based on its indicators. This will allow you to get a perfectly flat wall in the future. If the walls are made of brick or concrete, and you have not plastered them, then according to the instructions it is better to use T-shaped beacon profiles.
They are fastened with Rotband “Knauf” gypsum plaster; its technical characteristics allow it to hold light weights. Just throw the solution in the places where the lighthouse will be. 3-4 points of contact are enough. Set it so that it does not touch the exposed thread.
Important: first you need to coat the wall with a special primer to increase the strength of the base and increase the adhesion of Rotband.
The leveling process itself occurs, of course, after applying the plaster. This is where the Rule tool is used (emphasis on the “i”). Having applied a layer of Rotband between the beacons, you need to slide over them from bottom to top, removing excess solution and distributing it to less saturated places. Having leveled the surface, remove the beacons and move them to the next area. The remaining gutter from the lighthouse can be easily leveled with a trowel.
Leveling with grout.
Having completed the process, it is necessary to proceed to the next important stage - grouting. It is better to do it right away, so that in the future there will be no additional difficulties when gluing wallpaper.
If you do not grout, you will have to additionally level the plaster using fine dispersion putty.
Rotband “Knauf” gypsum plaster is rubbed down 40-50 minutes after coating. When the solution becomes solid.
Take the grout moistened with water and spray the wall generously. Make circular movements with the grout along the plane without pressing too hard. After a short period of time, “milk” from Rotband is formed, which helps remove traces of unevenness from spatulas and trowels.
It will be much more difficult to make movements, since the viscosity of the structure is increased. But the expenditure of force in general will not be significant. After removing the grout from the wall, remove the “milk” from the tool and proceed to a new area.