Finishing work requires the use of various compositions. In some cases, combining them leads to excellent results. Volma-Sloy gypsum plaster has proven itself as a finishing or adhesive material. Plaster is in demand among builders and customers due to its good quality and affordable price. It is supplied in paper bags of various sizes. What is needed to prepare it and what are the areas of application? This will be discussed in the article.
"VOLMA-Canvas"
Light hand-applied gypsum plaster
GOST R 58279-2018
Quantity on pallet:
Description of "VOLMA-Canvas"
“VOLMA-Canvas” is a dry plaster mixture based on gypsum binder, lightweight aggregate with the use of mineral and chemical additives that provide high adhesion, water-holding capacity and optimal operating time.
For leveling walls and ceilings for wallpapering, painting, ceramic tiles. If the application technology is followed, it gives a glossy surface that does not require additional putty. “VOLMA-Canvas” is used indoors with normal humidity and temperatures from +5 to +30ºС.
Concrete, brick, cement-lime plasters, gypsum blocks and slabs, gas and foam concrete, gypsum plasterboard, gypsum fiber board.
The base must be dry, durable, free from dust, dirt, oil stains and peeling. Treat metal elements with a corrosion-preventing agent. Treat highly absorbent substrates with VOLMA-Universal and VOLMA-Interior primers. To increase the adhesion strength of the plaster mixture to concrete bases, treat them with VOLMA-Contact primer. Attach the corner profile to the outer corners. When plastering over “beacons”, fix the “beacon” profiles vertically on the surface using “VOLMA-Canvas” plaster or “VOLMA-Montazh” assembly adhesive. In this case, the step between the beacons should be less than the length of the rule for leveling the plaster.
For 1 kg of dry mixture, add 0.6-0.65 liters of water. Pour the dry mixture into a clean plastic container filled with clean water at room temperature and mix until smooth with a professional mixer or drill with an attachment. Let the solution sit for 2-3 minutes. If necessary, add dry mixture or water to obtain the desired consistency and mix again.
Within 20 minutes from the moment of mixing, apply the resulting solution to the surface in a layer 5-50 mm thick using a plaster trowel or throwing it with a trowel.
Level the plaster mixture on the surface using the h-rule. If necessary, to obtain a thicker layer, “comb” the not yet hardened first layer with a dovetail-shaped plaster comb. The second layer of plaster is applied only after the first layer has dried.
When the plaster solution begins to set (45-60 minutes after mixing), level the surface using a trapezoidal rule, holding it perpendicular to the base, cutting off excess and filling the recesses.
To obtain a perfectly smooth surface, 10-20 minutes after trimming, rub the plaster with a sponge trowel, generously moistened with water. Then, after waiting for the matte surface to appear, smooth the plaster with a wide metal spatula.
Within 24 hours, but not earlier than 3 hours after preparing the solution, moisten the plaster generously and smooth it using a metal trowel or spatula. After this treatment, the surface does not require additional putty.
The surface of the plaster can be given a different pattern or texture. To do this, after leveling, the surface of the plaster is rolled with a relief roller or structured with a forming tool: a trowel, a sponge grater, a spatula, a hard brush, etc.
Drying time depends on the thickness of the plaster layer, temperature and humidity in the room and averages 5-7 days with a thickness of 10 mm. To ensure the plaster dries quickly, it is recommended to provide good ventilation in the room.
After drying, it is recommended to treat the plaster with “VOLMA-Interior” or “VOLMA-Universal” primer in order to improve adhesion during subsequent finishing of the surface.
For work, use clean tools and containers (contaminated tools and containers reduce the time of use of the plaster solution). After use, wash the tool with water.
Bags of dry plaster mixture “VOLMA-Canvas” should be stored on wooden pallets in dry rooms. Pour the mixture from damaged bags into whole bags and use first.
Guaranteed shelf life in undamaged original packaging is 12 months.
The manufacturer guarantees that the quality of the product meets the technical specifications subject to the technology of working with the material, but is not responsible for its use for purposes not provided for in the instructions.
Application sequence.
Leveling - having thrown the composition onto the wall, they begin to level it using a broad rule using beacons or without them when the wall is more or less even). The rule is from bottom to top, removing all excess and placing it on the recesses.
Trimming is carried out when the gypsum structure has set (after an hour) and acquired hardness. Similar to leveling, the rule cuts off small irregularities in individual areas, directing them into the remaining recesses. Already at this stage you can finish with plaster if your goal is to decorate with wallpaper or tiles. Remember to prime the surface before proceeding with the next type of work.
Smoothing is done with a grater with a sponge surface. It is recommended to start 20 minutes after trimming. After moistening the base with water, begin to move the grater over it until a “milk” forms.
You will immediately feel it when it appears, the friction will increase significantly and it will become more difficult to drive the tool. The resulting substance fills the microcavities and evens out the lunges.
Glossing is the final stage of processing. Here a grater with a metal plane is used. Essentially, the remaining defects on the gypsum surface are rubbed and compacted.
Maintain the full drying time indicated in the instructions; it depends on the temperature and ventilation of the room.
Instructions for dilution and application.
The preparation of Volma “Layer” gypsum plaster begins with studying the instructions
Here are essentially the usual steps; it is important to follow the proportions indicated on the packaging. Add 600-700 milliliters of liquid to 1 kilogram of composition
Considering that Volma gypsum plaster is packaged in 30 kg craft bags, it turns out that we need 18-21 liters of water per package.
To begin, pour some water into a convenient container (preferably plastic, it’s easier to work with) to wet the bottom and walls. The mixture is poured to the exact ratio of water according to the proportions. Mixing can be done using a trowel or trowel, but it is much more convenient (much easier for large volumes) to use a construction mixer or a trill with a special attachment. Tools will significantly save time and effort for quality work.
After stirring once, let the solution sit for about 3-5 minutes, this is the period of maturation of the components. After time has passed, stir the diluted mixture again until lumps are completely removed. The consistency should resemble thick sour cream, be plastic, but at the same time not flow off the instrument.
The gypsum composition in question can be used for minor repairs and major interior finishing. The limitation is due to the fact that gypsum, by its nature, absorbs moisture very well, so applying such plaster outdoors is a bad option.
The diluted composition is excellent for: plastering plasterboard, cellular concrete, reinforced concrete slabs, brick and wood.
This plaster is used for:
- restoration work, when minor defects are eliminated;
- minor repairs to level surfaces;
- capital finishing, when work is done from scratch;
- as a finishing coating for leveling before grouting with a sponge float
- creating decorative elements, arches, reliefs or sculptures.
After applying the finishing coat, immediately begin painting or laying ceramic tiles; surfaces coated with Volma “Layer” plaster allow this to be done.
Remember the recommendations on the packaging; the work room should be dry with a temperature range of 5-30 degrees above zero.
Which mixture to choose
This question is often asked before starting a renovation. The choice is huge, but the leaders on the market are manufacturers Volma and Knauf. They buy both mixtures. Let's look at the differences.
When puttying Knauf Rothban, the surface of the walls turns out to be rough; in order to glue the wallpaper, additional processing is necessary. The Volma layer has a smooth glossy surface and does not require additional processing. The main thing is to let the plaster dry well - this takes 4-8 days - and you can safely glue wallpaper or lay tiles.
There are no fundamental differences, since both companies use raw materials from the same gypsum quarries. Difference in mixture composition. So, if Rothban gypsum plaster uses a classic recipe, which affects drying and ease of work - Knauf takes longer to dry and is a little more difficult to work with - then Volma have developed their own recipe. Volma mixtures contain organically harmless chemical compounds that ensure quick drying of the surface and easy work.
After applying gypsum plaster, it is much easier to work with Volma at the final stage - gloss it, cover it with a finishing solution, unlike Knauf, which is more difficult and longer to work with.
Important! When choosing any gypsum plaster, focus only on yourself, your capabilities and needs.
For convenience and clarity of working with Volma-layer gypsum plaster, we suggest you watch the video:
How to breed Volma layer
To dilute 30 kg of dry Volma layer powder, the instructions for use recommend taking 18-19 liters of cold tap water. The water consumption indicated is approximate. Therefore, the consistency of the solution will have to be adjusted to the desired consistency during mixing.
This is due to several factors, for example, to apply the mass in a thick layer, you need a thick consistency. Therefore, to begin with, not the entire specified volume is poured into the container, leaving 3-4 liters separately for finishing (in reserve). If, when mixing, the gypsum plaster turns out to be thick, add liquid from the reserve, adding in portions.
When mixing a smaller mass, the volume specified by the manufacturer is proportionally reduced and a portion is also left in reserve. So for 10 kg of mixture take 6-6.3 liters. The volume of water poured into the container should not occupy more than a third of its volume, otherwise part of the solution will end up on the floor.
A simple rule that is easy to remember: it is correct to pour powder into water, but do not pour liquid into the dry mixture.
Be sure to take cold water. Increasing the temperature of the mixing water dramatically increases the rate of all chemical reactions. Therefore, the lifespan of the solution is reduced, which is undesirable.
Mix the water and powder with a mixer at low speed. Using a spatula or trowel, remove the adhering debris from the walls of the container towards the center and discard it. Stir again until the lumps disappear.
A feature of the process of mixing and hardening of the gypsum composition is its ability to become a “stake” when lumps of old mortar enter. In a fresh solution during the normal course of the process, crystallization centers do not appear immediately, only at a certain stage.
But lumps of previously mixed gypsum already have such centers, therefore, in turn, when they get into a fresh solution (at any stage), they become catalysts for the formation of new centers and serve as them themselves.
For the same reason, you cannot add gypsum powder to the thickening solution. If you want to regulate the consistency, then it is better to dilute the initially thick mixture when mixing, adjusting the density with a water supply.
After the first mixing, the solution is allowed to stand for 3-4 minutes and mixed again. After this, the mass can be applied to the wall.
How long does it take for cement mortar to dry?
In the warm season, when the air temperature is between 20-22 degrees Celsius, the solution
(concrete) begins to “set” approximately 2 hours after mixing. If the air temperature fluctuates around 0 degrees, this process can take 20 hours.
Interesting materials:
What are negative numbers? What are the different number systems? What are mixed numbers? What types of triangles are there at the corners? What types of quadrilaterals are there? What are the units of measurement in AutoCAD? What electric charges attract each other? What Emoji appeared in iOS 14? What are the aesthetics? What are the functions?
Specifications
Volma plasters may differ from each other in technical parameters, which depends on the components included in the composition. There are also average characteristics. Thus, the time until most mixtures dry completely is 5-7 days, and the recommended temperature for working with them is +5...+30 degrees. After hardening, the plaster layer tolerates temperature changes within the range of –40…+60 degrees. The initial setting time of the layer is 20-40 minutes, the final setting occurs in 180 minutes.
Compound
Volma plasters are made on a cement or gypsum base. Also, to increase strength, stickiness and other positive properties, stabilizers, modifiers, plasticizers, frost-resistant additives, anti-caking agents, etc. are introduced into the composition of materials.
Shades
The mixtures are presented in gray, beige, light yellow versions. They are usually used to level various surfaces. Those Volma plasters that are intended for finishing are sold in white. White mixtures can be tinted with dry pigments, but this is only required for decorative plasters. If desired, after drying, they can be painted with any silicate, silicone, or acrylic paints.
Layer thickness
The recommended layer thickness when working with these types of building materials is 5-30 mm. The permissible thickness of the plaster layer is 6 cm, but only with preliminary reinforcement. The minimum layer that can be applied is limited by the grain size of the filler, and in its absence - by 3 mm.
Adhesion and strength
All Volma plasters are characterized by a high degree of adhesion to building materials. Their compressive strength is 3.5 MPa, and their flexural strength is 1.5 MPa.
https://youtube.com/watch?v=BwQ-b1foe2U
Frost resistance and water absorption
Thanks to the presence of special additives that increase resistance to low temperatures, some plasters can withstand up to 75-100 freezing and thawing cycles. Most of them tolerate temperature drops down to –40 degrees, and some mixtures (for example, “Bark beetle”) - down to –50 degrees. All compositions are characterized by a low degree of water absorption.
Is it possible to putty walls on wet plaster?
I do not recommend putting putty on wet Rotband. The adhesion of the putty to the plaster layer will not be good. If there are wet spots, this does not mean that the rest of the wall has dried well. On such a thick layer, Rotband should be given about 2-3 days until it dries completely.
Interesting materials:
How to dry branches for crafts? How to Swipe in Badu? How to cook peas to prevent flatulence? How to cook porridge for a baby? How to cook a rabbit in a saucepan? How are the spinal cord and brain connected? How to link two YouTube accounts? How to contact the Children's World online store? How to contact the Beeline operator in Pavlodar? How to contact the Lifecell operator?
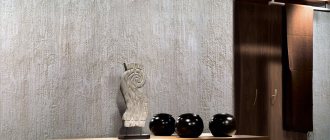
Decor on the surface.
You can decorate in different ways, from simple wallpapering to complex techniques of painting on dry plaster. It all depends on your preferences.
- The relief and texture can be set by special rollers. You can also even apply a relief pattern that can be selected on the roller rotor.
- The texture is also set with a simple spatula, alternately pressing on the weakly set gypsum solution. It turns out very beautiful.
- Decorative plaster can make many dreams come true, having a huge selection of options.
- Having the talent of an artist, take up your brushes and paints, create unique and inimitable patterns.
Caring for self-leveling floors during setting and strength gain
Optimal drying conditions for the poured solution:
- The temperature of the base inside the room before the start of work, during and in the next 2-4 days – from +10 to +25 ºС;
- Relative air humidity – 50-80%;
- The absence of drafts, direct sunlight, a working “warm floor” system and other heating devices.
The base heating must be turned off 72 hours before starting work. Restarting is allowed 14-28 days after the solution has been produced. To avoid premature or uneven drying, you can cover the floor with polyethylene.
An ideal base for installation of finishing coatings.
All this will prevent the appearance of cracks and uneven areas. Accordingly, you will receive the required, that is, a perfectly smooth, durable coating for the installation of any finishing materials.
Advice! If you need floor repair specialists, there is a very convenient service for selecting specialists from PROFI.RU. Just fill out the order details, the experts will respond and you can choose who to collaborate with. Each specialist in the system has a rating, reviews and examples of work, which will help with the choice. Looks like a mini tender. Placing an application is FREE and does not oblige you to anything. Works in almost all cities of Russia. Without your desire, no one will see your phone number and will not be able to call you until you yourself reveal your number to a specific specialist.
If you are a master, follow this link, register in the system and be able to accept orders.
Specifications
The company's unique recipe formula helps achieve maximum results at minimum costs.
Compound
Plaster is based on gypsum, which significantly reduces the time for complete drying to seven days. Special mineral and chemical additives ensure maximum strength and a high level of adhesion (stickiness).
Colors
The color palette is represented mainly by neutral universal shades: white, gray and light gray. If you do not plan subsequent finishing, you can experiment with rare light yellow, yellow, green and pink colors.
Layer thickness
The optimal layer thickness is 0.3 cm, the maximum thickness is 0.6 cm. When planning to increase the layer beyond the optimal thickness, you should take into account that the work must be carried out in several stages, and only after waiting for the first layer to dry completely, proceed to the second.
Adhesion (stickiness), strength
The plaster has a high level of adhesion. On average, the compressive strength is at least 3.5 MPa. Bending strength – no less than 1.5 MPa.
Frost resistance, moisture absorption
The dry powder is quite frost-resistant and has low water absorption. Recommended for use in rooms with a temperature range of +5-+30 degrees. The mixture is resistant to temperature changes ranging from -40 to + 60 degrees. Depending on the type of mixture, indicators may vary, so it is recommended that you carefully read the instructions on the package.
More details about the characteristics can be found in the table.
| Drying time | 5-7 days |
| Base temperature – оС | from +5 to +30 оС |
| Start of setting | no earlier than 40 minutes |
| End of setting | no later than 180 minutes |
| Maximum layer thickness | 60 mm |
| Compressive Strength | not less than 3.5 MPa |
| Flexural strength | not less than 1.5 MPa |
| Consumption per 1 sq.m with a layer thickness of 10mm | 8-9 kg per 1 sq.m |
| Water consumption | 0.6-0.65 l/kg |
| Recommended layer thickness | 5-30 mm |
How to make decorative plaster from simple putty?
Today, among the trendy facing materials, designer plaster occupies one of the leading places. The reason for this priority is the original and exclusive appearance, practicality, and the ability to support any style of interior and exterior. It has a more attractively priced option that is suitable for people who are far from construction and design work, who want to use their creative abilities, realize their artistic ideas, create and cover their home with a decorative mixture of putty.
Conventional putty, used by non-professionals to make decorative putty, gives building fences the appearance of different structures. They acquire a variety of external characters and look like:
- a smooth wall with visible reflections of various colors;
- painting that evokes memories of frescoes;
- a surface with protrusions and depressions, that is, having a relief.
The construction “missions” of plaster and putty sometimes overlap in certain areas. These compositions belong to building mixtures, the task of which is to correct planes.
Putty is used to correct small imperfections in the surface formed by usually applied plaster, and then proceed to finishing. The purpose of the solution is to thoroughly level the enclosing structures, capital partitions, often with simultaneous decoration. This effect is obtained due to a soft, heterogeneous mass, the ingredients of which can be fine- and coarse-grained granules, stone grains and other various particles. We recommend that you familiarize yourself with the popular finishing method in the article about the features of Bark beetle plaster.
Do-it-yourself plaster using putty
A protruding decorative surface is achieved with a ready-made solution and a repeated process of covering the fence with layers using various devices and techniques. The thickness of the resulting layer can reach 5 cm. And the density of plaster made from putty material does not exceed 1.5 cm.
Different consistencies also dictate the variety of textural finishes of the areas. With plaster they are more “brutal” and you can spray it with any texture; the viscosity of the putty composition does not allow this. But the decorative finish made from a thin putty mass can be brought to perfection by sanding it with emery materials.
This coating is based on an adhesive mixture. It is obtained by diluting a special powdery substance. But ready-made suspensions for work are also available for sale, depending on the ingredient that forms the texture, they are:
- Structural, creating a pronounced uneven silhouette or relief for the planes. Their originality is that the treated areas are covered with an even layer, and the filler of mineral granules gives the structure a unique appearance.
- Modeling mixtures allow you to create any shape on a plane. This is one of the best options for those who first decided to do decorative plastering on their own. It’s not difficult to cover with your own hands, but the effect is spectacular.
- Putty materials that create the impression of ancient building elements have a very thick mass and this ensures a shabby appearance and the formation of cracks on the working base. Only specialists can handle this.
An alternative where smoothness is required is achieved by plastering with regular finishing putty. If it is necessary to disguise any surface imperfections, defects, dents, chips, cracks, a starting paste designed for relief decoration comes to the rescue here. It is obvious that these pastes are not interchangeable: when another is used instead of one composition, the finish soon becomes unusable.
Consumption per 1 m2 of wall
As with other SS, the consumption for the mixture per 1 m2 is indicated for a layer whose thickness is 10 mm. The figure given on the packaging is 8-9 kg - average. So, to cover a flat area of 1 square meter with a solution thickness of 3 cm (30 mm) you will need 24-27 kg (based on the calculation of 8kg * 3cm or 9kg * 3cm).
In fact, plastered walls, partitions or ceilings are far from even. Filling and leveling large depressions, cracks, and joints may require more mixture. More test is also required for curved, for example, columns, as well as other curved surfaces. You can also use our online calculator to calculate.
In addition, the correct preparation, the water-gypsum ratio (affecting the thickness of the solution), the experience of the plasterer are important factors that also influence the amount of consumption.
Preparing the walls
The purpose of this stage:
- ensuring strong adhesion of the new coating to the base;
- eliminating sources of stain bleed through in finishing;
- protection of walls (base) from the appearance of biosettlers (mold, fungus);
- protection of the connecting layer from destruction, for example, from the entry and accumulation of water;
- protection of cement-containing substrates from the effects of sulfates released by wet gypsum;
- reducing the consumption of leveling mixtures;
- strengthening the surface of a weak base;
- protection of plaster mortar from dehydration (on porous substrates).
All these goals are achieved by performing a set of operations applied to the entire room.
All wiring in the room is disconnected from the electrical network (de-energized) before starting work.
In the case of repairing old walls, remove paint, plaster, wallpaper, loose or simply weak, crumbling plaster, and remove dust.
Characteristics of Volma Plaster Plast, Canvas and Base
Volma plaster is one of the most popular building materials, used not only for finishing and leveling walls, but also for other types of work.
The main advantage is that plaster can be used instead of drywall, achieving the desired result.
One of the main advantages is its versatility.
The use of these mixtures allows you to achieve the most ideal result; the surface is not just smooth, not requiring further putty, but also glossy, smooth and even.
Gypsum-based mixtures set fairly quickly, which is a significant time saver. The effect of rapid drying is achieved by adding special components (chemical and mineral origin) to the composition, which in turn guarantees high strength, as well as very good adhesion.
All mixtures are presented in several color options. As a rule, these are neutral pastel shades - gray, white. If further decorative finishing is envisaged, you can choose mixtures of rare shades - pink, green, yellow.
Conclusions and comparisons.
When you come to a construction site to buy finishing materials, your head is spinning from the wide variety.
Without knowing exactly what to choose, you can get confused. The most popular plasters are “Knauf” and “Volma”. Which gypsum plaster is better, “Knauf” or “Volma”, read on the forums in reviews of ordinary citizens and professional builders. data-matched-content-ui-type=”image_stacked” data-matched-content-rows-num=”2″ data-matched-content-columns-num=”3″ data-ad-format=”autorelaxed”>
Advantages
Among consumers there are opposing opinions about the products of this company. But it should be noted that the advantages outweigh the disadvantages.
Among the advantages are the following:
- frost resistance;
- good stickiness;
- environmental friendliness. Has environmental certificates and the “ECOSTAMP” stamp
- low consumption;
- moisture resistance;
- combination of reasonable price and excellent quality;
- ease of operation;
- can be used on various types of surfaces, both with and without subsequent finishing;
- obtaining a smooth glossy surface without puttying;
- regulation of the microclimate in the room (the surface breathes).
Finish coating and self-leveling floor
On the packages with the mixtures it is written which ones are suitable for laminate, ceramics, parquet and the like. This condition allows you to determine how long it takes for the self-leveling floor to dry in specific cases.
Manufacturers set the following hardening times for laminate:
- Universal Knauf (Knauf) Tribon (layer 10-60 mm) – 1 day.
- Universal Yunis Horizon (layer 2-100 mm) – 7 days.
- Volma Level Comfort (layer 1-100 mm) – 7 days.
- Weber Vetonit Strong (layer 10-50 mm) – 5 days.
- Axton finishing (layer 5-100 mm) – 3 days.
- Universal self-leveling Knauf Tribon (layer 10-60 mm) – 1 day.
- Reinforced Perfecta (layer 1-100 mm) – 1 day.
- Fast-hardening Bolars (layer 2-100 mm) – 3 days.
- Prospectors “Thick” (layer 3-100 mm) – 3-4 weeks.
- Prospectors “Practical” (layer 5-70 mm) – 7 days.
- Reinforced Perfecta (layer 1-100 mm) – 3 days.
- Universal Unis Horizon (layer 2-100 mm) – 7 days.
Most self-leveling floors for interior use are suitable for all types of finishing coatings.
There are also options for the street. They dry in about 12 hours to avoid deformation of the coating. They are much more expensive, but can be used at very low and high temperatures. 3D self-leveling floors harden in a short time. However, it is influenced by the number of layers and the method of applying the pattern. If film is used, the drying time does not increase. Due to acrylic paint, drying time is usually extended. Each layer is waiting for the standard time until complete hardening.
VOLMA-AKVASLOY light cement plaster for manual application 25 kg
VOLMA-Aqualayer
— dry lightweight cement leveling plaster mixture based on Portland cement with light fillers, polymer and mineral additives that improve the performance properties of the solution, crack-resistant, fiber-reinforced, for manual application outside and inside the building.
For manual leveling of walls and ceilings, outside and inside buildings, including in rooms with high relative humidity.
For preparing the surface of walls for tiling: in kitchens, shower rooms, saunas, etc., for applying decorative plasters and putties.
It is not recommended to use for leveling and repairing floors.
— concrete bases, including slag concrete, expanded clay concrete, foam-aerated concrete,
- plastered with cement-sand, cement-lime compositions,
- masonry made of ceramic and silicate bricks.
The base for plastering must comply with the requirements of SNiP 3.04.01-87 and be dry and durable. The age of brickwork must be at least 28 days, and concrete - at least 3 months. The surface must first be cleaned of various types of contaminants and substances that reduce the adhesion of the plaster solution to the base (fats, lubricating oils, bitumen mastics, glue, paint and varnish coatings, etc.). When reconstructing buildings, weak areas of old plaster (delamination from the base, etc.) must be removed from the walls. The prepared base made of ceramic or silicate brick must be primed with Volma-Universal primer. Prime concrete and other weakly absorbent smooth substrates with Volma-Contact primer. Bases made of foamed aerated concrete and other highly absorbent materials must be primed 1-2 times with VOLMA-Universal primer.
At ambient temperatures above +30ºС, it is recommended to moisten the base before applying plaster. The temperature of the base should not be lower than +5ºС and not higher than +30ºС.
Places subject to the formation of cracks (for example, various structural materials located nearby, corners of holes, etc.) must be strengthened before plastering with a reinforced fiberglass mesh with 5x5 mm cells.
Pour clean water into the container at the rate of 0.28-0.3 liters of water per 1 kg of mixture. Add the appropriate amount of dry mixture to a container with water. Mix the solution with a professional construction mixer at medium speed (600-800 rpm) to achieve a homogeneous plastic mass without lumps, add water if necessary. Then a technological pause of 3-5 minutes is maintained to “ripen” the mortar mixture, after which it is mixed again.
At +20ºС the mixture remains viable for at least 2 hours. As the temperature decreases, this time increases, and as the temperature rises, it shortens.
Attention: Do not overdose on water, as excess water leads to peeling and loss of mechanical strength of the plaster, as well as the appearance of cracks on the surface. Application of mortar mixture:
Application of mortar mixture:
The finished solution is evenly spread onto the prepared base with a trowel, trowel, plaster ladle, or applied with a plaster trowel, then leveled using an h-shaped rule until a smooth surface is obtained. Check vertical deviations with a two-meter building level, not allowing deviations of more than 5 mm. After 20-24 hours from the moment the plaster layer is leveled, the plastered surface must be trimmed. Trimming is performed using a trapezoidal rule, holding it at an angle of 90 degrees to the surface being treated, and cutting off any irregularities. Then you need to moisten the cut surface and rub it with a felt or polyurethane grater. When using the latter, the surface becomes rougher.
Conditions for performing work:
The applied material cannot be dried by force: using heaters, heat guns and other devices.
When working on facades, freshly laid plaster should be protected from precipitation for three days, as well as from excessive drying and cooling. Do not begin finishing work in rain or strong winds.
Store bags with VOLMA-Aquaslay dry mixture on wooden pallets in dry rooms. Pour the mixture from damaged bags into whole bags and use first.
Guaranteed shelf life in undamaged original packaging is 12 months.
Carry out work in accordance with construction requirements, standards and occupational safety and health regulations.
Other mixtures from the manufacturer.
Volma “Aquaslayer” plaster is a lighter fibrous composition with the presence of Portland cement, polymers and natural components. Like the composition we are considering, it is intended for leveling bases. Already from the name one can judge that it is hydrophobic and can be used in wet areas. Cement plaster Volma "Aquasloy" is used both inside buildings and on their exterior facade.
Compositions with a cement binder are often used as a primary layer, which serves as a reliable base:
- laying ceramic tiles;
- putty and decoration.
There are practically no restrictions on covering bases with Aqualayer; it can be cellular concrete, reinforced concrete products, floor slabs, wooden walls. Volma cement plaster “Aquaslayer” is packaged in 25 kg craft bags.
Some features of Volma plaster
Volma-sloy products have many advantages over similar products from other manufacturers:
- the plaster mixture is very plastic and easy to apply to the surface;
- a layer 6 cm thick does not shrink;
- after drying, a glossy surface is formed;
- no finishing required;
- belongs to the category of environmentally friendly products;
- does not require preliminary puttying of the walls;
- Hand-applied gypsum plaster allows the wall to breathe.
Volma is a company that is constantly developing. To date, many different types of products have been created on it. These are Volma plaster mixtures:
layer;
- canvas;
- gypsum asset;
- aqualayer MN;
- layer;
- MN layer;
- decor;
- cement asset;
- title.
Volma plast plaster is a dry gypsum composition. The prepared solution is applied manually. It works great for leveling walls and ceilings before finishing them. Canvas is usually used for manual work. It contains a light binder. Gypsum asset is mainly used for application by a special machine. The composition is highly water resistant. The machine applies the prepared solution to the wall or ceiling to level it before painting, before gluing wallpaper, before laying tiles.
Aqualayer MN is a mixture for applying to the wall by machine. Used outside and inside buildings. The MN layer has almost the same characteristics as the MN aqualayer. The title contains perlite, some chemical and mineral additives, which allow you to obtain a glossy surface without putty.
It is best to store dry mixtures in dry rooms in the original packaging. The bags should be placed on stands so that moisture cannot penetrate them through the floor. The composition of Volma dry mixtures includes various mineral additives, some chemical elements along with light binding components. This makes working with ready-made solutions quite simple and easy. The solution dries in a very optimal time. The result of its application to the surface always remains excellent.
Some technical characteristics of materials:
- consumption per 1 m² – 8-9 kg;
- thickness of the applied solution – 5-30 mm;
- maximum layer – 6 cm;
- complete drying - 5-8 days;
- water consumption per kg of mixture – 600-650 ml;
- temperature regime – +5 – +30˚;
- the beginning of setting of the solution – 45-50 minutes;
- the end of setting is 3-3.5 hours.
The solution begins to set in 45 minutes, but it is better to use it 30 minutes after mixing.
Advantages and disadvantages
It is important to be well aware of the pitfalls of any material or device before use. Regarding the gypsum base, the following advantages can be highlighted:
- no shrinkage;
- ease of application;
- environmental friendliness;
- no need for putty;
- vapor permeability;
- no need for pre-plastering.
When dried, the gypsum base from Volm does not shrink. This is what makes it possible to immediately apply a thick layer of plaster. Applying plaster to walls does not require the use of special tools. It is enough to use a trowel or ladle. It is easy to pull together, because the solution is plastic. The surface of the dried Volma gypsum mixture is glossy, so it does not need to be additionally covered with plaster for finishing. Walls require a minimal level of preparation before application, so there is no need to plaster them before applying Volma. Thanks to its components, the plaster is environmentally friendly and has no harmful emissions. Due to the presence of pores, the material allows the walls to carry out gas exchange, which prevents the development of fungus and mold.
How to plaster walls with volma
Manual application of the Volma plaster layer is similar to the application of any leveling gypsum mixture. At the same time, the gypsum mixture is so environmentally friendly that it can be formed by hand without fear of consequences. Depending on the task and the condition of the base, three application methods are possible: with a spatula (on a flat surface) a thin layer is applied and leveled; as a rule, the mass is applied without beacons where achieving a high-quality finish is not required; Walls with large flaws are leveled along the beacons.
instructions on the packaging volma layer
You might also be interested in an article about ways to level walls.
The temperature of the base and air should not be higher than +30, lower than +5°C. Humidity – no higher than 65%.
It is recommended to start plastering the room from areas where the compounds will dry longer - places opposite windows, doors, heating appliances.
By lighthouses
To plaster the wall, guide strips are used - beacons that form an auxiliary vertical plane. Beacon profiles (metal, plastic, wood or mortar) are placed in increments of 1.0-1.3 m. Since Volma plaster is gypsum, mortar beacons made from the same mortar will be the best. They do not need to be removed after plastering; the main thing is that after making the mortar guides, prime them before plastering.
The dough is slapped from bottom to top between two adjacent planks. Having filled an area of approximately 1 sq. meter area, level the solution using an h-shaped rule, guiding it along the guides. Excess mass is collected on the tool, which is returned with a spatula to the wall where there is less mortar. Having carried out the rule 2-3 times, they continue to fill the gap between the beacons with the solution, then proceed to fill the adjacent path formed by the profiles.
After 40 minutes from the start of mixing, trimming is performed using a trapezoidal rule, with the tip perpendicular to the wall. The rule is moved in the same direction in which the leveling was carried out - from bottom to top. If trimming is carried out across the direction of smoothing, burrs may form.
To accurately determine the timing of the second trim, a test is used that uses the hand, the so-called “lip” test. Touching the surface with your hand leaves a trace of the solution on the palm - linden. The second pruning begins when the linden “goes away” and the surface itself becomes matte. When you press with your finger, marks still remain on the surface, but the dough does not stick to your finger.
Trimming is done with a spatula, moving it perpendicular to the wall. At this stage, the solution “collected” from the surface will be needed to fill the depressions. There is no need to make smoothing movements with the spatula, placing it at an acute angle to the wall. At this stage, only trimming is done, without putting much pressure on the tool.
The instructions for the Volma layer give the maximum values for the thickness of the layer applied in one pass. According to it, a layer of up to 60 mm is applied with a volley. This thickness is only possible on vertical surfaces, in small areas. Moreover, the dough should be thick so that it does not slide down under its own weight.
For ceilings, the maximum thickness is reduced to 10 mm. They do this for safety reasons (in case the products are expired, water leaks from above, etc.). Minimum thickness – 3 mm. Rational values are 5-30 mm.
Without beacons
With this method of plastering, the rule is based on the existing bumps on the surface, and all the recesses in the path of the tool’s movement are filled with the solution. The solution is applied twice. After the first layer has dried, fill the remaining dimples and pores, moving a wide spatula across the movement of the rule during the first pass.
Grouting and ironing
After trimming, wait 10-30 minutes, then grout (also called “soaking”). The purpose of the procedure is to expel gypsum milk from the pores and fill the smallest irregularities with putty. The wall (when the surface of the laid mortar becomes dull) is generously moistened with a sponge grater in a circular motion. The procedure does not require strong pressure. Running a wide spatula over the surface, squeeze out the plaster milk from the wall. The milk (semi-liquid gypsum mass) that collects on the blade is used to fill the remaining pores.
Ironing (or glossing) is done if you want to get a glossy surface suitable for paint. Choose a time (no later than 24 hours from the beginning of setting, no earlier than 3 hours from the same time), wet the surface, and then use a spatula to force it along the wall, pressing small bulges.
Is it possible to use expired plaster?
The established expiration date does not mean that the building mixture needs to be thrown away the next day after expiration. Most craftsmen are calm about “overstayed” plaster, as long as it has not become wet, matted or lost its properties.
The deterioration of the quality of the material does not occur simultaneously. Modifying additives that make the plaster plastic, increase the setting time, and give the finish strength, gradually lose activity during storage and cease to perform these functions. It is more difficult to work with such plaster; you have to put in more effort and use additives.
But the main thing is that the manufacturer does not guarantee the reliability of the coating. When using material after its expiration date, you should not be surprised that the finish may turn out to be of poor quality, and in the future the imaginary savings will “backfire” - you will have to redo the work again.
Where and what is it used for?
According to the manufacturer of SS Volma Layer, the technical characteristics allow the material to be used for manual plastering of bases made of materials such as:
- concrete walls;
- gypsum fiber boards (GVL);
- drywall;
- plasters with cement-lime binders;
- aerated concrete;
- gypsum slabs and blocks;
- brick;
- foam concrete.
The mixture is used to level ceilings, partitions and walls under conditions of normal or dry humidity in the room. It is used if the planned finishing is painting, tiles, wallpaper or decorative plaster.
The reader got acquainted with the Russian-made gypsum composition - Volma layer. Technical characteristics will help not only when choosing, but also when making calculations, for example, how much CC should be purchased. The information will also help you properly manage the material (temperature conditions, setting time, how long the raw material can be stored).
Products
"VOLMA - AQUASTANDART LIGHT" REINFORCED CEMENT PUTTER BASED ON WHITE CEMENT
“VOLMA-Aquastandard Light” is a dry cement putty mixture based on white Portland cement with mineral and polymer additives, non-shrinking, moisture resistant, fiber reinforced.
1. For basic leveling with a layer of up to 3 mm of bases for subsequent finishing with decorative coatings (painting, applying decorative plaster, ceramic tile cladding).
2. For sealing local depressions, potholes, cracks, sinkholes with a layer of up to 6 mm, sealing seams and joints of concrete slabs with a layer of up to 8 mm.
3. For interior and exterior work: on the facade, base, as well as walls and ceilings in dry, damp and unheated rooms.