It is absolutely impossible to imagine an apartment or a house, and even more so an office, without shelves. These are very multifunctional pieces of furniture that are used both for decorating space and arranging various souvenirs, and for convenient storage of various things.
Often they fit so well into the interior that they are able to emphasize its style and individuality . But hanging shelves is sometimes not so easy. Often apartment owners want to secure them so that the fastenings are not visible.
This is done in order to maintain the integrity of a particular style or for a number of other reasons. However, attaching shelves to the wall without visible fasteners is not such a difficult task as it seems at first glance.
Attaching shelves to the wall without visible fasteners
“Flying” shelves are just shelves with hidden fastenings
The hidden shelf is a decorative accent that creates the illusion. The shelf seems to “float” on the wall. By adding such furniture to the interior of your living room, bathroom, kitchen, bedroom, you can solve the problems of storing books, necessary accessories or souvenirs. Such furniture is often required to decorate children's rooms, which have a lot of tiny cars, dolls or other toys. “Floating” shelves are cheap, beautiful, keep everything safe on them, and it takes little time to make such furniture.
General recommendations
When using visible and invisible fastenings, it is important to consider the thickness of the wall. Hidden fittings are used when the wall thickness is from 25 cm. If it is made of brick and at least 10.5 cm if it is made of concrete. When the wall is made of plasterboard or cinder blocks, with a total thickness of up to 10 cm, the use of hanging shelves is possible for decorative purposes.
The shelf itself needs to be chosen correctly. Do not take heavy, massive products; it is better to prefer thinner, lighter materials. The main requirements are cleanliness, dryness, high-quality coating. To store light items, shelves up to 3 cm thick; for books, heavy objects take a thickness of 4.5 to 6 cm.
Based on the factors described, fasteners are selected. Then there will be a clear idea of what load is imposed, what the main surface is made of, and what options are acceptable in a particular case.
Non-standard options include furniture fittings, an overview of which can be seen in the following video:
Rustic Bathroom Shelves
If it's time to modernize your interior, shelves with hidden fastenings in the Provence style are the perfect decor. She creates exclusively her own, unique home comfort. And at the same time it seems to be floating in the air! Its artsy yet simple appearance will brighten up the bathroom and any nook that needs storage space.
This shelf model installs as a floating shelf and is reinforced for added strength, making it a great storage option for collectibles, photos, keepsakes and glassware. The design is inexpensive and requires very few materials.
Advice. You should avoid last-minute shopping trips; it is better to prepare materials in advance.
Bracket material
- metal or alloy (steel, aluminum, bronze, cast iron);
- natural solid wood, chipboard, MDF;
- gypsum.
From an operational point of view, a metal shelf bracket is an ideal choice. When choosing it, you can find strict, laconic models in the spirit of minimalism or elaborate forged supports. The latter will fit perfectly into fusion, gothic or rococo style. Although forging is becoming less and less common in interiors due to its high cost, a shelf with ornate supports will become the highlight of a living room or hallway.
For classic room design, plaster holders are recommended. They can be standard white or gold plated. Ceramic figurines, porcelain sets and elegant vases look harmonious on such shelves. There is no need to worry about the load-bearing capacity of the stucco molding: it is all reinforced with metal fittings.
For connoisseurs of country, shabby chic or Provence style, wooden brackets are suitable. The winning option is intentionally aged wood with a rough natural texture or painted to match the interior.
Shelves-tubes for toys
If you want to keep your playroom tidy, you can easily make round shelves from empty paint buckets.
And, voila, the furniture is ready! This DIY shelf is an economical idea for creating storage space for small items.
Sliding shelves - a solution to eternal problems
For wine connoisseurs: how to make the right shelves with your own hands
Source
Non-standard solutions
It is not always possible to find the right mounting option for shelves, or the homeowner/designer has a special design idea. Then human imagination comes to the rescue, giving rise to unusual methods of solution.
Shelf with straps
Instead of loops, sometimes they use rings with hooks, water pipes, and fittings. Sometimes belts, chains, and rope are used.
Shelves on pipes with fittings
Unusual things with a different purpose create a unique style for the room and complement interesting design ideas.
Honeycomb shaped shelf
You can take non-standard fasteners and hang shelves in an unusual way. Not strictly horizontally, at an angle, forming corners, honeycombs, diamonds, making storage space of an unusual shape.
Non-standard arrangement of shelves at an angle
Progress
The design of the shelf consists of two parts: a frame - the shelf holder and a sleeve, which is put on the frame.
First, we make a holder from pine bars 1 by 2 cm thick (thicker is possible). You will need 2 bars 70 cm long (this is the length of the shelf), 2 bars 20 cm each and 5 bars 18 cm each. We connect them all as in the diagram with self-tapping screws.
The sleeve is made from two rectangles of plywood 72.5 by 21 cm, between which there is a “U”-shaped base of bars (see diagram).
When all parts of the shelves are ready, you need to sand them with sandpaper or a sander and paint the sleeves.
Now, using a level, screw the shelf holders to the wall.
Source
Choosing the right bracket
To ensure that your purchase does not disappoint, you need to find out in advance which bracket is best to choose. Some practical tips:
A high-quality shelf holder always comes with a manufacturer’s warranty card with the specified characteristics and maximum load. It would be a good idea to ask the seller about the possibility of replacing or returning an unsuitable product.
Before making a purchase, be sure to check the complete set of the bracket: in addition to the product itself, the composition must include the appropriate fasteners. Thus, manufacturers of shelf brackets complete corner models with four self-tapping screws and two dowels.
If for some reason the kit does not contain a self-tapping screw, you should purchase it yourself. The diameter and length of the hardware depend on the wall material (plasterboard, concrete or brick) and the load.
The free end of the shelf (console) should not protrude beyond the brackets by more than 10 cm. It is optimal if the length of the supporting part of the bracket is 2/3 of the total width of the shelf.
Don't forget about the decorative value of the shelf bracket. You can opt for hidden modifications that give the shelf weightlessness and lightness. Or you can go the other way - and choose a massive holder, making it a full-fledged element of the interior.
Attaching shelves to the wall without visible fasteners
It is absolutely impossible to imagine an apartment or a house, and even more so an office, without shelves. These are very multifunctional pieces of furniture that are used both for decorating space and arranging various souvenirs, and for convenient storage of various things.
This is done in order to maintain the integrity of a particular style or for a number of other reasons. However, attaching shelves to the wall without visible fasteners is not such a difficult task as it seems at first glance.
Attaching shelves to the wall without visible fasteners
Corners and loops
This type of fastening is most common among consumers. It is quite simple, fast, and neat. Suitable for any interior. Unlike the bracket, the corners and hinges are small and do not particularly stand out.
First you need to decide on the place where you need to attach the shelf to the wall.
Of course, it will be better if the selected area is not previously cluttered with paintings or portraits. A set of necessary materials can be purchased at any hardware store. We attach them to a pre-marked place on the outer bottom of the product.
For installation, self-tapping screws of various lengths and widths are used.
After installing the screws, the shelf must be attached so that the drilled holes in the corners (or eyelets) coincide with the marked places.
If everything matches, then you can tighten the screws, trying to do this as evenly as possible, carefully and smoothly.
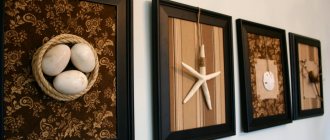
Shelves in a modern interior
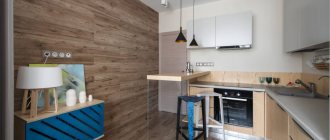
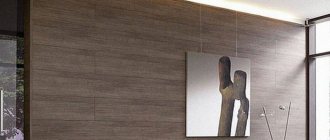
In any house, if a person lives in it, there are always a lot of different jars, bottles, maybe books, souvenirs, photo frames and much more. And in order to keep order in the house, it is recommended to put each thing in its designated place. And often a wall shelf acts as such a place. It usually serves two functions - it is a convenient stand for something decorative or useful, and it can also be the highlight of a certain design.
Wall shelves in the interior
Depending on the room in which the shelf is installed, it can perform a very different role. So, in the kitchen there may be a set of spices on it or some elements of utensils. In the bathroom , a shelf is a must-have for arranging various bottles and bottles. A shelf is also needed in the bedroom , where you can place on it various things you need before going to bed. Of course, these interior elements are also in the living room - books, flowers, and souvenirs can be placed on them. Often they are able to significantly save space, as well as overcome clutter in the room, because from now on everything will be in its place. That is why this piece of furniture is absolutely irreplaceable, despite the fact that there may be many wardrobes or chests of drawers in the house.
Wall in the form of shelves
On a note! The shelf is appropriate and functional in absolutely any interior, regardless of its style. The main thing is to choose the right and suitable option and place it in a place where the shelf will look organic and as part of the interior.
Moreover, it is important to choose not only a shelf that suits the style, but also one that you will like and look aesthetically pleasing when hung. When creating certain styles, it is important that the fastenings on it are invisible. In general, there are several variations of fixing shelves on the wall.
Built-in
Important A characteristic feature of a built-in wardrobe is that it is made exactly according to the dimensions of the place where it will later be placed. Therefore, it makes no sense to disassemble it for moving. But it may be necessary to dismantle it during repairs
This is done like this:
But it may be necessary to dismantle it during repairs. This is done like this:
- The door is removed. Typically, such lockers are designed in the form of a compartment, the doors in them are sliding on rollers, and the support can be either the lower or the upper one. To dismantle the door, you must carefully lift it so that the lower roller comes off the guides, then tilt it outward so that the upper roller comes off the rail. Then the door can simply be moved to the side.
- The shelves and sides of the internal sections are removed.
- If the remaining structure is light enough, it can be completely removed from the niche and pulled away (using rollers sold in hardware stores to move furniture or simply pieces of old thick wool fabric as a lining for a support so as not to scratch the floor). If it is still too heavy or you need to disassemble it alone, you need to continue dismantling.
- The back wall is removed. It is usually made of plywood or fiberboard, and is attached to small furniture nails. To remove it, carefully pry it up with the tip of a flat screwdriver or chisel, and separate it from the frame by gently pressing from the inside or lightly tapping it with a mallet.
- The frame itself is disassembled. It all depends on the design. If a tie was used on eccentrics, unscrew them; if the corners are used, unscrew the screws; if dowels are used, the elements are separated by gentle tapping.
- Upon completion of disassembly, the fittings are collected in a separate package, and the structural elements are marked so that when reassembling you know what is attached to what.
The video shows the process of disassembling a built-in wardrobe:
How can I mount a shelf on the wall?
Table. Methods of fastening shelves.
Bracket or holders
| Mounting option | Short description |
| This option assumes the presence of visible fastenings for shelves. They can be seen, and they are fixed both below and above the shelf. The brackets can also be hidden. Visible brackets can be simple or decorative. They come in both plastic and metal, ornate and simple, etc. One side is attached to the wall, the other to the shelf itself. However, it is important to understand that this option is not suitable for every interior style. | |
| This is the choice of those who save on mounting costs, but want to install the shelf as quickly and easily as possible. It is suitable for almost every interior. Moreover, this is a fairly reliable fastener, and depending on its size, you can vary the load on the shelves. | |
| Fastenings for glass options | These fasteners are used only for fixing shelves made of glass and characterized by their large mass and fragility. They are usually made of metal and have special gaskets that will allow you to securely fix the shelf itself to the wall, preventing it from falling. There are also suction cup fasteners for glass, but they are not very reliable. As a rule, the suction cup is fixed on the underside of the shelf. Typically, such fasteners are small in size. |
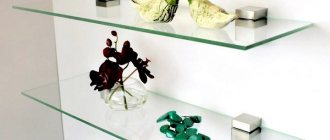
| This option will allow you to install the shelf so that the fasteners themselves will not be visible from any side of the shelf. It will seem like it's just glued to the wall. |
Concealed shelf holder
Types of products
The second name for the hardware option we are considering is ball guides, since the system moves on small balls, which ensure smooth running and durability of the structures. Let's figure out what product options are available, and then consider the model range presented on the market.
Main types
All telescopic options are divided according to the following characteristics:
Possibility of disassembly. There are both collapsible and non-dismountable options; the second option is not suitable, since the element in it cannot be disassembled and it is difficult to remove such a box. But the vast majority of options on the market are collapsible, so there will be no problems with repairs.
The design consists of three main components shown in the diagram
Number of steps. Depending on the extension length, structures are divided into two-section and multi-section. If everything is clear with the first option, then the second is much more complex in design, so you should disassemble it more carefully. But as for the installation and removal process, there is no fundamental difference; if you understand the topic, you will be able to service all types.
Multi-section options extend to a much greater distance than two-section options
Presence of a closer. This element makes the use of furniture more convenient, because the drawers themselves are pressed to the end and become the way they need to be. Of course, models with a closer are noticeably more expensive than simple options without this element. What you choose in the end is up to you, both solutions are quite reliable, there is not much difference in quality.
The closer is a special plastic block on the outer edge of the structure
The guides also differ in the degree of extension of the elements; there are three main options:
| Illustration | Description |
| Partial extension systems. A standard solution in which the element does not come out completely; a small part of it remains inside the housing, as shown in the photo. These are the cheapest products, which are similar in operating principle to standard roller products, although in terms of reliability they are significantly superior to this analogue. |
Their use is justified if you do not need full access to the internal cavity.
Full extension designs. This type allows full access to the contents of the drawer, which is very convenient. Naturally, the reliability of the system is an order of magnitude higher than that of the first option, since it must withstand higher loads.
Most often this is a multi-stage system, since it is impossible to ensure a large guide stroke using two units.
Super full extension telescopic guides. This option allows the drawers to extend beyond the surface of the furniture façade, providing the best access to the contents. Such fittings are usually used in high-capacity elements; they can withstand high loads, but are also significantly more expensive than the analogues described above.
Guide dimensions
On sale you can find different sizes of telescopic systems:
Construction sealant rdpro 300 ml price
| Illustration | Description |
| Height 17 mm. The most compact option with the following characteristics: |
- Length from 182 to 438 mm. Used for small drawers in cabinets and chests of drawers.
- Permissible load - 8-10 kg.
- For installation, the manufacturer recommends making a groove in the furniture wall with a depth of 10 mm and a height of 17 mm.
- Installation begins with the wall of the furniture, only then the element is screwed to the side of the drawer.
- The partial extension option, non-separable, is not the most convenient solution, which is rarely used these days.
Height 27-30 mm. This option is more reliable and has the following characteristics:
- There are both partial and full extensions.
- Length varies from 250 to 500 mm.
- The permissible load can be up to 15 kg.
- Unlike the first type, milling the side walls of the furniture is not required, which greatly simplifies installation and removal.
- The elements are collapsible; if necessary, the box can be quickly removed.
Height 35 mm. According to the main characteristics, this type of fittings resembles the type described above, so it makes no sense to list all its main features.
The only significant difference is the permissible load, here it is already 20 kg.
Height 45 mm. The most common and popular solution today, which has a number of advantages:
- The length range varies from 250 to 700 mm in increments of only 50 mm.
- The permissible load can be up to 38 kg, which is very, very high.
- There are options of all types - partial, full and super full extension.
- The system fits into both a small kitchen cabinet and a large wardrobe; the main thing is to choose the optimal size.
Mounts without visible fasteners
Many people now choose fastenings without visible fasteners, since this option involves completely invisible fixing of the shelf on the wall , without unnecessary elements. It is the reluctance to see additional elements on the walls for one reason or another that drives the owners of shelves and apartments to choose this option.
Brackets for mounting shelves in the wall
There are three options to secure the shelf to the wall so that the fasteners are not visible.
DIY zigzag shelf made of chipboard
Fastening with metal pins
Hidden fastening of shelves to the wall without visible fasteners
The most reliable option for fixing the shelf is with metal pins, as this will provide the ability to seriously load the shelf. Moreover, this is the most inconspicuous option, even in comparison with other methods related to secret ones.
Creation algorithm
- To make hidden shelves with your own hands, first draw a sketch; this will help you understand the design and find out what type and size of wood is needed. The step also includes measuring the width of the space from wall to wall.
- The next step is to create a special frame. You can use liquid nails to glue the frame together first, and then use screws and angle iron to hold all the pieces together.
- Next, the boards are painted or painted, which will then be fixed to the frame. You can use the same paint or varnish that has already been used on other furniture. It's nice that today there are varnishes available that will make wood look old in a matter of minutes and highlight its texture, such a finish is great for a rustic style.
- The desired height of future shelves is measured and the support frames are attached to the wall. Before drilling, the wall is checked using a detector for the presence of wires and pipes.
- Next, you need to make sure that the invisible shelf is level. After all, it is quite difficult to find beautiful boards that are quite straight. If it turns out that the boards are uneven, proceed to step 6.
- Spacers are added to level the shelf. This step is repeated for the top and bottom boards.
- Then the top board is glued to the frame using liquid nails.
- The bottom board is much more difficult to fix with liquid nails, so it is better to secure it with screws.
- The front part of the shelf is glued last.
Attention! The walls of the room are painted before attaching the shelves. Instead of boards, you can use MDF.
How to choose a fixation type?
This is not an easy task, since when choosing a method for attaching shelves, several factors must be taken into account. And they are the ones who will influence the final decision.
Brackets for mounting shelves in the wall
Relationship between shelf depth and load on each mensolo holder
Important! You can choose the right mount only if you know the answers to the questions: “What will stand on the shelf?” and “Which wall will the product be fixed on?”, only then can you make the right choice.
It is also important to estimate the number of fasteners in advance. So, if the shelf is shorter than 1-1.5 m, then a couple of fasteners are enough. If the length is greater than the specified parameters, then it is better to increase the number of fasteners in order to evenly distribute the load on the product and the wall. Moreover, again, the number of fasteners can vary greatly depending on the thickness of the shelf itself and its quality.
The free space above the sofa is organically filled with shelves to match the walls
What types of brackets are there?
Shelf brackets vary in shape, material, style and maximum load. Photos of shelf brackets, which can be found in hardware catalogs or on the Internet, allow us to distinguish 3 main forms:
Corner bracket. One of the easiest ways to attach a shelf. Structurally, it consists of two planks connected by a rib or jumper for greater rigidity. The vertical strip is used to attach the support to the wall, and the horizontal part is used to mount the shelf itself.
Rectangular brackets. The method of fixing to the wall is similar to the previous one. A distinctive feature is that the bracket allows you to install 2 shelves under each other at once.
Pelican type mount. The support got its name due to the similarity of the lower part with the beak of a bird. Most often used as a bracket for glass shelves. But it can also be found paired with a shelf made of chipboard or metal.
This type of shelf holder has a collapsible design, dividing the device into moving and fixed parts, a screw pair and a seal. The fixed part is attached to the wall; a pressing element with a rubber or silicone gasket is inserted on top. The shelf is clamped between the two parts using a screw.
Most models can withstand loads of up to 30 kg. At home, it is very rare that the weight of a shelf with its contents exceeds this figure. But for warehouses or retail outlets, it makes more sense to secure shelves using reinforced shelf brackets.
Increased thickness (from 3 mm or more), the addition of additional stops and ribs make the element durable. It can withstand significant loads without deforming.
Fixing the shelf on the wall using hidden fasteners
Step 1. In order to fix a shelf on the wall using a hidden fastening option, you will need to prepare a hammer drill with a drill of a certain section, 2-3 special titanium pins, a building level, a square, a drill and a bit, the shelf itself, and a pencil for marking. The pin is a metal rod that is threaded on one side and smooth on the other. The threaded part will screw into the wall, and the smooth part will need to be fitted with a shelf. Typically the pin diameter is 10-12 mm. The drill is selected with the same diameter as the purchased titanium.
Special metal pin
Step 2. First of all, you need to apply markings to the shelf itself. By the way, you can make it yourself from any part of other furniture that has served its age, rather than buying new one. Using a ruler, you need to set aside the required distance from the end edge of the shelf. In this case, a distance of 12 cm was chosen.
Step 3. Having chosen the distance, you need, using a square and a pencil, to draw a line perpendicular to the plane of the shelf at the end where the hole for fastening will be drilled.
A perpendicular line is drawn at the end
Step 4. Next you need to find the middle of the end of the board and make a corresponding mark for the drill. It is important to understand that if the shelf consists of two sheets of chipboard glued together, then in this case it is better to drill a hole for fastening not in the middle, but with a slight offset towards one or another board (better - towards the bottom, it will be more reliable).
A mark is placed for the drill
Step 5. Similar markings must be applied on the opposite side of the shelf.
On the other side the same markings are applied
Step 6. Next, to the end of the shelf where the markings are applied, you need to attach a building level and directly on it make marks parallel to those previously applied to the board, as well as marking the edges of the shelf itself. The level cannot be moved while the marking is being transferred. Pencil marks can then be easily erased from the surface of the level, but this technique of transferring markings will make it easy to make markings for drilling holes in the wall.
The level cannot be moved while the marking is being transferred.
Marks are made at the level
Step 7. Then you need to select the approximate location of the shelf on the wall. Having applied it to the surface, you need to mark the boundaries of the product directly on the wallpaper with a pencil.
The shelf is attached to the wall
The boundaries of the shelf are marked
Step 8. Now you need to take a building level with markings and, attaching it to the wall in the selected and marked place, align and transfer the markings from the level to the wall, also using a pencil. In this way, you can easily and quickly make precise markings for the locations for drilling holes for the pins without unnecessary movements.
Transferring markings from level to wall
Step 9. Next, in the end part of the shelf, in the designated places, you need to drill holes for the pins. They should be the same depth as the length of the part of the pin on which the board will be placed.
A hole is drilled in the end
The depth of the hole should correspond to the part of the pin on which the shelf will be placed
Step 10. Now you need to take a hammer drill with a drill of the same diameter as the pin and make holes in the wall in accordance with the previously made marks. To prevent dust from concrete from falling onto the floor, it can be removed immediately using a switched on vacuum cleaner, the hose from which will be held by an assistant.
Holes are made in the wall
Step 11. Both titanium pins need to be installed in place, that is, inserted into the holes in the wall. If they are difficult to enter, you can carefully knock them out with a hammer or screw them into the wall using a key.
The pins are inserted into the holes
Step 12. All that remains is to put the shelf on the pins in the wall, aligning the holes with the metal fasteners. The shelf is installed. By the way, for better fixation, you can add a little glue to the holes of the shelf - then the connection will be even more reliable. This mounting option will allow you to achieve an effect where it seems as if the shelf is supported on the wall by itself.
The shelf fits onto the pins in the wall
Finished shelf without visible fasteners
Video - How to install a shelf with invisible fasteners
Installation of new guides
My enthusiasm knew no bounds. I started screwing the bottom part right away. But then it suddenly became clear that for some reason the holes from the screws did not coincide with the new part, and screwing it into an untouched place, squirming around inside a cramped case, was not the most pleasant experience.
The screwdriver kept trying to slip out of my hands, and the screws kept falling off
And then I remembered that there was a screwdriver in the house. Yes, I know how to use it! First, I inserted a small drill bit into the screwdriver to make small indentations for the screws.
The tip of the self-tapping screw easily fit into these recesses; it no longer fell out and was easily twisted.
It was, of course, easier to screw onto the drawers than in the case
All that remained to be done was to tuck the finished boxes into place and enjoy their flawless work.
Perfect fit without distortion or gaps
It took me three and a half hours to do all the work, including going to the store. To be honest, I spent most of my time on my awkward attempts with a screwdriver. If I had immediately taken out a screwdriver, it would have been faster. So if you have such a tool at home, learn to use it and use it, it will definitely come in handy.
Fixation on drywall
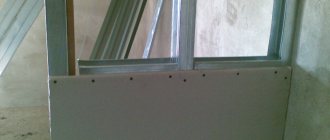
Many people now prefer to line the walls with sheets of plasterboard or make room partitions from this material. And it is clear that attaching shelves to it using pins is not the best option. Drywall is a fairly thin and fragile material, not designed for heavy loads . So the option of hanging shelves on the partition is completely eliminated.
Types of fasteners for drywall
But if the walls were leveled with plasterboard and it was already known where the shelf would hang, then you can use a trick and still use invisible fasteners. To do this, it is enough to install a reliable wooden block between the wall and the sheet of drywall in the place where the shelf will be attached. Next, you will need to fix the shelf itself so that the pins pass immediately through the drywall, through the block, and through the concrete wall. However, it is important to understand that such a piece of furniture should not be heavy in itself, and you should not place massive or significant objects on it. Also, special fasteners for drywall can be used to fix lightweight shelves.
That, in fact, is all that could be said about invisible options for attaching shelves to walls. Everything is quite simple and should not cause any difficulties even for a beginner in this matter. The main thing is to purchase everything you need in advance, and the work can be completed within 30-40 minutes. A shelf will appear on the wall that will stand “by itself.”
Source
Built-in
Important
A characteristic feature of a built-in wardrobe is that it is made exactly according to the dimensions of the place where it will later be placed. Therefore, it makes no sense to disassemble it for moving.
But it may be necessary to dismantle it during repairs. This is done like this:
- The door is removed. Typically, such lockers are designed in the form of a compartment, the doors in them are sliding on rollers, and the support can be either the lower or the upper one. To dismantle the door, you must carefully lift it so that the lower roller comes off the guides, then tilt it outward so that the upper roller comes off the rail. Then the door can simply be moved to the side.
- The shelves and sides of the internal sections are removed.
- If the remaining structure is light enough, it can be completely removed from the niche and pulled away (using rollers sold in hardware stores to move furniture or simply pieces of old thick wool fabric as a lining for a support so as not to scratch the floor). If it is still too heavy or you need to disassemble it alone, you need to continue dismantling.
- The back wall is removed. It is usually made of plywood or fiberboard, and is attached to small furniture nails. To remove it, carefully pry it up with the tip of a flat screwdriver or chisel, and separate it from the frame by gently pressing from the inside or lightly tapping it with a mallet.
- The frame itself is disassembled. It all depends on the design. If a tie was used on eccentrics, unscrew them; if the corners are used, unscrew the screws; if dowels are used, the elements are separated by gentle tapping.
- Upon completion of disassembly, the fittings are collected in a separate package, and the structural elements are marked so that when reassembling you know what is attached to what.
The video shows the process of disassembling a built-in wardrobe:
Attaching shelves to the wall without visible fasteners
With all the variety of existing methods of interior design and modern design, it is almost impossible to imagine a modern room in which shelves would not be used.
Decorative and easy to store various small items, massive for books - shelves can not only be an additional useful surface, but they can also act as a decorative decoration for any room or office.
There are two main ways to attach shelves:
The traditional method of fastening using various types of brackets, metal or wooden racks is popular only when the fasteners, correctly selected in color, texture and material, also add their own “zest” to the artistic image of the room.
But often, the presence of additional decorative and technological elements is not always consistent with the overall design of the designer and the target orientation of the structures. In this case, it would be better to use the second fastening method.
The development of modern design craft and the construction industry makes it possible not only to quickly cope with the task of hanging shelves, but also to successfully use the fastening of shelves to the wall without visible fasteners, thereby creating the illusion of floating in space.
Invisible fastening of shelves to the wall
Let's consider the main stages of properly attaching a shelf to the wall, while hiding all fastening elements:
With a brick partition thickness of 250 mm or more, concrete partitions with a thickness of 100 mm or more can be safely used for hanging shelves without additional load-bearing structures.
Scheme of invisible shelf fastening.
1 – bracket for fastening the shelf; 2 – mounting holes; 3 – steel axle; 4 – suspension; 5 – shelf.
With thinner bricks, cinder block and plasterboard walls up to 100 mm, it is possible to use invisible fastening of shelves to the wall, but such shelves are suitable only for decorative purposes.
Since they simply will not withstand additional loads.
Then you need to determine the thickness of the shelf itself.
It can be determined by placing a load of expected weight on it. The absence of visual deflection and deflection to the touch indicates sufficient thickness of the board.
An exception may be cases when the choice of a thicker board is dictated by the general concept of the interior.
However, it is also necessary to take into account the fastening features, due to which the thickness of the board, as a rule, cannot be less than 30 mm. The thickness of the shelf must be selected depending on the load, for example, for books - boards with a thickness of 45 to 60 mm are suitable.
The board must be dry and processed in accordance with its purpose.
Types of fastening shelves to the wall
After this, the types of fastening the shelves to the wall are selected, depending on its purpose and the thickness of the board.
There are a huge number of fastening materials that can be expertly hidden from prying eyes; let’s look at some of them:
Fastening technology using hinges:
For accurate hanging, you need to accurately measure the distance between the centers of the loops. This distance will determine the markings on the wall for the mounting holes. To ensure that the shelf hangs evenly and does not warp, it is better to use a building level, which will ensure an accurate horizontal line for the shelf. After the holes in the wall are drilled in accordance with the markings, they are filled with a plug into which screws are screwed. The screw should be screwed in deep enough, but the distance between its head and the wall should allow the shelf hinges to be put on.
The shelves come complete with special fasteners designed for invisible installation. A shelf installed in this way will be securely fastened. This will create a visual impression that it is literally hanging in the air.
Method of installing shelves using special furniture fittings
Let's look at the step-by-step implementation of this installation.
It starts with purchasing a modern shelf in a furniture supermarket or online store.
Step 1. Measure the distance between the centers of the mounting holes directly on the product.
Step 2. After this, mark the location of the shelf on the wall. Using a building level, we draw a horizontal axis on which we mark the position of the mounting holes, taking into account the center-to-center distance between them.
Step 3. Next, we attach the bracket to the resulting axis in the center of the shelf holes and mark the places for its future attachment to the wall. They must be located strictly along the horizontal axis.
Step 4. The next step is to drill a hole for attaching the brackets. They must be made strictly perpendicular to the wall, this will ensure that the shelf angle is 90 degrees relative to the wall. To simplify drilling, it is advisable to use a square.
Step 5. Next, remove the remaining drilling products from the holes and hammer in wood plugs or plastic dowels.
Step 7. Now we carry out the direct installation of the shelf. To do this, we put it on the steel axles of the brackets, alternately tapping it with a rubber hammer on the left and right sides in the front part. The shelf will be evenly installed on the fastening elements, eliminating distortions.
Step 8. The final stage will be to check the play and reliability of the fastening. After this, we remove the remaining debris and install a flowerpot with an orchid. The installation process is complete.
Installation nuances
The width, length and thickness of the fittings are selected based on the tasks assigned to the ball guides. Designs with dimensions of 27x350 mm are in fairly high demand. Often used under the keyboard.
Reviews clearly prove that using telescopic guides for drawers is extremely beneficial. They are efficient, glide easily, and allow you to close and open the drawer with a simple movement. At the same time, the marking, adjustment and installation diagram are quite simple. You can watch the video and photos for clarity, and also use some of my tips. I hope you find them useful.
- The kit includes 2 runners that can be disassembled into 2 components. The first should be installed on the sidewall. It has a large width. The narrower part is mounted on the box;
- Be careful not to mix up the sides so that you end up with the boxes hitting the back of the rail. It is better to attach all the elements in advance, leaving the necessary gap;
- The guides (rails) are extended all the way. There is a plastic tongue in the middle. Click on the long end to extend the small rail;
- Apply markings to the side of the cabinet and the drawer itself that will be inserted into it. Here you will have to navigate by the size of the furniture in order to determine the location of the ball-type guides;
- Using self-tapping screws, fasten the wide guides on the sides, and the narrow ones on the drawers on both sides;
- Carefully and smoothly slide the box inside into the special grooves. At first, you do not need to insert the drawer all the way. As soon as you hear a click, stop, pull the drawer back, and repeat the movement several times.
There are also no problems with how to remove the guides. You need to pull the box out of the front, press the plastic tabs on both sides, thereby disconnecting the structure.
In the instructions for collapsible ball guides, the manufacturer usually indicates how to disassemble the fittings. But usually you don’t have to do anything complicated for this.
Collapsible ones are more complex in design, more expensive, but can be repaired. Whether you will repair the fittings yourself is a rather secondary question. As for me, it is much easier to buy high-quality non-separable guides and use them calmly. Repairing fittings is not the most rewarding task.