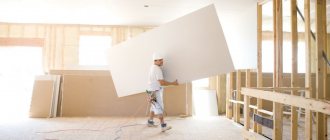
In this article we will tell you how to make a plasterboard partition with a door with your own hands. Such a partition made of plasterboard sheets is erected very quickly and with almost no debris. It has sufficient strength and good sound insulation. And when finishing gypsum plasterboard, the wall is very simple, because it turns out perfectly flat. This is ideal if the work is performed by a person with no experience.
Another undeniable advantage of a plasterboard partition is that dragging sheets and metal profiles to the upper floors does not cause problems, because they have a variety of sizes and are light in weight. Here is an incomplete list of gypsum board sizes: 3000*1200, 2500*1200, 2000*1200, 1500*1200, 1500*600. Metal profiles come in lengths of 3 and 4 m, they are very light.
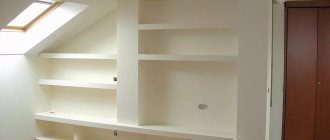
Plasterboard partition with door
Page navigation
A plasterboard partition with a door is the best option to divide a large area into rooms that will have their own purpose.
Depending on the purpose of the room, the partition is installed with insulating material and sound insulation is used. In some cases, it is necessary to use double gypsum board sheathing or bend the sheet for decoration.
An important fact is the door being installed. The installation process of the partition depends on its type.
Are jumpers needed in plasterboard walls?
When constructing plasterboard walls, it is necessary to take into account the presence of jumpers. In the case of erecting a vertical structure, horizontal jumpers can be placed where seams are formed between two adjacent sheets.
If the distance between the vertical guides is large enough, for example, up to 80 cm or more, then it is necessary to install horizontal jumpers approximately every meter.
When constructing plasterboard walls, it is necessary to take into account the presence of jumpers.
The advantage of plasterboard floors in apartments and houses
Drywall is a universal building material used in repair work. A partition created from GC sheets has a number of features:
- Features of the materials are resistance to moisture, temperature changes, and light weight. The created partitions do not weigh down the supporting structure of the building. Galvanized profiles do not rust. HA sheet does not emit harmful substances. Installation of the partition is easy, and the design is durable. It is possible to install lighting, make heat and sound insulation. The surface of the created wall is smooth, ready for finishing.
- Easy wall installation with doors. Installation of the structure is within the capabilities of a beginner. To get the job done correctly, you should follow the masters’ plan and take into account the nuances that arise during work.
- Electrical wiring and pipelines are laid inside the structure being created. It is possible to install hidden doors.
All materials used for the construction of the structure have reasonable prices, accessible to anyone.
The procedure for performing installation work
Before making an interior partition from plasterboard slabs, you must carefully plan the order of the work. This will allow you to quickly and efficiently cope with the task, without additional alterations and damage to the building material.
Recommended procedure:
- Accurate determination of the location of the partition;
- Preparation of the selected area of the floor base, ceiling and walls: stripping of the finishing coating, sealing cracks, leveling surfaces;
- Taking measurements to calculate the amount of required building materials and fasteners;
- Purchase of materials;
- Marking the bases;
- Direct execution of construction work;
- Finishing.
The implementation of each of the listed points must be taken responsibly so that the result is a high-quality, durable and reliable design.
When you need to make a partition with a door
In addition to your own desire to change the room, there are cases when a partition is necessary:
- Moving into a new apartment. Contractors hand over new apartments without planning. This allows the owner to decide where the office, living room will be, and what size it will be.
- Major renovation with redevelopment. Let's say you need a separate room for a child, a room for work. In this case, it is advisable to install a partition with a door and make sound insulation.
- Installing a partition to create a dressing room or pantry.
- Office reshuffles. Hiring a new employee requires a separate room. The way out of this situation would be to erect a partition with a door and niches.
- Warehouses. There must be a warehouse accountant in the warehouse. For quiet work, allocate a place and create a partition. Using drywall is the best option.
There is also the owner’s desire to completely change the home. Make an office or corner for fresh flowers. Create an interesting design in your apartment or apply a medieval style.
Ready-made reinforced profiles
The values of permissible load indicators for a metal profile depend on factors: the thickness of the metal and the width of the structural elements. The thicker and wider the profile, the stronger it naturally becomes.
Therefore, when there is a need to strengthen a plasterboard structure, you can buy factory-produced, certified parts that are specially designed to withstand increased loads.
There are several varieties of particularly strong partition profiles. It is worth noting that the height parameter is the same for everyone. Products are classified into categories by width:
— 50.0 mm – multifunctional standard;
— 75.0 mm – the most popular profile;
— 100.0 mm – especially durable elements for partitions with high requirements.
How to make a plasterboard partition with a door with your own hands
To create a plasterboard partition with a door, you must carry out the work according to the planned plan. Each point is important for the long service life of the structure and its appearance.
Before installing metal profiles, preparatory work is carried out. They are as follows:
- determining the exact location of the septum;
- cleaning - freeing the surface of the floor, walls, ceiling from the finishing coating to identify cracks that may affect the gypsum board partition;
- taking measurements;
- purchase of material;
- marking;
- installation work;
- finishing events.
Each item is performed carefully and efficiently. The strength of the entire structure depends on this.
Tools
To carry out the work of installing a plasterboard structure, it is necessary to prepare electric and manual tools:
- hammer drill, screwdriver, drill;
- cutter, metal scissors;
- construction knife, hacksaw for gypsum boards;
- spatulas with various blades, roller, brush.
For marking you need:
- laser level or regular, meter;
- pencil, tapping cord, plumb lines.
To install the GC structure you will need a ladder and gloves.
Materials
Need to purchase materials:
- Galvanized profile – guide (PN, UW), rack-mount (PS, CW).
- Drywall. Room humidity and fire resistance are taken into account. Choose a regular sheet - gray, moisture-resistant - green, fire-resistant - pink. Sheet thickness 12.5 cm.
- Soundproofing material. Mineral wool is used. It has insulation and sound absorption properties.
- Fasteners: dowel-nails 6x40, 6x60, metal screws LB9, LB 11, screws for plasterboard 25, 30.
- Damper tape.
- PU corner profile – to protect external corners.
- Reinforcing tape for gypsum board joints. Paper Knauf or serpyanka.
- Joint putty and finishing mixture.
- Primer.
- Sandpaper for grouting.
To install doors you need: a door block, fittings, fittings, fasteners (nails without heads).
Measurements: calculation table
Correct calculations are made to purchase materials. This will allow you to save money and not purchase unnecessary items.
Let’s say there is a gypsum plasterboard partition with dimensions: length – 5 m, width 3 m. It has a door 80 cm wide, 2.1 m high. The frame is made of profiles 7.5 cm wide, the gypsum board cladding is 1 layer.
- Guide profile. Calculation of the perimeter of the partition: (5+3)*2=16 m. The width of the opening is subtracted from this value (0.8) = 16-0.8=15.2 m. The height of the partition is 3 m, that is, you need 2 profiles of 3 meters each, the rest of the profile will be used ceiling, floor and reinforcement of the metal structure in the place where the door will be.
- Rack profile PS. Based on the width of the plasterboard sheet, the PS is mounted at a distance of 60 cm from each other. The width of the partition is 5 m. This means that 5/0.6 = 8.3, you need 8 pieces of PS, each 3 meters long.
- Door pillars are made reinforced using a double profile. You can strengthen the racks with the remains of NP. They will require 2 more PS pieces of 3 meters each. PS 1 meter goes to the top of the doorway.
- For the frame jumpers, sections of profiles are needed. For accuracy, you need to purchase 1 more PS strip, and the leftovers will also go.
- Drywall. Sheet length 3 m, width 1.2 m, thickness 12.5 mm. For 1 side you need 5 sheets. Accordingly, 2 sides - 10 sheets.
- The number of fasteners is calculated based on the frequency of fastening. The mounting distance is no more than 30 cm.
Approximate calculation table:
To simplify mathematical calculations, use an online calculator.
Layout and marking
Before starting the construction of the partition, you need a plan diagram.
It indicates the dimensions of the partition, its appearance (lighting, niches), type of doors (hinged, sliding). The plan diagram is depicted on a regular sheet or graph paper. Based on the design and dimensions, markings are applied to the surface using a laser level, pencil, or meter.
Marking begins with pendants suspended from the ceiling. With their tip they show the points along which they draw a line on the floor. Accordingly, on the ceiling.
Basics of proper markup:
- Do not focus on the adjacent wall. She may be overwhelmed. To make precise markings, plumb lines and a laser level are used.
- Before drawing a guide line, you need to calculate the thickness of the GC sheet, profile, putty - these are additional millimeters.
- You should also consider the thickness of the doorway.
The floor line indicates the location of the door and the width of the opening. In this case, the swing door is not installed flush with the adjacent wall. It is necessary to make an indent for the free opening of the canvas.
The location of the door frame is also marked on the ceiling. Markings are made on the walls. The lines must be clearly vertical.
If the room has a suspended ceiling, the partition is not built all the way to the top. Leave space
Installation of sheathing
After the markings have been made, the installation of the frame begins. To do this, follow the step-by-step instructions:
- A damper tape is glued to the back side of the NP. It is sound-absorbing and dampens vibrations.
- Holes are made on the floor and ceiling for dowel nails. 15 cm are retreated from the wall, after which dowels are inserted every 30 cm. NP is applied and fixed with nails.
- At the installation site, doors are not placed on the NP floor.
- The profiles are fixed on adjacent walls in the same way.
- At the location where the doors are installed, the NP is installed vertically along the designated boundaries of the door frame. Reinforcement is done with a wooden board or 1 more profile. It is fastened with self-tapping screws.
- After this, the height of the doors is indicated on the profiles. Using these marks, a horizontal crossbar with a length equal to the width of the doorway (from one post to another) is set. It needs to be strengthened.
- Now measure the distance from the vertical door post to the wall. This distance is divided into segments for the PS. The step between them is 60 cm.
- The rack profile is inserted into the NP from above and below. Fixed with self-tapping screws. A prerequisite is constant level monitoring.
- The metal frame is ready. For the strength of the sheathing, stiffening ribs are installed. They are prepared from horizontal jumpers made of PS. Mount horizontally, in steps (not in one line).
If the partition has niches, then their depth will determine the thickness of the box.
All work done to install profiles is checked for evenness. This is a guarantee of strength and durability.
After installing the frame base, you need to carry out electrical wiring. There must be a diagram for this. Location of lighting fixtures and sockets. All wires must be corrugated and not touch the metal profile. In places where a lamp or socket (switch) is supposed to be installed, the wires are set at 15 cm.
Crabs are used to fasten the stiffeners.
Sound and noise insulation
After the communications have been laid in the metal frame, you need to start sheathing the GC with sheets on one side of the partition.
First, whole gypsum boards are installed. The sheet needs to be secured so that the horizontal boundaries do not coincide. Then the remaining open parts of the frame are closed. Small self-tapping screws (seeds) are used to secure the sheet. They retreat 3 cm from the edge. The step between the fasteners is 15-20 cm. The screws are recessed a little into the gypsum board, but not too much, so as not to damage the cardboard.
There should be a chamfer on the edges of the sheets. The sheet is not attached flush to the adjacent wall and to the floor, leaving a gap of 5 mm. Subsequently, it will be covered with sickle and putty.
After installing the gypsum board on one side, insulation is placed inside the partition and the partition is covered with sheets on the other side. The places where the lamps and sockets will be are marked, the wires are exposed outside.
Finishing
After facing with plasterboard, the following work is performed:
- Check all gypsum board joints. There must be a chamfer (recess). If it is not there, cut out a recess at an angle of 45 degrees with a construction knife.
- The seams are treated with a primer. To do this, use a brush.
- Serpyanka is glued to the joints using joint putty. The same putty is used to cover all fasteners.
- After the putty has dried, grout is done with sandpaper, removing excess solution.
- The entire surface is coated with primer using a roller.
- The HA surface is puttied with a finishing solution. After drying, rub and coat again with primer.
The partition is ready for painting, wallpapering, tiling.
Frame covering
- First, sheathe one side of the partition. The height of each sheet must be taken 1 centimeter less than the height of the frame stand. The sheets should be secured with self-tapping screws every 15–20 centimeters. The sheet of drywall should be 1 centimeter away from the floor; to maintain this gap, you can use stands.
Tip: cutting out a doorway is especially difficult, so it is best to screw the entire sheet and only then cut, focusing on the frame.
- Take care of laying communications. Attach the electrical wiring, corrugated for fire safety, to the frame.
- Time to make noise and heat insulation: strengthen a material that combines the functions of insulation and sound insulation, for example, mineral wool, between the walls of the racks.
- Treat all wooden parts with an antiseptic.
- Cover the frame with plasterboard on the other side.
- At the final stage, using a drill and a hole saw, you need to make holes for switches and sockets and bring the wires out.
USEFUL INFORMATION: Wall preparation: how to remove old plaster
Important! Sheets of drywall should meet in the middle of the profile, and above the door, the drywall at the joint should not coincide with the edge of the vertical post.
How to make a plaster wall under compartment doors
To create a partition with sliding doors, a reinforced metal frame is made (double profiles), and the partition is sheathed with a double layer of gypsum board.
Further:
- There should be no insulation inside the partition. It can interfere with the free movement of doors.
- All wires are pulled inside the frame base. They should not hang - this is an obstacle to the motor mechanism of the door leaf. With all this, it is necessary to take into account the depth of the socket box for gypsum boards. It can become an obstacle to opening doors.
- The frame base is mounted using a level.
- When installing a floor mechanism for a door, consider the coating. It should not interfere with the movement of the canvas.
All nuances are taken into account when installing the partition, since it will be impossible to correct errors later - only dismantling.
Installing compartment doors in the wall
The compartment door mechanism is installed in the partition during the creation of the frame. The upper and lower door guides are fixed between the profiles, evenly and firmly.
The door leaf is installed into the mechanism after covering the partition and finishing coating. Installed doors are checked for unhindered opening. After this, the fittings are installed and the flooring is laid.
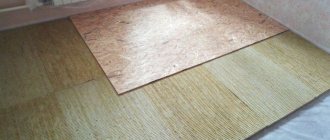
Features of insulation and sound insulation
It is not recommended to leave a hollow partition; it will be filled with sheet or roll insulation. They are laid after one side of the wall is covered with plasterboard , and only then is it covered on the other side.
If you plan to install utilities or a sliding door in such a wall, then insulation is not installed in the place where they are located.
To create sound insulation , use mineral wool or isover. From below, when installing the sheet, you need to leave a small gap, so stands of the appropriate thickness are installed.
How to care
Caring for the partition is easy.
If it is painted, wipe the surface with damp microfiber. If wallpaper is glued, use a dry cloth. If there is tile on the partition, do not get it too wet. Water on the floor will penetrate the gypsum board and the surface will become deformed. Installing a plasterboard partition will not take much time. For proper work, it is necessary to make the correct calculations, purchase the required amount of material and assemble a set of tools. If you don't have a power tool, you can rent one.
When installing sliding doors into a partition, you need to be extremely careful to ensure that all elements are fixed evenly. You also need to make the correct calculation - how wide the doorway will be and where it will be located. We must take into account the opening of the door. Hinged doors or compartments.
Video about the secrets of forming a doorway
Puttying and finishing
- First, clean the finished structure from dust and dirt. It is best to do this with a soft brush or an old dry rag.
- Cover all joints, seams, and dents with a primer. You can use masking tape, which is sold in hardware stores.
- If you do not use tape, after the primer is applied, apply a sickle mesh over the treated areas.
- Use tape or mesh to handle the seams, but it is not necessary to apply it to the places where the screws are screwed in. The tape should be moistened and the seams should be sealed with special glue. After this, carefully smooth the tape with a spatula and remove air bubbles.
- After everything is dry, re-prime.
- After this, the glued tape can be completely filled with finishing putty mixture.
Now that the preparation has been completed, you can begin the main body of work.
- Most people do not know how to putty drywall sheets, and is finishing and pre-treatment important? In fact, both operations are important, and if you skip one of the steps, then even the highest quality putty composition will quickly crack.
- After the seams, cracks, and dents are well sealed and dried, you can begin the main treatment of the sheet surface. Use a wide spatula; it is required to carefully smooth out the putty into a thin layer. The first layer should dry, and there is no need to force the surface to dry, as everything should happen naturally.
- Apply a second coat, and the package instructions should tell you how long it takes to dry for one coat. Smooth everything very carefully, and also make sure that the fineness of application is maintained.
- So the surface should be treated 2 or 3 times and be sure to dry after each layer. If you rush and do everything at once, don't expect good quality. The point is that the plaster on top is covered only with cardboard, which is quite smooth in structure and there will be no good adhesion to the surface.
Please note that for the convenience of the master, side lighting should be installed. This way you will notice all the shortcomings in the work and will be able to correct everything right away.
- Be sure to maintain the temperature specified in the instructions, and also do not forget to maintain a normal humidity level.
- Finally, the dry surface should be sanded. To do this, you can use simple sandpaper or a fine grater. This way you can remove all the defects that were made in the work.
When everything is done, you can paint the walls and wallpaper them.
Door frame
You can assemble the door frame with your own hands. If you have some experience working with wood or installing doors, then it is better to assemble the frame yourself, as in this case the cost will be lower.
Please note that the box must be rectangular and correspond to all dimensions according to the calculation, since otherwise the door will not close well. You should also take into account damper gaps and do not forget about the quality of the material, humidity and its thickness.
If you still doubt your abilities, then it is better to buy a ready-made door frame that will contain hinges and doors.
Installing the box inside the opening
Before installing the door into a plasterboard partition, all finishing and painting work should be completed. After this, you can take the box and insert it into the opening. Secure it and secure it with wedges, and then level it. When the box for installing a sliding or interior door into a plasterboard partition is installed in the desired position, attach it to the profiles using self-tapping screws through pre-drilled holes.
Afterwards, everything should be carefully checked with a building level, especially the verticality of the installation. If everything is in order, then you can proceed to the next stage. Using a construction gun, fill all the gaps between the opening and the box (just that 3 cm for reserve) using polyurethane foam.
Please note that when the foam expands, it can even deform the frame, and then the door will not function normally. To prevent this from happening, you should wedge the box using jumpers.
After this, wait until the foam dries and remove the excess using a stationery or construction knife. You can hang the door the next day, when the foam has completely dried. The hinges are usually inserted into the holes of the receiving hinge, so be sure to lubricate them.
Characteristics of rack parts
Rack elements are marked PS or CW. The standard dimensions of these frame parts are the same as in the case of the guides, and completely repeat them. The width of the back in both cases is identical, since the frame installation technology assumes that the parts are inserted into each other.
Unlike the main parts, which have the same length, the rack parts have different indicators in this regard.
The following lengths are available:
Such a large choice of lengths is dictated by the features of the technology, which does not allow the extension of racks if the room has high ceilings.
Rack strips to strengthen the structure